IAM tutorial: Permit users to manage their credentials and MFA settings
You can permit your users to manage their own multi-factor authentication (MFA) devices and credentials on the Security credentials page. You can use the AWS Management Console to configure credentials (access keys, passwords, signing certificates, and SSH public keys), delete or deactivate credentials that are not needed, and enable MFA devices for your users. This is useful for a small number of users, but that task could quickly become time consuming as the number of users grows. This tutorial shows you how to enable these best practices without burdening your administrators.
This tutorial shows how to allow users to access AWS services, but only when they sign in with MFA. If they are not signed in with an MFA device, then users cannot access other services.
This workflow has three basic steps.
- Step 1: Create a policy to enforce MFA sign-in
-
Create a customer managed policy that prohibits all actions except the few IAM actions. These exceptions allow a user to change their own credentials and manage their MFA devices on the Security credentials page. For more information about accessing that page, see How IAM users change their own password (console).
- Step 2: Attach policies to your test user group
-
Create a user group whose members have full access to all Amazon EC2 actions if they sign in with MFA. To create such a user group, you attach both the AWS managed policy called
AmazonEC2FullAccessand the customer managed policy you created in the first step. - Step 3: Test your user's access
-
Sign in as the test user to verify that access to Amazon EC2 is blocked until the user creates an MFA device. The user can then sign in using that device.
Prerequisites
To perform the steps in this tutorial, you must already have the following:
-
An AWS account that you can sign in to as an IAM user with administrative permissions.
-
Your account ID number, which you type into the policy in Step 1.
To find your account ID number, on the navigation bar at the top of the page, choose Support and then choose Support Center. You can find your account ID under this page's Support menu.
-
A virtual (software-based) MFA device, FIDO security key, or hardware-based MFA device.
-
A test IAM user who is a member of a user group as follows:
| User name | User name instructions | User group name | Add user as a member | User group instructions |
|---|---|---|---|---|
| MFAUser | Choose only the option for Enable console access – optional, and assign a password. | EC2MFA | MFAUser | Do NOT attach any policies or otherwise grant permissions to this user group. |
Step 1: Create a policy to enforce MFA sign-in
You begin by creating an IAM customer managed policy that denies all permissions except those required for IAM users to manage their own credentials and MFA devices.
-
Sign in to the AWS Management Console as a user with administrator credentials. To adhere to IAM best practices, don't sign in with your AWS account root user credentials.
Important
IAM best practices recommend that you require human users to use federation with an identity provider to access AWS using temporary credentials instead of using IAM users with long-term credentials. We recommend that you only use IAM users for specific use cases not supported by federated users.
-
Open the IAM console at https://console.aws.amazon.com/iam/
. -
In the navigation pane, choose Policies, and then choose Create policy.
-
Choose the JSON tab and copy the text from the following JSON policy document: AWS: Allows MFA-authenticated IAM users to manage their own credentials on the Security credentials page.
-
Paste the policy text into the JSON text box. Resolve any security warnings, errors, or general warnings generated during policy validation, and then choose Next.
Note
You can switch between the Visual editor and JSON options anytime. However, the policy above includes the
NotActionelement, which is not supported in the visual editor. For this policy, you will see a notification on the Visual editor tab. Return to JSON to continue working with this policy.This example policy does not allow users to reset a password while signing in to the AWS Management Console for the first time. We recommend that you do not grant permissions to new users until after they sign in and reset their password.
-
On the Review and create page, type
Force_MFAfor the policy name. For the policy description, typeThis policy allows users to manage their own passwords and MFA devices but nothing else unless they authenticate with MFA.In the Tags area, you can optionally add tag key-value pairs to the customer managed policy. Review the permissions granted by your policy, and then choose Create policy to save your work.The new policy appears in the list of managed policies and is ready to attach.
Step 2: Attach policies to your test user group
Next you attach two policies to the test IAM user group, which will be used to grant the MFA-protected permissions.
-
In the navigation pane, choose User groups.
-
In the search box, type
EC2MFA, and then choose the group name (not the checkbox) in the list. -
Choose the Permissions tab, choose Add permissions, and then choose Attach policies.
-
On the Attach permission policies to EC2MFA group page, in the search box, type
EC2Full. Then select the checkbox next to AmazonEC2FullAccess in the list. Don't save your changes yet. -
In the search box, type
Force, and then select the checkbox next to Force_MFA in the list. -
Choose Attach policies.
Step 3: Test your user's access
In this part of the tutorial, you sign in as the test user and verify that the policy works as intended.
-
Sign in to your AWS account as
MFAUserwith the password you assigned in the previous section. Use the URL:https://<alias or account ID number>.signin.aws.amazon.com/console -
Choose EC2 to open the Amazon EC2 console and verify that the user has no permissions to do anything.
-
In the navigation bar on the upper right, choose the
MFAUseruser name, and then choose Security credentials.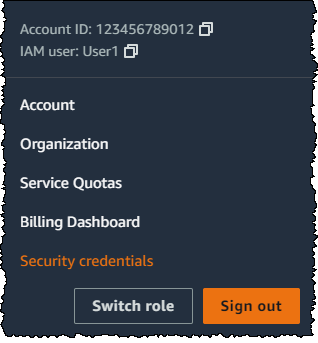
-
Now add an MFA device. In the Multi-factor Authentication (MFA) section, choose Assign MFA device.
Note
You might receive an error that you are not authorized to perform
iam:DeleteVirtualMFADevice. This could happen if someone previously began assigning a virtual MFA device to this user and cancelled the process. To continue, you or another administrator must delete the user's existing unassigned virtual MFA device. For more information, see I am not authorized to perform: iam:DeleteVirtualMFADevice. -
For this tutorial, we use a virtual (software-based) MFA device, such as the Google Authenticator app on a mobile phone. Choose Authenticator app, and then click Next.
IAM generates and displays configuration information for the virtual MFA device, including a QR code graphic. The graphic is a representation of the secret configuration key that is available for manual entry on devices that do not support QR codes.
-
Open your virtual MFA app. (For a list of apps that you can use for hosting virtual MFA devices, see Virtual MFA Applications
.) If the virtual MFA app supports multiple accounts (multiple virtual MFA devices), choose the option to create a new account (a new virtual MFA device). -
Determine whether the MFA app supports QR codes, and then do one of the following:
-
From the wizard, choose Show QR code. Then use the app to scan the QR code. For example, you might choose the camera icon or choose an option similar to Scan code, and then use the device's camera to scan the code.
-
In the Set up device wizard, choose Show secret key, and then type the secret key into your MFA app.
When you are finished, the virtual MFA device starts generating one-time passwords.
-
-
In the Set up device wizard, in the Enter the code from your authenticator app. box, type the one-time password that currently appears in the virtual MFA device. Choose Register MFA.
Important
Submit your request immediately after generating the code. If you generate the codes and then wait too long to submit the request, the MFA device is successfully associated with the user. However, the MFA device is out of sync. This happens because time-based one-time passwords (TOTP) expire after a short period of time. If this happens, you can resync the device.
The virtual MFA device is now ready to use with AWS.
-
Sign out of the console and then sign in as
MFAUseragain. This time AWS prompts you for an MFA code from your phone. When you get it, type the code in the box and then choose Submit. -
Choose EC2 to open the Amazon EC2 console again. Note that this time you can see all the information and perform any actions you want. If you go to any other console as this user, you see access denied messages. The reason is that the policies in this tutorial grant access only to Amazon EC2.
Related resources
For additional information, see the following topics:
