Deploying a Django application to Elastic Beanstalk
This tutorial walks through the deployment of a default, autogenerated Django
In this tutorial, you’ll do the following:
Prerequisites
To follow this tutorial, you should have all of the Common Prerequisites for Python installed, including the following packages:
-
Python 3.7 or later
-
pip -
virtualenv -
awsebcli
The Django
Note
Creating environments with the EB CLI requires a service role. You can create a service role by creating
an environment in the Elastic Beanstalk console. If you don't have a service role, the EB CLI attempts to create one when you run eb create.
Set up a Python virtual environment and install Django
Create a virtual environment with virtualenv and use it to install Django and its dependencies. By using a virtual environment, you can
know exactly which packages your application needs, so that the required packages are installed on the Amazon EC2 instances that are running your application.
The following steps demonstrate the commands you must enter for Unix-based systems and Windows, shown on separate tabs.
To set up your virtual environment
-
Create a virtual environment named
eb-virt. -
Activate the virtual environment.
You'll see
(eb-virt)prepended to your command prompt, indicating that you're in a virtual environment.Note
The rest of these instructions show the Linux command prompt in your home directory
~$. On Windows this isC:\Users\, whereUSERNAME>USERNAMEis your Windows login name. -
Use
pipto install Django.(eb-virt)~$pip install django==2.2Note
The Django version you install must be compatible with the Python version on the Elastic Beanstalk Python configuration that you choose for deploying your application. For information about deployment, see Deploy your site with the EB CLI in this topic.
For more information about current Python platform versions, see Python in the AWS Elastic Beanstalk Platforms document.
For Django version compatibility with Python, see What Python version can I use with Django?
-
To verify that Django is installed, enter the following.
(eb-virt)~$pip freezeDjango==2.2 ...This command lists all of the packages installed in your virtual environment. Later, you use the output of this command to configure your project for use with Elastic Beanstalk.
Create a Django project
Now you are ready to create a Django project and run it on your machine, using the virtual environment.
Note
This tutorial uses SQLite, which is a database engine included in Python. The database is deployed with your project files. For production environments, we recommend that you use Amazon Relational Database Service (Amazon RDS), and that you separate it from your environment. For more information, see Adding an Amazon RDS DB instance to your Python Elastic Beanstalk environment.
To generate a Django application
-
Activate your virtual environment.
You'll see the
(eb-virt)prefix prepended to your command prompt, indicating that you're in a virtual environment.Note
The rest of these instructions show the Linux command prompt
~$in your home directory and the Linux home directory~/. On Windows these areC:\Users\, whereUSERNAME>USERNAMEis your Windows login name. -
Use the
django-admin startprojectcommand to create a Django project namedebdjango.(eb-virt)~$django-admin startproject ebdjangoThis command creates a standard Django site named ebdjango with the following directory structure.
~/ebdjango |-- ebdjango | |-- __init__.py | |-- settings.py | |-- urls.py | `-- wsgi.py `-- manage.py -
Run your Django site locally with
manage.py runserver.(eb-virt) ~$cd ebdjango(eb-virt) ~/ebdjango$python manage.py runserver -
In a web browser, open
http://127.0.0.1:8000/to view the site. -
Check the server log to see the output from your request. To stop the web server and return to your virtual environment, press Ctrl+C.
Django version 2.2, using settings 'ebdjango.settings' Starting development server at http://127.0.0.1:8000/ Quit the server with CONTROL-C. [07/Sep/2018 20:14:09] "GET / HTTP/1.1" 200 16348Ctrl+C
Configure your Django application for Elastic Beanstalk
Now that you have a Django-powered site on your local machine, you can configure it for deployment with Elastic Beanstalk.
By default, Elastic Beanstalk looks for a file named application.py to start your application. Because this doesn't exist in the Django project that
you've created, you need to make some adjustments to your application's environment. You also must set environment variables so that your application's
modules can be loaded.
To configure your site for Elastic Beanstalk
-
Activate your virtual environment.
-
Run
pip freeze, and then save the output to a file namedrequirements.txt.(eb-virt) ~/ebdjango$pip freeze > requirements.txtElastic Beanstalk uses
requirements.txtto determine which package to install on the EC2 instances that run your application. -
Create a directory named
.ebextensions.(eb-virt) ~/ebdjango$mkdir .ebextensions -
In the
.ebextensionsdirectory, add a configuration file nameddjango.configwith the following text.Example ~/ebdjango/.ebextensions/django.config
option_settings:
  aws:elasticbeanstalk:container:python:
    WSGIPath: ebdjango.wsgi:application
This setting,
WSGIPath, specifies the location of the WSGI script that Elastic Beanstalk uses to start your application.Note
If you're using an Amazon Linux AMI Python platform version (preceding Amazon Linux 2), replace the value for
WSGIPathwithebdjango/wsgi.py. The value in the example works with the Gunicorn WSGI server, which isn't supported on Amazon Linux AMI platform versions. -
Deactivate your virtual environment with the
deactivatecommand.(eb-virt) ~/ebdjango$deactivateReactivate your virtual environment whenever you need to add packages to your application or run your application locally.
Deploy your site with the EB CLI
You've added everything you need to deploy your application on Elastic Beanstalk. Your project directory should now look like this.
~/ebdjango/
|-- .ebextensions
|   `-- django.config
|-- ebdjango
|   |-- __init__.py
|   |-- settings.py
|   |-- urls.py
|   `-- wsgi.py
|-- db.sqlite3
|-- manage.py
`-- requirements.txt
Next, you'll create your application environment and deploy your configured application with Elastic Beanstalk.
Immediately after deployment, you'll edit Django's configuration to add the domain name that Elastic Beanstalk assigned to your application to Django's
ALLOWED_HOSTS. Then you'll redeploy your application. This is a Django security requirement, designed to prevent HTTP Host
header attacks. For more information, see Host header
validation
To create an environment and deploy your Django application
Note
This tutorial uses the EB CLI as a deployment mechanism, but you can also use the Elastic Beanstalk console to deploy a .zip file containing your project's contents.
-
Initialize your EB CLI repository with the eb init command.
~/ebdjango$eb init -p python-3.7 django-tutorialApplication django-tutorial has been created.This command creates an application named
django-tutorial. It also configures your local repository to create environments with the latest Python 3.7 platform version. -
(Optional) Run eb init again to configure a default key pair so that you can use SSH to connect to the EC2 instance running your application.
~/ebdjango$eb initDo you want to set up SSH for your instances? (y/n):ySelect a keypair. 1) my-keypair 2) [ Create new KeyPair ]Select a key pair if you have one already, or follow the prompts to create one. If you don't see the prompt or need to change your settings later, run eb init -i.
-
Create an environment and deploy your application to it with eb create.
~/ebdjango$eb create django-envNote
If you see a "service role required" error message, run
eb createinteractively (without specifying an environment name) and the EB CLI creates the role for you.This command creates a load-balanced Elastic Beanstalk environment named
django-env. Creating an environment takes about 5 minutes. As Elastic Beanstalk creates the resources needed to run your application, it outputs informational messages that the EB CLI relays to your terminal. -
When the environment creation process completes, find the domain name of your new environment by running eb status.
~/ebdjango$eb statusEnvironment details for: django-env Application name: django-tutorial ... CNAME:eb-django-app-dev.elasticbeanstalk.com...Your environment's domain name is the value of the
CNAMEproperty. -
Open the
settings.pyfile in theebdjangodirectory. Locate theALLOWED_HOSTSsetting, and then add your application's domain name that you found in the previous step to the setting's value. If you can't find this setting in the file, add it to a new line.... ALLOWED_HOSTS = ['eb-django-app-dev.elasticbeanstalk.com'] -
Save the file, and then deploy your application by running eb deploy. When you run eb deploy, the EB CLI bundles up the contents of your project directory and deploys it to your environment.
~/ebdjango$eb deployNote
If you are using Git with your project, see Using the EB CLI with Git.
-
When the environment update process completes, open your website with eb open.
~/ebdjango$eb openThis opens a browser window using the domain name created for your application. You should see the same Django website that you created and tested locally.
If you don't see your application running, or get an error message, see Troubleshooting deployments for help with how to determine the cause of the error.
If you do see your application running, then congratulations, you've deployed your first Django application with Elastic Beanstalk!
Update your application
Now that you have a running application on Elastic Beanstalk, you can update and redeploy your application or its configuration, and Elastic Beanstalk does the work of updating your instances and starting your new application version.
For this example, we'll enable Django's admin console and configure a few other settings.
Modify your site settings
By default, your Django website uses the UTC time zone to display time. You can change this by specifying a time zone in
settings.py.
To change your site's time zone
-
Modify the
TIME_ZONEsetting insettings.py.Example ~/ebdjango/ebdjango/settings.py
... # Internationalization LANGUAGE_CODE = 'en-us' TIME_ZONE ='US/Pacific'USE_I18N = True USE_L10N = True USE_TZ = TrueFor a list of time zones, visit this page
. -
Deploy the application to your Elastic Beanstalk environment.
~/ebdjango/$eb deploy
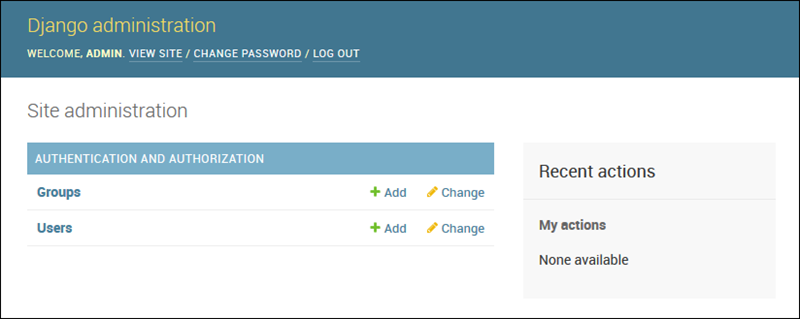
Create a site administrator
You can create a site administrator for your Django application to access the admin console directly from the website. Administrator login details are stored securely in the local database image included in the default project that Django generates.
To create a site administrator
-
Initialize your Django application's local database.
(eb-virt) ~/ebdjango$python manage.py migrateOperations to perform: Apply all migrations: admin, auth, contenttypes, sessions Running migrations: Applying contenttypes.0001_initial... OK Applying auth.0001_initial... OK Applying admin.0001_initial... OK Applying admin.0002_logentry_remove_auto_add... OK Applying admin.0003_logentry_add_action_flag_choices... OK Applying contenttypes.0002_remove_content_type_name... OK Applying auth.0002_alter_permission_name_max_length... OK Applying auth.0003_alter_user_email_max_length... OK Applying auth.0004_alter_user_username_opts... OK Applying auth.0005_alter_user_last_login_null... OK Applying auth.0006_require_contenttypes_0002... OK Applying auth.0007_alter_validators_add_error_messages... OK Applying auth.0008_alter_user_username_max_length... OK Applying auth.0009_alter_user_last_name_max_length... OK Applying sessions.0001_initial... OK -
Run
manage.py createsuperuserto create an administrator.(eb-virt) ~/ebdjango$python manage.py createsuperuserUsername:adminEmail address:me@mydomain.comPassword:********Password (again):********Superuser created successfully. -
To tell Django where to store static files, define
STATIC_ROOTinsettings.py.Example ~/ebdjango/ebdjango/settings.py
# Static files (CSS, JavaScript, Images) # https://docs.djangoproject.com/en/2.2/howto/static-files/ STATIC_URL = '/static/'STATIC_ROOT = 'static' -
Run
manage.py collectstaticto populate thestaticdirectory with static assets (JavaScript, CSS, and images) for the admin site.(eb-virt) ~/ebdjango$python manage.py collectstatic119 static files copied to ~/ebdjango/static -
Deploy your application.
~/ebdjango$eb deploy -
View the admin console by opening the site in your browser, appending
/admin/to the site URL, such as the following.http://djang-env.p33kq46sfh.us-west-2.elasticbeanstalk.com/admin/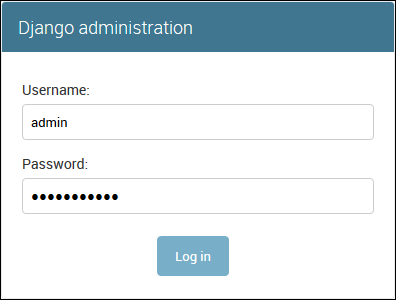
-
Log in with the username and password that you configured in step 2.
You can use a similar procedure of local updating/testing followed by eb deploy. Elastic Beanstalk does the work of updating your live servers, so you can focus on application development instead of server administration!
Add a database migration configuration file
You can add commands to your .ebextensions script that are run when your site is updated. This enables you to automatically generate
database migrations.
To add a migrate step when your application is deployed
-
Create a configuration file named
db-migrate.configwith the following content.Example ~/ebdjango/.ebextensions/db-migrate.config
container_commands:
  01_migrate:
    command: "source /var/app/venv/*/bin/activate && python3 manage.py migrate"
    leader_only: true
option_settings:
  aws:elasticbeanstalk:application:environment:
    DJANGO_SETTINGS_MODULE: ebdjango.settings
This configuration file activates the server's virtual environment and runs the
manage.py migratecommand during the deployment process, before starting your application. Because it runs before the application starts, you must also configure theDJANGO_SETTINGS_MODULEenvironment variable explicitly (usuallywsgi.pytakes care of this for you during startup). Specifyingleader_only: truein the command ensures that it is run only once when you're deploying to multiple instances. -
Deploy your application.
~/ebdjango$eb deploy
Clean up
To save instance hours and other AWS resources between development sessions, terminate your Elastic Beanstalk environment with eb terminate.
~/ebdjango$ eb terminate django-envThis command terminates the environment and all of the AWS resources that run within it. It doesn't delete the application, however, so you can always create more environments with the same configuration by running eb create again.
If you're done with the sample application, you can also remove the project folder and virtual environment.
~$ rm -rf ~/eb-virt
~$ rm -rf ~/ebdjango
Next steps
For more information about Django, including an in-depth tutorial, see the official
documentation
If you want to try out another Python web framework, check out Deploying a Flask application to Elastic Beanstalk.
