Using AWS CodeCommit with Visual Studio Team Explorer
You can use AWS Identity and Access Management (IAM) user accounts to create Git credentials and use them to create and clone repositories from within Team Explorer.
Credential Types for AWS CodeCommit
Most AWS Toolkit for Visual Studio users are aware of setting up AWS credential profiles that contain their access and secret keys. These credential profiles are used in the Toolkit for Visual Studio to enable the calls to service APIs, for example, to list Amazon S3 buckets in AWS Explorer or to launch an Amazon EC2 instance. The integration of AWS CodeCommit with Team Explorer also uses these credential profiles. However, to work with Git itself you need additional credentials, specifically, Git credentials for HTTPS connections. You can read about these credentials (a user name and password) at Setup for HTTPS Users Using Git Credentials in the AWS CodeCommit User Guide.
You can create the Git credentials for AWS CodeCommit only for IAM user accounts. You cannot create them for a root account. You can create up to two sets of these credentials for the service and, although you can mark a set of credentials as inactive, inactive sets still count toward your limit of two sets. Note that you can delete and recreate credentials at any time. When you use AWS CodeCommit from within Visual Studio, your traditional AWS credentials are used for working with the service itself, for example, when you're creating and listing repositories. When working with the actual Git repositories hosted in AWS CodeCommit, you use the Git credentials.
As part of the support for AWS CodeCommit, the Toolkit for Visual Studio automatically creates and manages these Git credentials for you and associates them with your AWS credential profile. You don't need to be concerned about having the right set of credentials at hand to perform Git operations within Team Explorer. Once you connect to Team Explorer with your AWS credential profile, the associated Git credentials are used automatically whenever you work with a Git remote.
Connecting to AWS CodeCommit
When you open the Team Explorer window in Visual Studio 2015 or later, you'll see an AWS CodeCommit entry in the Hosted Service Providers section of Manage Connections.
Choosing Sign up opens the Amazon Web Services home page in a browser window. What happens when you choose Connect depends on whether the Toolkit for Visual Studio can find a credential profile with AWS access and secret keys to enable it to make calls to AWS on your behalf. You might have set up a credential profile by using the new Getting Started page that displays in the IDE when the Toolkit for Visual Studio cannot find any locally stored credentials. Or you might have been using the Toolkit for Visual Studio, the AWS Tools for Windows PowerShell, or the AWS CLI and already have AWS credential profiles available for the Toolkit for Visual Studio to use.
When you choose Connect, the Toolkit for Visual Studio starts the process to find a credential profile to use in the connection. If the Toolkit for Visual Studio can't find a credential profile, it opens a dialog box that invites you to enter the access and secret keys for your AWS account. We strongly recommend that you use an IAM user account, and not your root credentials. In addition, as noted earlier, the Git credentials you eventually need can only be created for IAM users. Once the access and secret keys are provided and the credential profile is created, the connection between Team Explorer and AWS CodeCommit is ready for use.
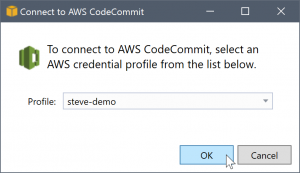
If the Toolkit for Visual Studio finds more than one AWS credential profile, you're prompted to select the account you want to use within Team Explorer.
If you have only one credential profile, the Toolkit for Visual Studio bypasses the profile selection dialog box and you're connected immediately:
When a connection is established between Team Explorer and AWS CodeCommit via your credential profiles, the invitation dialog box closes and the connection panel is displayed.
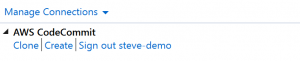
Because you have no repositories cloned locally, the panel shows just the operations you can perform: Clone, Create, and Sign out. Like other providers, AWS CodeCommit in Team Explorer can be bound to only a single AWS credential profile at any given time. To switch accounts, you use Sign out to remove the connection so you can start a new connection using a different account.
Now that you have established a connection, you can create a repository by clicking the Create link.
Creating a Repository
When you click the Create link, the Create a New AWS CodeCommit Repository dialog box opens.
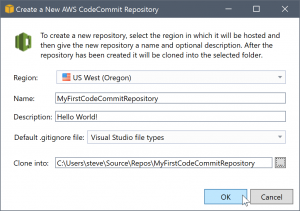
AWS CodeCommit repositories are organized by region, so in Region you can select the region in which to host the repository. The list has all the regions in which AWS CodeCommit is supported. You provide the Name (required) and Description (optional) for our new repository.
The default behavior of the dialog box is to suffix the folder location for the new repository with the repository name (as you enter the name, the folder location also updates). To use a different folder name, edit the Clone into folder path after you finish entering the repository name.
You can also choose to automatically create an initial .gitignore file for the repository. The
AWS Toolkit for Visual Studio provides a built-in default for Visual Studio file types. You can also choose to have no file
or to use a custom existing file that you would like to reuse across repositories. Simply select
Use custom in the list and navigate to the custom file to use.
Once you have a repository name and location, you are ready to click OK and start creating the repository. The Toolkit for Visual Studio requests that the service create the repository and then clone the new repository locally, adding an initial commit for the .gitignore file, if you're using one. It's at this point that you start working with the Git remote, so the Toolkit for Visual Studio now needs access to the Git credentials described earlier.
Setting up Git Credentials
To this point you've been using AWS access and secret keys to request that the service create your repository. Now you need to work with Git itself to do the actual clone operation, and Git doesn't understand AWS access and secret keys. Instead, you need to supply the user name and password credentials to Git to use on an HTTPS connection with the remote.
As noted in Setting up Git credentials, the Git credentials you're going to use must be associated with an IAM user. You cannot generate them for root credentials. You should always set up your AWS credential profiles to contain IAM user access and secret keys, and not root keys. The Toolkit for Visual Studio can attempt to set up Git credentials for AWS CodeCommit for you, and associate them with the AWS credential profile that you used to connect in Team Explorer earlier.
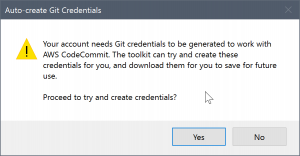
When you choose OK in the Create a New AWS CodeCommit Repository dialog box and successfully create the repository, the Toolkit for Visual Studio checks the AWS credential profile that is connected in Team Explorer to determine if Git credentials for AWS CodeCommit exist and are associated locally with the profile. If so, the Toolkit for Visual Studio instructs Team Explorer to commence the clone operation on the new repository. If Git credentials are not available locally, the Toolkit for Visual Studio checks the type of account credentials that were used in the connection in Team Explorer. If the credentials are for an IAM user, as we recommend, the following message is shown.
If the credentials are root credentials, the following message is shown instead.
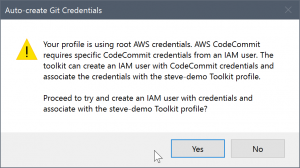
In both cases, the Toolkit for Visual Studio offers to attempt to do the work to create the necessary Git credentials for you. In the first scenario, all it needs to create are a set of Git credentials for the IAM user. When a root account is in use, the Toolkit for Visual Studio first attempts to create an IAM user and then proceeds to create Git credentials for that new user. If the Toolkit for Visual Studio has to create a new user, it applies the AWS CodeCommit Power User managed policy to that new user account. This policy allows access only to AWS CodeCommit and enables all operations to be performed with AWS CodeCommit except for repository deletion.
When you're creating credentials, you can only view them once. Therefore, the Toolkit for Visual Studio prompts you to
save the newly created credentials as a .csv file before continuing.
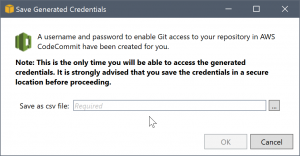
This is something we also strongly recommend, and be sure to save them to a secure location!
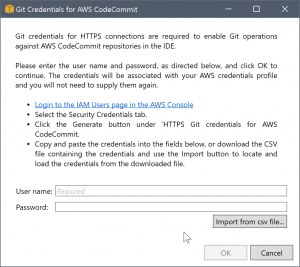
There might be cases where the Toolkit for Visual Studio can't automatically create credentials. For example, you may already have created the maximum number of sets of Git credentials for AWS CodeCommit (two), or you might not have sufficient programmatic rights for the Toolkit for Visual Studio to do the work for you (if you're signed in as an IAM user). In these cases, you can log into the AWS Management Console to manage the credentials or obtain them from your administrator. You can then enter them in the Git Credentials for AWS CodeCommit dialog box, which the Toolkit for Visual Studio displays.
Now that the credentials for Git are available, the clone operation for the new repository proceeds
(see progress indication for the operation inside Team Explorer). If you elected to have a default
.gitignore file applied, it is committed to the repository with a comment of ‘Initial Commit'.
That's all there is to setting up credentials and creating a repository within Team Explorer. Once the required credentials are in place, all you see when creating new repositories in the future is the Create a New AWS CodeCommit Repository dialog box itself.
Cloning a Repository
To clone an existing repository, return to the connection panel for AWS CodeCommit in Team Explorer. Click the Clone link to open the Clone AWS CodeCommit Repository dialog box, and then select the repository to clone and the location on disk where you want to place it.
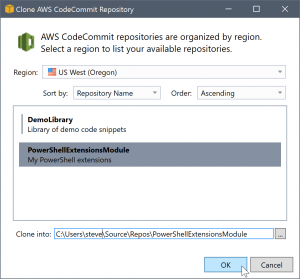
Once you choose the region, the Toolkit for Visual Studio queries the service to discover the repositories that are available in that region and displays them in the central list portion of the dialog box. The name and optional description of each repository are also displayed. You can reorder the list to sort it by either repository name or the last modified date, and to sort each in ascending or descending order.
Once you select the repository you can choose the location to clone to. This defaults to the same repository location used in other plugins to Team Explorer, but you can browse to or enter any other location. By default, the repository name is suffixed onto the selected path. However, if you want a specific path, simply edit the text box after you select the folder. Whatever text is in the box when you click OK will be the folder in which you will find the cloned repository.
Having selected the repository and a folder location, you then click OK to proceed with the clone operation. Just as with creating a repository, you can see the progress of the clone operation reported in Team Explorer.
Working with Repositories
When you clone or create repositories, notice that the local repositories for the connection are listed in the connection panel in Team Explorer under the operation links. These entries give you a convenient way to access the repository to browse content. Simply right-click the repository and choose Browse in Console.
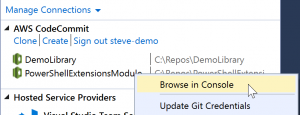
You can also use Update Git Credentials to update the stored Git credentials associated with the credential profile. This is useful if you've rotated the credentials. The command opens the Git Credentials for AWS CodeCommit dialog box where you can enter or import the new credentials.
Git operations on the repositories work as you'd expect. You can make local commits and, when you are ready to share, you use the Sync option in Team Explorer. Because the Git credentials are already stored locally and associated with our connected AWS credential profile, we won't be prompted to supply them again for operations against the AWS CodeCommit remote.
