Creating a stack from existing resources
This topic shows you how to create a stack from existing AWS resources by describing them in a template. To instead scan for existing resources and automatically generate a template that you can use to import existing resources into CloudFormation or replicate resources in a new account, see Generate templates from existing resources with IaC generator.
Prerequisites
Before you begin, you must have the following:
-
A template that describes all of the resources that you want in the new stack. Save the template locally or in an Amazon S3 bucket.
-
For each resource you want to import, include the following:
-
the properties and property values that define the resource's current configuration.
-
the unique identifier for the resource, such as the resource name. For more information, see Resource identifiers.
-
Topics
Example template
In this walkthrough, we assume you're using the following example template, called
TemplateToImport.json, that specifies two DynamoDB tables that were created outside
of CloudFormation. ServiceTable and GamesTable are the targets of the
import.
Note
This template is meant as an example only. To use it for your own testing purposes, replace the sample resources with resources from your account.
{
    "AWSTemplateFormatVersion": "2010-09-09",
    "Description": "Import test",
    "Resources": {
        "ServiceTable": {
            "Type": "AWS::DynamoDB::Table",
            "DeletionPolicy": "Retain",
            "Properties": {
                "TableName": "Service",
                "AttributeDefinitions": [
                    {
                        "AttributeName": "key",
                        "AttributeType": "S"
                    }
                ],
                "KeySchema": [
                    {
                        "AttributeName": "key",
                        "KeyType": "HASH"
                    }
                ],
                "ProvisionedThroughput": {
                    "ReadCapacityUnits": 5,
                    "WriteCapacityUnits": 1
                }
            }
        },
        "GamesTable": {
            "Type": "AWS::DynamoDB::Table",
            "DeletionPolicy": "Retain",
            "Properties": {
                "TableName": "Games",
                "AttributeDefinitions": [
                    {
                        "AttributeName": "key",
                        "AttributeType": "S"
                    }
                ],
                "KeySchema": [
                    {
                        "AttributeName": "key",
                        "KeyType": "HASH"
                    }
                ],
                "ProvisionedThroughput": {
                    "ReadCapacityUnits": 5,
                    "WriteCapacityUnits": 1
                }
            }
        }
    }
}
Create a stack from existing resources using the AWS Management Console
Sign in to the AWS Management Console and open the AWS CloudFormation console at https://console.aws.amazon.com/cloudformation
. -
On the Stacks page, choose Create stack, and then choose With existing resources (import resources).

-
Read the Import overview page for a list of things you're required to provide during this operation. Then, choose Next.
-
On the Specify template page, provide your template using one of the following methods, and then choose Next.
-
Choose Amazon S3 URL, and then specify the URL for your template in the text box.
-
Choose Upload a template file, and then browse for your template.
-
-
On the Identify resources page, identify each target resource. For more information, see Resource identifiers.
-
Under Identifier property, choose the type of resource identifier. For example, the
AWS::DynamoDB::Tableresource can be identified using theTableNameproperty. -
Under Identifier value, type the actual property value. For example, the
TableNamefor theGamesTableresource in the example template isGames -
Choose Next.
-
-
On the Specify stack details page, modify any parameters, and then choose Next. This automatically creates a change set.
Important
The import operation fails if you modify existing parameters that initiate a create, update, or delete operation.
-
On the Review
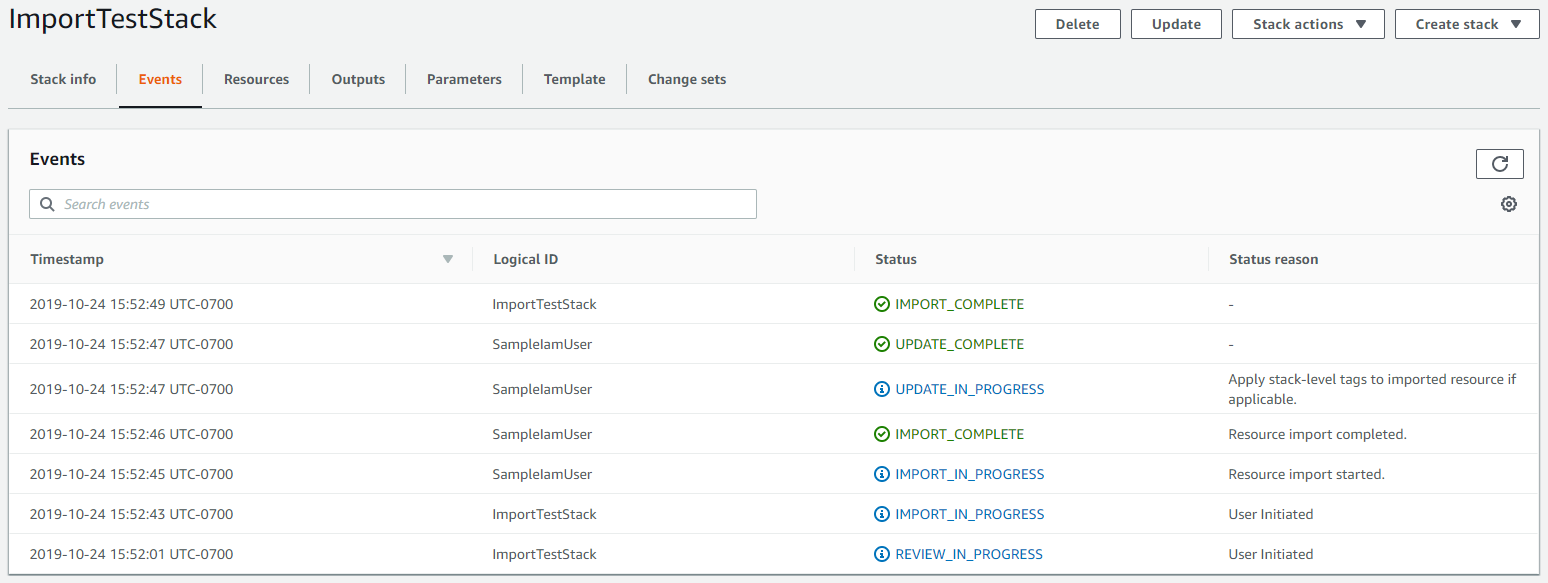
stack-namepage, confirm that the correct resources are being imported, and then choose Import resources. This automatically executes the change set created in the last step.The Events pane of the Stack details page for your new stack displays.
-
(Optional) Run drift detection on the stack to make sure the template and actual configuration of the imported resources match. For more information about detecting drift, see Detect drift on an entire CloudFormation stack.
-
(Optional) If your imported resources don't match their expected template configurations, either correct the template configurations or update the resources directly. In this walkthrough, we correct the template configurations to match their actual configurations.
-
Revert the import operation for the affected resources.
-
Add the import targets to your template again, making sure that the template configurations match the actual configurations.
-
Repeat steps 2 – 8 using the modified template to import the resources again.
-
Create a stack from existing resources using the AWS CLI
-
To learn which properties identify each resource type in the template, run the get-template-summary command, specifying the S3 URL of the template. For example, the
AWS::DynamoDB::Tableresource can be identified using theTableNameproperty. For theGamesTableresource in the example template, the value ofTableNameisGames. You'll need this information in the next step.aws cloudformation get-template-summary \ --template-urlhttps://amzn-s3-demo-bucket.s3.us-west-2.amazonaws.com/TemplateToImport.jsonFor more information, see Resource identifiers.
-
Compose a list of the actual resources from your template and their unique identifiers in the following JSON string format.
[{"ResourceType":"AWS::DynamoDB::Table","LogicalResourceId":"GamesTable","ResourceIdentifier":{"TableName":"Games"}},{"ResourceType":"AWS::DynamoDB::Table","LogicalResourceId":"ServiceTable","ResourceIdentifier":{"TableName":"Service"}}]Alternatively, you can specify the JSON-formatted parameters in a configuration file.
For example, to import
ServiceTableandGamesTable, you might create aResourcesToImport.txtfile that contains the following configuration.[ { "ResourceType":"AWS::DynamoDB::Table", "LogicalResourceId":"GamesTable", "ResourceIdentifier":{ "TableName":"Games" } }, { "ResourceType":"AWS::DynamoDB::Table", "LogicalResourceId":"ServiceTable", "ResourceIdentifier":{ "TableName":"Service" } } ] -
To create a change set, use the following create-change-set command and replace the placeholder text. For the
--change-set-typeoption, specify a value ofIMPORT. For the--resources-to-importoption, replace the sample JSON string with the actual JSON string you just created.aws cloudformation create-change-set \ --stack-nameTargetStack--change-set-nameImportChangeSet\ --change-set-typeIMPORT\ --template-urlhttps://amzn-s3-demo-bucket.s3.us-west-2.amazonaws.com/TemplateToImport.json\ --resources-to-import'[{"ResourceType":"AWS::DynamoDB::Table","LogicalResourceId":"GamesTable","ResourceIdentifier":{"TableName":"Games"}},{"ResourceType":"AWS::DynamoDB::Table","LogicalResourceId":"ServiceTable","ResourceIdentifier":{"TableName":"Service"}}]'Note
--resources-to-importdoesn't support inline YAML. The requirements for escaping quotes in the JSON string vary depending on your terminal. For more information, see Using quotation marks inside strings in the AWS Command Line Interface User Guide.Alternatively, you can use a file URL as input for the
--resources-to-importoption, as shown in the following example.--resources-to-importfile://ResourcesToImport.txt -
Review the change set to make sure the correct resources will be imported.
aws cloudformation describe-change-set \ --change-set-nameImportChangeSet--stack-nameTargetStack -
To initiate the change set and import the resources, use the following execute-change-set command and replace the placeholder text. On successful completion of the operation
(IMPORT_COMPLETE), the resources are successfully imported.aws cloudformation execute-change-set \ --change-set-nameImportChangeSet--stack-nameTargetStack -
(Optional) Run drift detection on the
IMPORT_COMPLETEstack to make sure the template and actual configuration of the imported resources match. For more information on detecting drift, see Detect drift on individual stack resources.-
Run drift detection on the specified stack.
aws cloudformation detect-stack-drift --stack-nameTargetStackIf successful, this command returns the following sample output.
{ "Stack-Drift-Detection-Id" : "624af370-311a-11e8-b6b7-500cexample" } -
View the progress of a drift detection operation for the specified stack drift detection ID.
aws cloudformation describe-stack-drift-detection-status \ --stack-drift-detection-id624af370-311a-11e8-b6b7-500cexample -
View drift information for the resources that have been checked for drift in the specified stack.
aws cloudformation describe-stack-resource-drifts --stack-nameTargetStack
-
-
(Optional) If your imported resources don't match their expected template configurations, either correct the template configurations or update the resources directly. In this walkthrough, we correct the template configurations to match their actual configurations.
-
Revert the import operation for the affected resources.
-
Add the import targets to your template again, making sure that the template configurations match the actual configurations.
-
Repeat steps 3 – 6 using the modified template to import the resources again.
-
