Amazon Monitron is no longer open to new customers. Existing customers can
continue to use the service as normal. For capabilities similar to Amazon
Monitron, see our blog post
Exporting your data with the console
Topics
Step 1: Setting up your Amazon S3 bucket
-
Open the Amazon S3 console
. -
Choose Create bucket.

-
Name your bucket and select an appropriate region. Then, at the bottom of the page, choose Create bucket.
Important
At this time, Amazon Monitron is only supported in three regions:
-
US East (N. Virginia) us-east-1
-
EU (Ireland) eu-west-1
-
Asia Pacific (Sydney) ap-south-east-2
Therefore, your Amazon S3 bucket must be in one of those regions.
It must also be the same region in which you are using the Amazon Monitron service.

-
-
Review the rest of the options on the page, and make the appropriate choices, depending on your security needs and policies.
Important
You are responsible for taking the appropriate steps to secure your data. We strongly recommend using server-side encryption and blocking public access to your bucket.
-
Using the search box, find the bucket you just created, and then choose it.
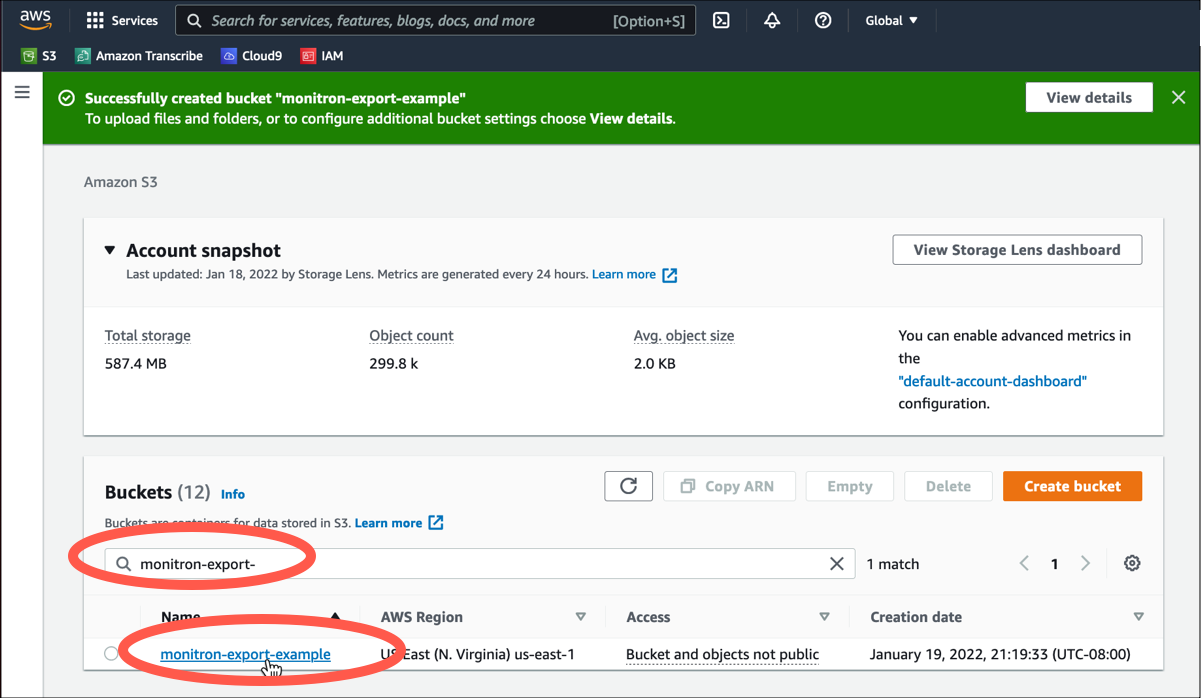
-
From the Properties tab, make a note of the name, ARN, and region of the bucket.

Step 2: Give Amazon Monitron permission to access Amazon S3
-
Open the IAM console
and choose Policies. 
-
Choose Create policy.

-
Select the JSON tab.

-
Delete the default JSON text so that the form is empty.
-
Paste in the bucket access policy.
{
    "Statement": [
        {
            "Action": [
                "s3:GetBucketAcl",
                "s3:GetBucketLocation",
                "s3:ListBucket"
            ],
            "Effect": "Allow",
            "Resource": [
                "arn:aws:s3:::bucketname"
            ]
        },
        {
            "Action": [
                "s3:PutObject",
                "s3:GetBucketAcl"
            ],
            "Effect": "Allow",
            "Resource": [
                "arn:aws:s3:::bucketname/*"
            ]
        }
    ],
    "Version": "2012-10-17"
}
-
Select Next.
-
On the Review and create page, do the following:
-
In Policy details, enter a Policy name and optional Description.
-
Leave the Permissions defined in this policy section as is.
-
In Add tags — optional, you can choose to add tags to keep track of your resources..
-
Choose Create policy.

-
Step 3: Create the role
-
Open the IAM console
and choose Roles. 
-
Choose Create role.

-
On the Select trusted entity, in Trusted entity type, choose AWS account.
-
In An AWS account, choose This account. You can customize additional setting using Options.
-
Choose Next.

-
In Add permissions, for Permissions policies, search for the policy you just created in the search box, and select your policy.

-
On the Name, review, and create page do the following:
-
In Role details enter a Role name and optional Description.
-
You can choose to ignore Step 1: Select trusted entities and Step 2: Add permisions.
-
For Step 3: Add tags, for Add tags — optional, add optional tags to keep track of your resources.
-
-
Choose Create role.

Step 4: Create the trust policy
-
Search for the role you just created and choose the role.

-
Select the Trust relationships tab.

-
Choose Edit trust relationship.

-
Erase the default JSON text so that the form is empty.
-
Paste in the policy that allows Amazon Monitron to assume the role.
{
	"Version": "2012-10-17",
	"Statement": [{
		"Effect": "Allow",
		"Principal": {
			"Service": ["monitron.amazonaws.com"]
		},
		"Action": "sts:AssumeRole"
	}]
}
-
Choose Update Trust Policy.
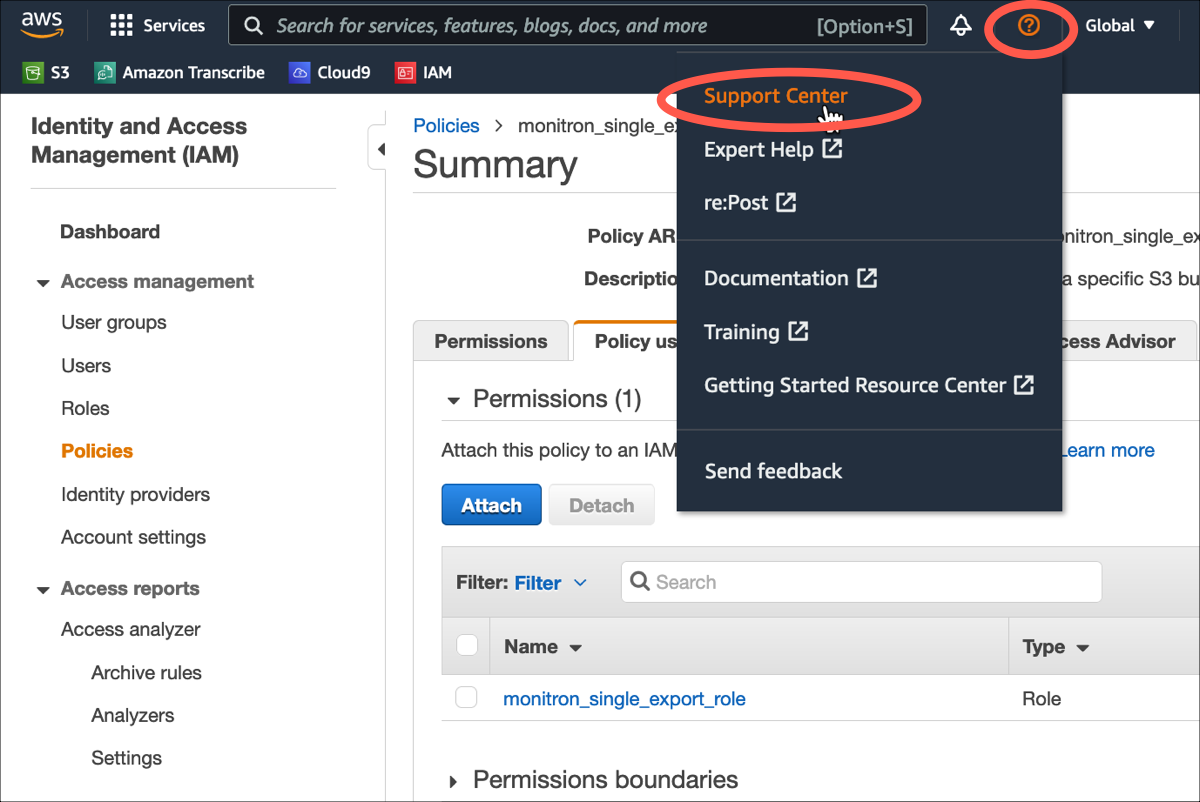
Step 5: Create the support case
-
From your AWS console, choose the question mark icon near the upper right corner of any page, then choose Support Center.
-
On the next page, choose Create case.

-
On the How can we help? page, do the following:
-
Choose Account and billing support.
-
Under Service, choose Account.
-
Under Category, choose Compliance & Accreditations.
-
Choose Severity, if that option is available to you based on your support subscription.
-
Choose Next step: Additional information.

-
-
In Additional information do the following:
-
Under Subject, enter Amazon Monitron data export request.
-
In the Description field, enter:
-
your account ID
-
the region of the bucket you created
-
the ARN of the bucket you created (for example: "arn:aws:s3:::bucketname")
-
the ARN of the role you created (for example: "arn:aws:iam::273771705212:role/role-for-monitron")

-
-
Choose Next step: Solve now or contact us.
-
-
In Solve now or contact us do the following:
-
In Solve now, select Next.

-
In Contact us, choose your Preferred contact language and preferred method of contact.
-
Choose Submit. A confirmation screen with your case ID and details will be displayed.

-
An AWS customer support specialist will get back to you as soon as possible. If there are any issues with the steps listed, the specialist may ask you for more information. If all the necessary information has been provided, the specialist will let you know as soon as your data has been copied to the Amazon S3 bucket that you created above.
