Cache settings for REST APIs in API Gateway
You can enable API caching in API Gateway to cache your endpoint's responses. With caching, you can reduce the number of calls made to your endpoint and also improve the latency of requests to your API.
When you enable caching for a stage, API Gateway caches responses from your endpoint for a specified time-to-live (TTL) period, in seconds. API Gateway then responds to the request by looking up the endpoint response from the cache instead of making a request to your endpoint. The default TTL value for API caching is 300 seconds. The maximum TTL value is 3600 seconds. TTL=0 means caching is disabled.
Note
Caching is best-effort. You can use the CacheHitCount and CacheMissCount metrics in
Amazon CloudWatch to monitor requests that API Gateway serves from the API cache.
The maximum size of a response that can be cached is 1048576 bytes. Cache data encryption may increase the size of the response when it is being cached.
This is a HIPAA Eligible Service. For more information about AWS, U.S. Health Insurance Portability and Accountability Act of 1996 (HIPAA), and using AWS services to process, store, and transmit protected health information (PHI), see HIPAA Overview
Important
When you enable caching for a stage, only GET methods have caching
enabled by default. This helps to ensure the safety and availability of your API. You
can enable caching for other methods by overriding method
settings.
Important
Caching is charged by the hour based on the cache size that you select. Caching is not eligible for the AWS Free Tier. For more information, see API Gateway Pricing
Enable Amazon API Gateway caching
In API Gateway, you can enable caching for a specific stage.
When you enable caching, you must choose a cache capacity. In general, a larger capacity gives a better performance, but also costs more. For supported cache sizes, see cacheClusterSize in the API Gateway API Reference.
API Gateway enables caching by creating a dedicated cache instance. This process can take up to 4 minutes.
API Gateway changes caching capacity by removing the existing cache instance and creating a new one with a modified capacity. All existing cached data is deleted.
Note
The cache capacity affects the CPU, memory, and network bandwidth of the cache instance. As a result, the cache capacity can affect the performance of your cache.
API Gateway recommends that you run a 10-minute load test to verify that your cache capacity is appropriate for
your workload. Ensure that traffic during the load test mirrors production traffic. For example, include ramp
up, constant traffic, and traffic spikes. The load test should include responses that can be served from the
cache, as well as unique responses that add items to the cache. Monitor the latency, 4xx, 5xx, cache hit, and
cache miss metrics during the load test. Adjust your cache capacity as needed based on these metrics. For more
information about load testing, see How do I select the best API Gateway cache
capacity to avoid hitting a rate limit?
Note
Creating or deleting a cache takes about 4 minutes for API Gateway to complete.
When a cache is created,
the Cache cluster value changes from Create in progress to
Active. When cache deletion is completed, the Cache cluster value changes from
Delete in progress to Inactive.
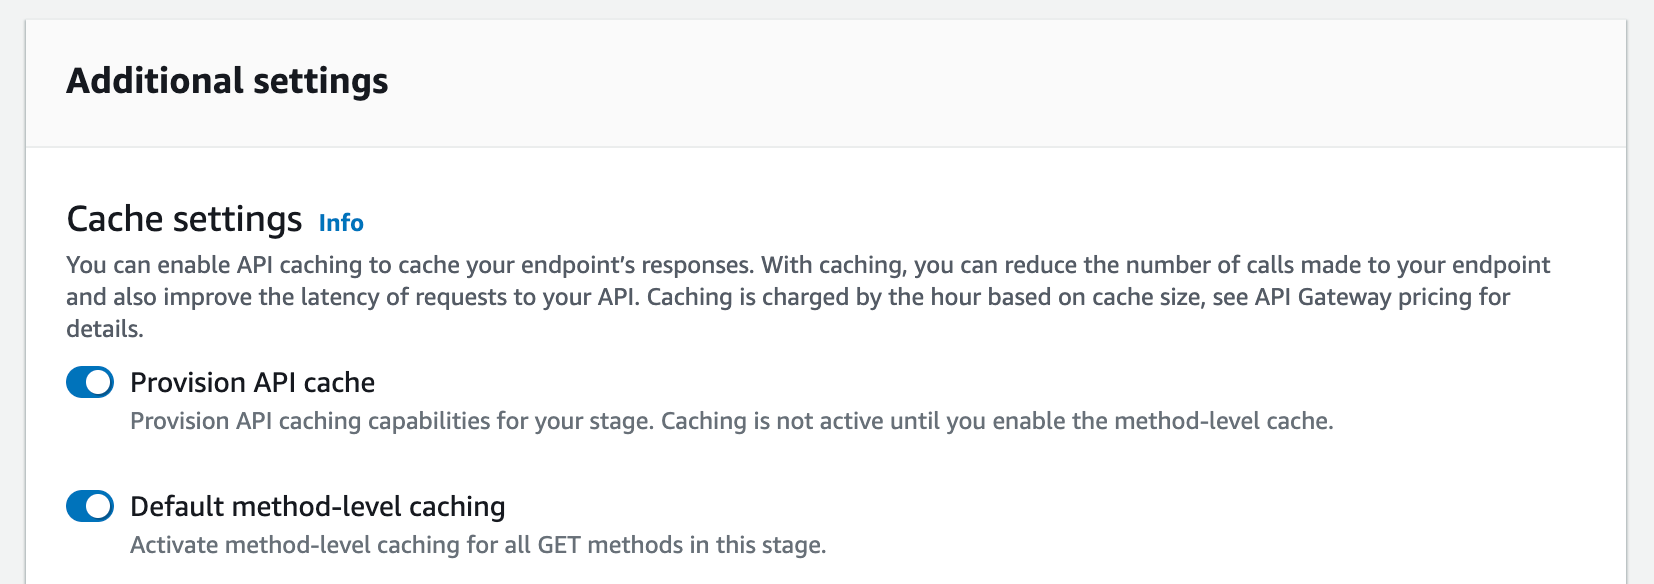
When you turn on method-level caching for all
methods on your stage, the Default method-level caching value changes to
Active. If you turn off method-level caching for all methods on your stage, the Default
method-level caching value changes to Inactive. If you have an existing setting for a
method-level cache, changing the status of the cache doesn't affect that setting.
When you enable caching within a stage's Cache settings, only GET methods
are cached. To ensure the safety and availability of your API, we recommend that you don't change this setting.
However, you can enable caching for other methods by overriding method settings.
If you would like to verify if caching is functioning as expected, you have two general options:
-
Inspect the CloudWatch metrics of CacheHitCount and CacheMissCount for your API and stage.
-
Put a timestamp in the response.
Note
Don't use the X-Cache header from the CloudFront response to determine if your API is being
served from your API Gateway cache instance.
Override API Gateway stage-level caching for method-level caching
You can override stage-level cache settings by turning on or turning off caching for a specific method. You can also modify the TTL period or turn encryption on or off for cached responses.
If you anticipate that a method that you are caching will receive sensitive data in its responses, encrypt your cache data. You might need to do this to comply with various compliance frameworks. For more information, see Amazon API Gateway controls in the AWS Security Hub User Guide.
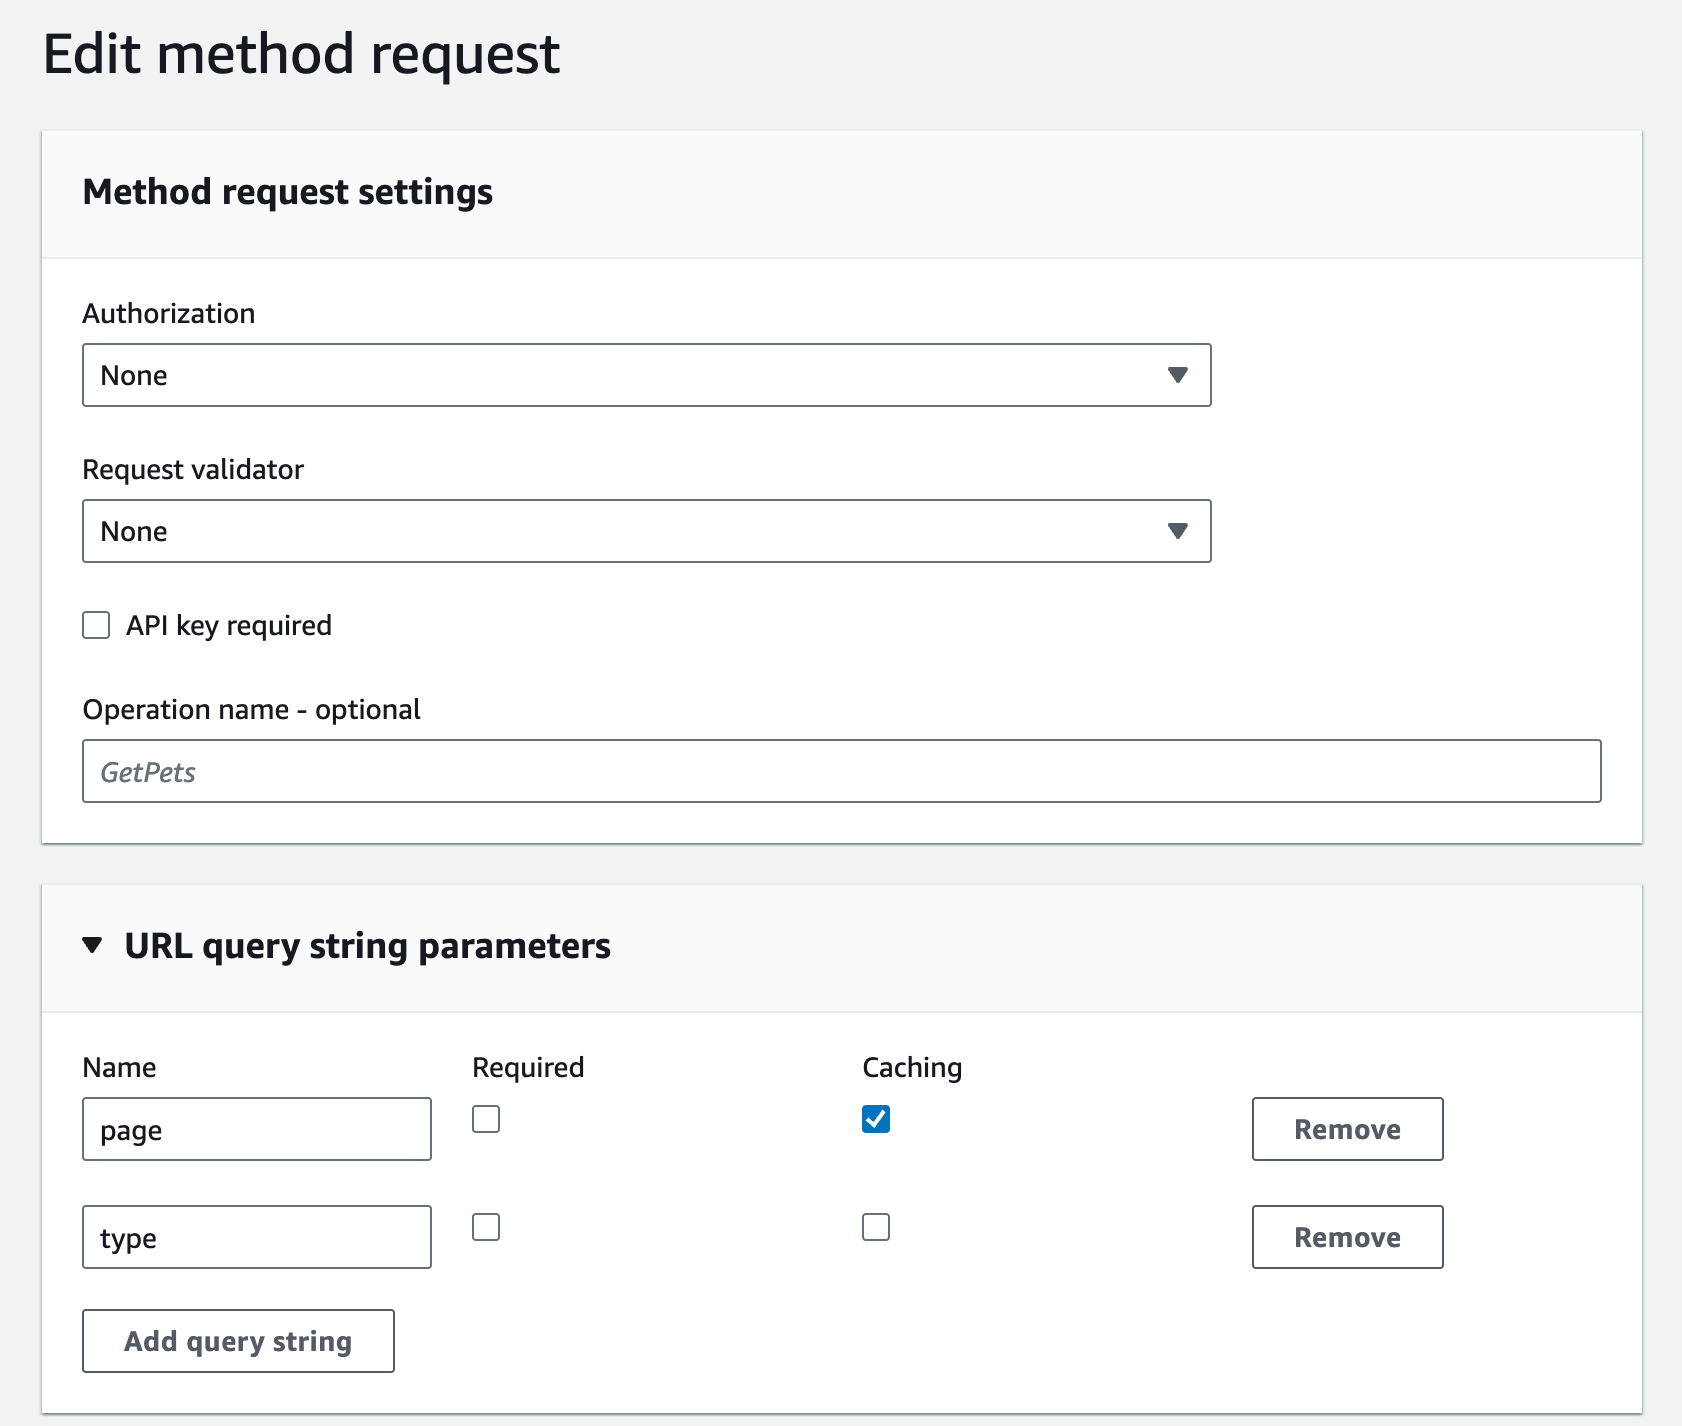
Use method or integration parameters as cache keys to index cached responses
You can use a method or integration parameter as cache keys to index cached responses. This includes custom headers, URL paths, or query strings. You can specify some or all of these parameters as the cache key, but you must specify at least one value. When you have a cache key, API Gateway caches the responses from each key value separately, including when the cache key isn't present.
Note
Cache keys are required when setting up caching on a resource.
For example, suppose you have a request in the following format:
GET /users?type=... HTTP/1.1
host: example.com
...
In this request, type can take a value of admin or
regular. If you include the type parameter as part of the
cache key, the responses from GET /users?type=admin are cached separately
from those from GET /users?type=regular.
When a method or integration request takes more than one parameter, you can choose to
include some or all of the parameters to create the cache key. For example, you can
include only the type parameter in the cache key for the following request,
made in the listed order within a TTL period:
GET /users?type=admin&department=A HTTP/1.1
host: example.com
...
The response from this request is cached and is used to serve the following request:
GET /users?type=admin&department=B HTTP/1.1
host: example.com
...
Flush the API stage cache in API Gateway
When API caching is enabled, you can flush your API stage's cache to ensure that your API's clients get the most recent responses from your integration endpoints.
Note
After the cache is flushed, responses are serviced from the integration endpoint until the cache is built up again. During this period, the number of requests sent to the integration endpoint may increase. This may temporarily increase the overall latency of your API.
Invalidate an API Gateway cache entry
A client of your API can invalidate an existing cache entry and reload it from the
integration endpoint for individual requests. The client must send a request that
contains the Cache-Control: max-age=0 header. The client receives the
response directly from the integration endpoint instead of the cache, provided that the
client is authorized to do so. This replaces the existing cache entry with the new
response, which is fetched from the integration endpoint.
To grant permission for a client, attach a policy of the following format to an IAM execution role for the user.
Note
Cross-account cache invalidation is not supported.
This policy allows the API Gateway execution service to invalidate the cache for requests
on the specified resource (or resources). To specify a group of targeted resources, use
a wildcard (*) character for account-id, api-id, and other
entries in the ARN value of Resource. For more information on how to set
permissions for the API Gateway execution service, see Control access to a REST API with IAM permissions.
If you don't impose an InvalidateCache policy (or choose the
Require authorization check box in the console), any client can
invalidate the API cache. If most or all of the clients invalidate the API cache, this
could significantly increase the latency of your API.
When the policy is in place, caching is enabled and authorization is required.
You can specify how API Gateway handles unauthorized requests by choosing from the following options:
- Fail the request with 403 status code
API Gateway returns a
403 Unauthorizedresponse.To set this option using the API, use
FAIL_WITH_403.- Ignore cache control header; Add a warning in response header
API Gateway processes the request and adds a warning header in the response.
To set this option using the API, use
SUCCEED_WITH_RESPONSE_HEADER.- Ignore cache control header
API Gateway processes the request and doesn't add a warning header in the response.
To set this option using the API, use
SUCCEED_WITHOUT_RESPONSE_HEADER.
You can set the unauthorized request handling behavior using the API Gateway console or AWS CLI.
CloudFormation example of a stage with a cache
The following CloudFormation template creates an example API, provisions a 0.5 GB cache for the
Prod stage, and turns on
method-level caching for all GET methods.
Important
Caching is charged by the hour based on the cache size that you select. Caching is not eligible for the
AWS Free Tier. For more information, see API Gateway
Pricing
AWSTemplateFormatVersion: 2010-09-09
Resources:
  Api:
    Type: 'AWS::ApiGateway::RestApi'
    Properties:
      Name: cache-example
  PetsResource:
    Type: 'AWS::ApiGateway::Resource'
    Properties:
      RestApiId: !Ref Api
      ParentId: !GetAtt Api.RootResourceId
      PathPart: 'pets'
  PetsMethodGet:
    Type: 'AWS::ApiGateway::Method'
    Properties:
      RestApiId: !Ref Api
      ResourceId: !Ref PetsResource
      HttpMethod: GET
      ApiKeyRequired: true
      AuthorizationType: NONE
      Integration:
        Type: HTTP_PROXY
        IntegrationHttpMethod: GET
        Uri: http://petstore-demo-endpoint.execute-api.com/petstore/pets/
  ApiDeployment:
    Type: 'AWS::ApiGateway::Deployment'
    DependsOn:
      - PetsMethodGet
    Properties:
      RestApiId: !Ref Api
  ApiStage:
    Type: 'AWS::ApiGateway::Stage'
    Properties:
      StageName: Prod
      Description: Prod Stage with a cache
      RestApiId: !Ref Api
      DeploymentId: !Ref ApiDeployment
      CacheClusterEnabled: True
      CacheClusterSize: 0.5
      MethodSettings:
        - ResourcePath: /*
          HttpMethod: '*'
          CachingEnabled: True
