Set up usage plans for REST APIs in API Gateway
Before you create a usage plan, make sure that you've set up the your API keys. For
more information, see Set up API keys for REST APIs in API Gateway.
Migrate your API to default usage plans (if needed)
If you started to use API Gateway after the usage plans feature was
rolled out on August 11, 2016, you will automatically have usage plans enabled for
you in all supported Regions.
If you started to use API Gateway before that date, you might need to migrate to default
usage plans. You'll be prompted with the Enable Usage Plans
option before using usage plans for the first time in the selected Region. When you
enable this option, you have default usage plans created for every unique API stage
that's associated with existing API keys. In the default usage plan, no throttle or
quota limits are set initially, and the associations between the API keys and API
stages are copied to the usage plans. The API behaves the same as before. However,
you must use the UsagePlan
apiStages property to associate specified API stage values
(apiId and stage) with included API keys (via UsagePlanKey), instead of using the ApiKey
stageKeys property.
To check whether you've already migrated to default usage plans, use the get-account CLI command. In the command output, the
features list includes an entry of "UsagePlans" when
usage plans are enabled.
You can also migrate your APIs to default usage plans by using the AWS CLI as
follows:
To migrate to default usage plans using the AWS CLI
-
Call this CLI command: update-account.
-
For the cli-input-json parameter, use the following
JSON:
[
    {
        "op": "add",
        "path": "/features",
        "value": "UsagePlans"
    }
]
Create a usage plan
The following procedure describes how to create a usage plan.
- AWS Management Console
To create a usage plan
Sign in to the API Gateway console at https://console.aws.amazon.com/apigateway.
-
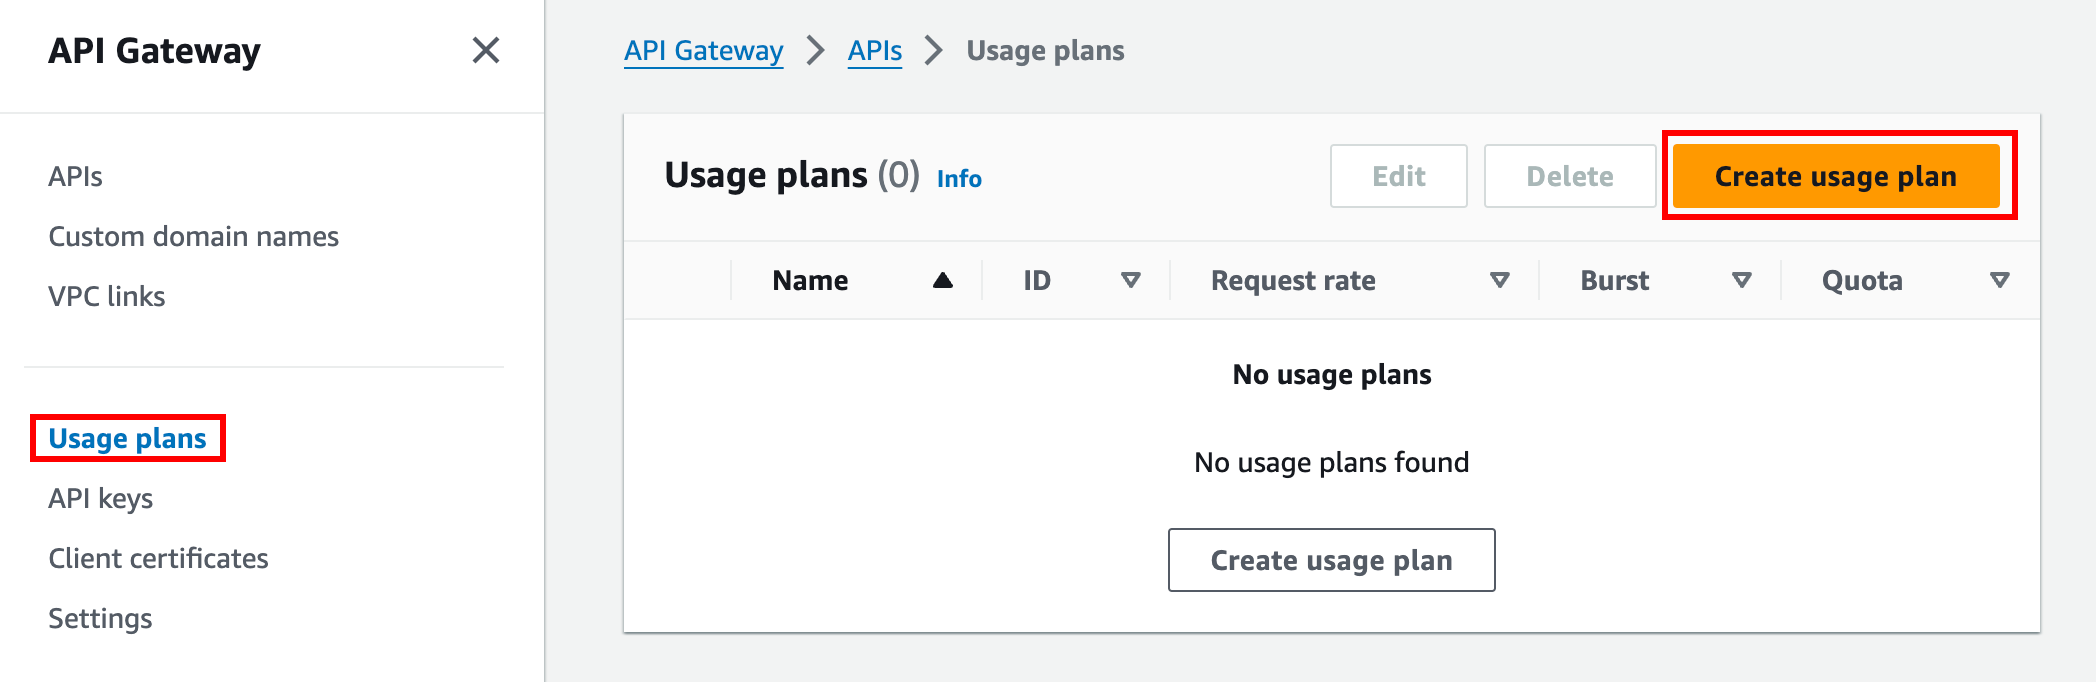
In the API Gateway main navigation pane, choose Usage
plans, and then choose Create usage plan.
-
For Name, enter a name.
-
(Optional) For Description, enter a description.
-
By default, usage plans enable throttling. Enter a Rate and a
Burst for your usage plan. Choose Throttling to turn off throttling.
-
By default, usage plans enable a quota for a time period. For Requests, enter the total number of
requests that a user can make in the time period of your usage plan. Choose Quota to turn off the quota.
-
Choose Create usage plan.
- AWS CLI
The following
create-usage-plan command creates a usage plan that resets at the beginning of the month:
aws apigateway create-usage-plan \
    --name "New Usage Plan" \
    --description "A new usage plan" \
    --throttle burstLimit=10,rateLimit=5 \
    --quota limit=500,offset=0,period=MONTH
- REST API
Call usageplan:create to create a usage plan.
Add a stage to a usage plan
The following procedure describes how to add a stage to a usage plan.
- AWS Management Console
-
To add a stage to a usage plan
-
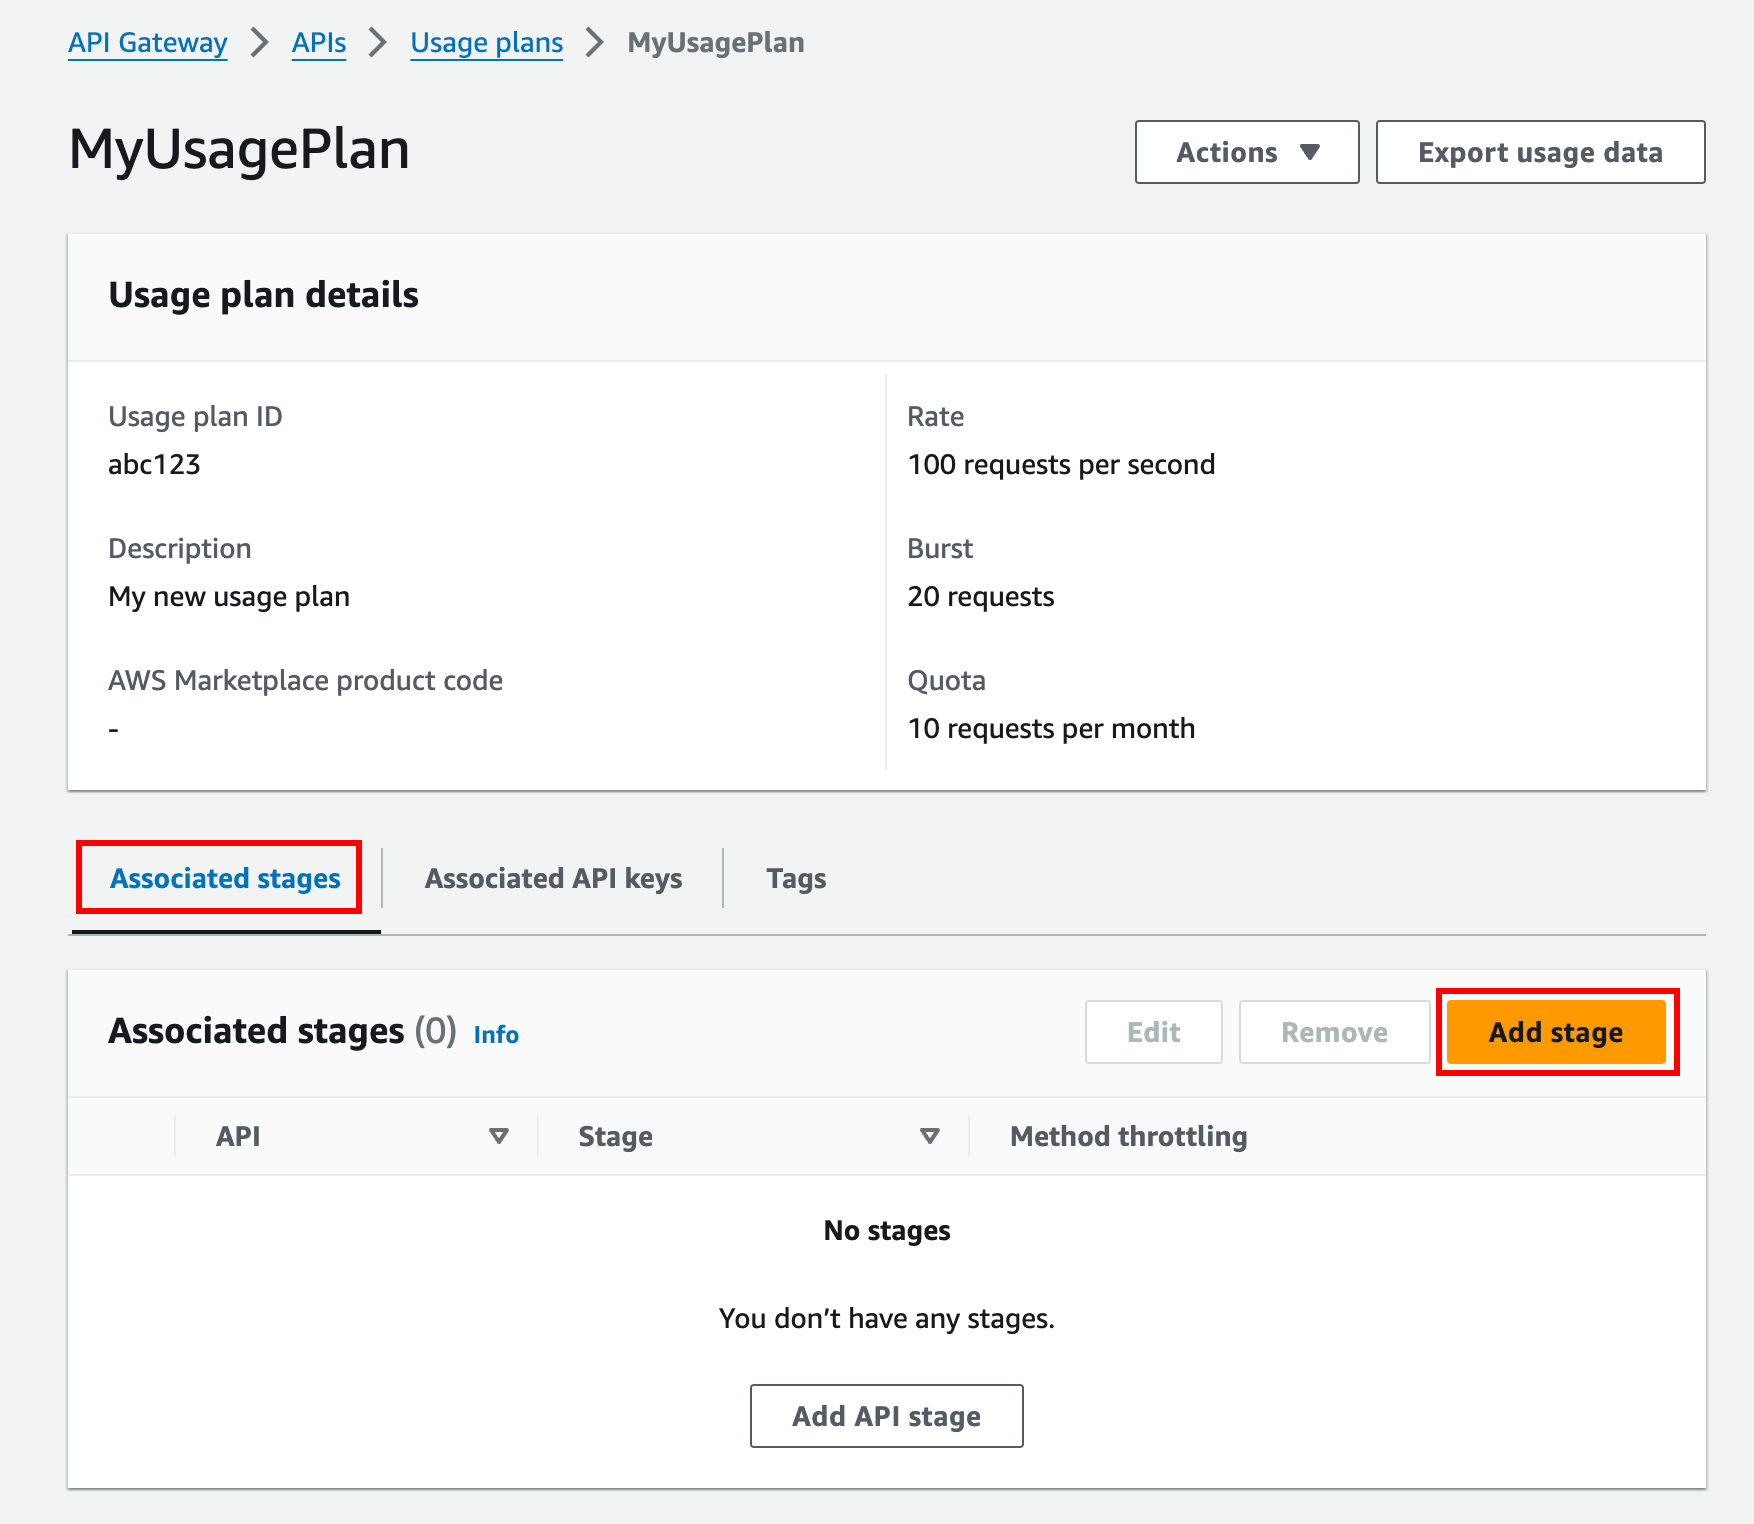
Select your usage plan.
-
Under the Associated stages tab, choose Add stage.
-
For API, select an API.
-
For Stage, select a stage.
-
(Optional) To turn on method-level throttling, do the following:
-
Choose Method-level throttling, and then choose Add method.
-
For Resource, select a resource from your API.
-
For Method, select a method from your API.
-
Enter a Rate and a
Burst for your usage plan.
-
Choose Add to usage plan.
- AWS CLI
-
The following update-usage-plan
command adds the Prod stage of an API to a usage plan:
aws apigateway update-usage-plan \
    --usage-plan-id abc123 \
    --patch-operations op="add",path="/apiStages",value="a1b1c2:Prod"
- REST API
Call usageplan:update to update a usage plan.
Add an API key to a usage plan
The following procedure shows how to add an API key to a usage plan.
- AWS Management Console
-
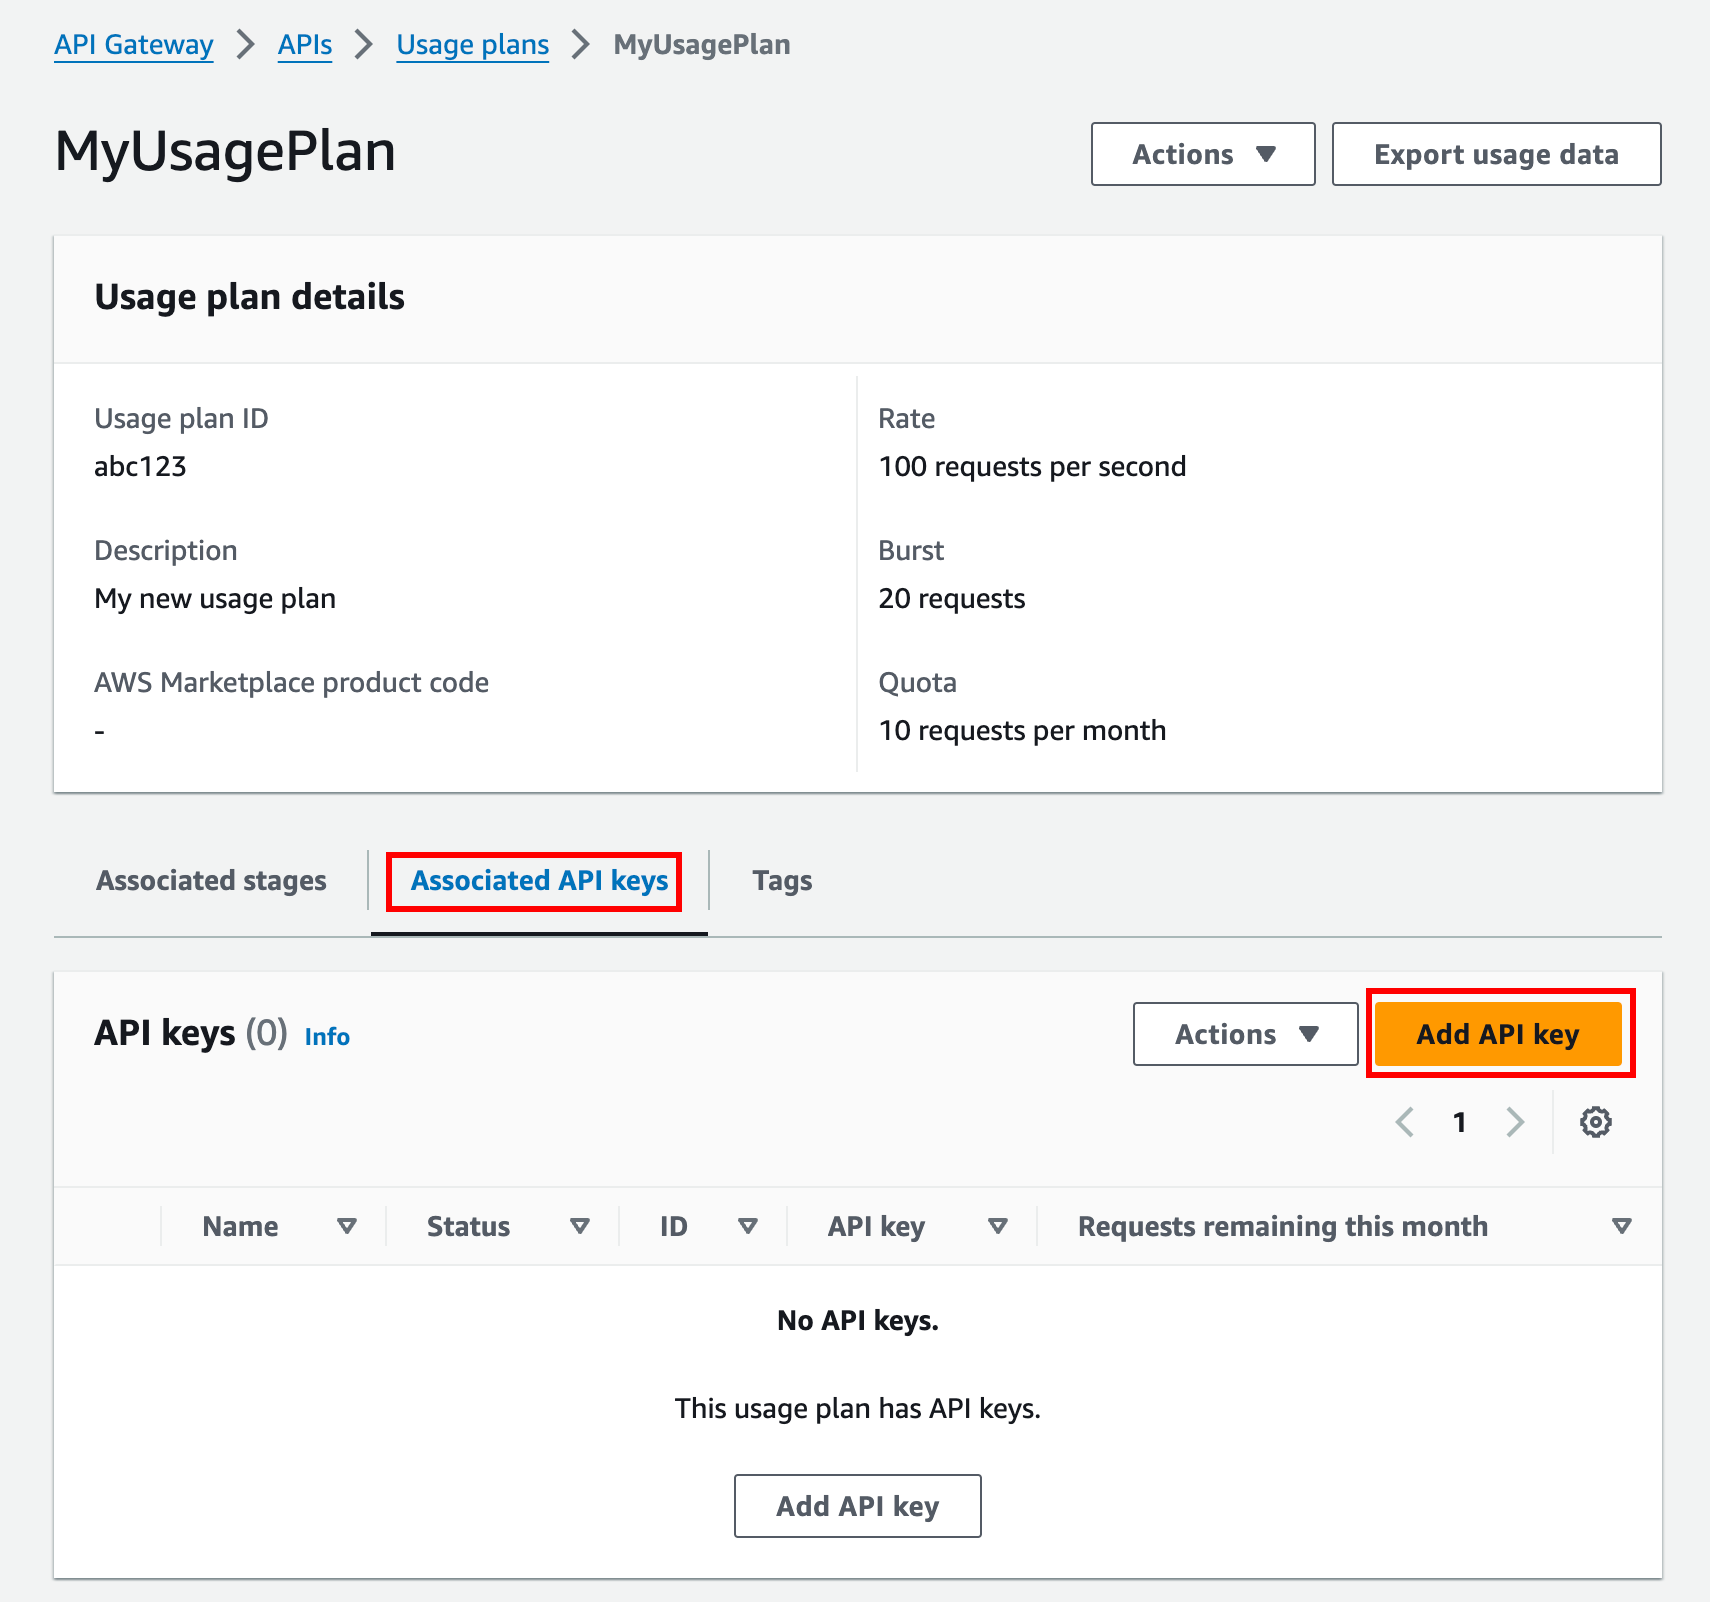
To add a key to a usage plan
-
Under the Associated API keys tab, choose Add API key.
-
-
To associate an existing key to your usage plan, select Add existing key, and then select your existing key from the dropdown menu.
-
To create a new API key, select Create and add new key, and then create a new key. For more information on how to create a new key, see Create an API key.
-
Choose Add API key.
- AWS CLI
-
The following create-usage-plan-key
command associates an existing API key with a usage plan:
aws apigateway create-usage-plan-key \
    --usage-plan-id a1b2c3 \
    --key-type "API_KEY" \
    --key-id aaa111bbb
- REST API
-
Call usageplankey:create to associate an existing API key with a usage plan.
You can also directly associate your APIs keys with a usage plan when you import them.
Call apikey:import to add one or more API
keys directly to the specified usage plan. The request payload
should contain API key values, the associated usage plan identifier,
the Boolean flags to indicate that the keys are enabled for the
usage plan, and, possibly, the API key names and descriptions.
The following example of the apikey:import request
adds three API keys (as identified by key,
name, and description) to one usage
plan (as identified by usageplanIds):
POST /apikeys?mode=import&format=csv&failonwarnings=fase HTTP/1.1
Host: apigateway.us-east-1.amazonaws.com
Content-Type: text/csv
Authorization: ...

key,name, description, enabled, usageplanIds
abcdef1234ghijklmnop8901234567, importedKey_1, firstone,  tRuE, n371pt
abcdef1234ghijklmnop0123456789, importedKey_2, secondone, TRUE, n371pt
abcdef1234ghijklmnop9012345678, importedKey_3,          , true, n371pt
As a result, three UsagePlanKey resources are created
and added to the UsagePlan.
You can also add API keys to more than one usage plan this way. To
do this, change each usageplanIds column value to a
comma-separated string that contains the selected usage plan
identifiers, and is enclosed within a pair of quotes
("n371pt,m282qs" or
'n371pt,m282qs').
An API key can be associated with more than one usage plan. A
usage plan can be associated with more than one stage. However,
a given API key can only be associated with one usage plan for
each stage of your API.