Viewing results in evidence finder
After your search is finished, you can view the results that matched your search criteria.
Keep in mind that multiple resources might be assessed during evidence collection. As a result, evidence can include one or more related resources. In evidence finder, results are shown at the resource level, with one row for each resource. You can preview a summary of each resource without leaving the page.
After you review the search results, you can generate an assessment report that includes that evidence. You can also export your search results into a comma-separated values (CSV) file.
Important
We recommend that you keep evidence finder open until you finished exploring your search
results. Your search results are discarded when you navigate away from the View
Results table. If needed, you can view your recent results in the
CloudTrail console at https://console.aws.amazon.com/cloudtrail/
Prerequisites
The following procedure assumes that you already followed the steps to perform a search in evidence finder.
Procedure
Follow these steps to view your search results in evidence finder.
Tasks
Step 1. Viewing the grouped results
If you grouped your results, you can review the groupings before you dive deeper into the evidence.
Note
If you didn't group results, evidence finder doesn’t display the Group by results table. Instead, you're taken directly to the View results table.
Use the Group by results table to learn the breadth of the matching evidence and how it's distributed across a specific dimension. Results are grouped by the value that you selected. For example, if you grouped by Resource type, the table shows a list of AWS resource types. The Total evidence column shows the number of matching results for each resource type.

To get the results for a group
-
From the Group by results table, select the row for the results that you want to get.
-
Choose Get results. This starts a new search query, and redirects you to the View results table where you can see the results for that group.
Step 2. Viewing the search results
The View results table displays your search results. From here, you can manage your viewing preferences and preview resource summaries.
Managing your viewing preferences
Your viewing preferences control what you see on the results page.
To manage your viewing preferences
-
Choose the settings icon (⚙) at the top of the View results table.
-
Review and change the following settings as needed:
Setting Description Select visible table columns
Use the toggle option to change which columns are displayed. Page size
Select a radio button to specify how many results are shown on each page. Wrap text Select the check box to wrap long lines of text for better readability.
-
Choose Confirm to save your preferences.
Previewing resource summaries
You can preview the related resources for the evidence that matched your search query. This helps you determine if the search query returned the intended results, or if you need to adjust your filters and re-run the search query.
Keep in mind that evidence can have one or more related resources. Evidence finder shows results at the resource level (with one row for each resource).
Note
Evidence finder returns results for automated and manual evidence. However, you can only preview resource summaries for automated evidence. This is because Audit Manager doesn’t perform resource assessments for manual evidence, and as a result, no resource summary is available.
To see details about manual evidence, choose the evidence name to open the evidence details page. If you generate an assessment report from your evidence finder results, the manual evidence details are included in the assessment report.
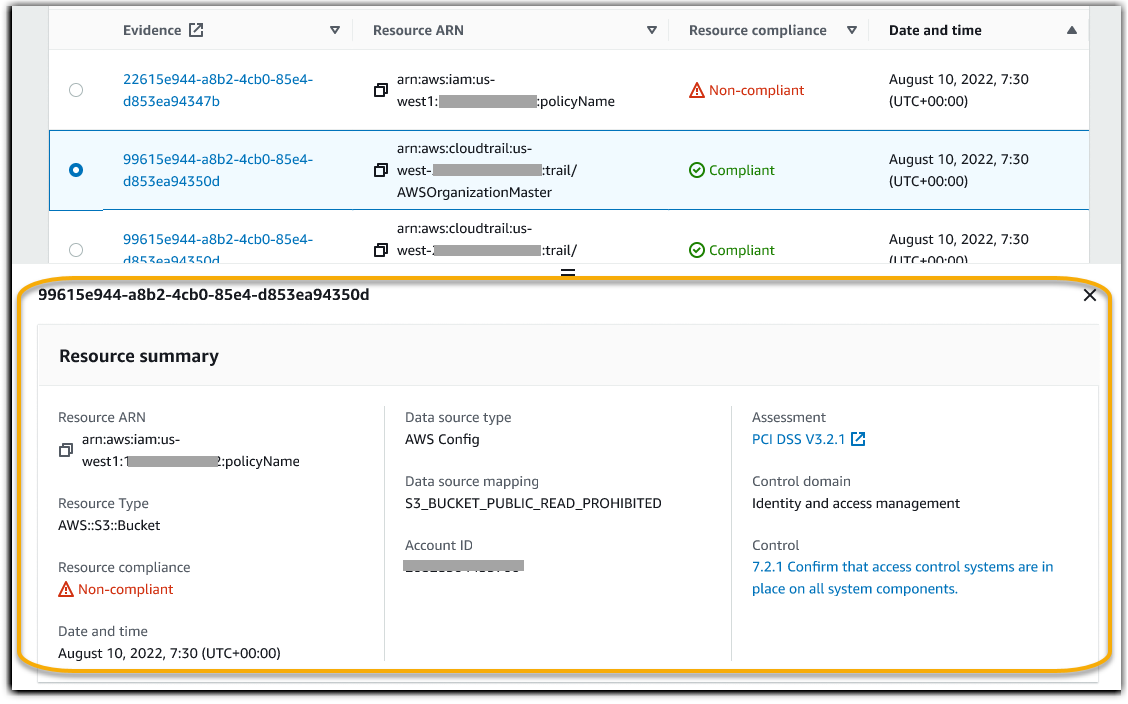
To preview resource summaries
-
Select the radio button next to a result. This opens a resource summary panel on the current page.
-
(Optional) To see the full details of the related evidence, choose the evidence name.
-
(Optional) Use the horizontal lines (=) to drag and resize the resource summary pane.
-
Choose (x) to close the resource summary pane.
Next steps
After you review your search results, you can generate an assessment report from them or export them as a CSV file. For instructions, see Exporting your search results from evidence finder.
Additional resources
