Build, test, and deploy with workflows
After writing your application code in a CodeCatalyst Dev Environment and pushing it to your CodeCatalyst source repository, you're ready to deploy it. The way to do this automatically is through a workflow.
A workflow is an automated procedure that describes how to build, test, and deploy your code as part of a continuous integration and continuous delivery (CI/CD) system. A workflow defines a series of steps, or actions, to take during a workflow run. A workflow also defines the events, or triggers, that cause the workflow to start. To set up a workflow, you create a workflow definition file using the CodeCatalyst console's visual or YAML editor.
Tip
For a quick look at how you might use workflows in a project, create a project with a blueprint. Each blueprint deploys a functioning workflow that you can review, run, and experiment with.
About the workflow definition file
A workflow definition file is a YAML file that describes your workflow.
By default, the file is stored in a ~/.codecatalyst/workflows/ folder in the root of
your source repository. The file can have a .yml or
.yaml extension, and the extension must be lowercase.
The following is an example of a simple workflow definition file. We explain each line of this example in the table that follows.
Name: MyWorkflow
SchemaVersion: 1.0
RunMode: QUEUED
Triggers:
  - Type: PUSH
    Branches:
      - main
Actions:
  Build:
    Identifier: aws/build@v1
    Inputs:
      Sources:
        - WorkflowSource
    Configuration:
      Steps:
- Run: docker build -t MyApp:latest .| Line | Description |
|---|---|
|
Specifies the name of the workflow. For more information about the
|
|
Specifies the workflow schema version. For more information about the
|
|
Indicates how CodeCatalyst handles multiple runs. For more information about the run mode, see Configuring the queuing behavior of runs. |
|
Specifies the logic that will cause a workflow run to start. For more information about triggers, see Starting a workflow run automatically using triggers. |
|
Indicates that the workflow must start whenever you push code to the
|
|
Defines the tasks to perform during a workflow run. In this example, the
|
|
Defines the properties for the |
|
Specifies the unique, hard-coded identifier for the build action. |
|
Indicates that the build action should look in the |
|
Contains the configuration properties that are specific to the build action. |
|
Tells the build action to build a Docker image called |
For a complete list of all the properties available in the workflow definition file, see the Workflow YAML definition.
Using the CodeCatalyst console's visual and YAML editors
To create and edit the workflow definition file, you can use your preferred editor, but we recommend using the CodeCatalyst console's visual editor or YAML editor. These editors offer helpful file validation to help ensure YAML property names, values, nesting, spacing, capitalization, and so on, are correct.
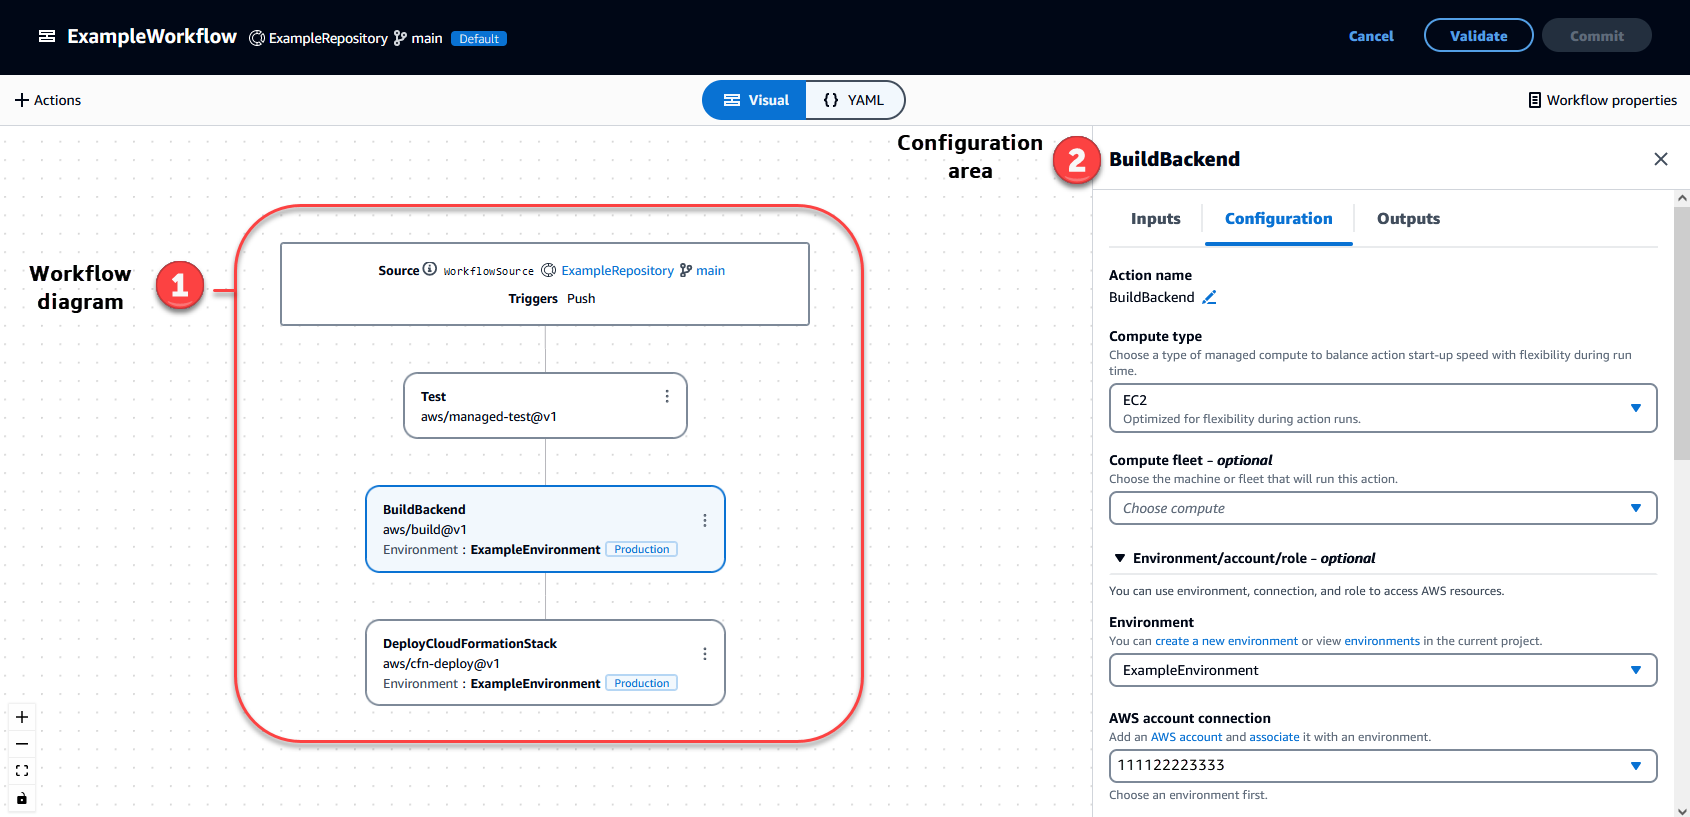
The following image shows a workflow in the visual editor. The visual editor offers you a complete user interface through which to create and configure your workflow definition file. The visual editor includes a workflow diagram (1) showing the workflow's main components, and a configuration area (2).
Alternatively, you can use the YAML editor, shown in the next image. Use the YAML editor to paste in large code blocks (from a tutorial, for example), or to add advanced properties that are not offered through the visual editor.
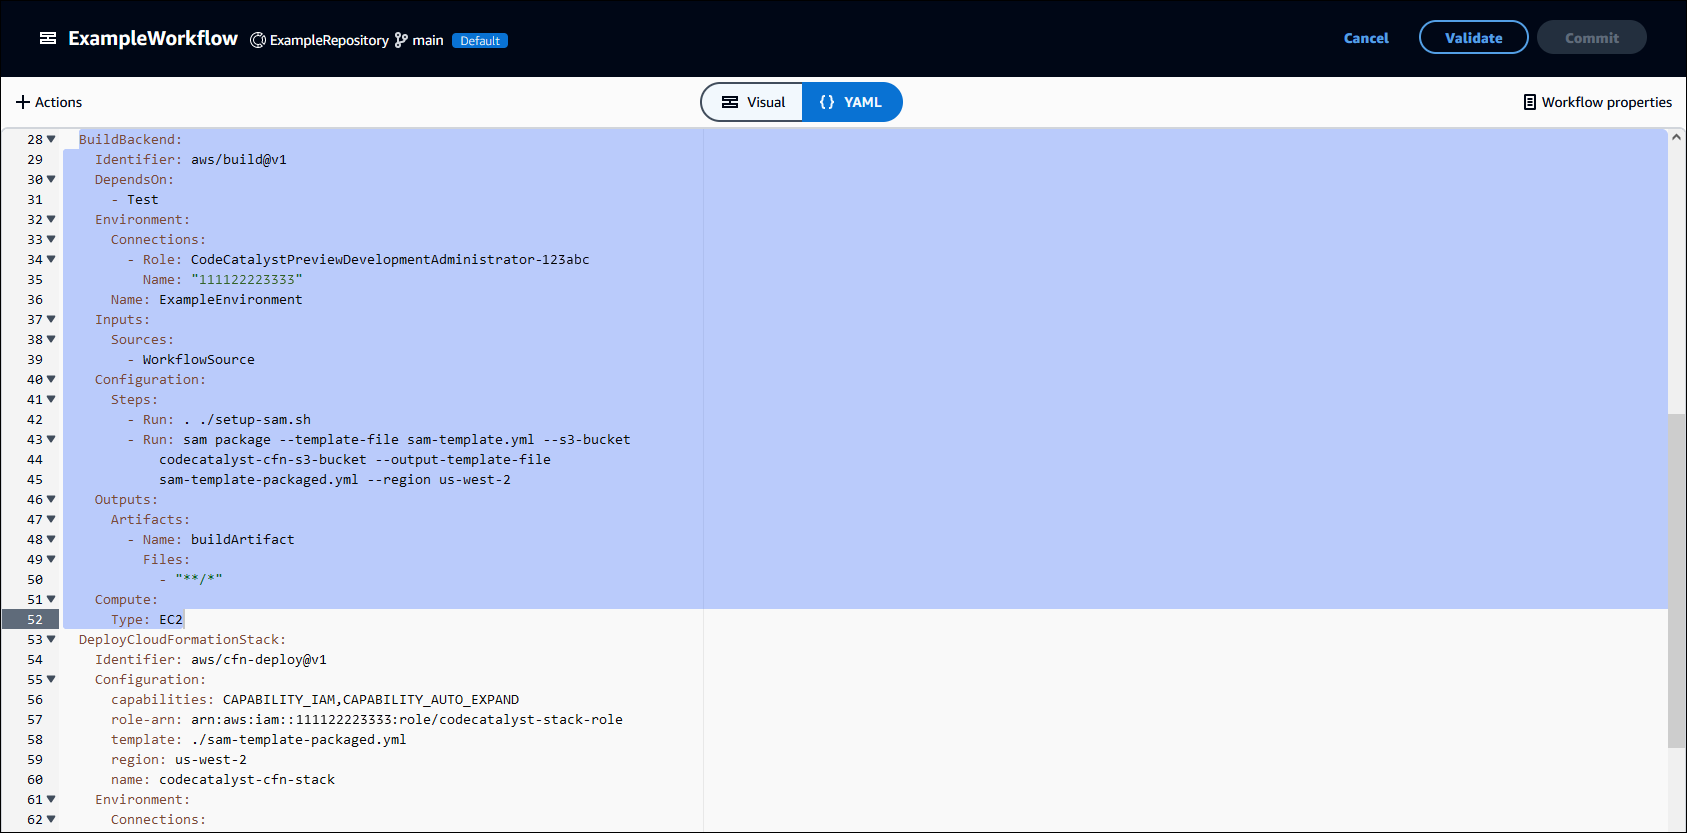
You can toggle from the visual editor to the YAML editor to see the effect that your configurations have on the underlying YAML code.
Discovering workflows
You can view your workflow on the Workflows summary page, along with other workflows you've set up in the same project.
The following image shows the Workflows summary page. It is populated with two workflows: BuildToProd and UnitTests. You can see that both have been run a few times. You can choose Recent runs to quickly see the run history, or choose the name of the workflow to see the workflow's YAML code and other detailed information.

Viewing workflow run details
You can view the details of a workflow run by choosing the run in the Workflows summary page.
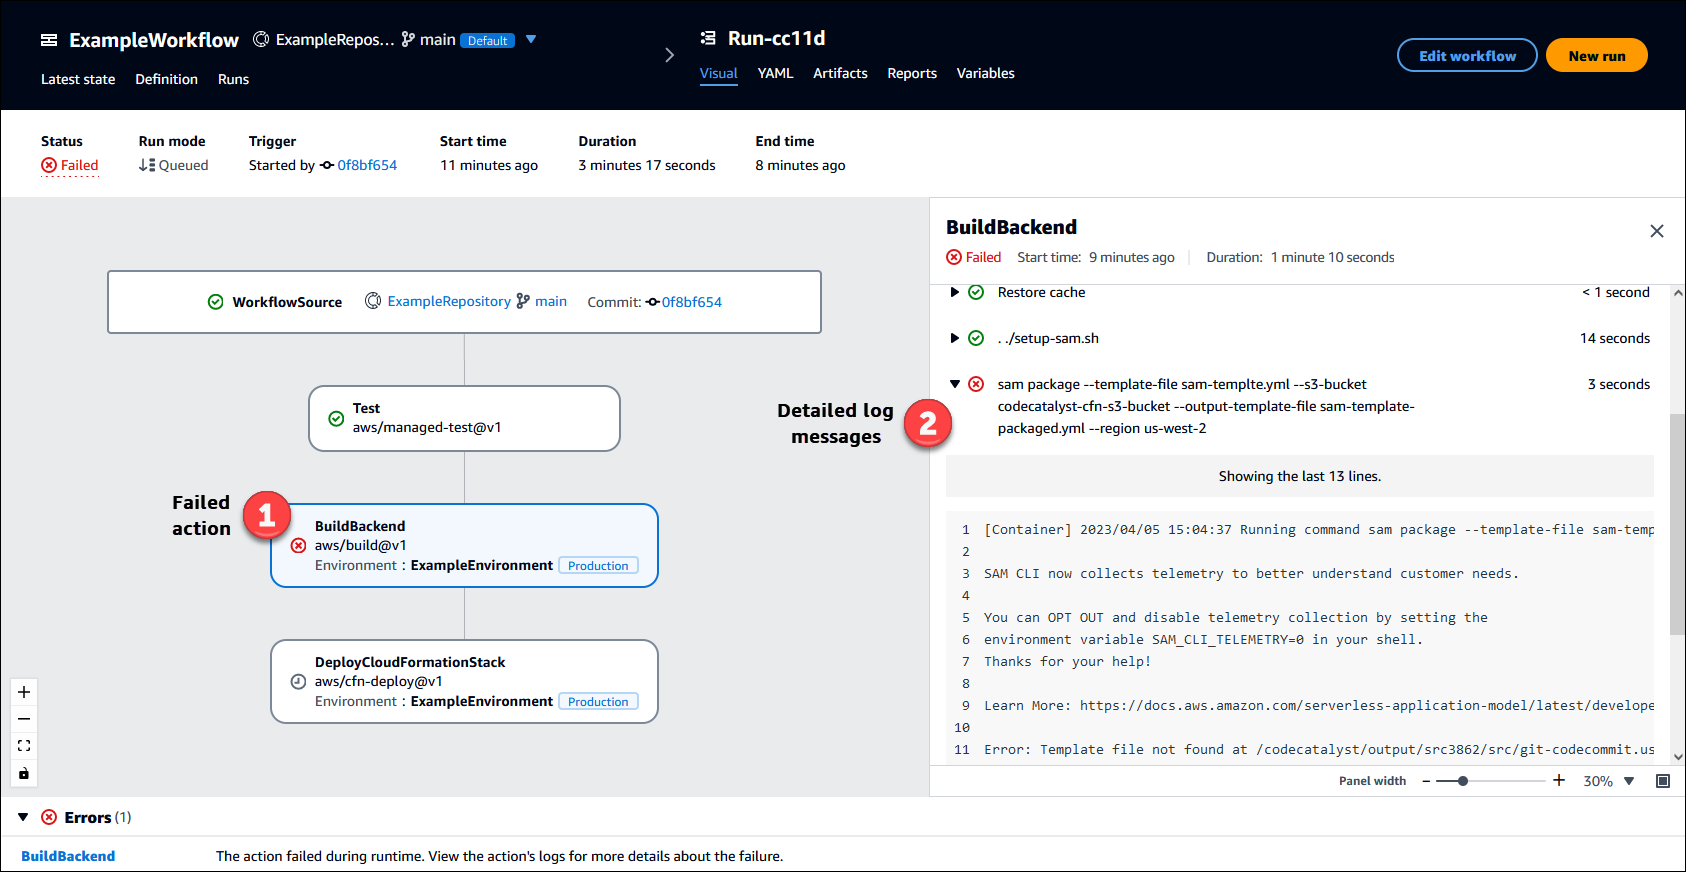
The following image shows the details of a workflow run called Run-cc11d that was started automatically on a commit to source. The workflow diagram indicates that an action has failed (1). You can navigate to the logs (2) to view the detailed log messages and troubleshoot issues. For more information about workflow runs, see Running a workflow.
Next steps
To learn more about workflows concepts, see Workflows concepts.
To create your first workflow, see Getting started with workflows.
