Add a custom agent status to the Amazon Connect Contact Control Panel (CCP)
Agents are responsible for setting their status in the Contact Control Panel (CCP). In fact, the only time an agent's status changes is when they manually change it in the CCP, or when their supervisor changes it in a real-time metrics report.
Amazon Connect provides two default status values:
-
Available
-
Offline
You can change the name of these values, and you can add new ones. For example, you might add a status for Lunch, and another for Training. These and the default status values will be used for reporting, metrics, and resource management.
When you add a new status, it will always be Custom, not routable.
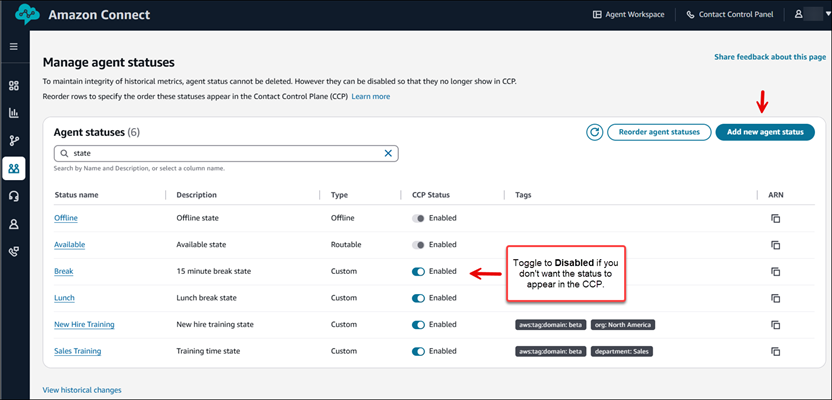
You can't delete a status value but you can disable it so it doesn't appear on the agent's CCP.
To add a new agent status
-
Log in to the Amazon Connect admin website at https://
instance name.my.connect.aws/. Use an Admin account, or an account that has Users and permissions - Agent status - Create permissions in its security profile. -
On the Amazon Connect admin website, on the navigation menu, choose Users, Agent status, Add new agent status. The following image shows a sample Manage agent statuses page.
-
Enter a status name and description.
-
Under Tags, optionally add resource tags to help organize agent statuses.
Note
Tags cannot be used for access control, for example, if you want to show a different CCP status to different agents based on their department (Sales, Technical, HR).
-
Choose Save.
-
After saving a custom status, you can disable it so that the status does not appear in the Contact Control Panel to agents.
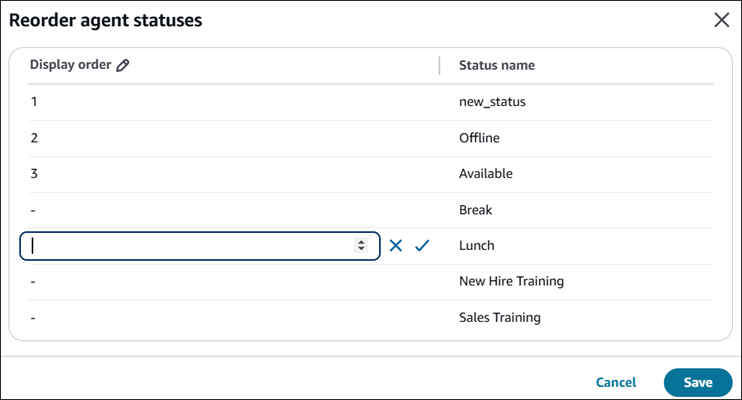
To change the order that the status values appear in the CCP, choose Reorder agent statuses. Enter the display order that makes sense for your agents. The following image shows a sample Reorder agent statuses page.
To edit an agent status
-
Log in to the Amazon Connect admin website at https://
instance name.my.connect.aws/. Use an Admin account, or an account that has Users and permissions - Agent status - Edit permissions in its security profile. -
On the Amazon Connect admin website, on the navigation menu, choose Users, Agent status.
-
Choose the status you want to edit.
-
Enter the new information, and choose Save to apply the changes.
Choose View historical changes to view the change history. You can filter changes by date (between two dates) or by user name. If you can't see the View historical changes link, make sure you have the following permission in your security profile: Historical changes - View historical changes - View.
