Using a smart card
You can use Amazon DCV to use one or more smart cards that's connected to your client computer. You can do this using the standard Personal Computer/Smart Card (PC/SC) interface, in a Amazon DCV session. For each session, only one connected client can connect a smart card at a time. This is especially important in environments where multiple clients connect to the same session.
Smart card access is supported only with the Windows, Linux, and macOS clients. It's not supported with the web browser client.
Only one client can connect a smart card at a time. While your smart card is connected, no other clients who are connected to the session can connect a smart card.
After you're done using the smart card in the Amazon DCV session, release it. After it's released, other clients who are connected to the session can connect a smart card. The smart card is automatically released when you disconnect from the session.
You must be authorized to use this feature. If you are not authorized, the functionality is not available in the client. For more information, see Configuring Amazon DCV Authorization in the Amazon DCV Administrator Guide.
Note
Smart card access in a Amazon DCV session operates at the PC/SC interface level. This means that applications using the PC/SC interface can interact with smart cards connected to the client computer. However, these smart cards will not be visible to server host components that interact directly with smart card devices. Most notably, the smart card devices will not appear in Windows Device Manager.
Connecting a smart card
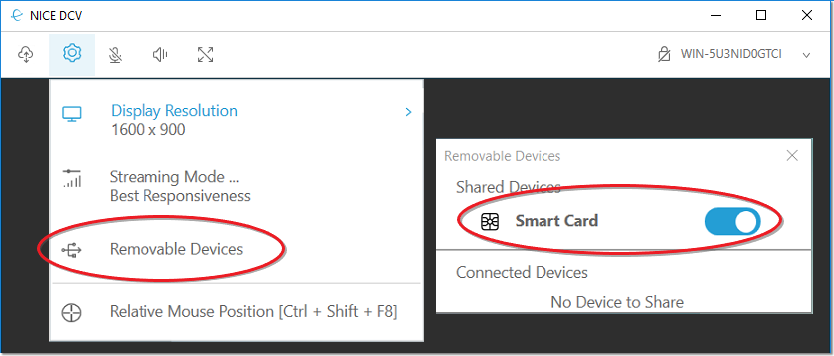
Connecting to a Windows client
Launch the client and connect to the Amazon DCV session.
Choose the Settings icon.
Select Removable Devices from the drop-down list.
Enable the Smart Card toggle.
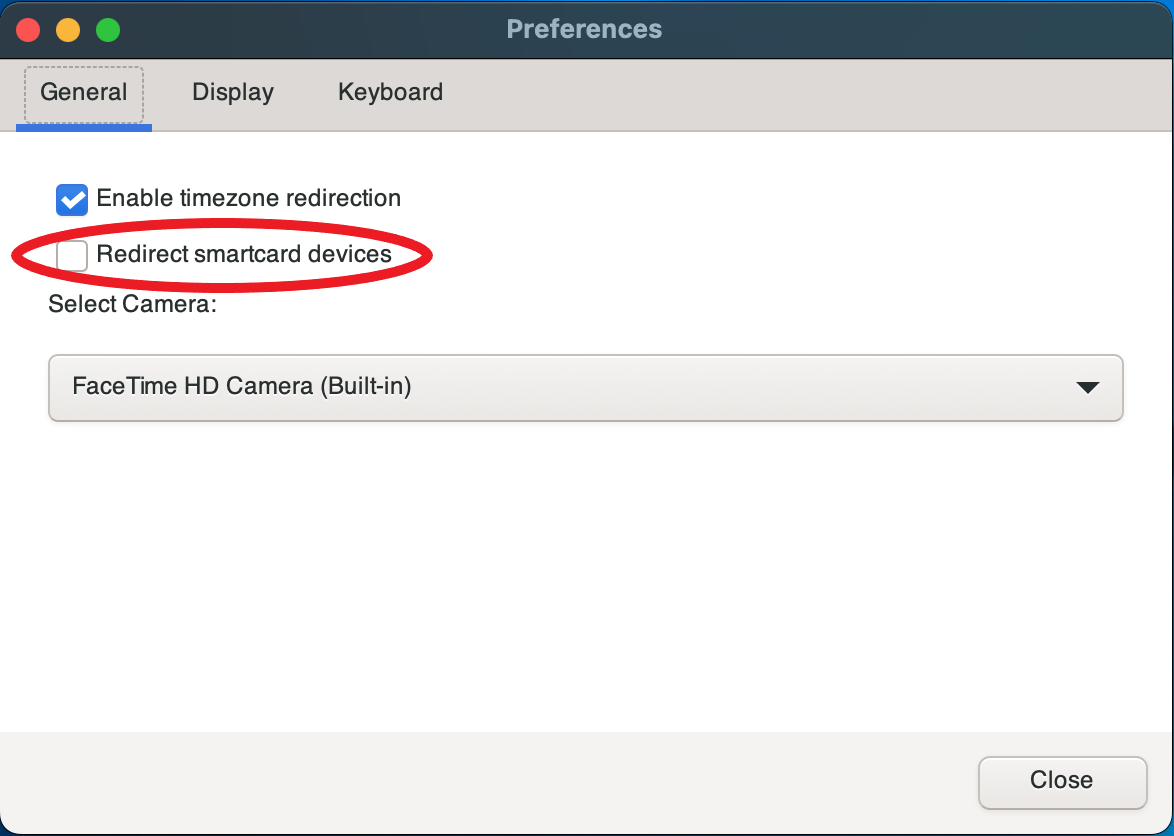
Connecting to a macOS client
Launch the client and connect to the Amazon DCV session.
Choose the DCV Viewer icon.
Select the General tab in the Preferences window.
Check the Redirect smartcard devices checkbox.
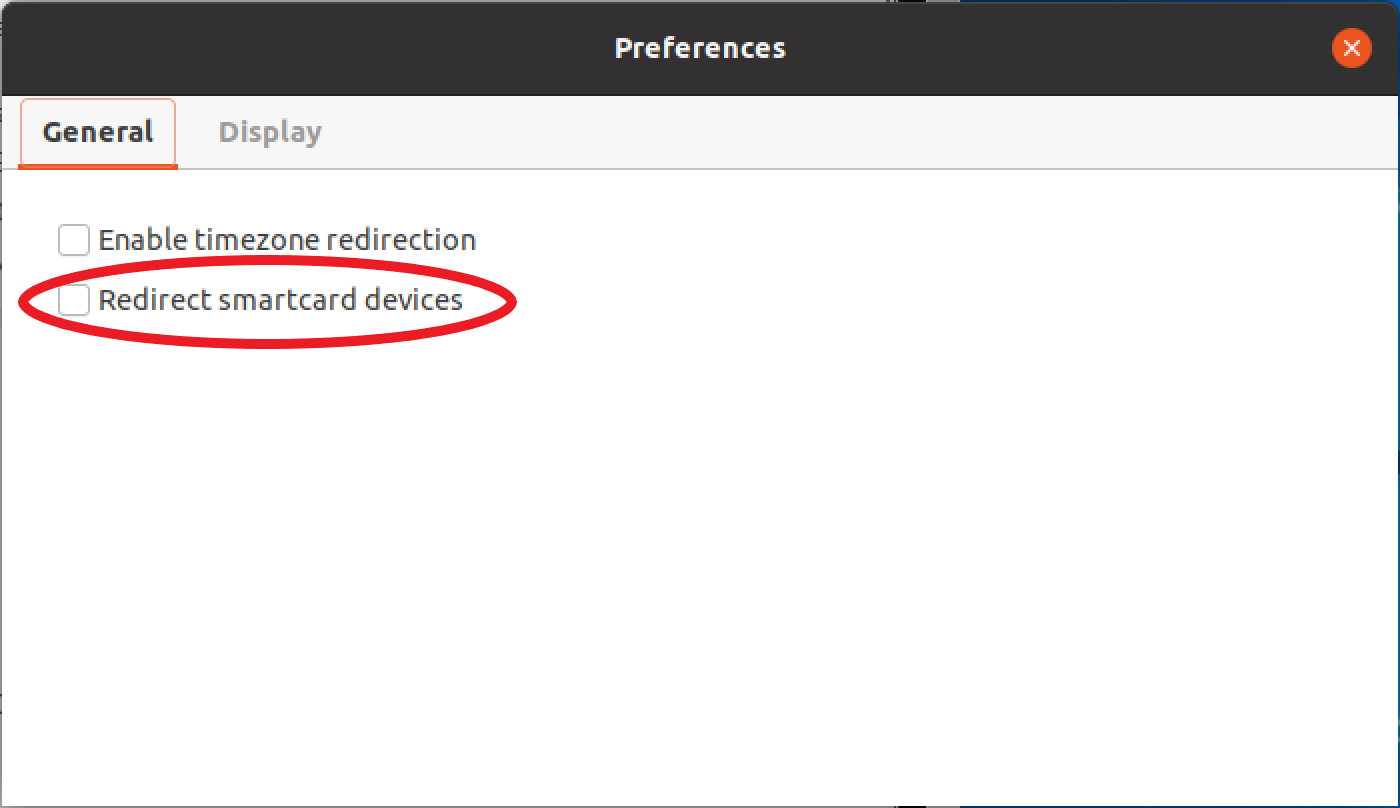
Connecting to a Linux client
Launch the client and connect to the Amazon DCV session.
Choose the Settings icon.
Select the General tab in the Preferences window.
Check the Redirect smartcard devices checkbox.
Using a smart card on Linux servers
Open a terminal and launch the application using the
dcvscruncommand followed by the application name and arguments.Example
For example, to launch
firefoxwith smart card support, use the following command:$dcvscrun firefoxImportant
If you enabled smart card caching, run the following command in the same terminal that you set and exported the
DCV_PCSC_ENABLE_CACHEenvironment variable in.
Releasing a smart card
Releasing from a Windows client
Choose the Settings icon.
Select Removable Devices from the drop-down list.
Disable the Smart Card toggle.
Releasing from a macOS and Linux clients
Choose the Settings icon.
Select the General tab in the Preferences window.
Uncheck the Redirect smartcard devices checkbox.
Smart card data caching (optional)
To have the Amazon DCV server cache smart card data, you will need to enable the smart card caching feature. By default, smart card caching is disabled. With smart card caching enabled, the server caches the results of recent calls to the client's smart card. This helps to reduce the amount of traffic that is transferred between the client and the server and improves performance.
You cannot enable smart card caching if it's disabled on the server. For more information, see Configuring Smart Card Caching in the Amazon DCV Administrator Guide
Enabling smart card caching on Windows servers
Launch the client and connect to the Amazon DCV session.
Open a terminal window.
Run one of the following commands:
-
To enable smart card caching for the current terminal window:
C:\>set DCV_PCSC_ENABLE_CACHE=1 -
To enable smart card caching permanently for all applications on the server:
C:\>setx DCV_PCSC_ENABLE_CACHE 1
-
Enabling smart card caching on Linux servers
Launch the client and connect to the Amazon DCV session.
Note
Make sure to run the following command in the same terminal that you intend to launch the application.
Open a terminal window where you ran the applicaiton with
dcvscrun.Export the
DCV_PCSC_ENABLE_CACHEwith the value1.Example
For example, you might run the command:
$DCV_PCSC_ENABLE_CACHE=1 dcvscrun APPLICATIONor
$DCV_PCSC_ENABLE_CACHE=1$dcvscrun APPLICATION
