Create a connection to Bitbucket
You can use the AWS Management Console or the AWS Command Line Interface (AWS CLI) to create a connection to a repository hosted on bitbucket.org.
Before you begin:
-
You must have already created an account with Bitbucket.
-
You must have already created a code repository on bitbucket.org.
Note
You can create connections to a Bitbucket Cloud repository. Installed Bitbucket provider types, such as Bitbucket Server, are not supported. See AWS CodeConnections supported providers and versions.
Note
Connections only provide access to repositories owned by the account that was used to create the connection.
If the application is being installed in a Bitbucket workspace, you need Administer workspace permissions. Otherwise, the option to install the app will not display.
Create a connection to Bitbucket (console)
You can use the console to create a connection to Bitbucket.
Note
Beginning July 1, 2024, the console creates connections with codeconnections in the resource ARN. Resources with both service prefixes will continue to display in the console.
Step 1: Create your connection
-
Sign in to the AWS Management Console, and open the AWS Developer Tools console at https://console.aws.amazon.com/codesuite/settings/connections
. -
Choose Settings > Connections, and then choose Create connection.
-
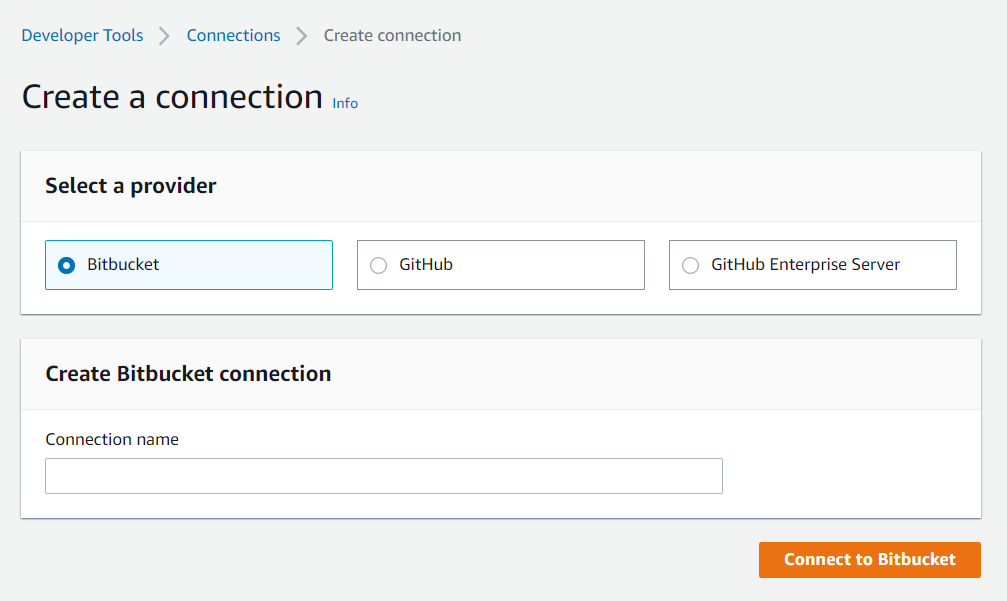
To create a connection to a Bitbucket repository, under Select a provider, choose Bitbucket. In Connection name, enter the name for the connection that you want to create. Choose Connect to Bitbucket, and proceed to Step 2.
Step 2: Connect to Bitbucket
-
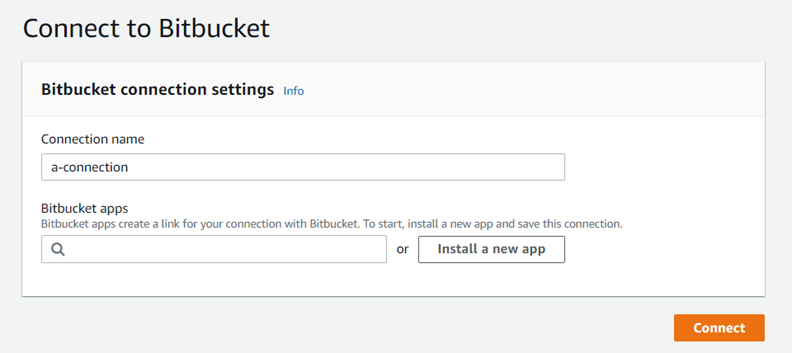
On the Connect to Bitbucket settings page, your connection name displays.
Under Bitbucket apps, choose an app installation or choose Install a new app to create one.
Note
You only install the app once for each Bitbucket workspace or account. If you have already installed the Bitbucket app, choose it and move to the last step in this section.
-
If the login page for Bitbucket displays, log in with your credentials and then choose to continue.
-
On the app installation page, a message shows that the AWS CodeStar app is trying to connect to your Bitbucket account.
If you are using a Bitbucket workspace, change the Authorize for option to the workspace. Only workspaces where you have administrator access will display.
Choose Grant access.

-
In Bitbucket apps, the connection ID for your new installation is displayed. Choose Connect. The created connection displays in the connections list.

Create a connection to Bitbucket (CLI)
You can use the AWS Command Line Interface (AWS CLI) to create a connection.
To do this, use the create-connection command.
Important
A connection created through the AWS CLI or AWS CloudFormation is in PENDING
status by default. After you create a connection with the CLI or AWS CloudFormation, use the
console to edit the connection to make its status AVAILABLE.
To create a connection to Bitbucket
-
Open a terminal (Linux, macOS, or Unix) or command prompt (Windows). Use the AWS CLI to run the create-connection command, specifying the
--provider-typeand--connection-namefor your connection. In this example, the third-party provider name isBitbucketand the specified connection name isMyConnection.aws codeconnections create-connection --provider-type Bitbucket --connection-name MyConnectionIf successful, this command returns the connection ARN information similar to the following.
{ "ConnectionArn": "arn:aws:codeconnections:us-west-2:account_id:connection/aEXAMPLE-8aad-4d5d-8878-dfcab0bc441f" } -
Use the console to complete the connection. For more information, see Update a pending connection.
