Enable internet access for VPC-connected Lambda functions
By default, Lambda functions run in a Lambda-managed VPC that has internet access. To access resources in a VPC in your account, you can add a VPC configuration to a function. This restricts the function to resources within that VPC, unless the VPC has internet access. This page explains how to provide internet access to VPC-connected Lambda functions.
Create the VPC
The Create VPC workflow creates all VPC resources required for a Lambda function to access the public internet from a private subnet, including subnets, NAT gateway, internet gateway, and route table entries.
To create the VPC
Open the Amazon VPC console at https://console.aws.amazon.com/vpc/
. -
On the dashboard, choose Create VPC.
-
For Resources to create, choose VPC and more.
-
Configure the VPC
-
For Name tag auto-generation, enter a name for the VPC.
-
For IPv4 CIDR block, you can keep the default suggestion, or alternatively you can enter the CIDR block required by your application or network.
-
If your application communicates by using IPv6 addresses, choose IPv6 CIDR block, Amazon-provided IPv6 CIDR block.
-
-
Configure the subnets
-
For Number of Availability Zones, choose 2. We recommend at least two AZs for high availability.
-
For Number of public subnets, choose 2.
-
For Number of private subnets, choose 2.
-
You can keep the default CIDR block for the public subnet, or alternatively you can expand Customize subnet CIDR blocks and enter a CIDR block. For more information, see Subnet CIDR blocks .
-
-
For NAT gateways, choose 1 per AZ to improve resiliency.
-
For Egress only internet gateway, choose Yes if you opted to include an IPv6 CIDR block.
-
For VPC endpoints, keep the default (S3 Gateway). There is no cost for this option. For more information, see Types of VPC endpoints for Amazon S3.
-
For DNS options, keep the default settings.
-
Choose Create VPC.
Configure the Lambda function
To configure a VPC when you create a function
Open the Functions page
of the Lambda console. -
Choose Create function.
-
Under Basic information, for Function name, enter a name for your function.
-
Expand Advanced settings.
-
Select Enable VPC, and then choose a VPC.
-
(Optional) To allow outbound IPv6 traffic, select Allow IPv6 traffic for dual-stack subnets.
-
For Subnets, select all private subnets. The private subnets can access the internet through the NAT gateway. Connecting a function to a public subnet doesn't give it internet access.
Note
If you selected Allow IPv6 traffic for dual-stack subnets, all selected subnets must have an IPv4 CIDR block and an IPv6 CIDR block.
-
For Security groups, select a security group that allows outbound traffic.
-
Choose Create function.
Lambda automatically creates an execution role with the AWSLambdaVPCAccessExecutionRole AWS managed policy. The permissions in this policy are required only to create elastic network interfaces for the VPC configuration, not to invoke your function. To apply least-privilege permissions, you can remove the AWSLambdaVPCAccessExecutionRole policy from your execution role after you create the function and VPC configuration. For more information, see Required IAM permissions.
To configure a VPC for an existing function
To add a VPC configuration to an existing function, the function's execution role must have permission to create and manage elastic network interfaces. The AWSLambdaVPCAccessExecutionRole AWS managed policy includes the required permissions. To apply least-privilege permissions, you can remove the AWSLambdaVPCAccessExecutionRole policy from your execution role after you create the VPC configuration.
Open the Functions page
of the Lambda console. -
Choose a function.
-
Choose the Configuration tab, and then choose VPC.
-
Under VPC, choose Edit.
-
Select the VPC.
-
(Optional) To allow outbound IPv6 traffic, select Allow IPv6 traffic for dual-stack subnets.
-
For Subnets, select all private subnets. The private subnets can access the internet through the NAT gateway. Connecting a function to a public subnet doesn't give it internet access.
Note
If you selected Allow IPv6 traffic for dual-stack subnets, all selected subnets must have an IPv4 CIDR block and an IPv6 CIDR block.
-
For Security groups, select a security group that allows outbound traffic.
-
Choose Save.
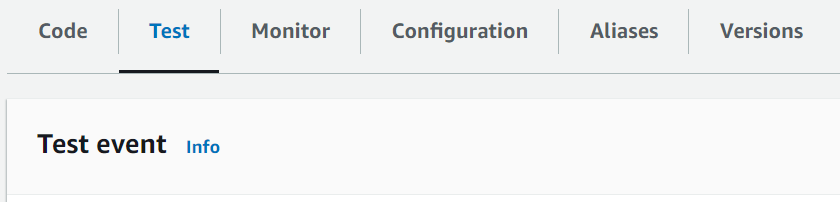
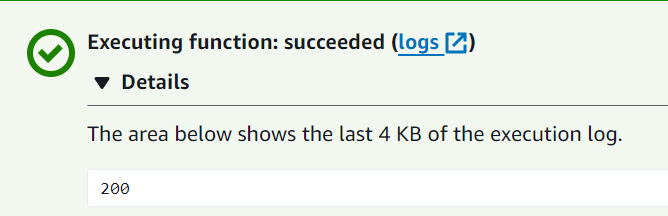
Test the function
Use the following sample code to confirm that your VPC-connected function can reach the public internet. If successful, the code returns a 200 status code. If unsuccessful, the function times out.


If you already have a VPC but you need to configure public internet access for a Lambda function, follow these steps. This procedure assumes that your VPC has at least two subnets. If you don't have two subnets, see Create a subnet in the Amazon VPC User Guide.
Verify the route table configuration
Open the Amazon VPC console at https://console.aws.amazon.com/vpc/
. -
Choose the VPC ID.
-
Scroll down to the Resource map section. Note the route table mappings. Open each route table that is mapped to a subnet.
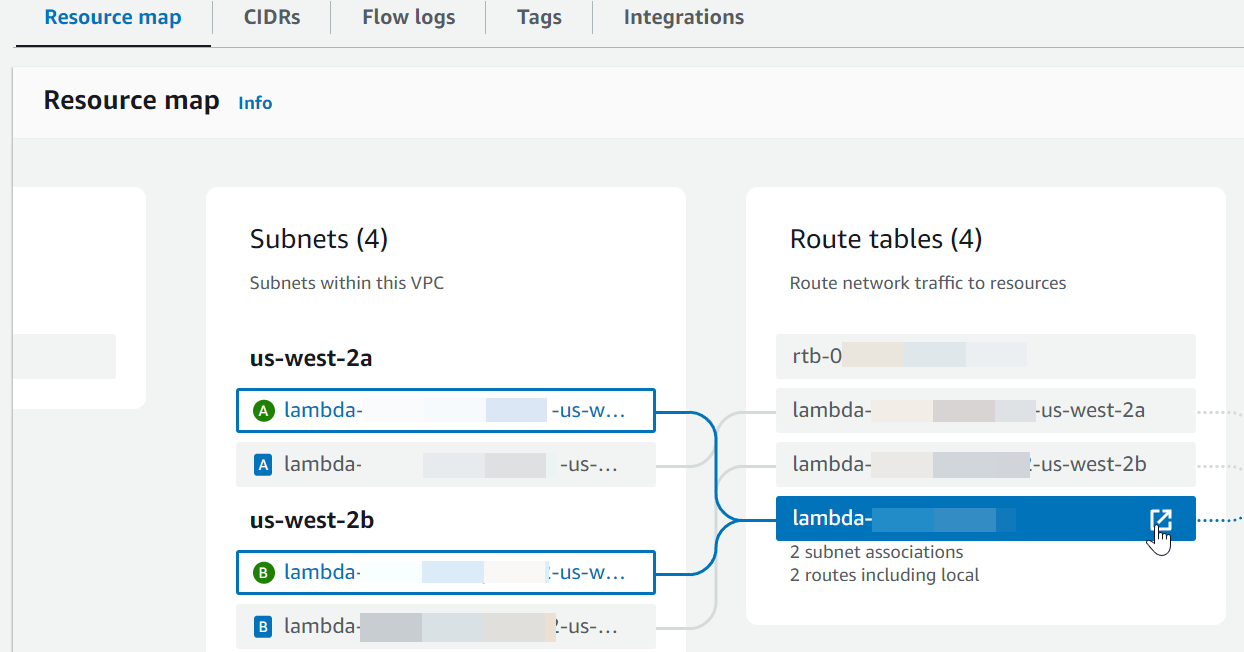
-
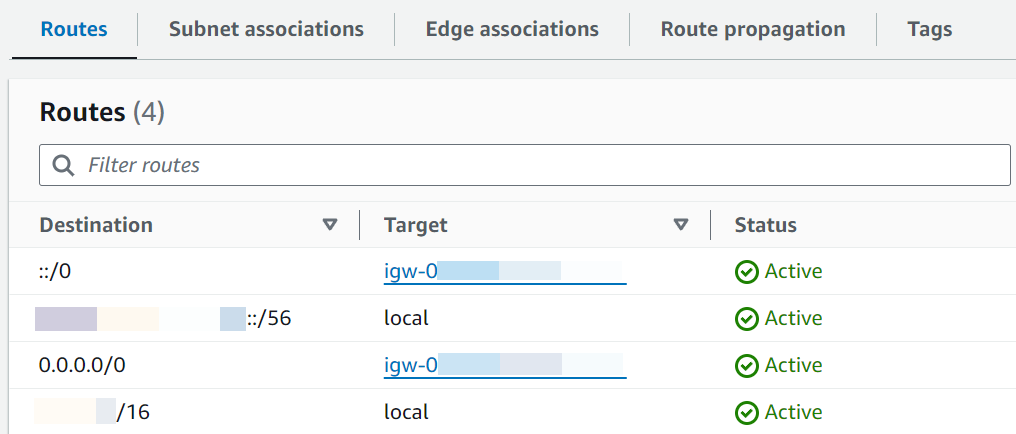
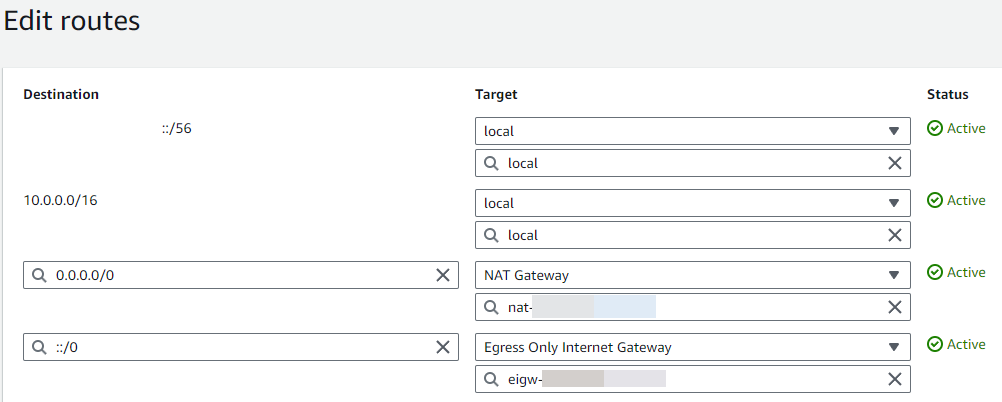
Scroll down to the Routes tab. Review the routes to determine if your VPC has both of the following route tables. Each of these requirements must be satisfied by a separate route table.
-
Internet-bound traffic (
0.0.0.0/0for IPv4,::/0for IPv6) is routed to an internet gateway (igw-xxxxxxxxxx). This means that the subnet associated with the route table is a public subnet.Note
If your subnet doesn't have an IPv6 CIDR block, you will only see the IPv4 route (
0.0.0.0/0).Example public subnet route table
-
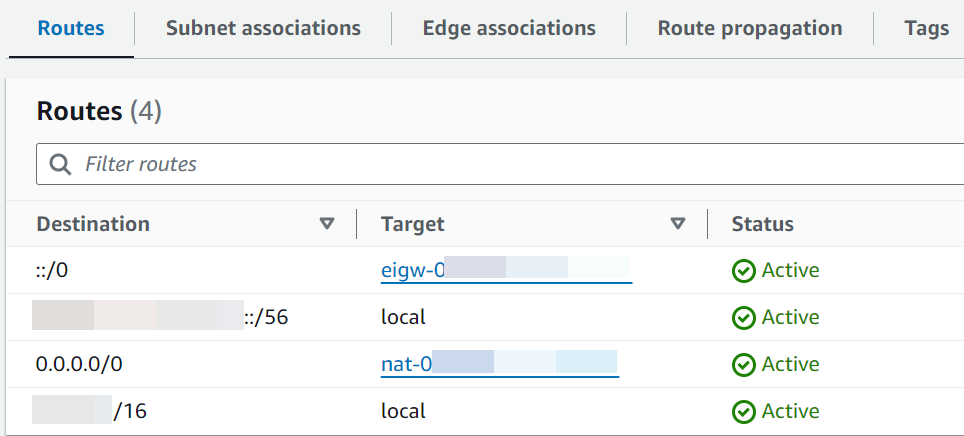
Internet-bound traffic for IPv4 (
0.0.0.0/0) is routed to a NAT gateway (nat-xxxxxxxxxx) that is associated with a public subnet. This means that the subnet is a private subnet that can access the internet through the NAT gateway.Note
If your subnet has an IPv6 CIDR block, the route table must also route internet-bound IPv6 traffic (
::/0) to an egress-only internet gateway (eigw-xxxxxxxxxx). If your subnet doesn't have an IPv6 CIDR block, you will only see the IPv4 route (0.0.0.0/0).Example private subnet route table
-
-
Repeat the previous step until you have reviewed each route table associated with a subnet in your VPC and confirmed that you have a route table with an internet gateway and a route table with a NAT gateway.
If you don't have two route tables, one with a route to an internet gateway and one with a route to a NAT gateway, follow these steps to create the missing resources and route table entries.
Follow these steps to create a route table and associate it with a subnet.
To create a custom route table using the Amazon VPC console
-
Open the Amazon VPC console at https://console.aws.amazon.com/vpc/
. -
In the navigation pane, choose Route tables.
-
Choose Create route table.
-
(Optional) For Name, enter a name for your route table.
-
For VPC, choose your VPC.
-
(Optional) To add a tag, choose Add new tag and enter the tag key and tag value.
-
Choose Create route table.
-
On the Subnet associations tab, choose Edit subnet associations.
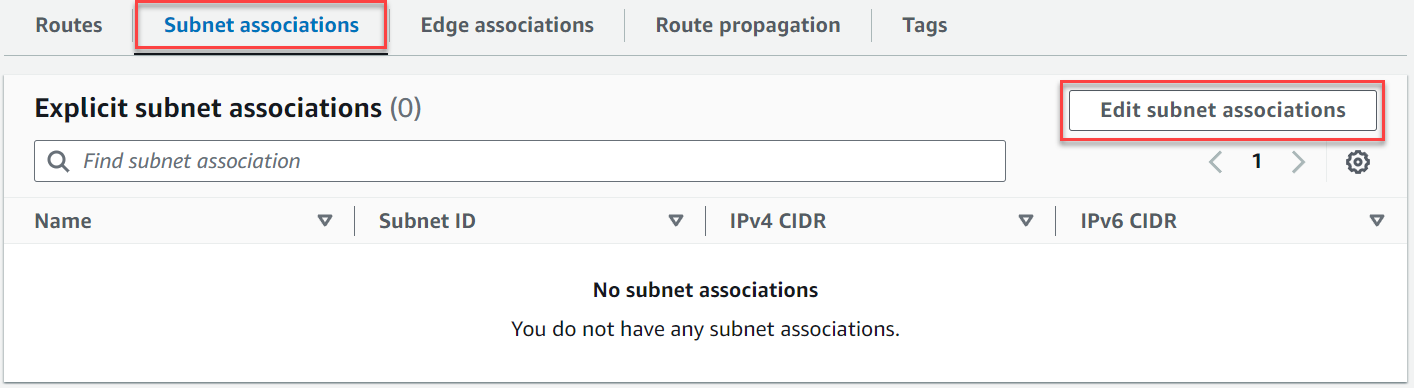
-
Select the check box for the subnet to associate with the route table.
-
Choose Save associations.
Follow these steps to create an internet gateway, attach it to your VPC, and add it to your public subnet's route table.
To create an internet gateway
Open the Amazon VPC console at https://console.aws.amazon.com/vpc/
. -
In the navigation pane, choose Internet gateways.
-
Choose Create internet gateway.
-
(Optional) Enter a name for your internet gateway.
-
(Optional) To add a tag, choose Add new tag and enter the tag key and value.
-
Choose Create internet gateway.
-
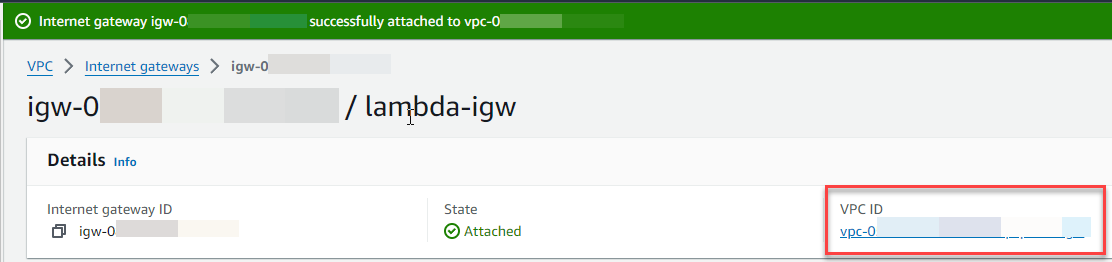
Choose Attach to a VPC from the banner at the top of the screen, select an available VPC, and then choose Attach internet gateway.

-
Choose the VPC ID.
-
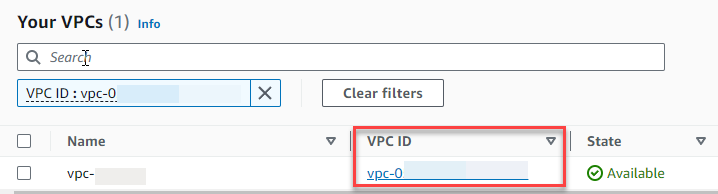
Choose the VPC ID again to open the VPC details page.
-
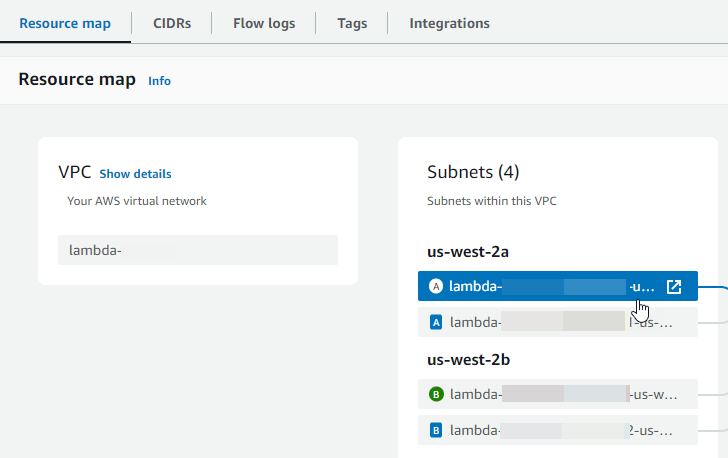
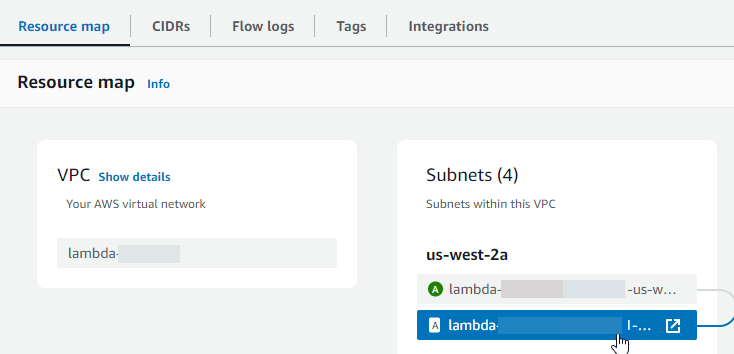
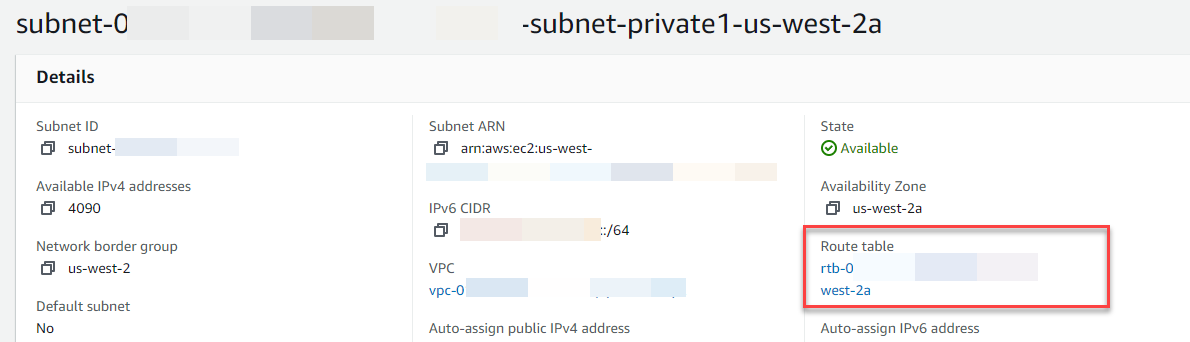
Scroll down to the Resource map section and then choose a subnet. The subnet details are displayed in a new tab.
-
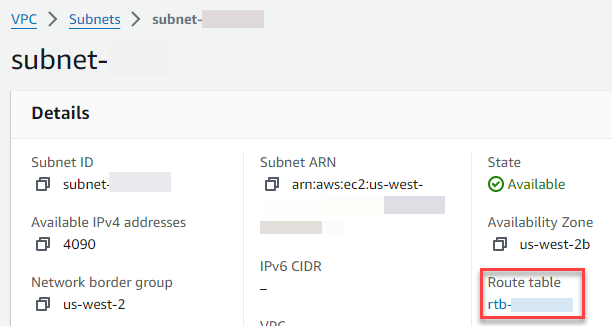
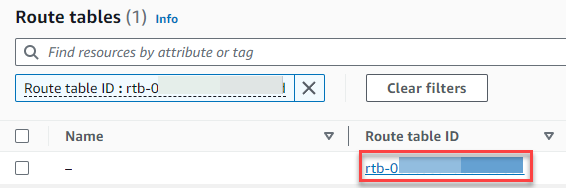
Choose the link under Route table.
-
Choose the Route table ID to open the route table details page.
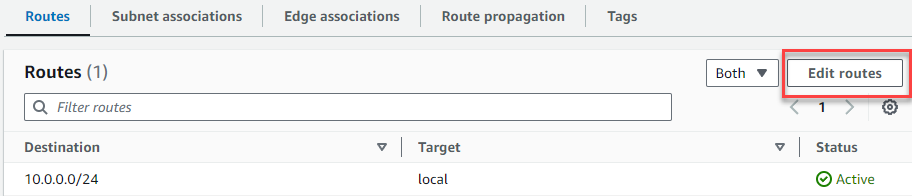
-
Under Routes, choose Edit routes.
-
Choose Add route, and then enter
0.0.0.0/0in the Destination box.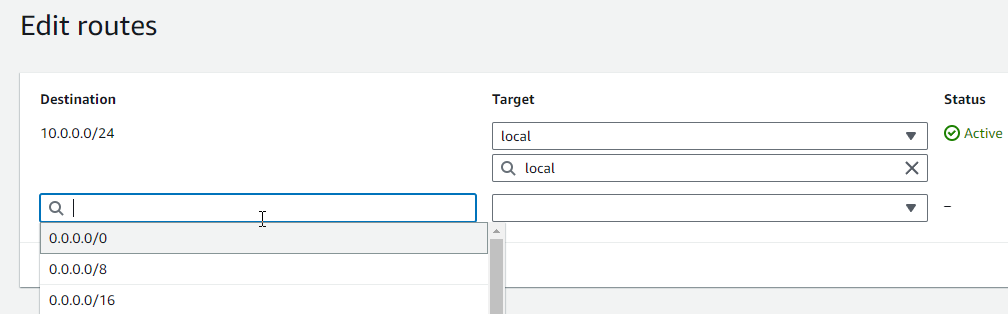
-
For Target, select Internet gateway, and then choose the internet gateway that you created earlier. If your subnet has an IPv6 CIDR block, you must also add a route for
::/0to the same internet gateway.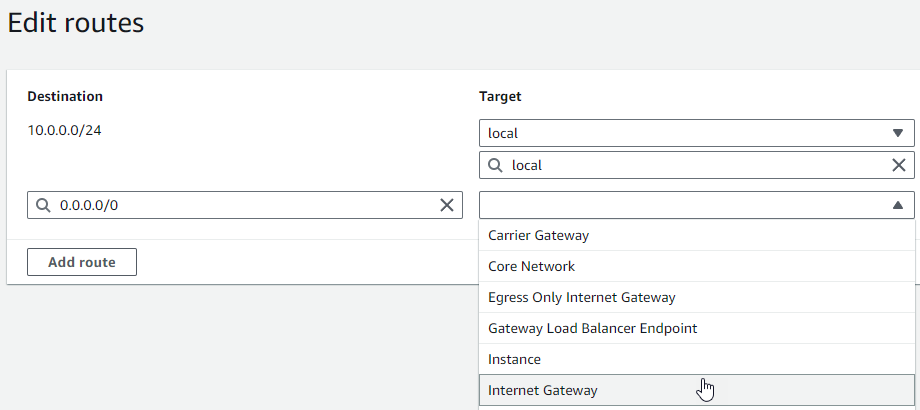
-
Choose Save changes.
Follow these steps to create a NAT gateway, associate it with a public subnet, and then add it to your private subnet's route table.
To create a NAT gateway and associate it with a public subnet
-
In the navigation pane, choose NAT gateways.
-
Choose Create NAT gateway.
-
(Optional) Enter a name for your NAT gateway.
-
For Subnet, select a public subnet in your VPC. (A public subnet is a subnet that has a direct route to an internet gateway in its route table.)
Note
NAT gateways are associated with a public subnet, but the route table entry is in the private subnet.
-
For Elastic IP allocation ID, select an elastic IP address or choose Allocate Elastic IP.
-
Choose Create NAT gateway.
To add a route to the NAT gateway in the private subnet's route table
-
In the navigation pane, choose Subnets.
-
Select a private subnet in your VPC. (A private subnet is a subnet that doesn't have a route to an internet gateway in its route table.)
-
Choose the link under Route table.
-
Choose the Route table ID to open the route table details page.
-
Scroll down and choose the Routes tab, then choose Edit routes

-
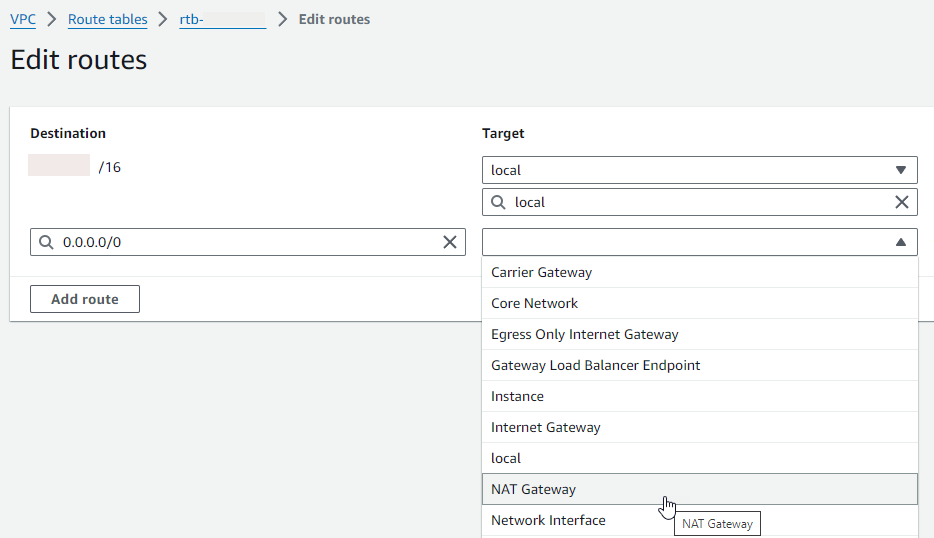
Choose Add route, and then enter
0.0.0.0/0in the Destination box.
-
For Target, select NAT gateway, and then choose the NAT gateway that you created earlier.
-
Choose Save changes.
Follow these steps to create an egress-only internet gateway and add it to your private subnet's route table.
To create an egress-only internet gateway
In the navigation pane, choose Egress-only internet gateways.
Choose Create egress only internet gateway.
-
(Optional) Enter a name.
-
Select the VPC in which to create the egress-only internet gateway.
Choose Create egress only internet gateway.
-
Choose the link under Attached VPC ID.

-
Choose the link under VPC ID to open the VPC details page.
-
Scroll down to the Resource map section and then choose a private subnet. (A private subnet is a subnet that doesn't have a route to an internet gateway in its route table.) The subnet details are displayed in a new tab.
-
Choose the link under Route table.
-
Choose the Route table ID to open the route table details page.
-
Under Routes, choose Edit routes.
-
Choose Add route, and then enter
::/0in the Destination box.
-
For Target, select Egress Only Internet Gateway, and then choose the gateway that you created earlier.
-
Choose Save changes.
Configure the Lambda function
To configure a VPC when you create a function
Open the Functions page
of the Lambda console. -
Choose Create function.
-
Under Basic information, for Function name, enter a name for your function.
-
Expand Advanced settings.
-
Select Enable VPC, and then choose a VPC.
-
(Optional) To allow outbound IPv6 traffic, select Allow IPv6 traffic for dual-stack subnets.
-
For Subnets, select all private subnets. The private subnets can access the internet through the NAT gateway. Connecting a function to a public subnet doesn't give it internet access.
Note
If you selected Allow IPv6 traffic for dual-stack subnets, all selected subnets must have an IPv4 CIDR block and an IPv6 CIDR block.
-
For Security groups, select a security group that allows outbound traffic.
-
Choose Create function.
Lambda automatically creates an execution role with the AWSLambdaVPCAccessExecutionRole AWS managed policy. The permissions in this policy are required only to create elastic network interfaces for the VPC configuration, not to invoke your function. To apply least-privilege permissions, you can remove the AWSLambdaVPCAccessExecutionRole policy from your execution role after you create the function and VPC configuration. For more information, see Required IAM permissions.
To configure a VPC for an existing function
To add a VPC configuration to an existing function, the function's execution role must have permission to create and manage elastic network interfaces. The AWSLambdaVPCAccessExecutionRole AWS managed policy includes the required permissions. To apply least-privilege permissions, you can remove the AWSLambdaVPCAccessExecutionRole policy from your execution role after you create the VPC configuration.
Open the Functions page
of the Lambda console. -
Choose a function.
-
Choose the Configuration tab, and then choose VPC.
-
Under VPC, choose Edit.
-
Select the VPC.
-
(Optional) To allow outbound IPv6 traffic, select Allow IPv6 traffic for dual-stack subnets.
-
For Subnets, select all private subnets. The private subnets can access the internet through the NAT gateway. Connecting a function to a public subnet doesn't give it internet access.
Note
If you selected Allow IPv6 traffic for dual-stack subnets, all selected subnets must have an IPv4 CIDR block and an IPv6 CIDR block.
-
For Security groups, select a security group that allows outbound traffic.
-
Choose Save.
Test the function
Use the following sample code to confirm that your VPC-connected function can reach the public internet. If successful, the code returns a 200 status code. If unsuccessful, the function times out.
