Set Up a Continuous Deployment Pipeline Using AWS CodePipeline
|
AWS experience |
Beginner |
|
Minimum time to complete |
30 minutes |
|
Cost to complete |
Free
Tier |
|
Services used |
|
|
Last updated |
February 14, 2023 |
Overview
In this tutorial, you will learn how to create an automated software release pipeline that deploys a live sample app. You will create the pipeline using AWS CodePipeline, a service that builds, tests, and deploys your code every time there is a code change. You will use your GitHub account, an Amazon Simple Storage Service (Amazon S3) bucket, or an AWS CodeCommit repository as the source location for the sample app’s code. You will also use AWS Elastic Beanstalk as the deployment target for the sample app. Your completed pipeline will be able to detect changes made to the source repository containing the sample app and then automatically update your live sample app.
Continuous deployment allows you to deploy revisions to a production environment automatically without explicit approval from a developer, making the entire software release process automated.
Everything done in this tutorial is Free Tier eligible.
What you will accomplish
In this tutorial, you will:
-
create an automated software release pipeline that deploys a live sample app
-
create the pipeline using AWS CodePipeline
-
use AWS Elastic Beanstalk as the deployment target for the sample app
Prerequisites
Before starting this tutorial, you will need an AWS account. If you don't already have one, follow the Setting Up Your AWS Environment getting started guide for a quick overview.
Implementation
Your continuous deployment pipeline will need a target environment containing virtual servers, or Amazon EC2 instances, where it will deploy sample code. You will prepare this environment before creating the pipeline.
To simplify the process of setting up and configuring EC2 instances for this tutorial, you will spin up a sample environment using AWS Elastic Beanstalk. With Elastic Beanstalk you can easily host web applications without needing to launch, configure, or operate virtual servers on your own. It automatically provisions and operates the infrastructure (such as virtual servers and load balancers) and provides the application stack (such as OS, language and framework, and web and application server) for you.
-
Create an application
To start, open the Elastic Beanstalk console
and choose Create Application. 
-
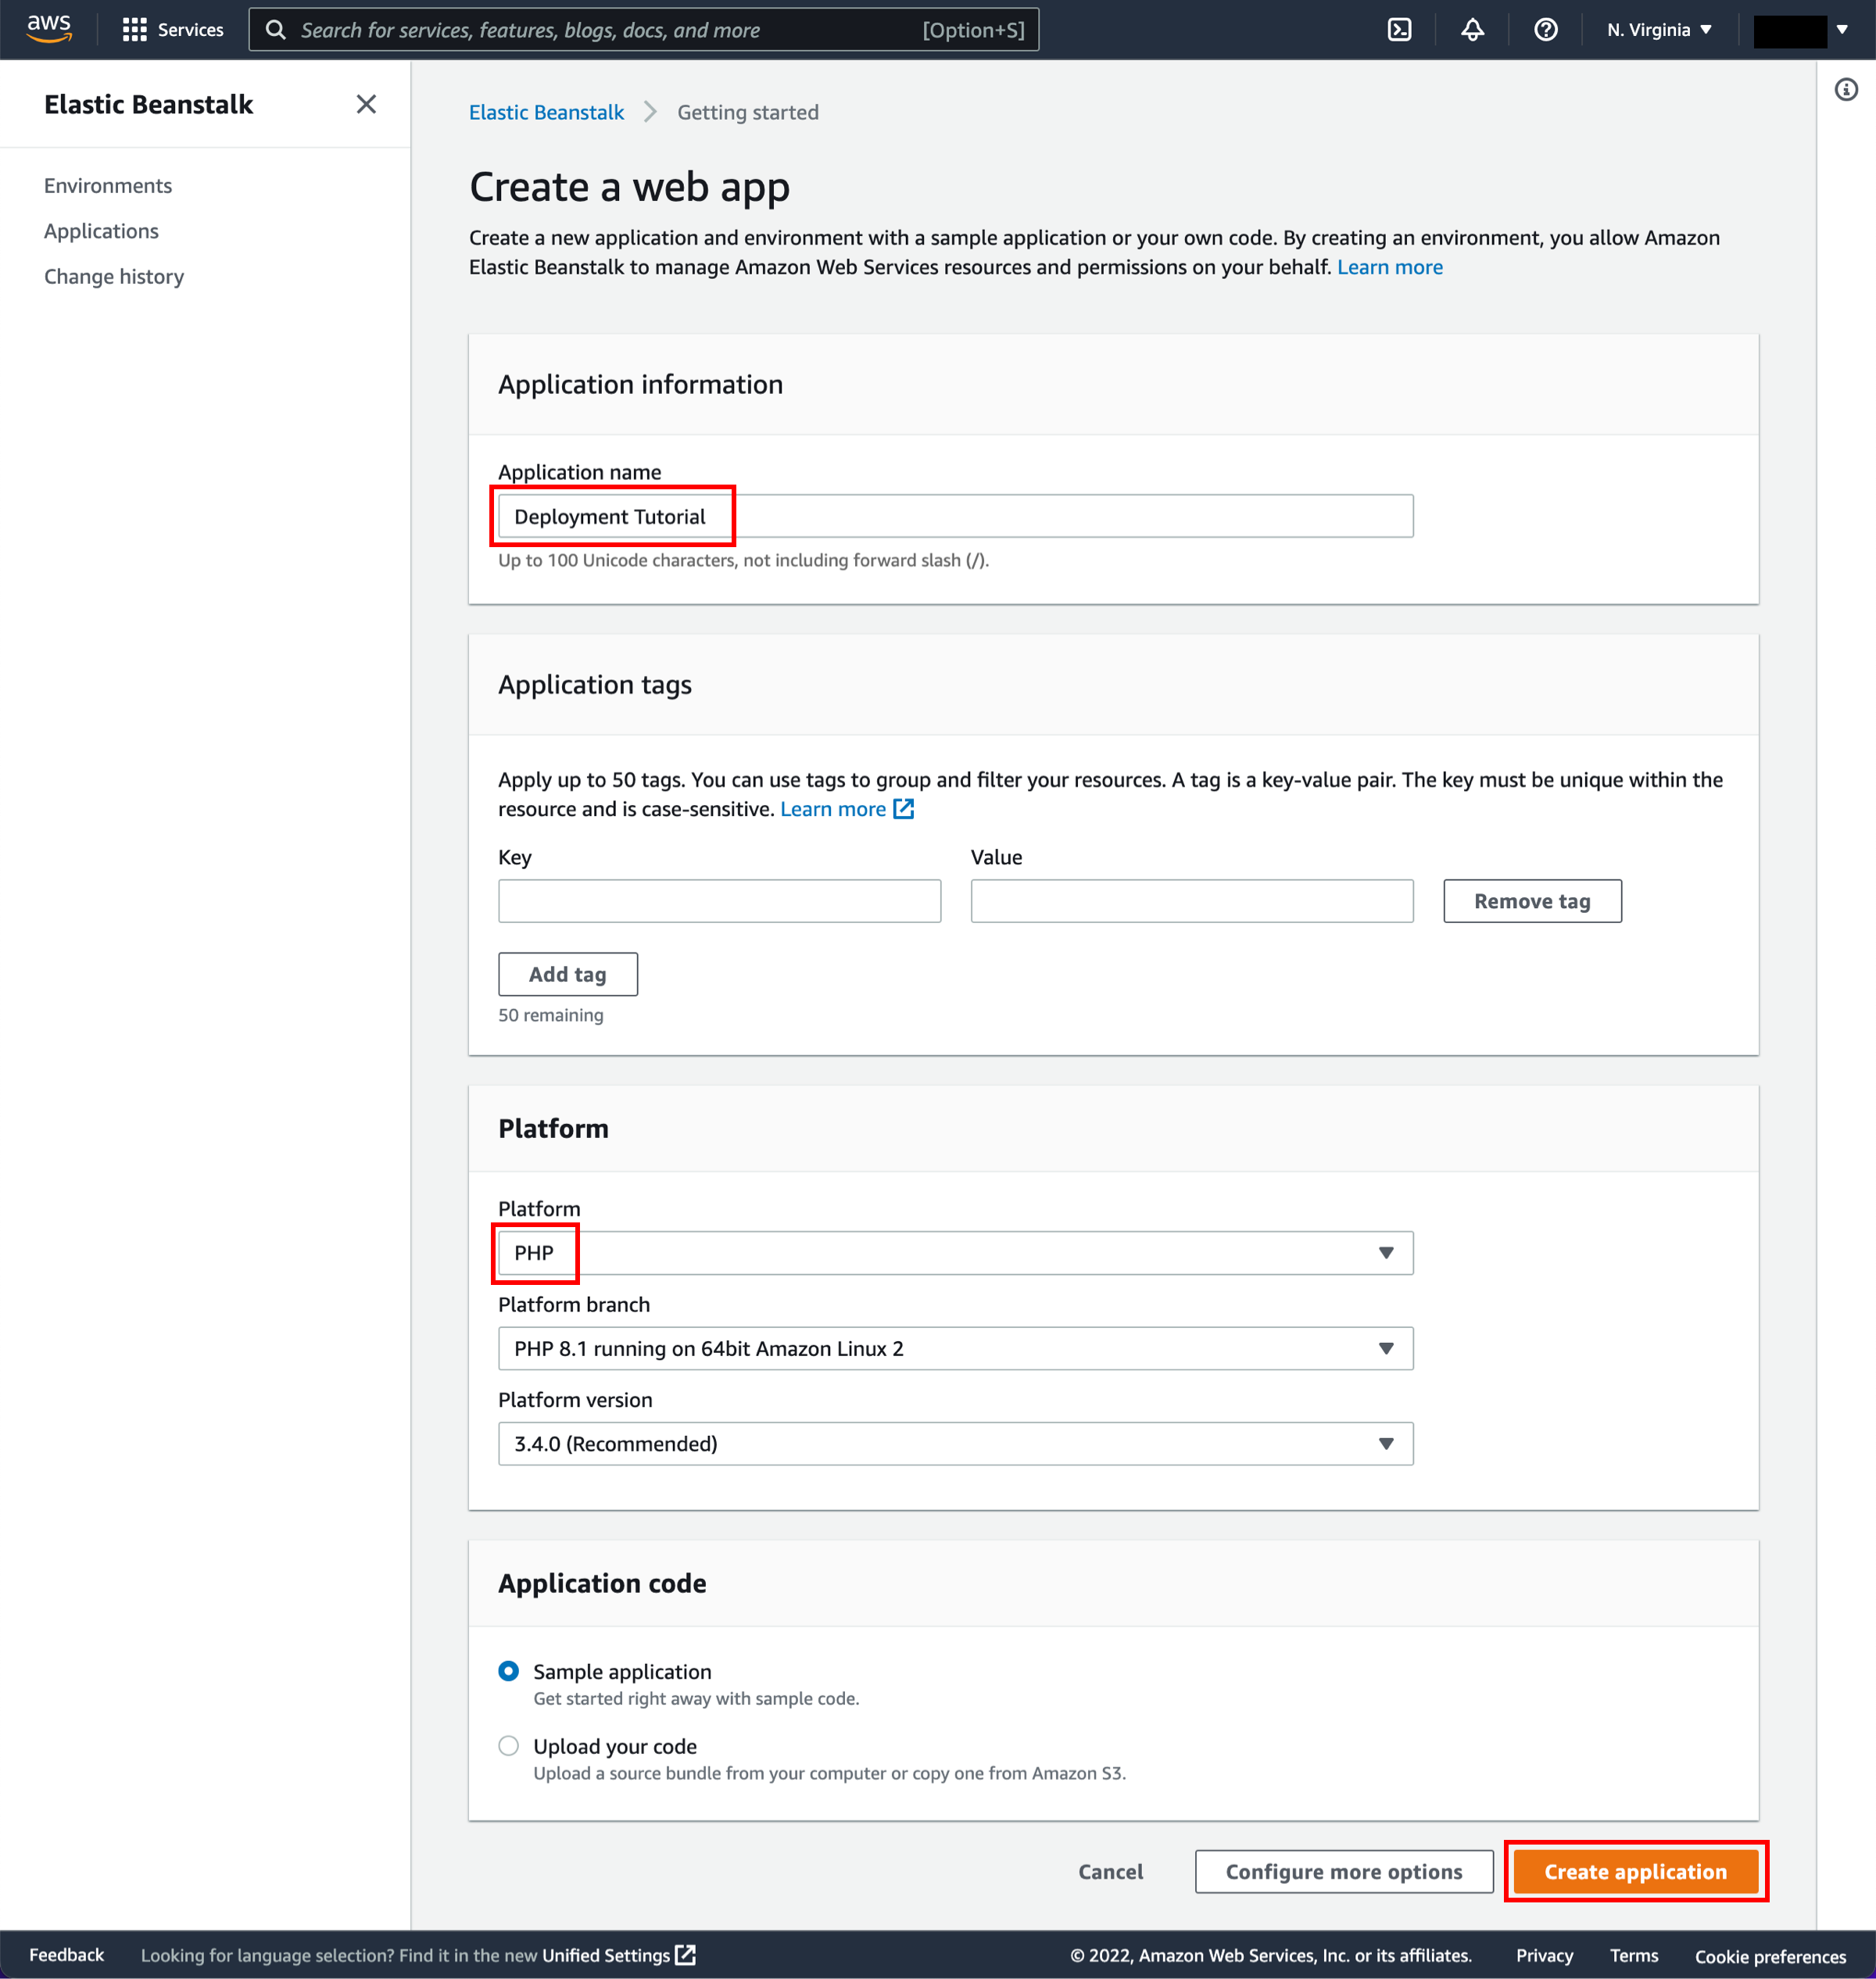
Configure the application
For Application name, enter Deployment Tutorial. Select PHP from the dropdown menu under Platform, and choose Create application.
Note
If you have created an Elastic Beanstalk application before, choose Create New Application on the upper-right corner. Name your application and create a new web server environment. Select PHP as your Platform and Single Instance as your Environment type. If you are planning to remote login to your instances, select a key pair. Otherwise, leave default values for the remaining options and create the environment for your continuous deployment pipeline.
-
Create a sample environment
Elastic Beanstalk will begin creating a sample environment for you to deploy your application to. It will create an Amazon EC2 instance, a security group, an Auto Scaling group, an Amazon S3 bucket, Amazon CloudWatch alarms, and a domain name for your application.
Note
This will take several minutes to complete.

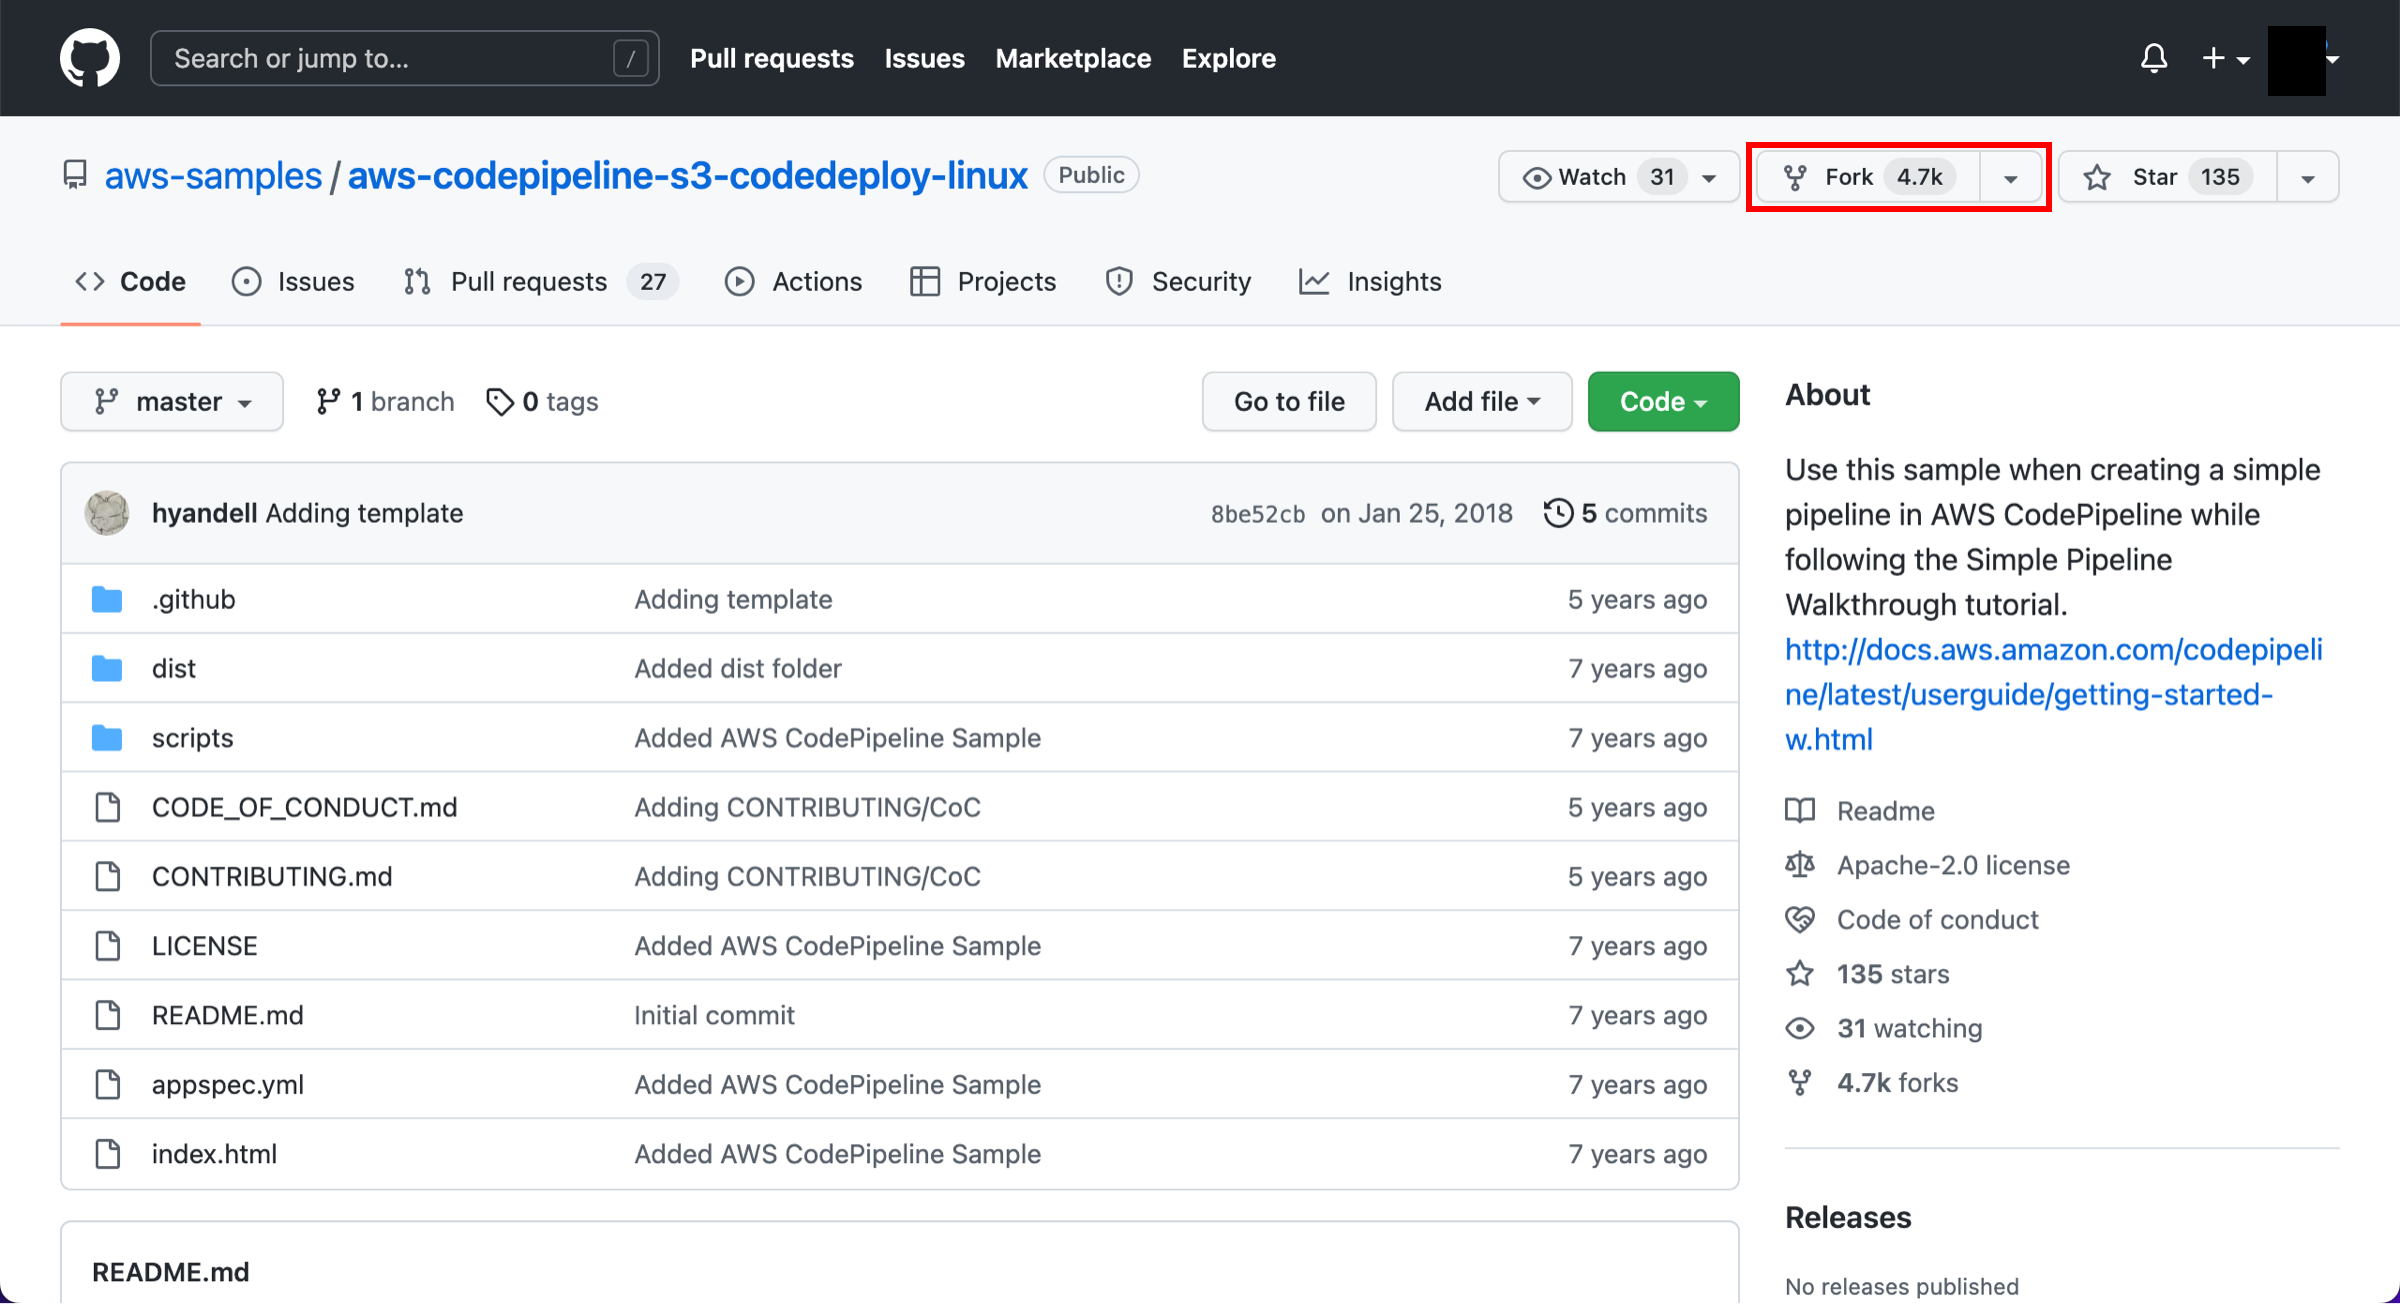
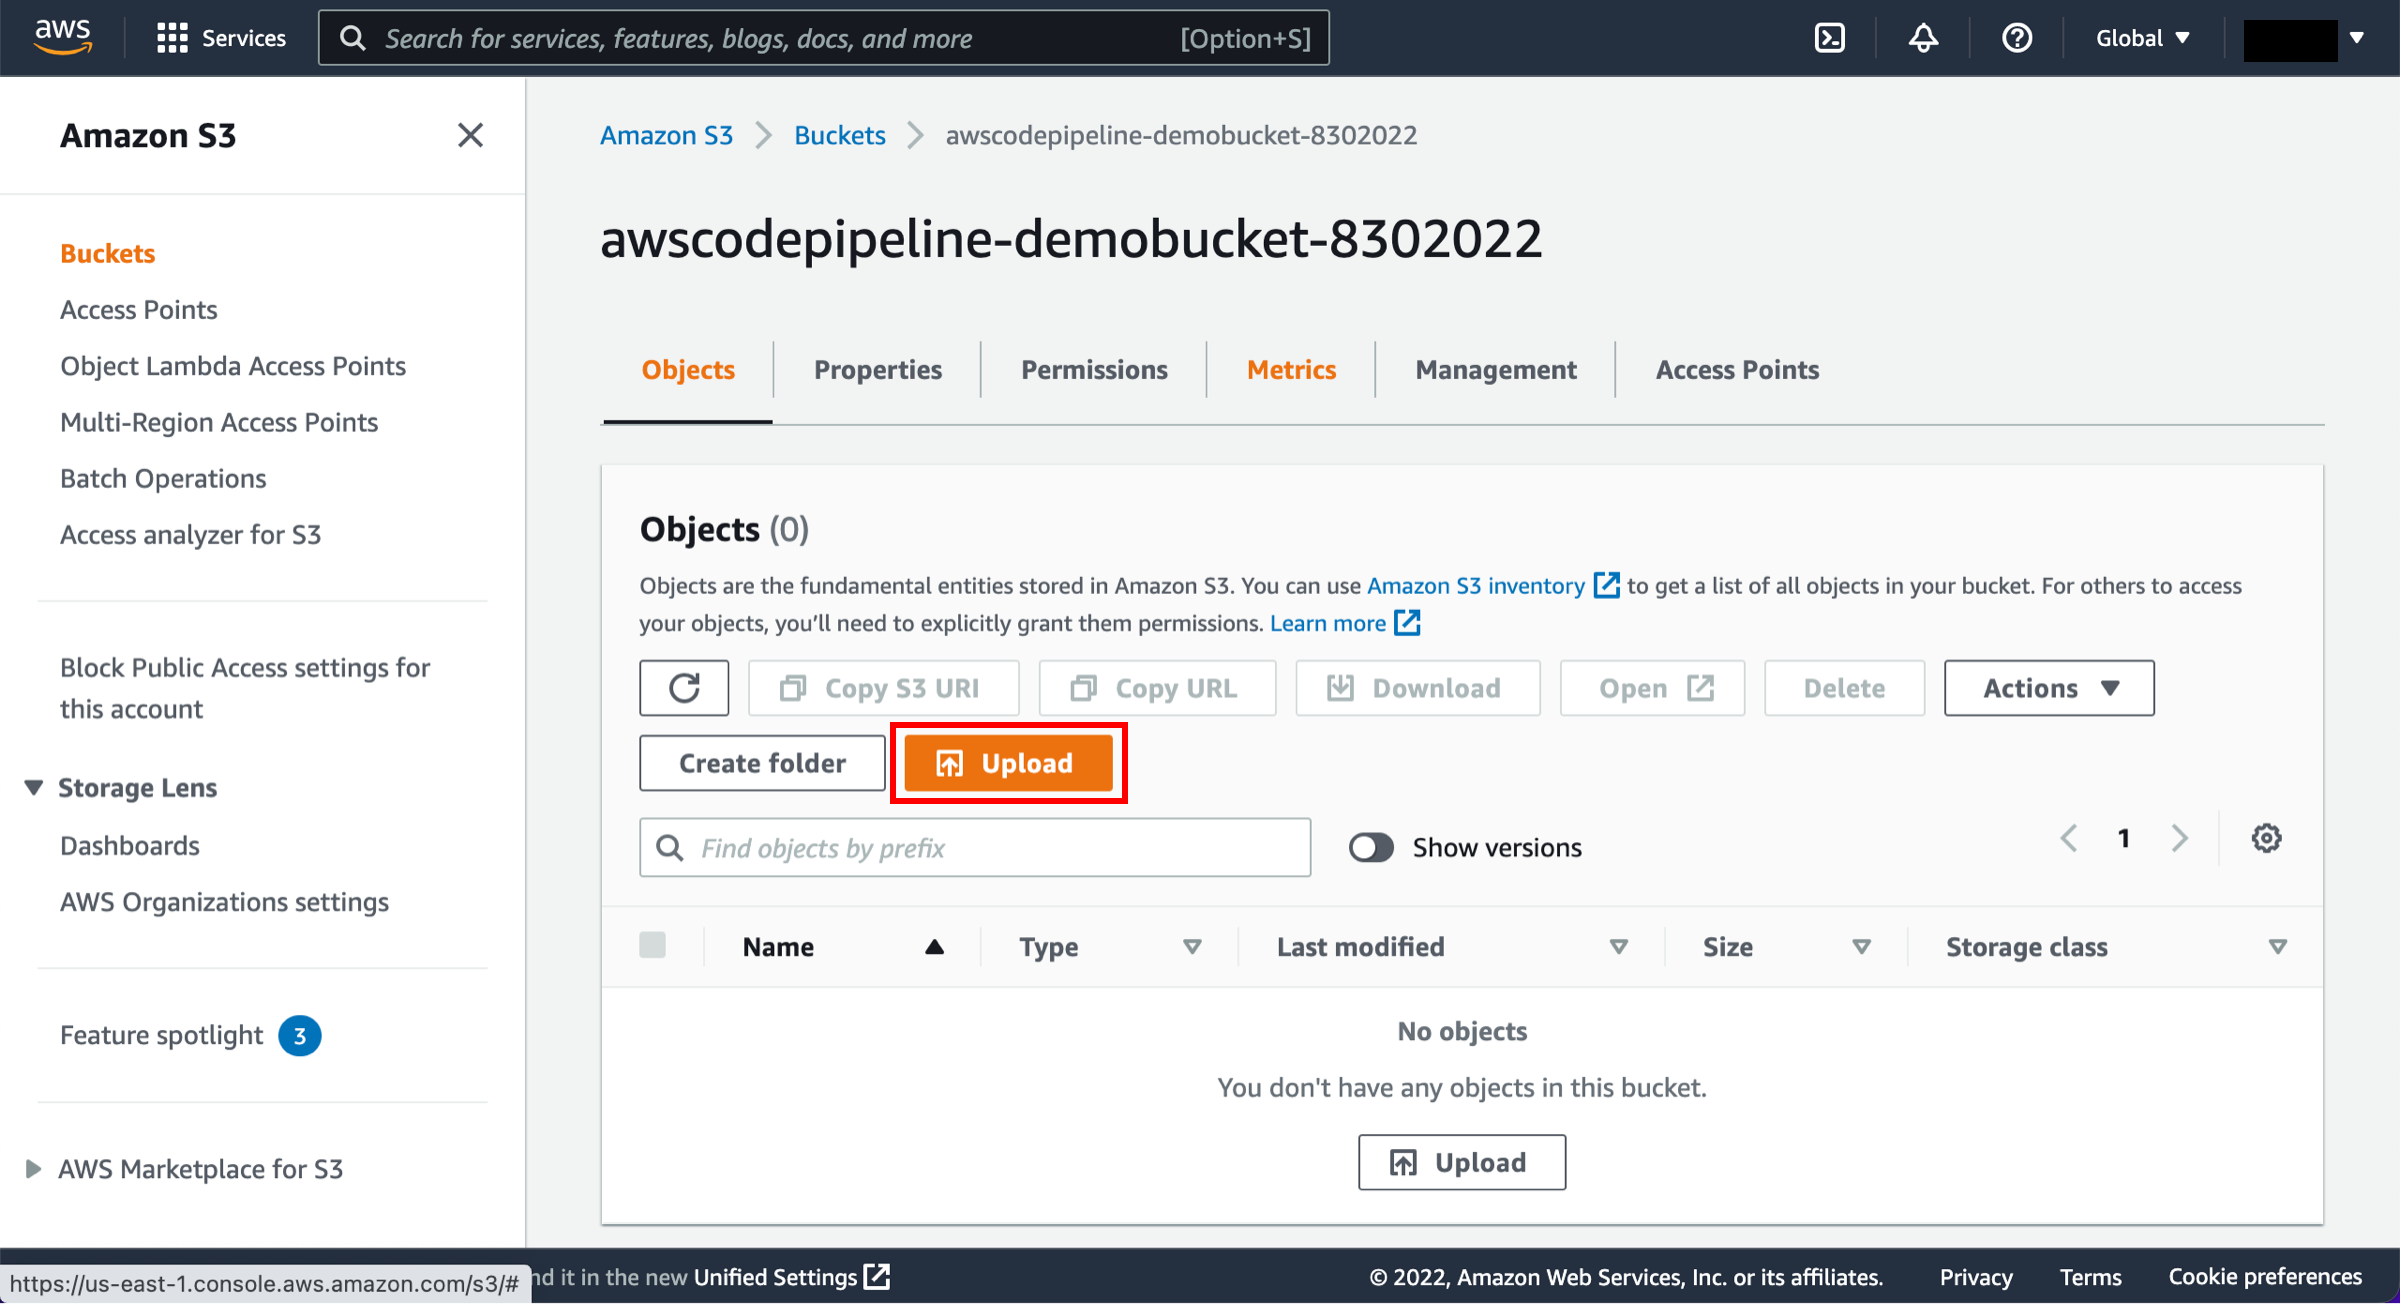
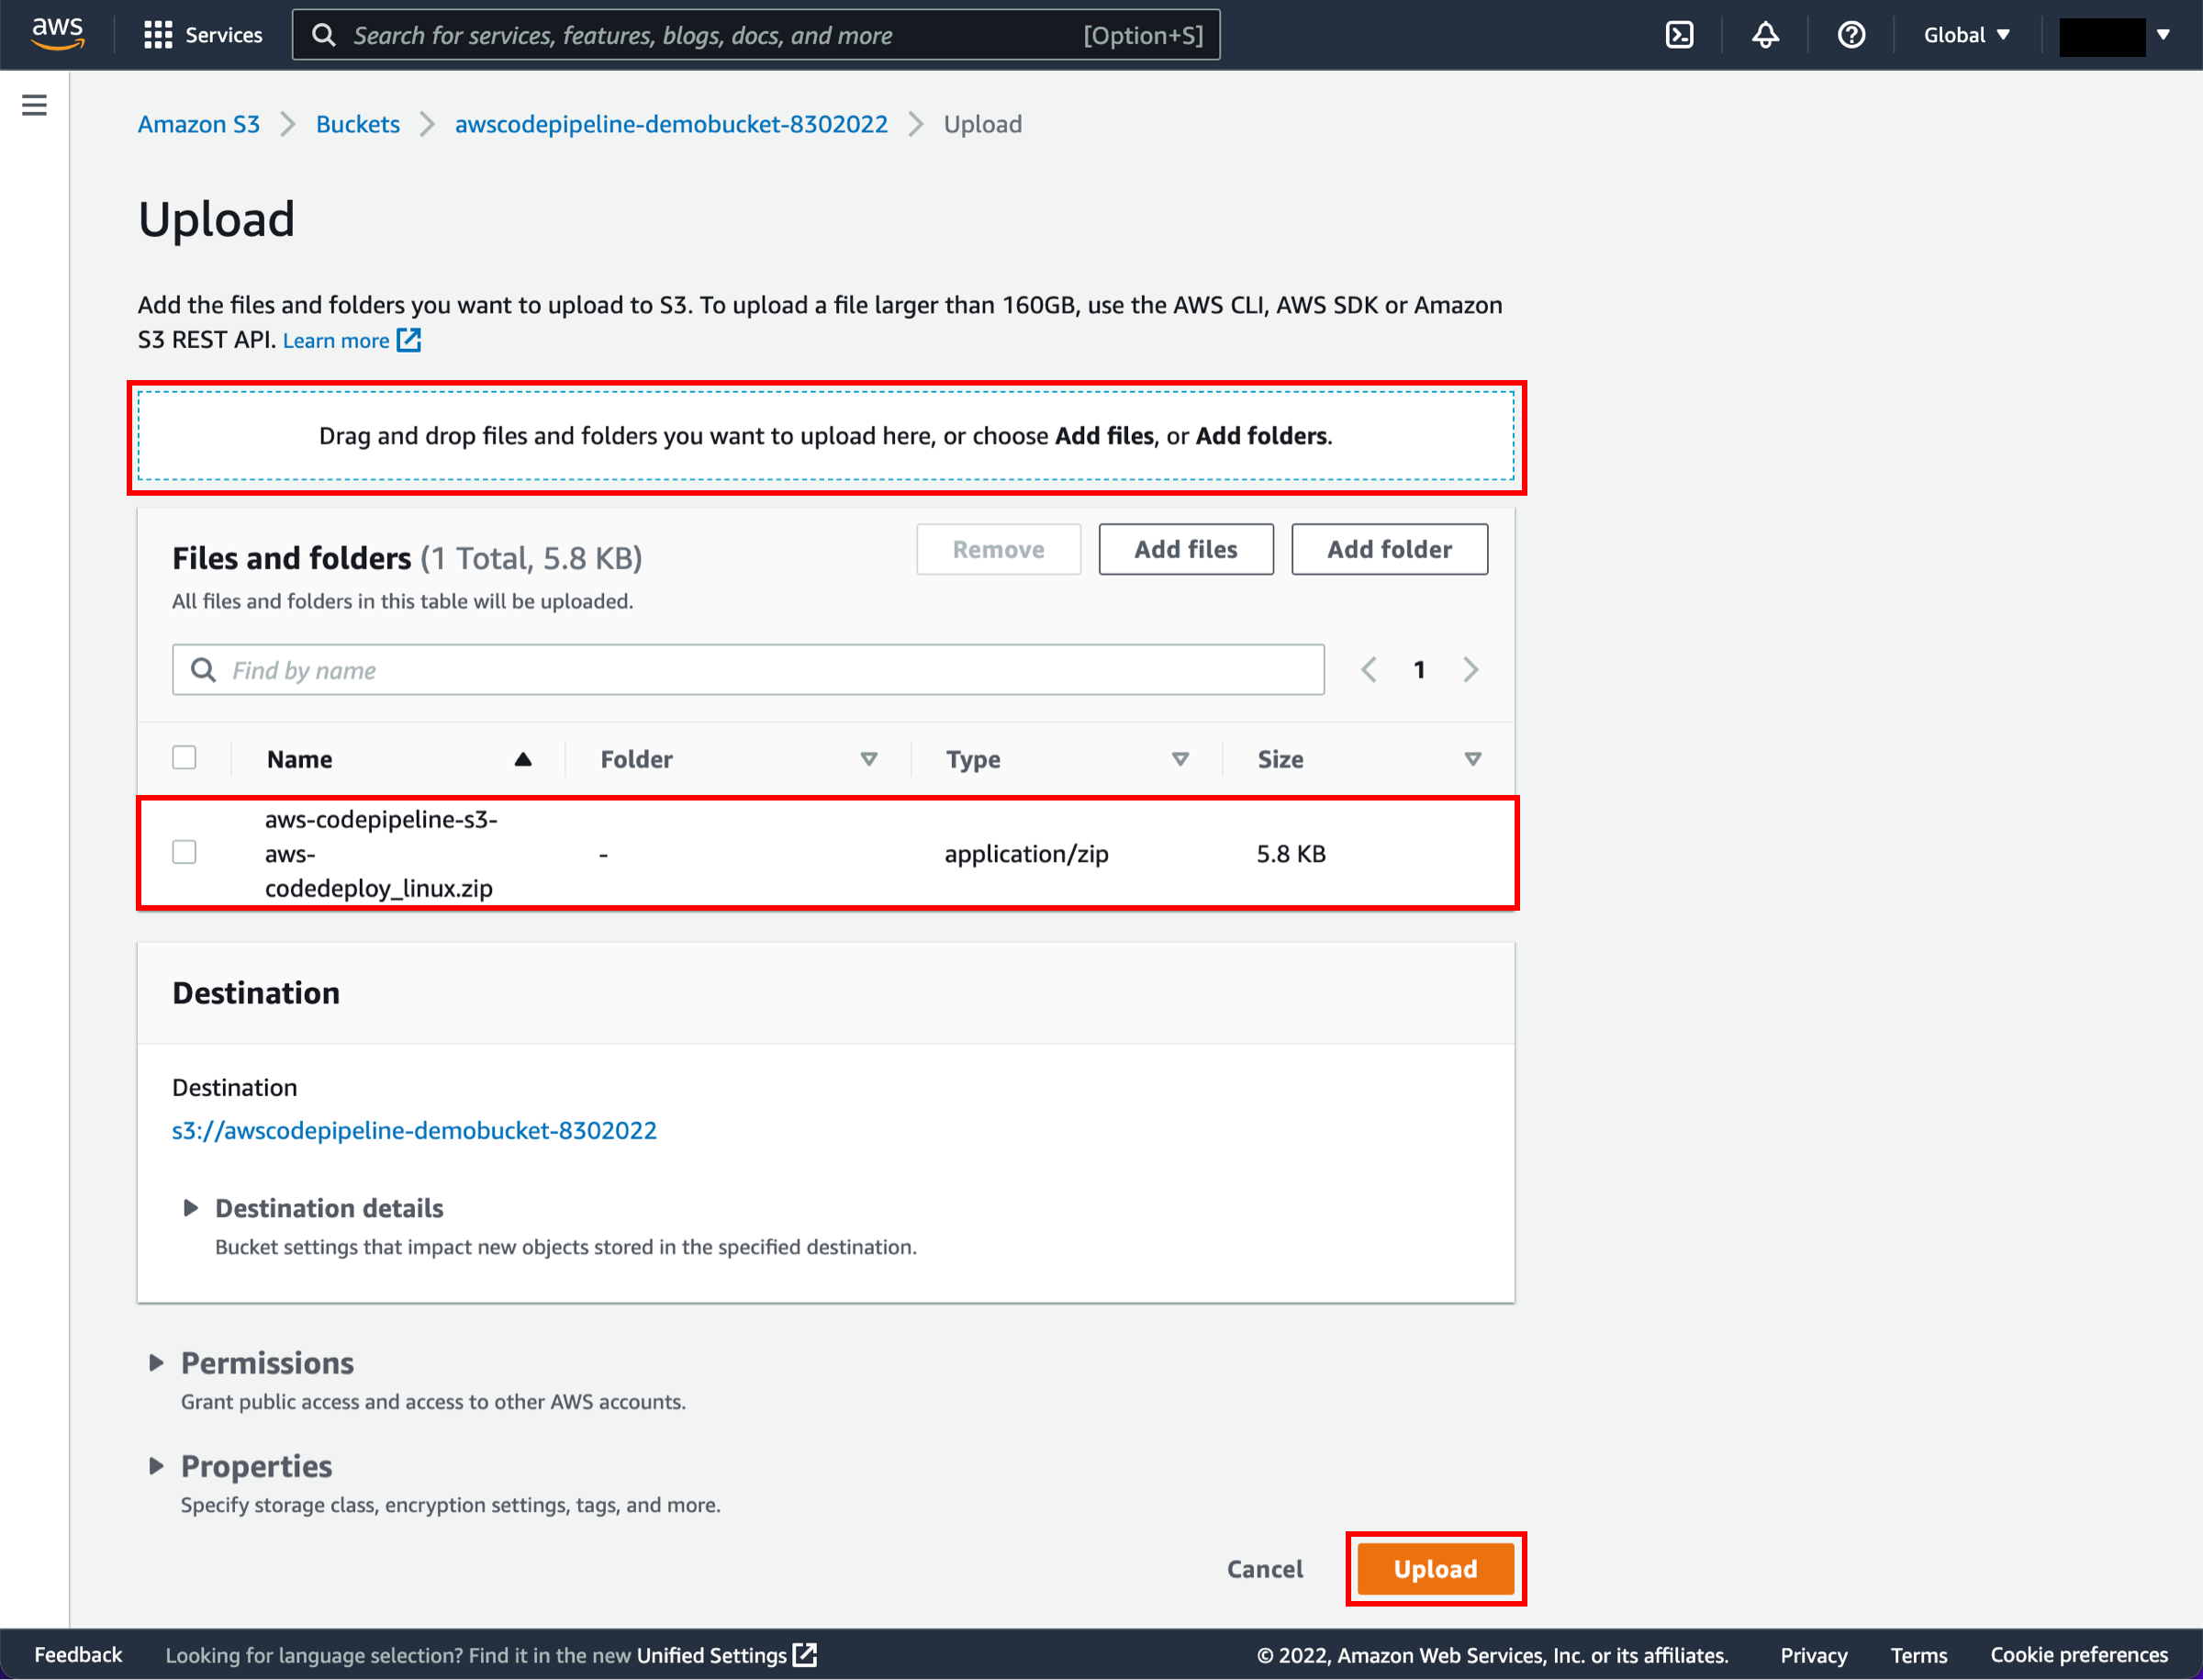
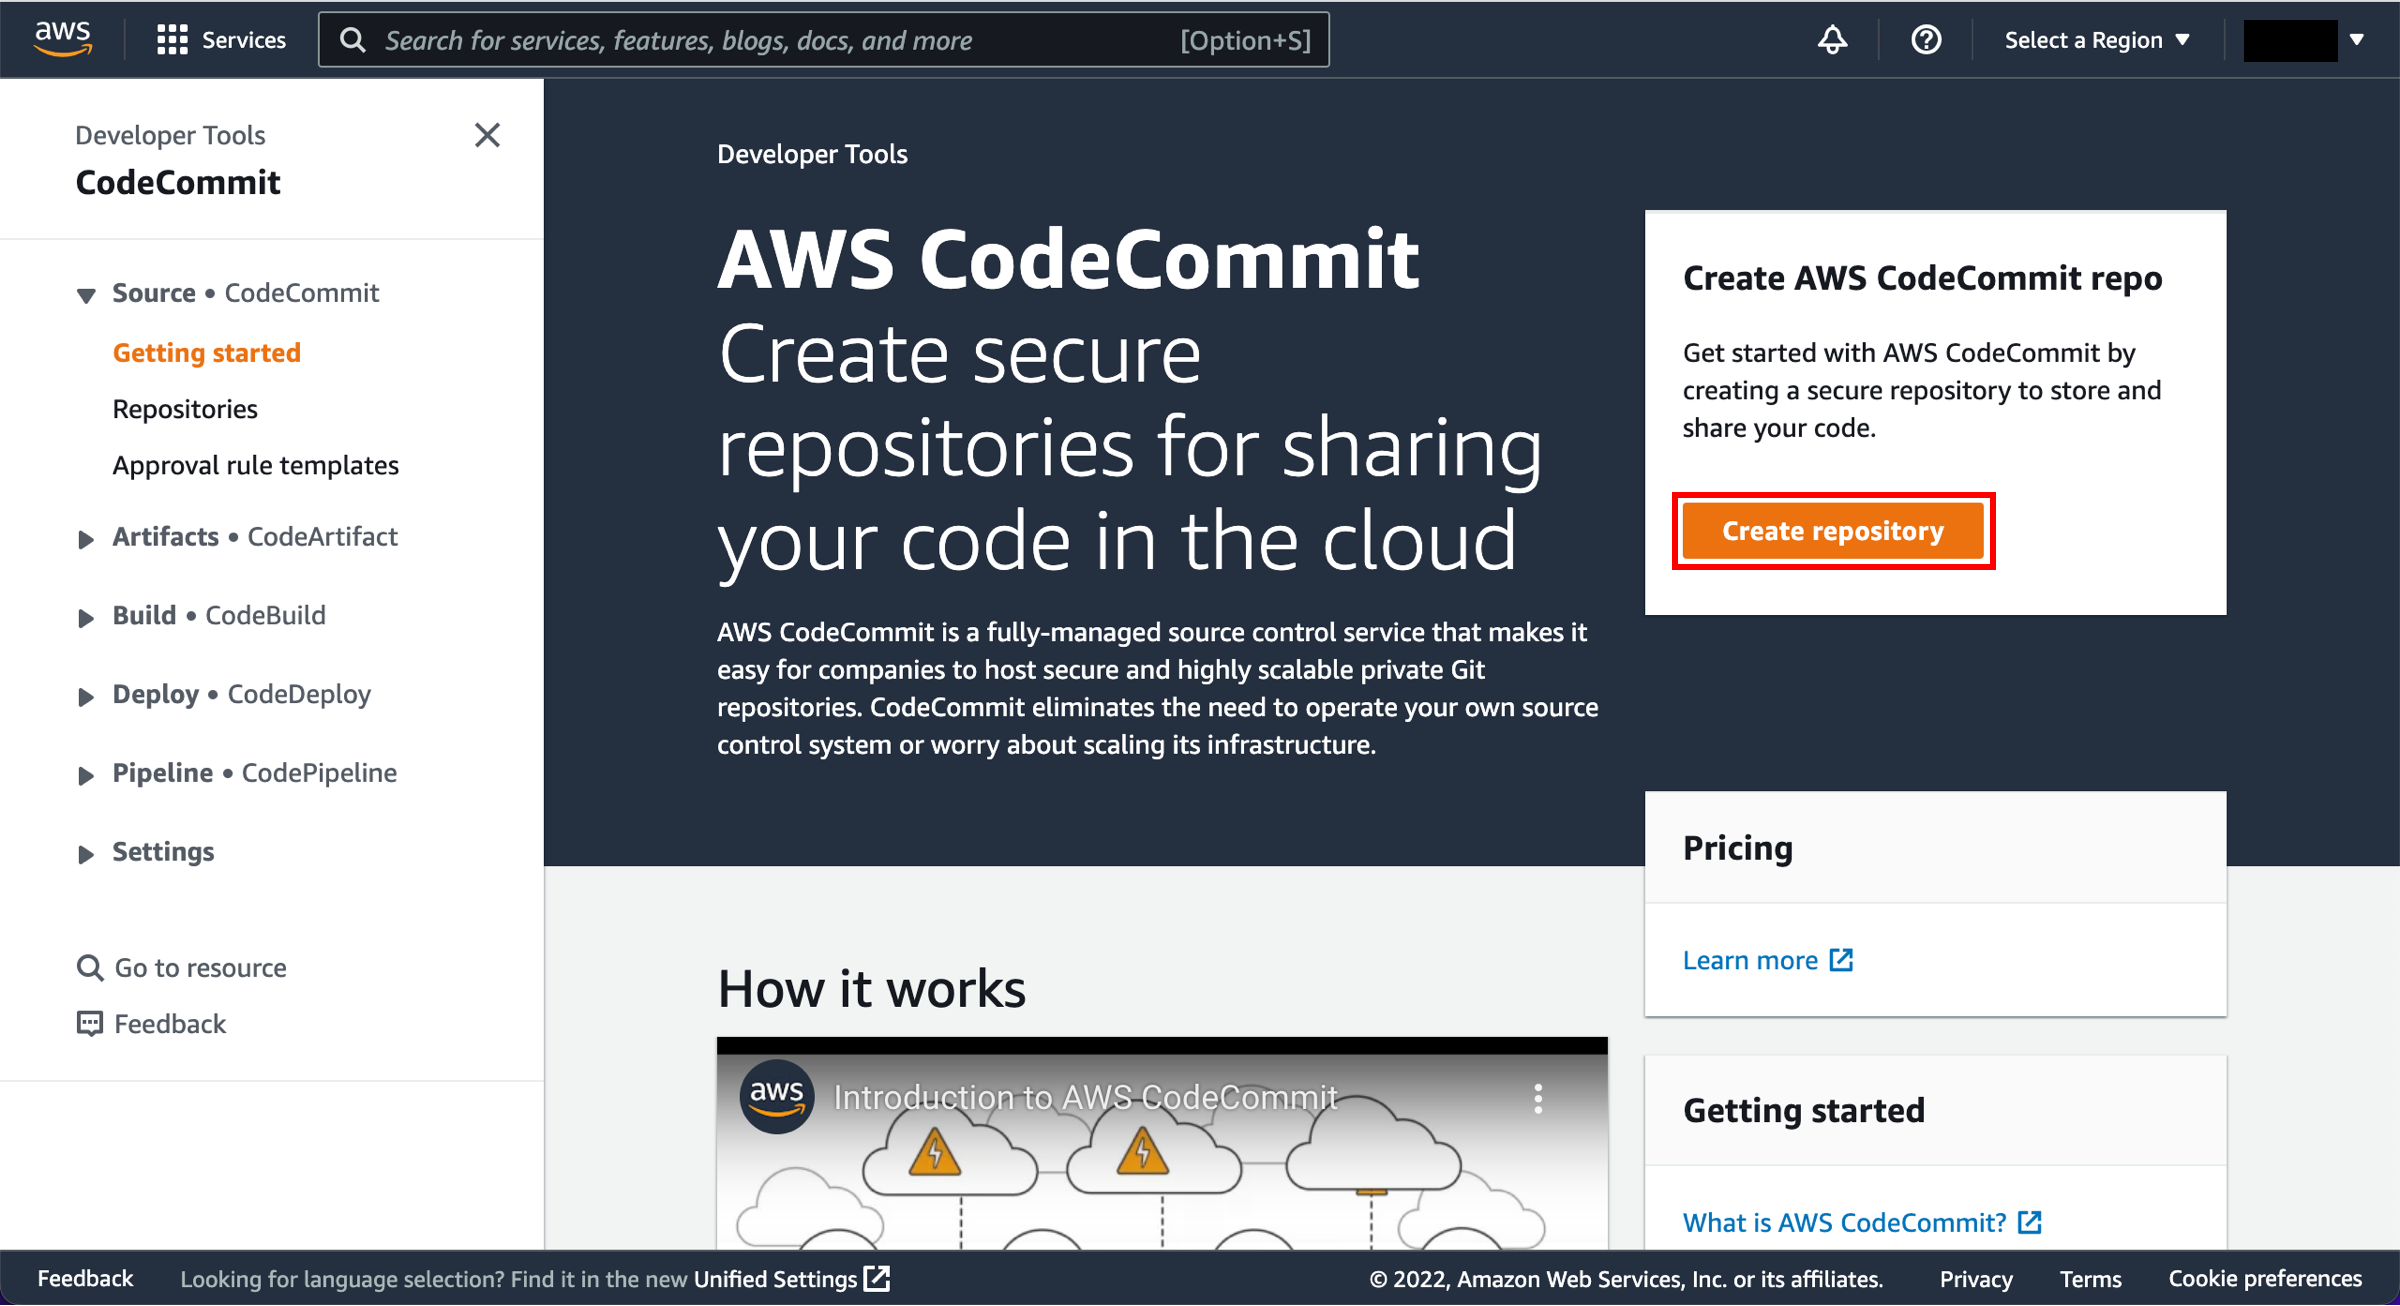
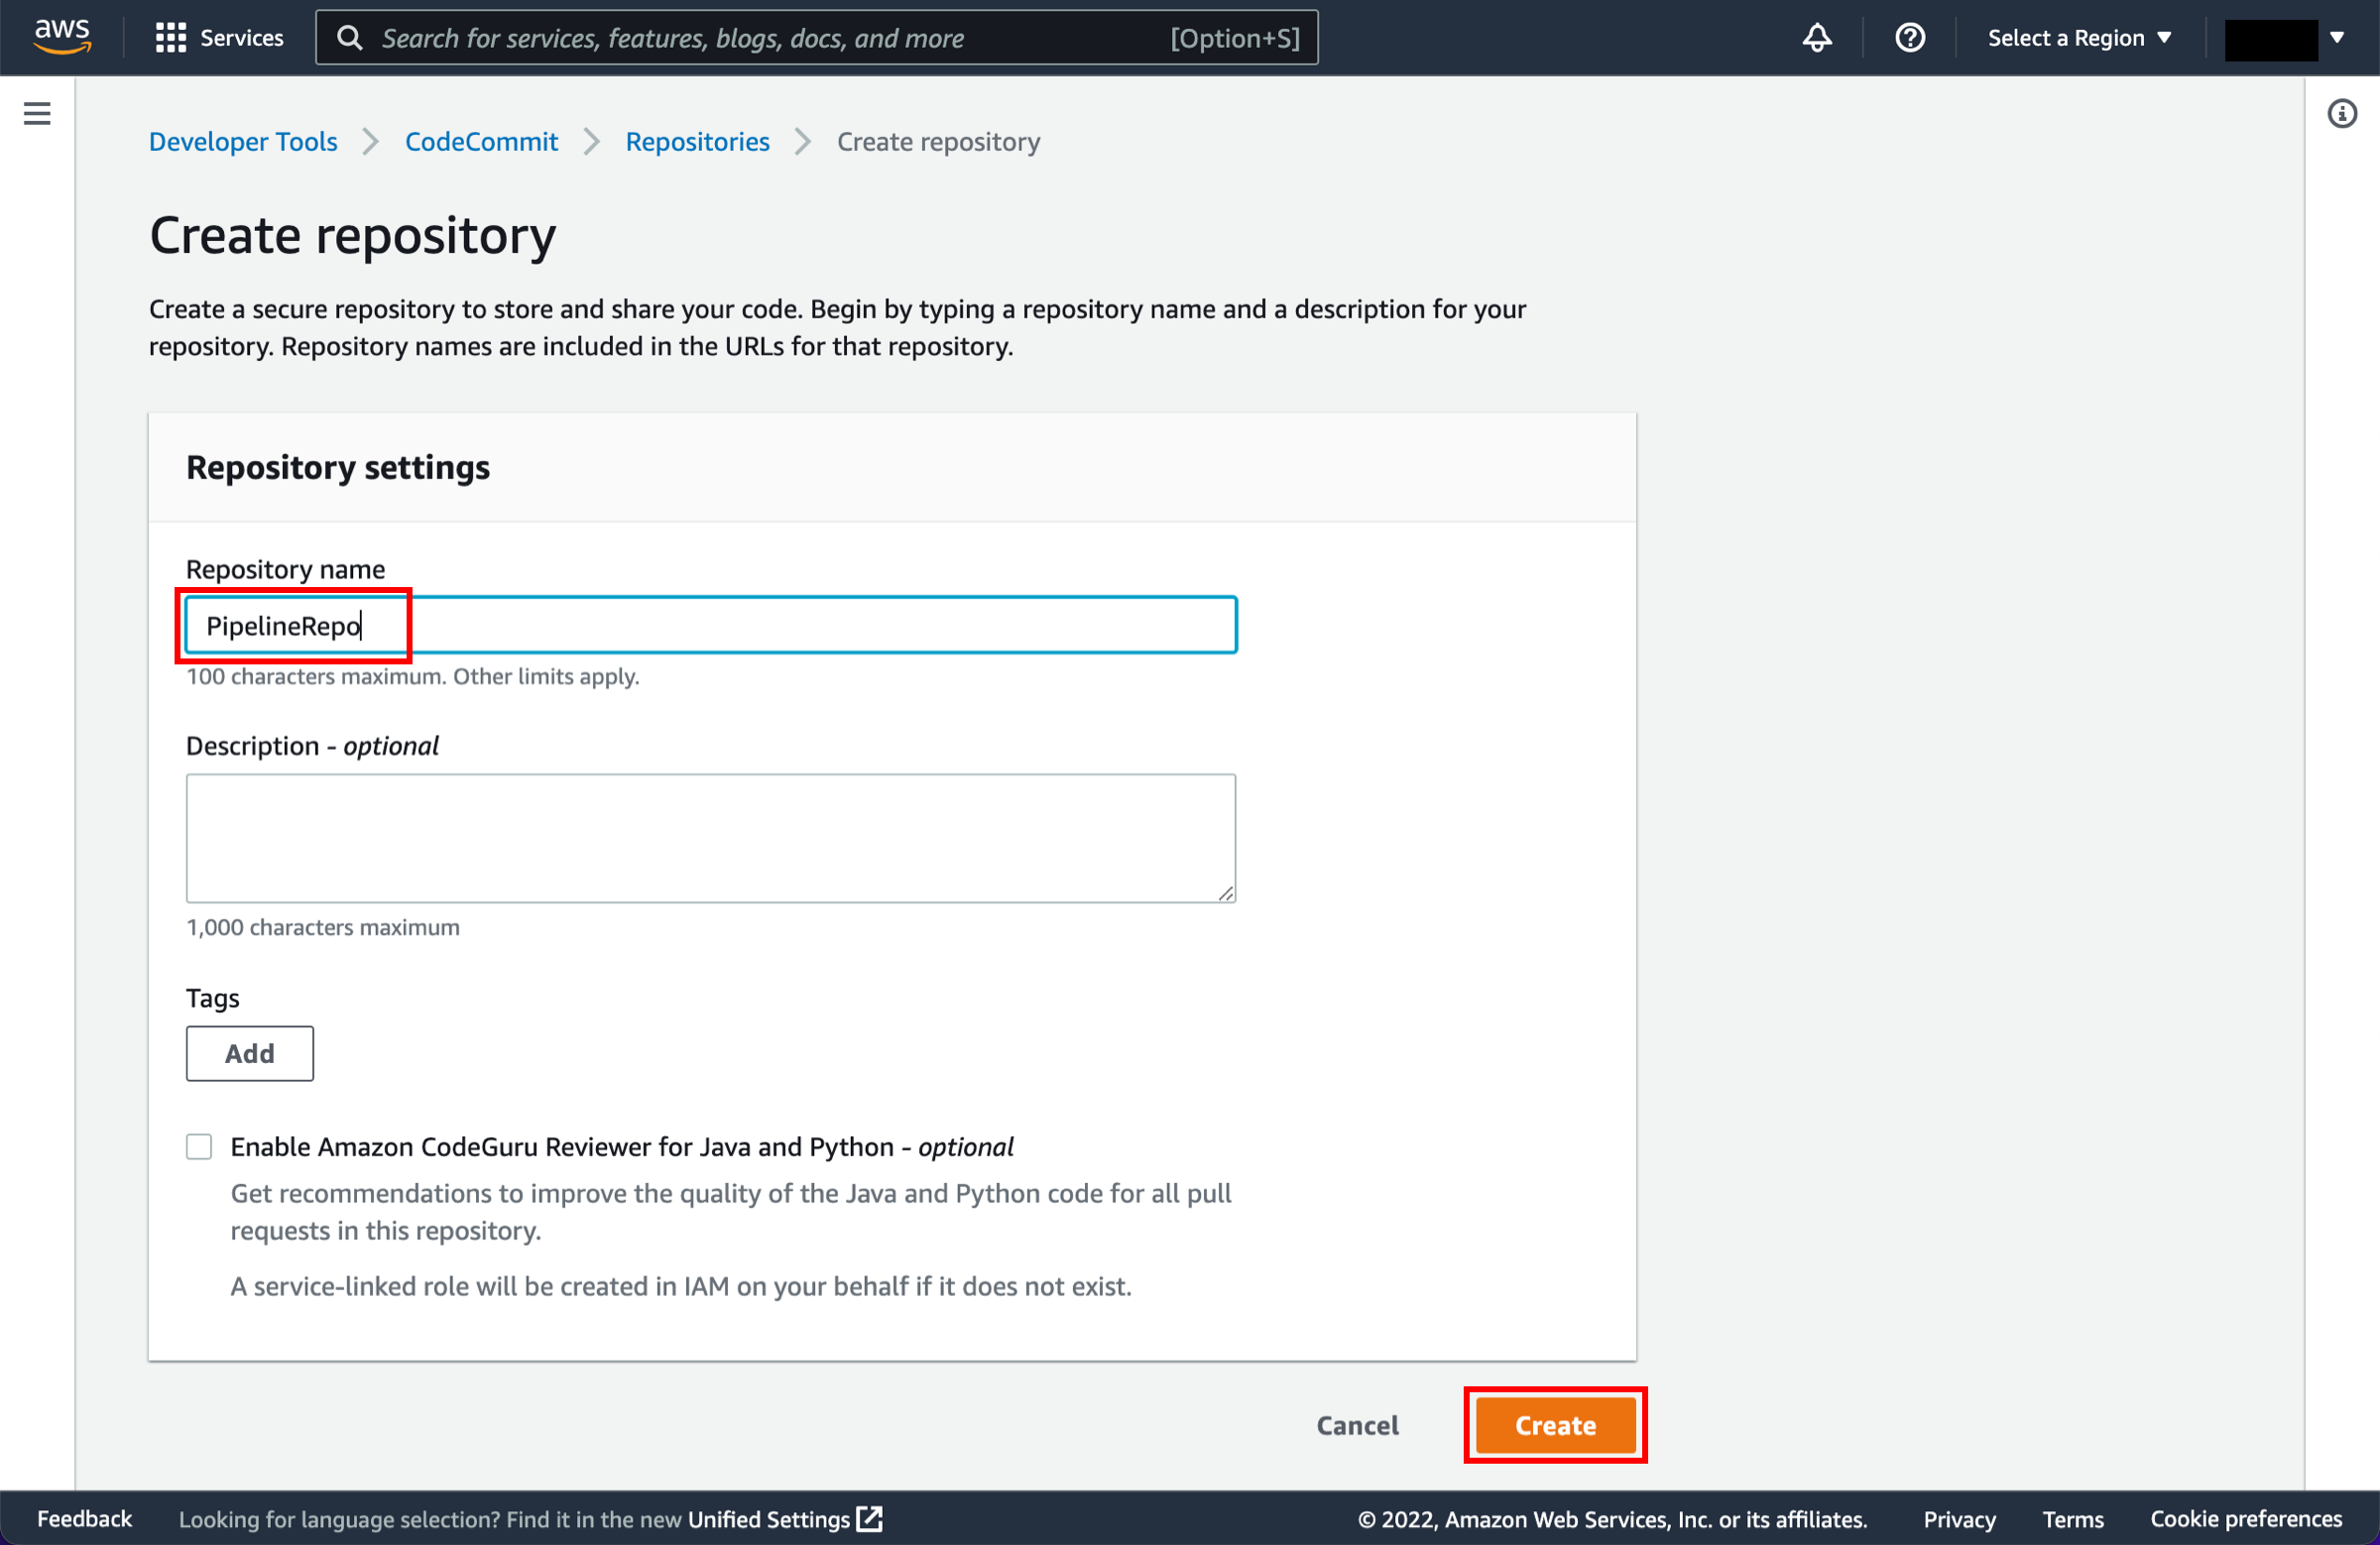
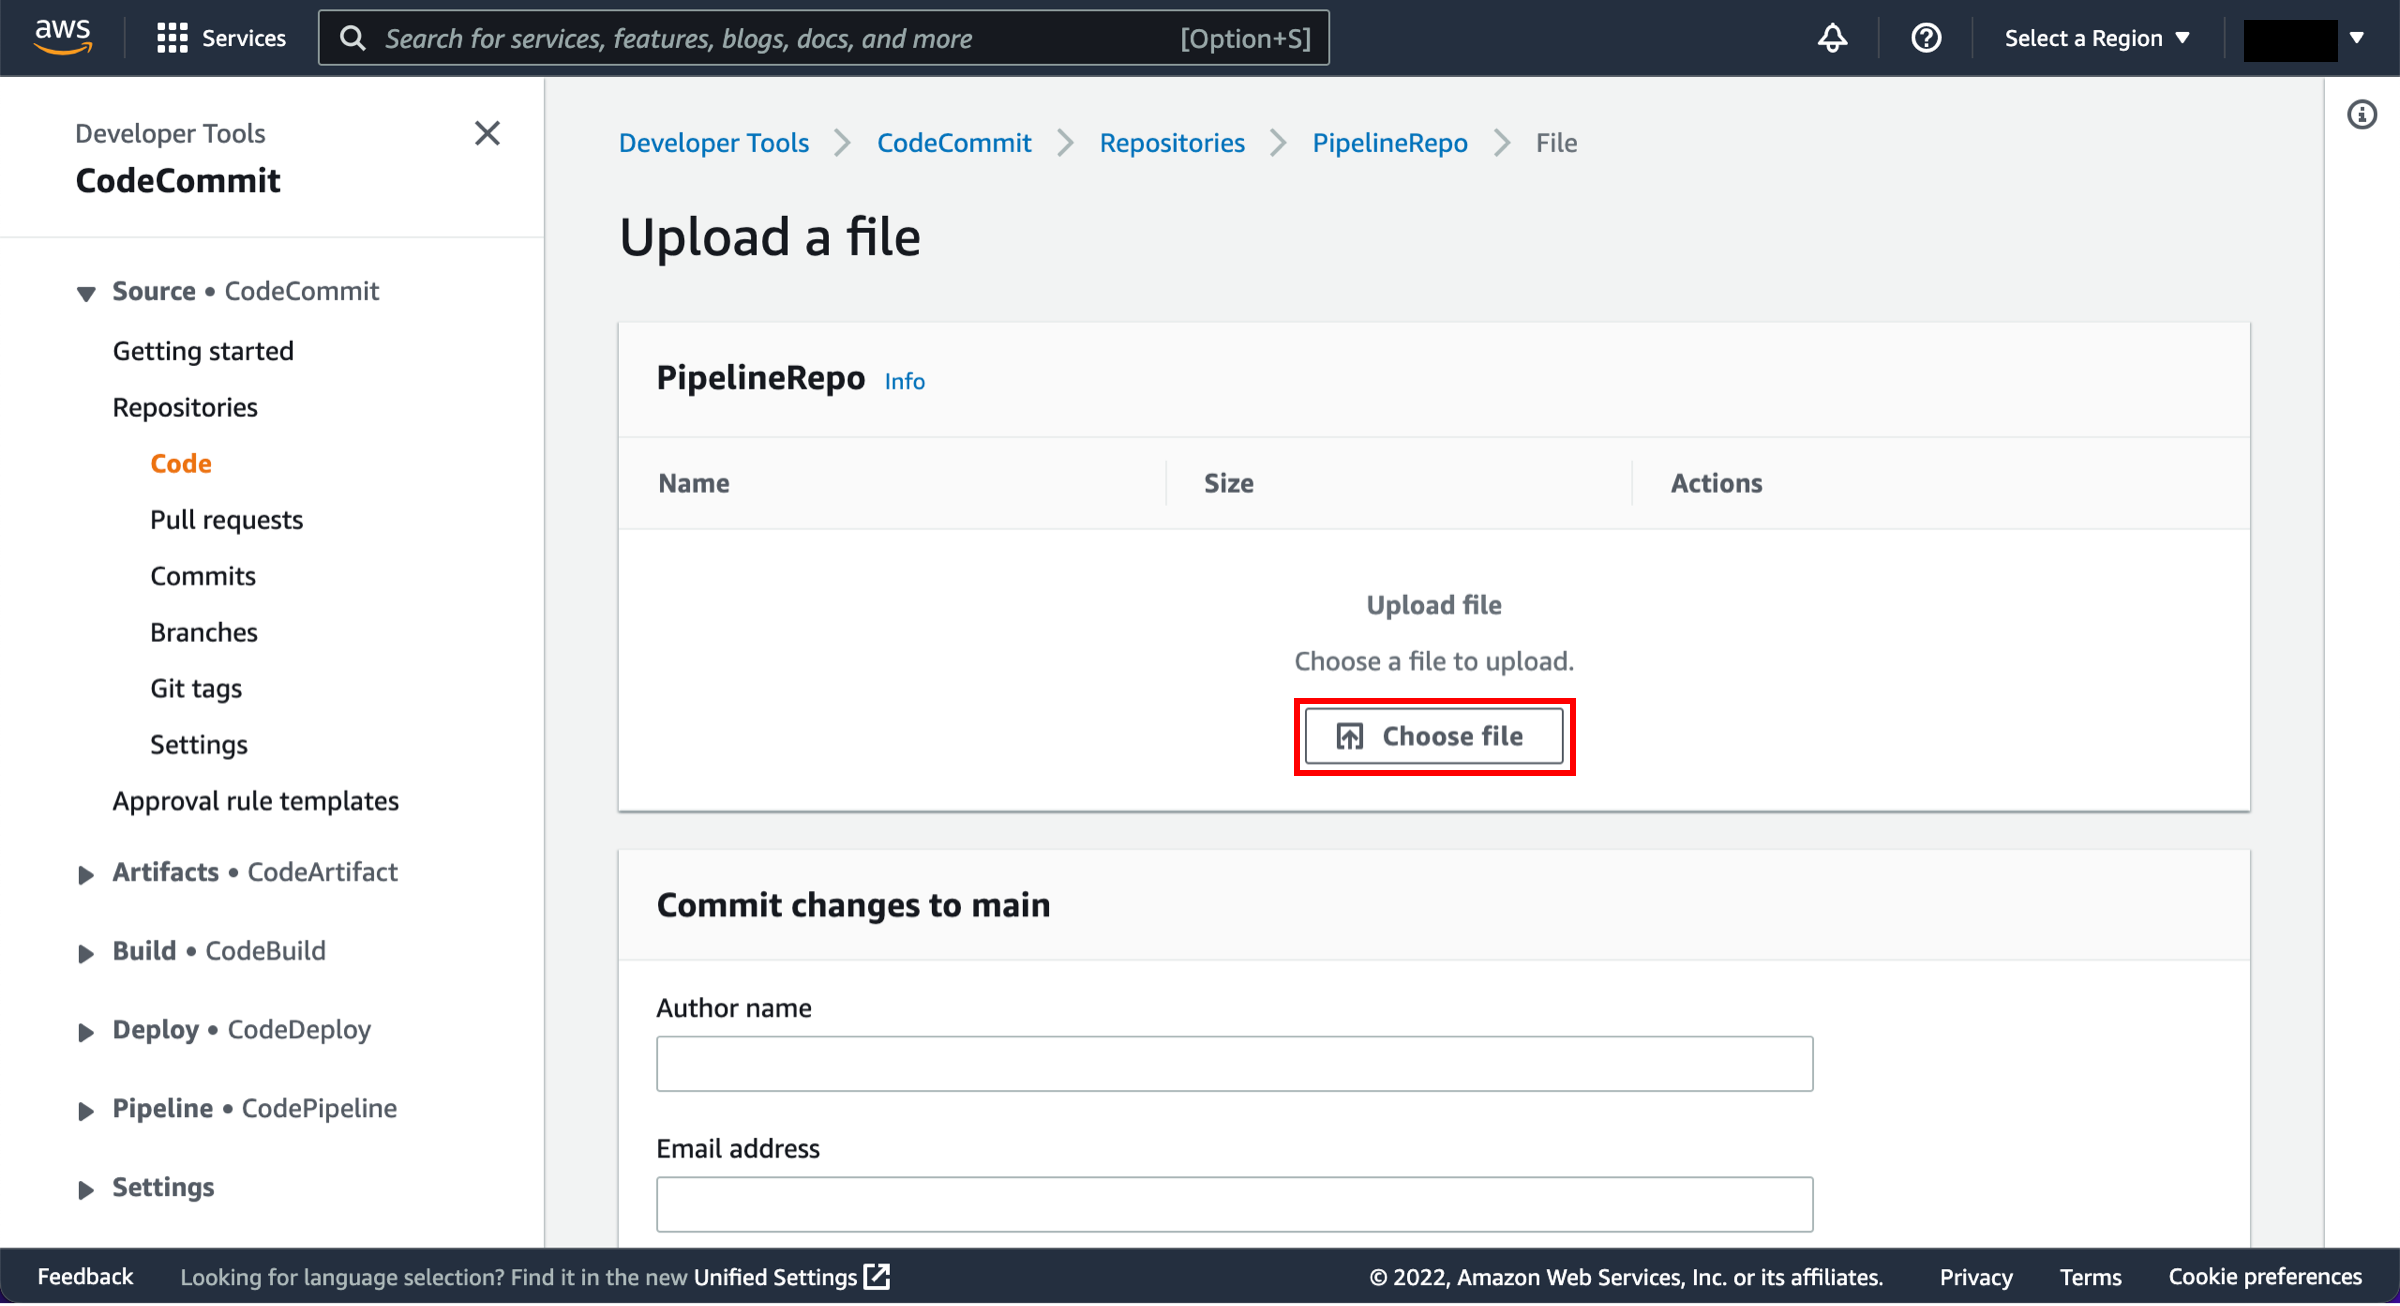
In this step, you will retrieve a copy of the sample app’s code and choose a source to host the code. The pipeline takes code from the source and then performs actions on it.
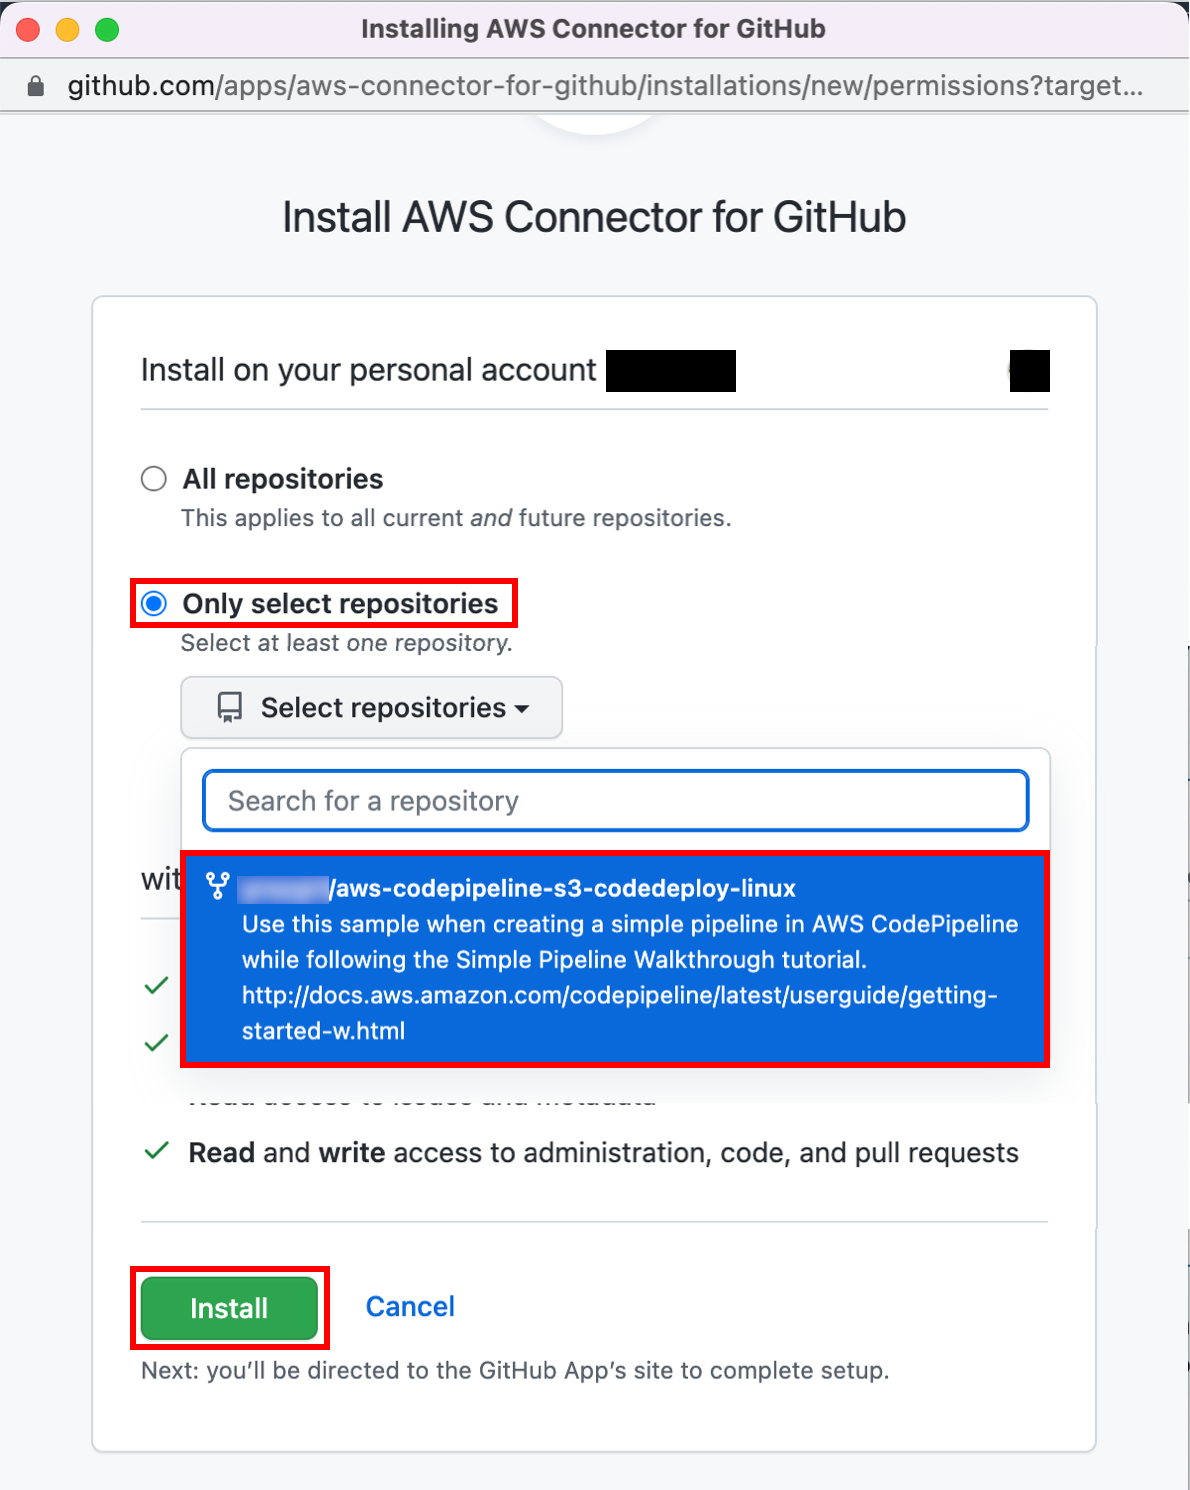
You can use one of three options as your source: a GitHub repository, an Amazon S3 bucket, or an AWS CodeCommit repository. Select your preference and follow the steps.

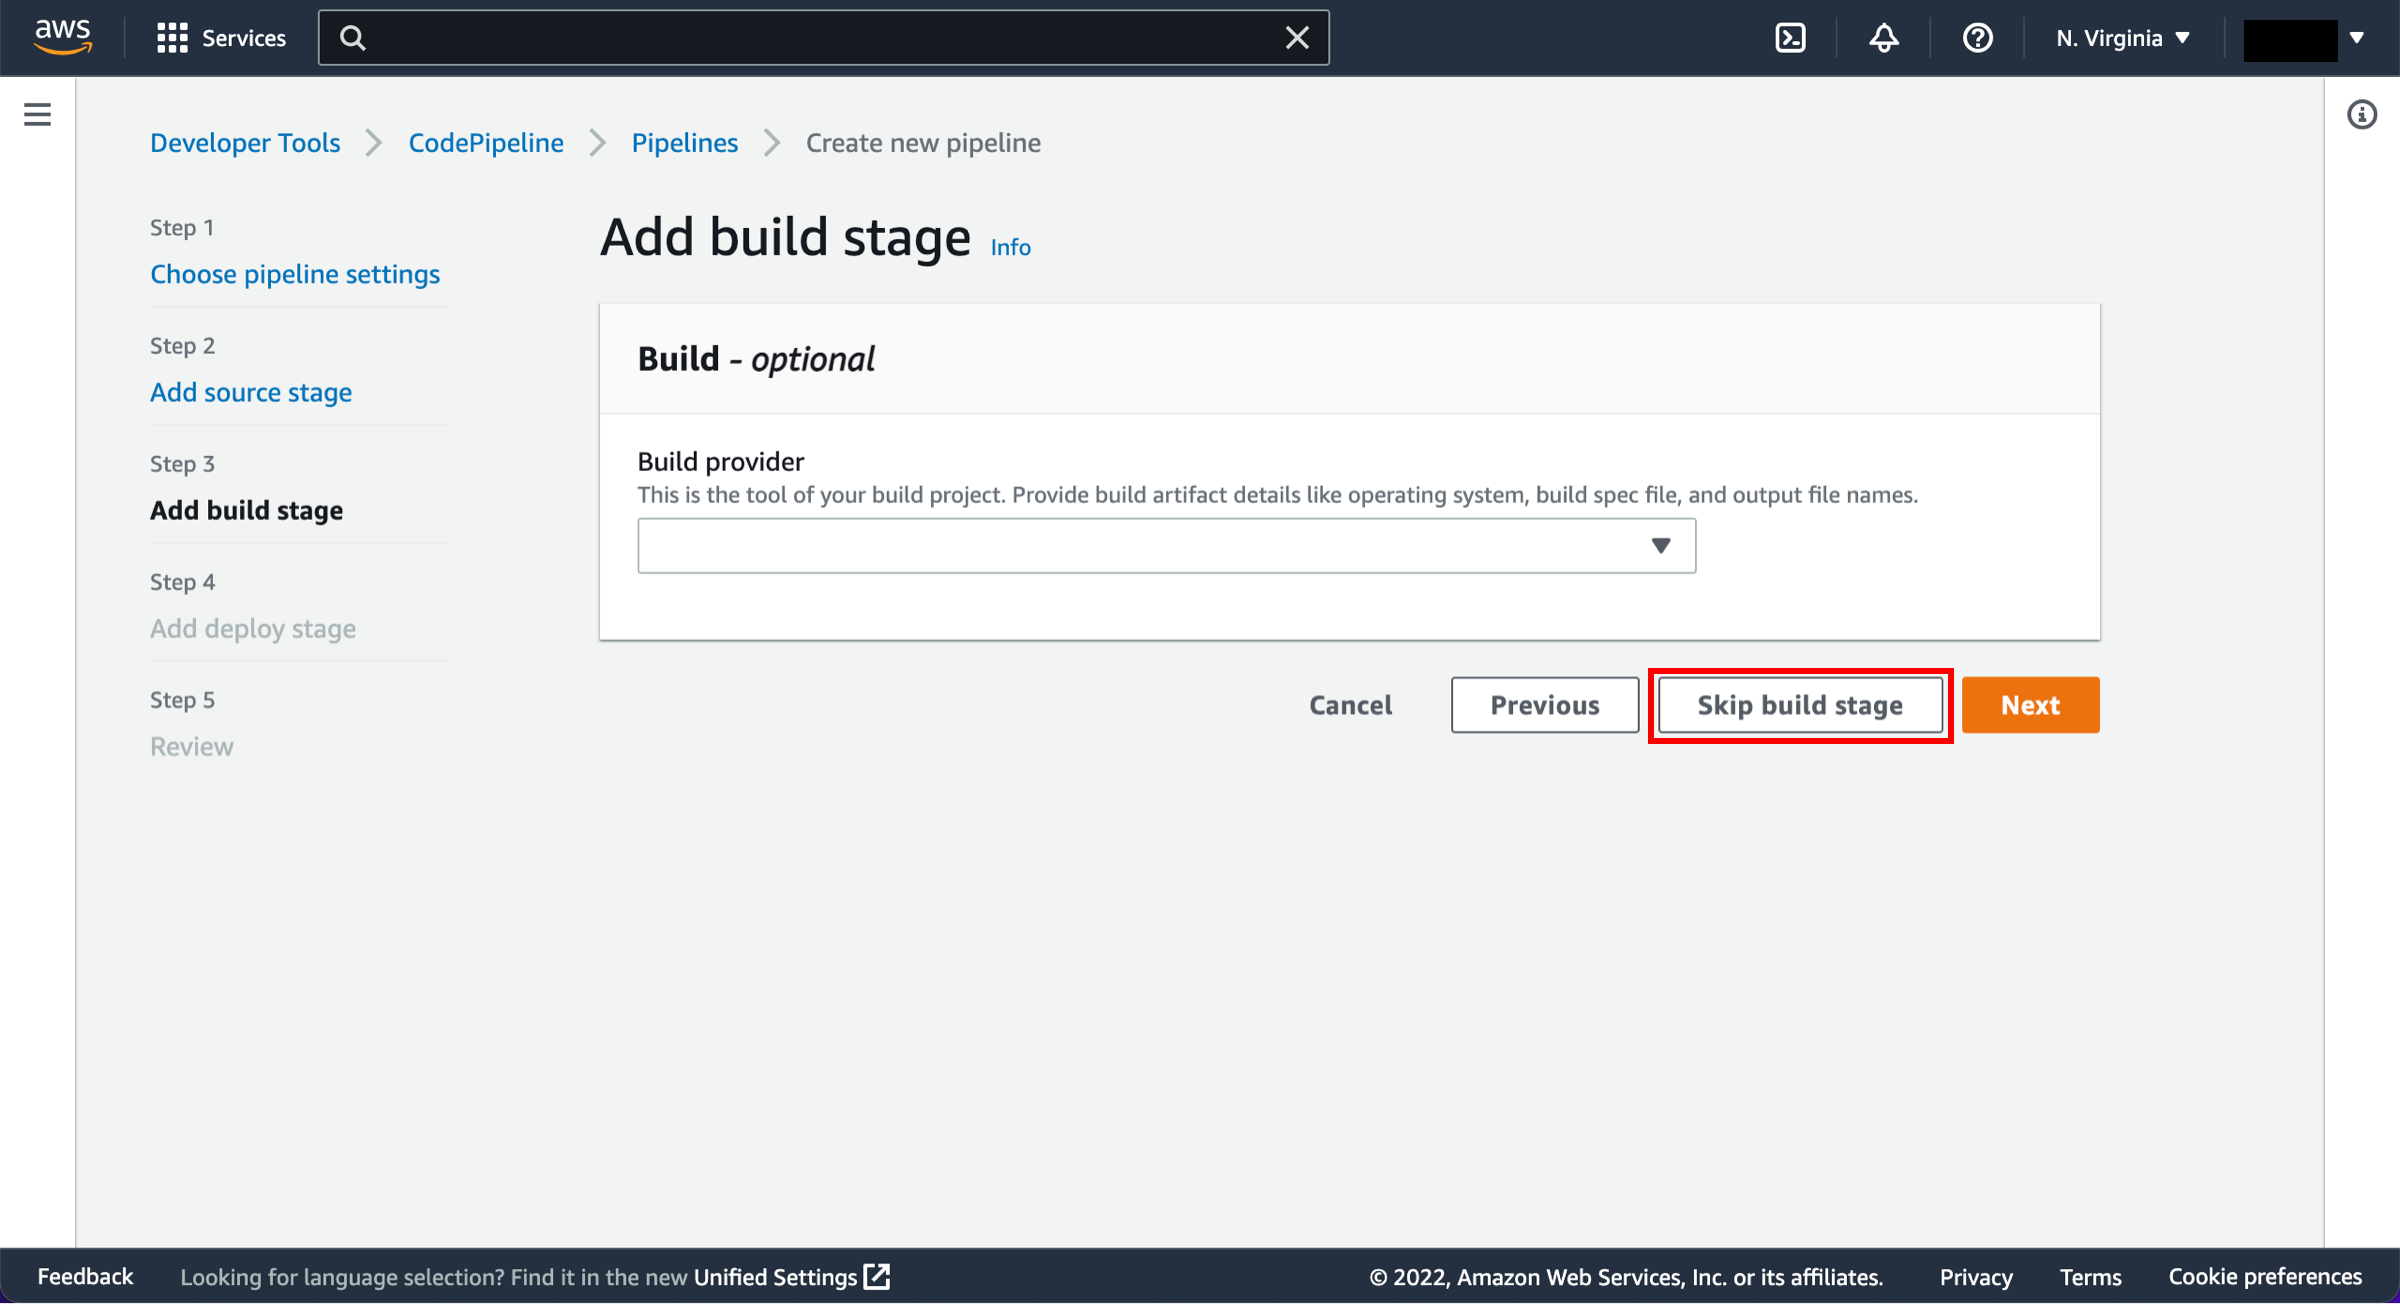
In this step, you will create and configure a simple pipeline with two actions: source and deploy. You will provide CodePipeline with the locations of your source repository and deployment environment.
-
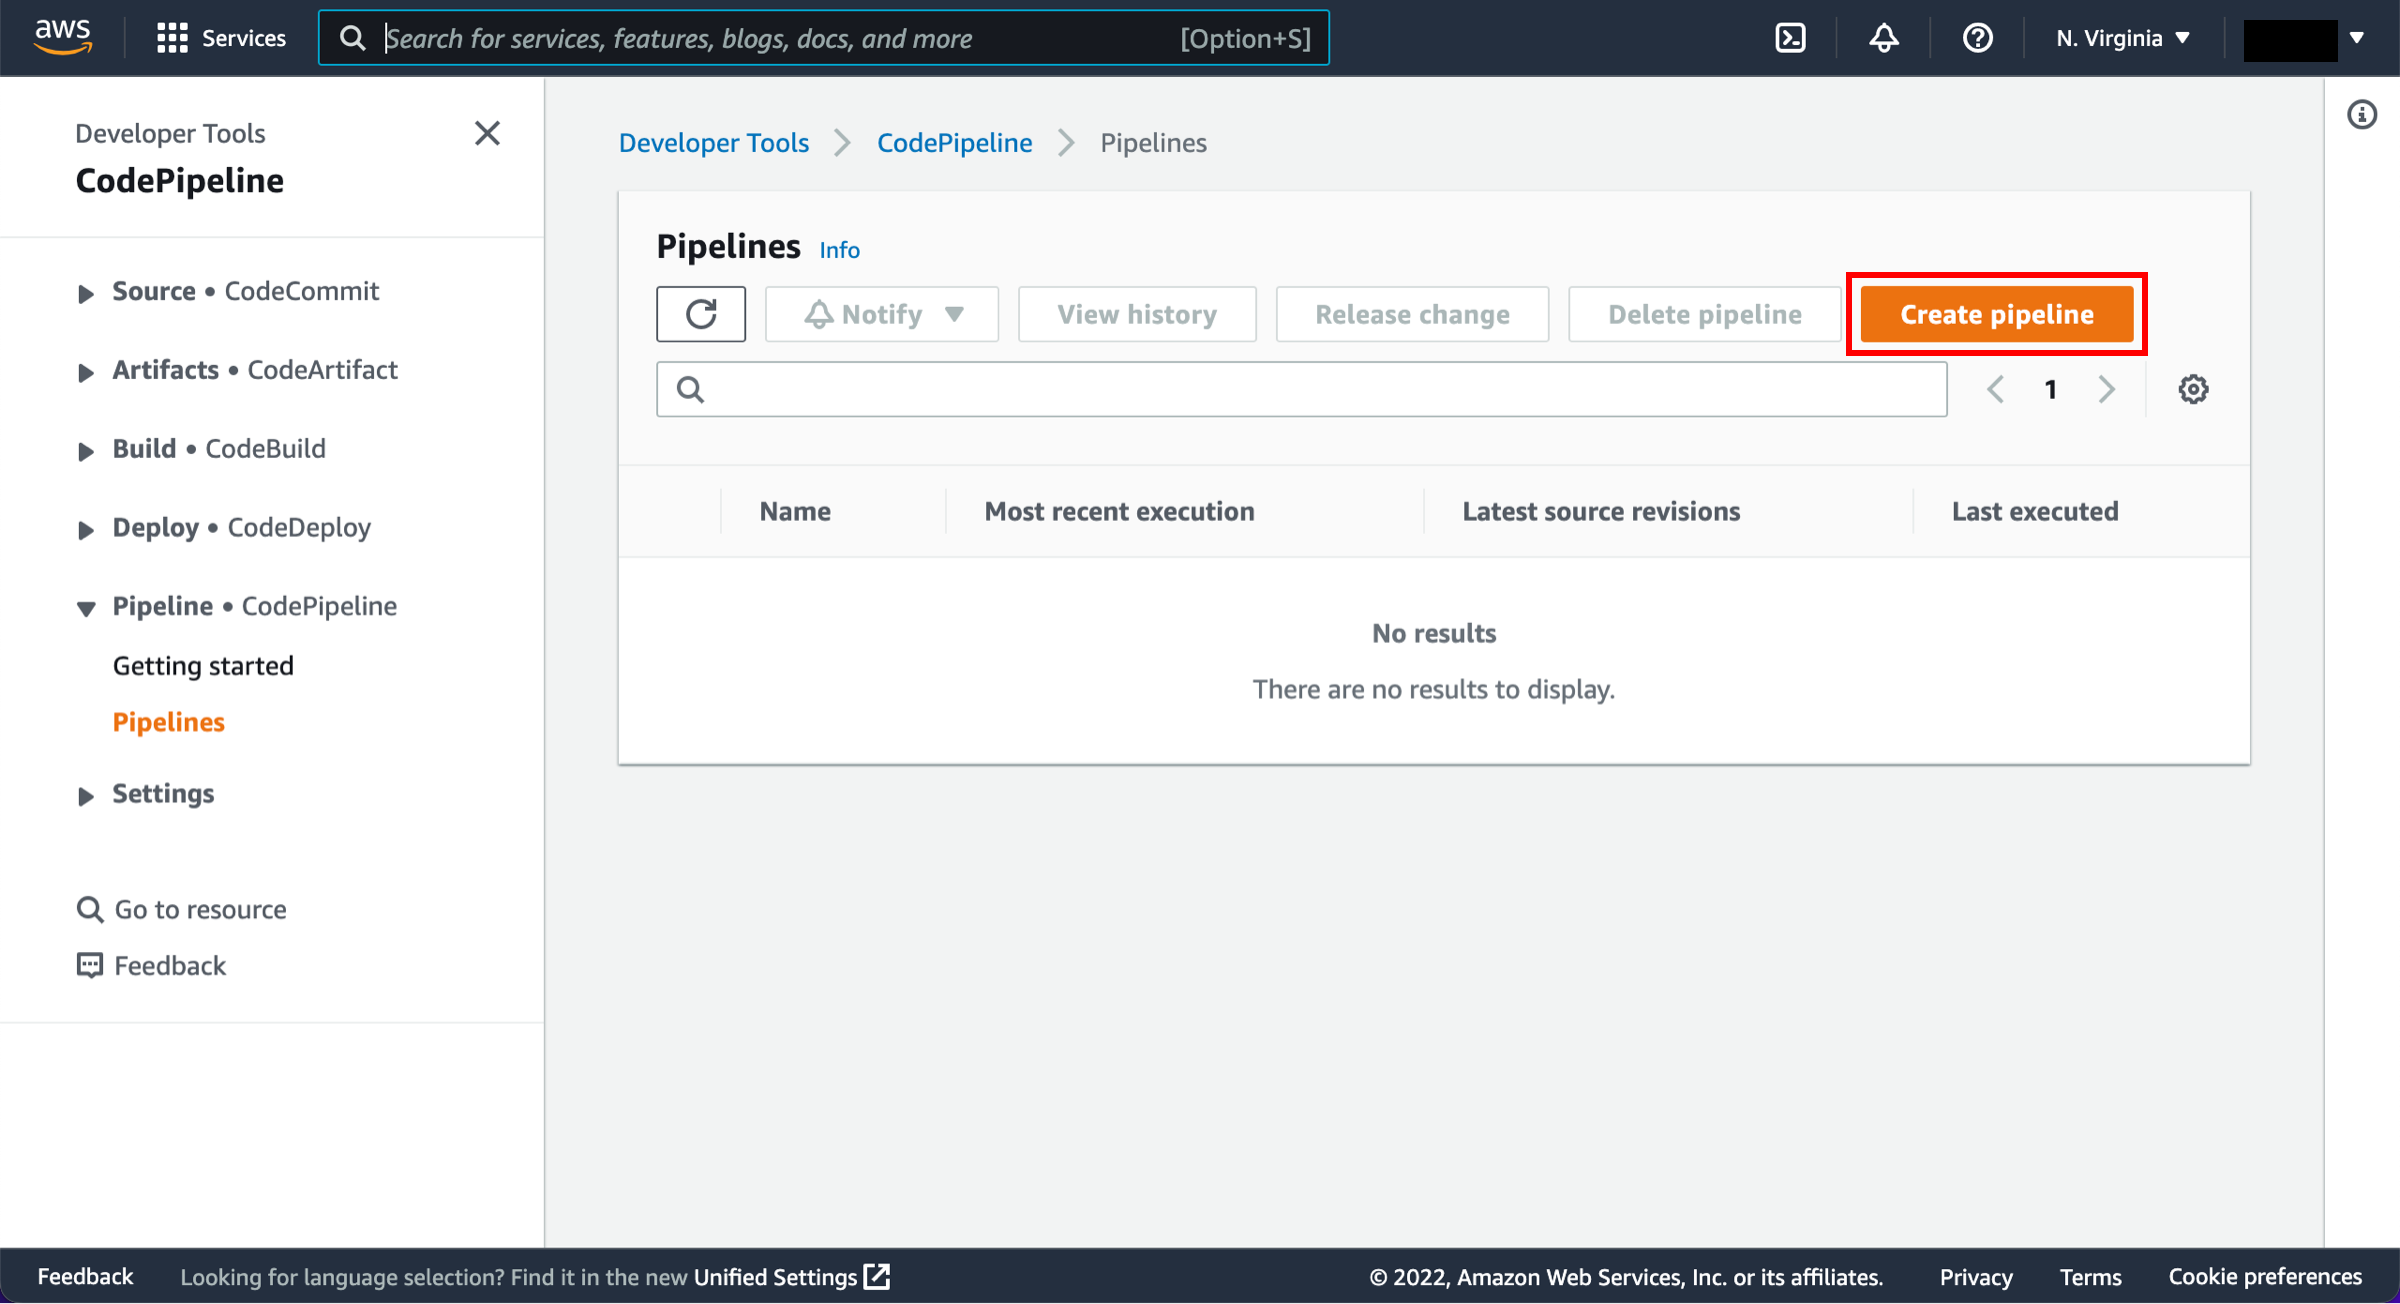
Create a pipeline
Open the AWS CodePipeline console.
On the Welcome page, choose Create pipeline.
-
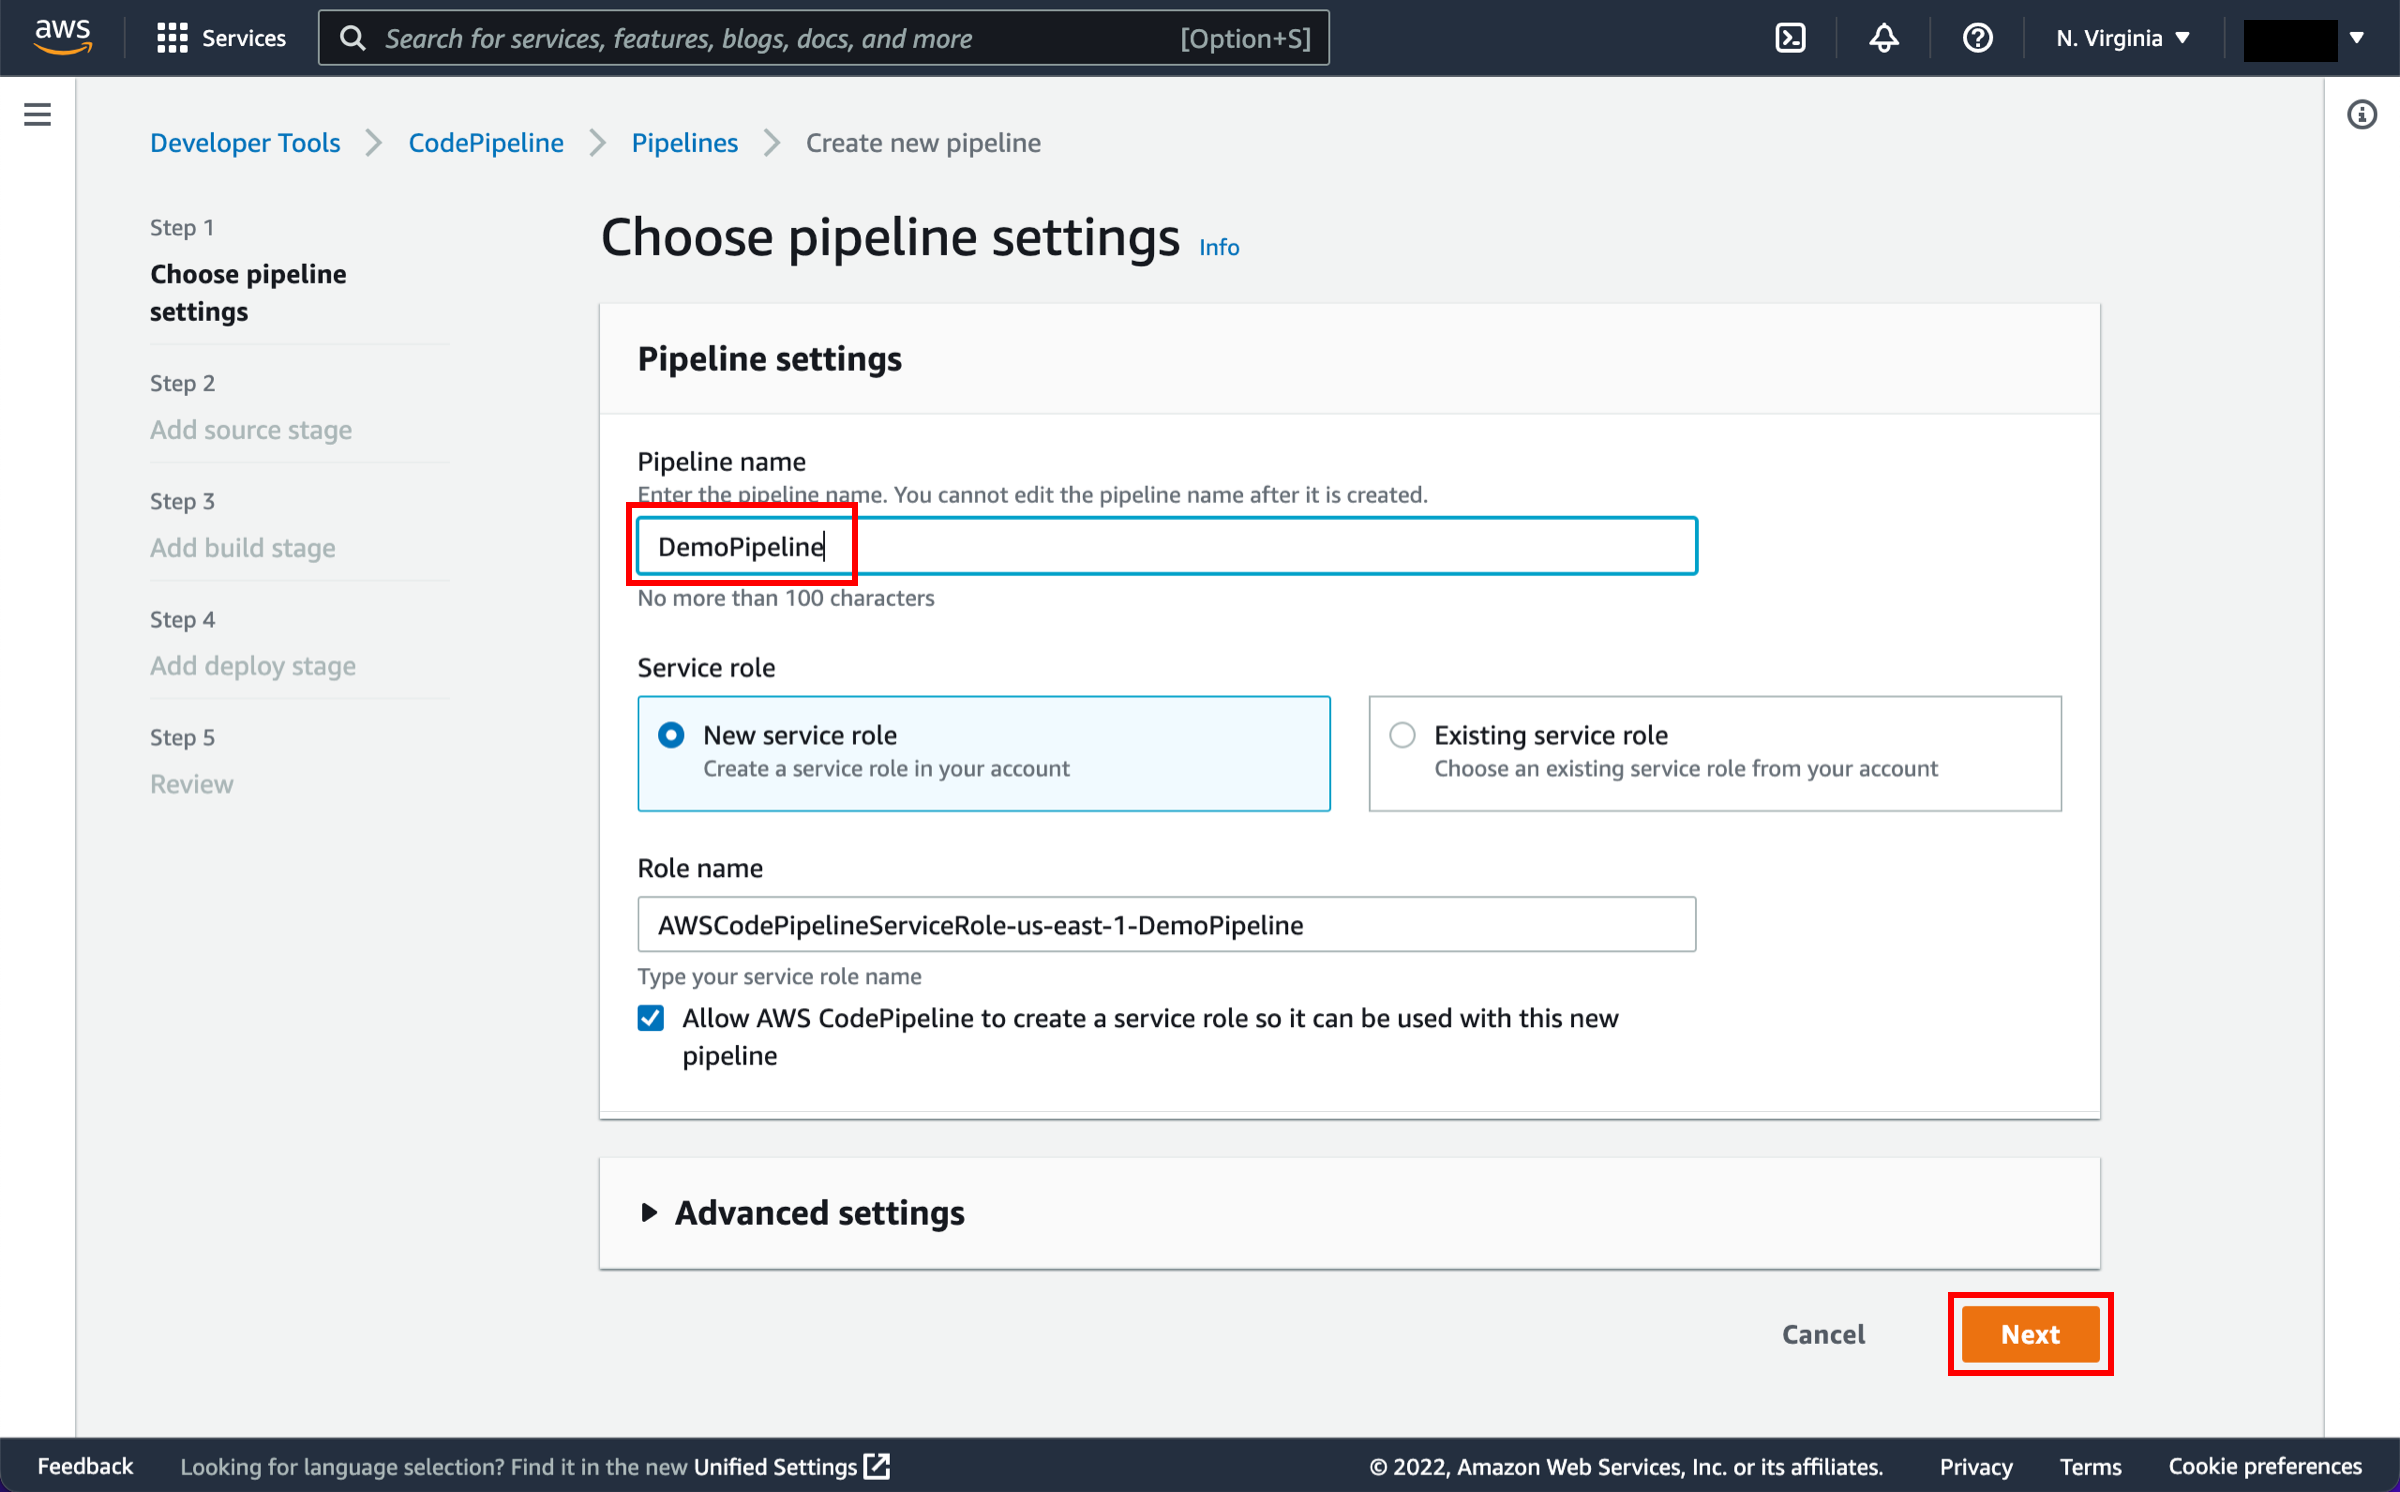
Configure pipeline settings
On the Step 1: Choose pipeline settings page:
-
Pipeline name: Enter the name for your pipeline, DemoPipeline.
-
Choose Next.
Note
After you create a pipeline, you cannot change its name.
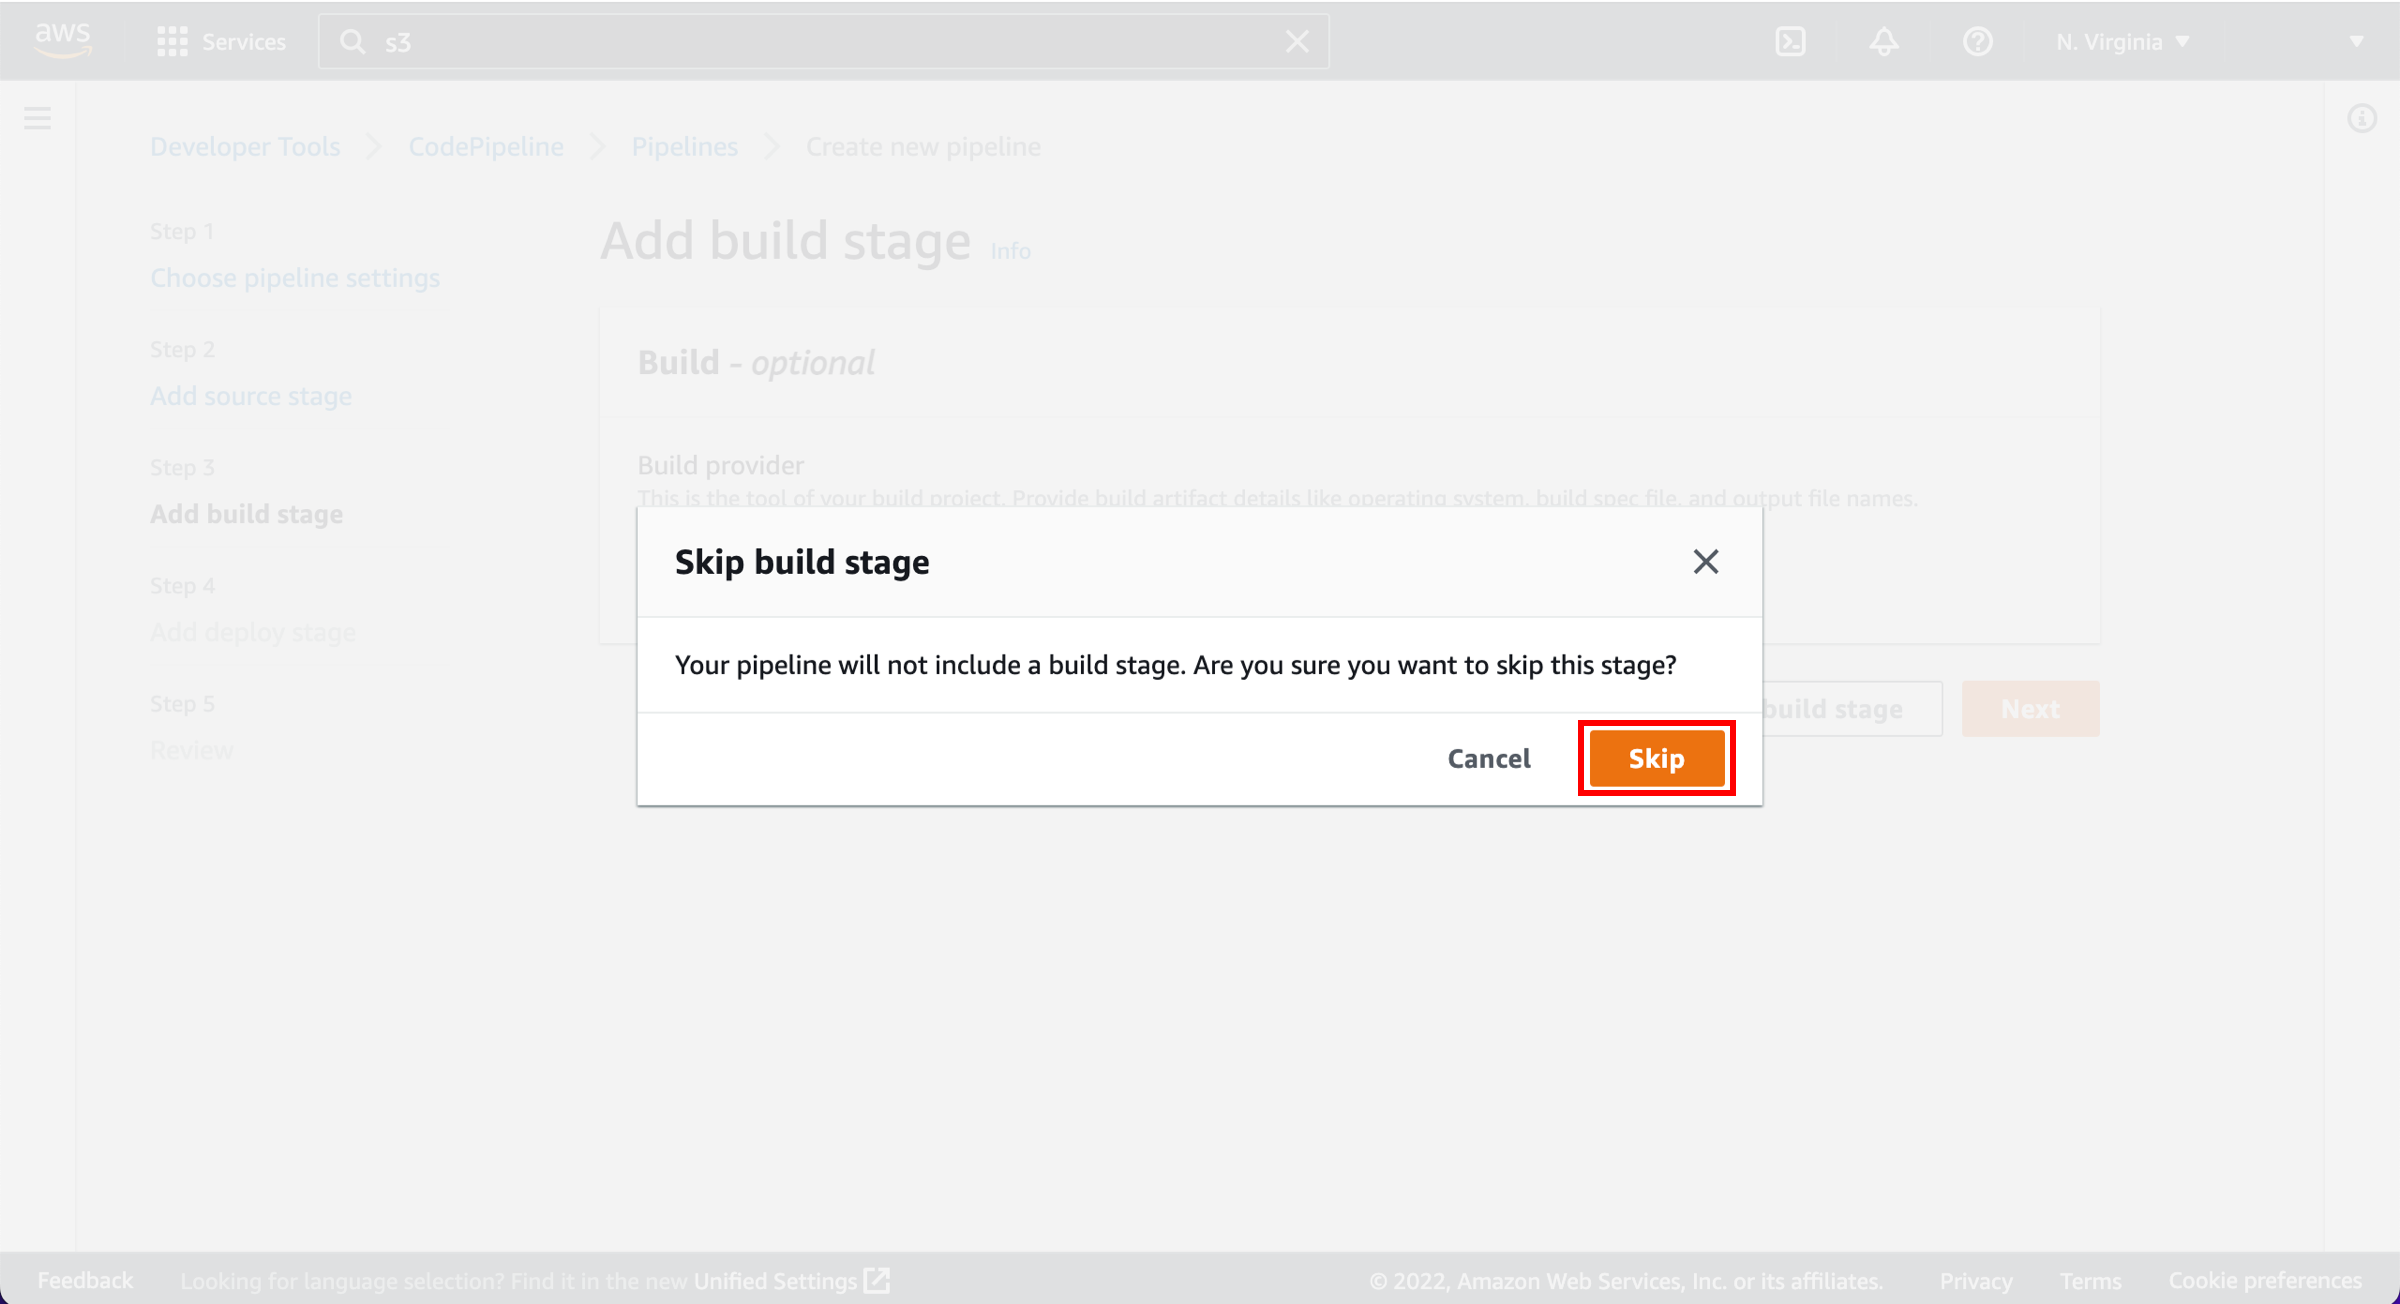
-
-
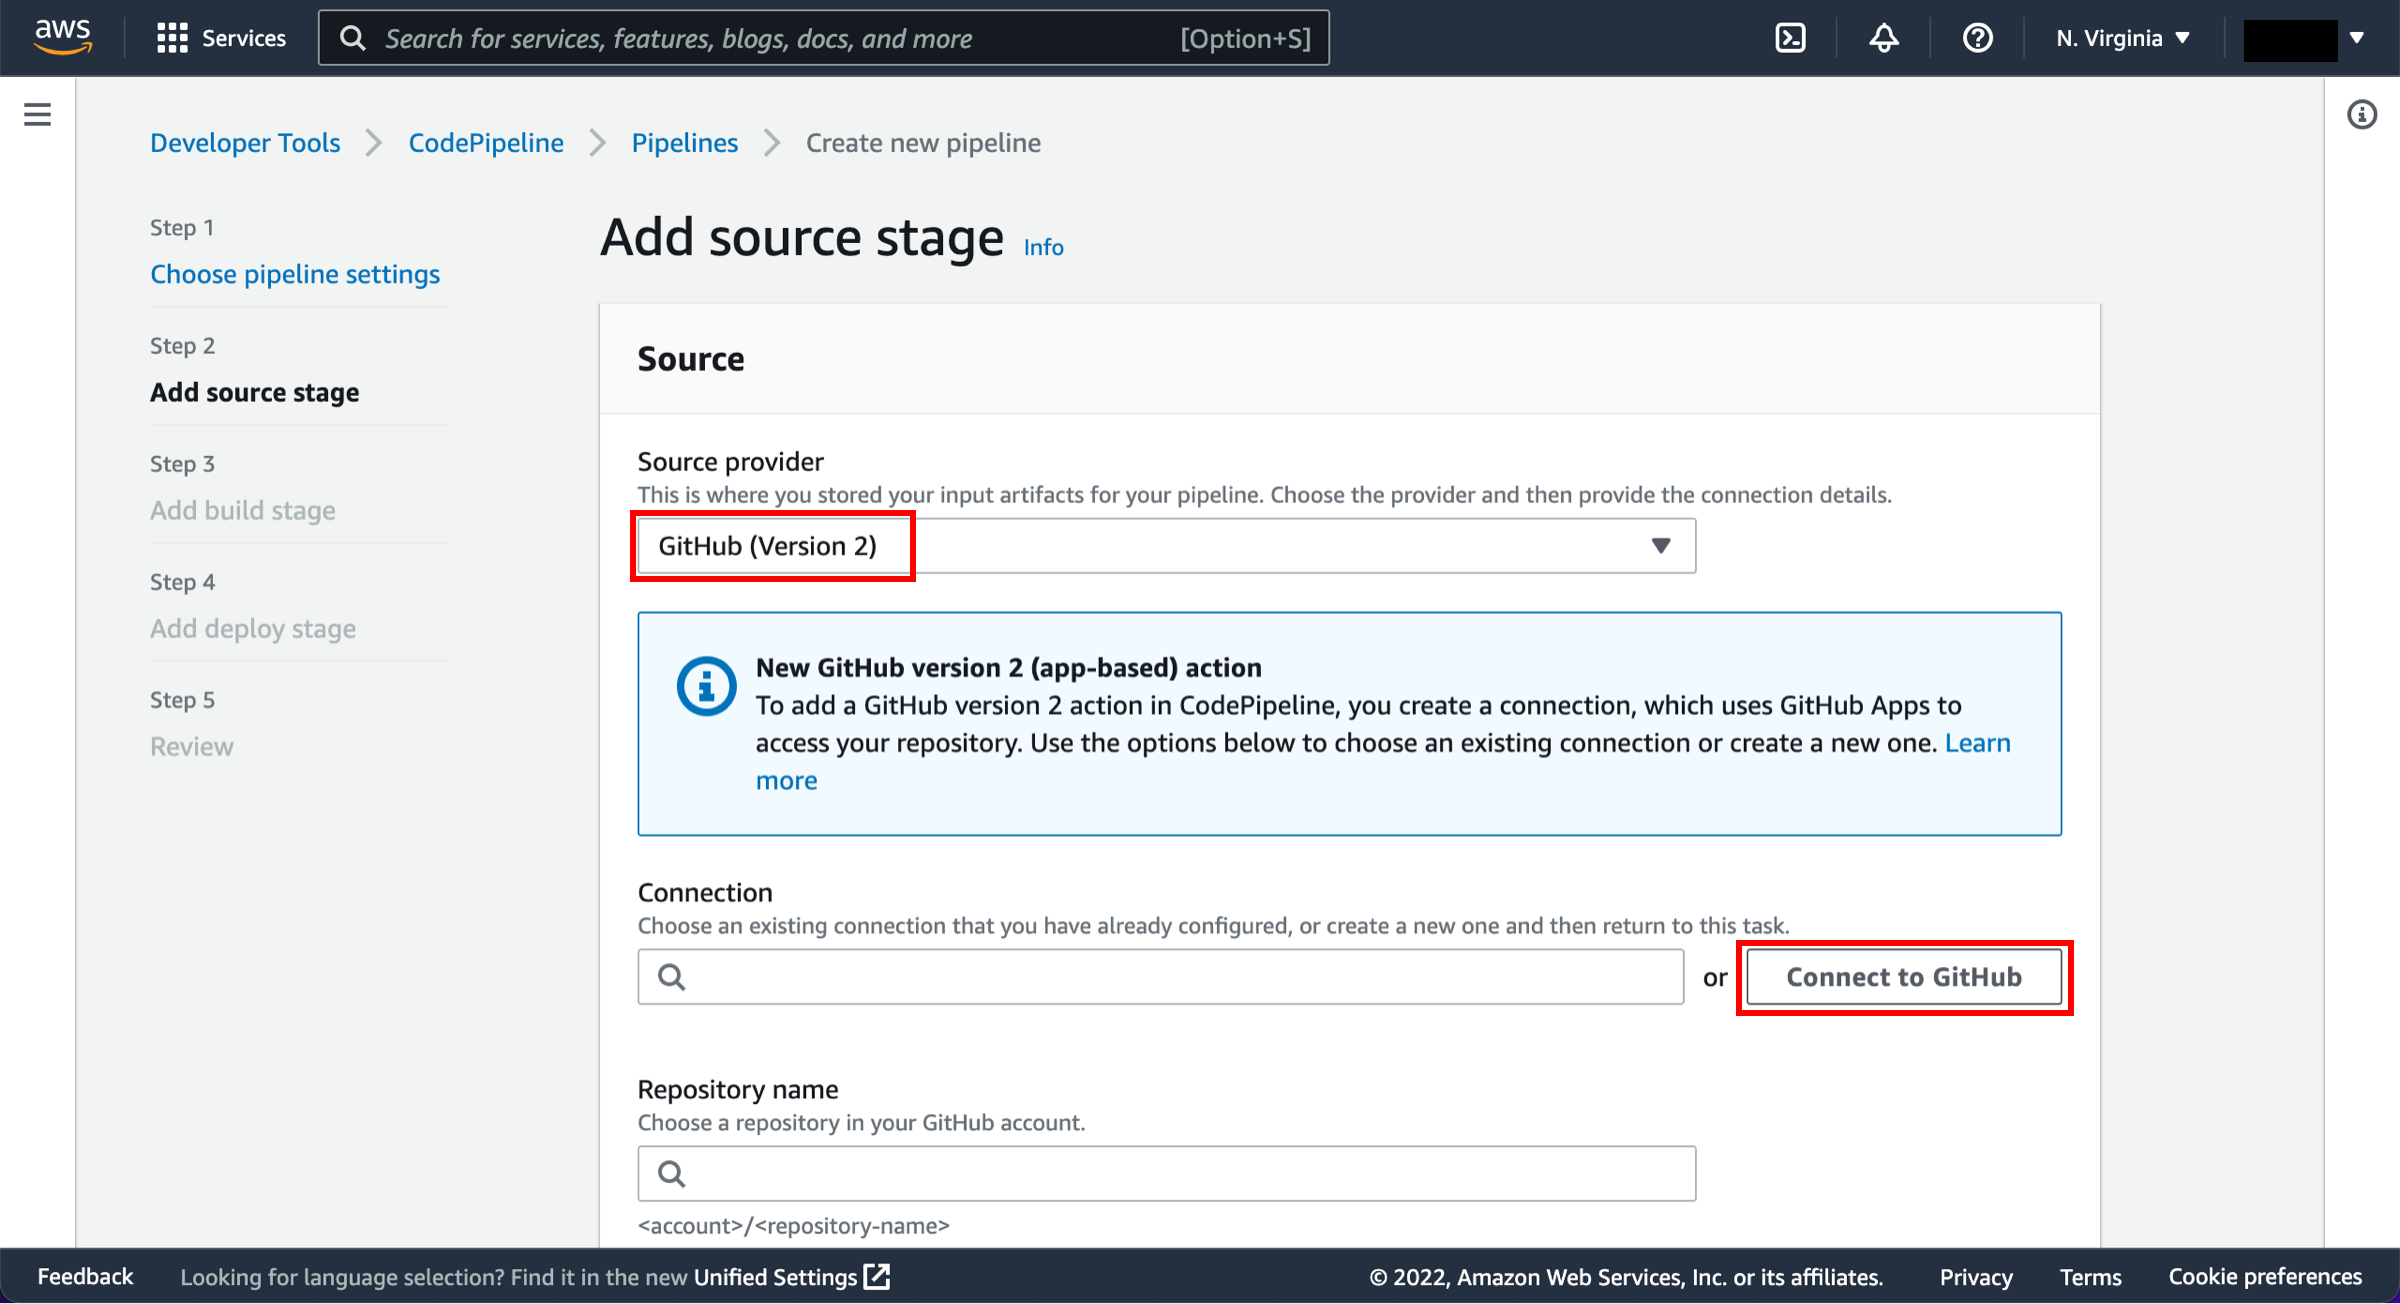
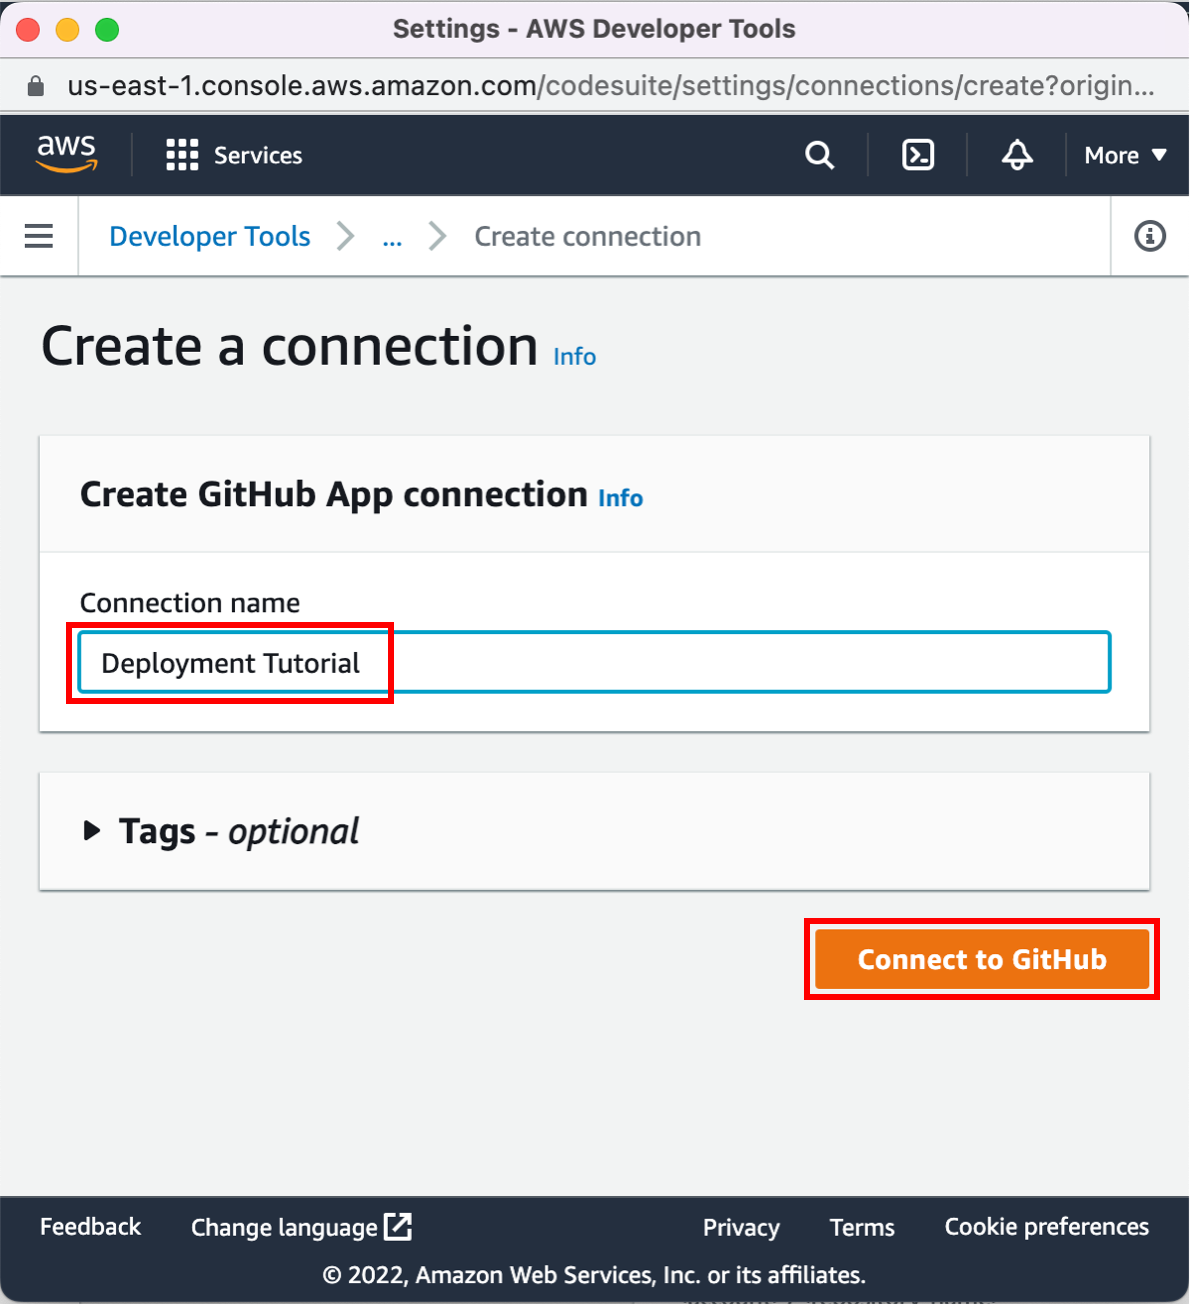
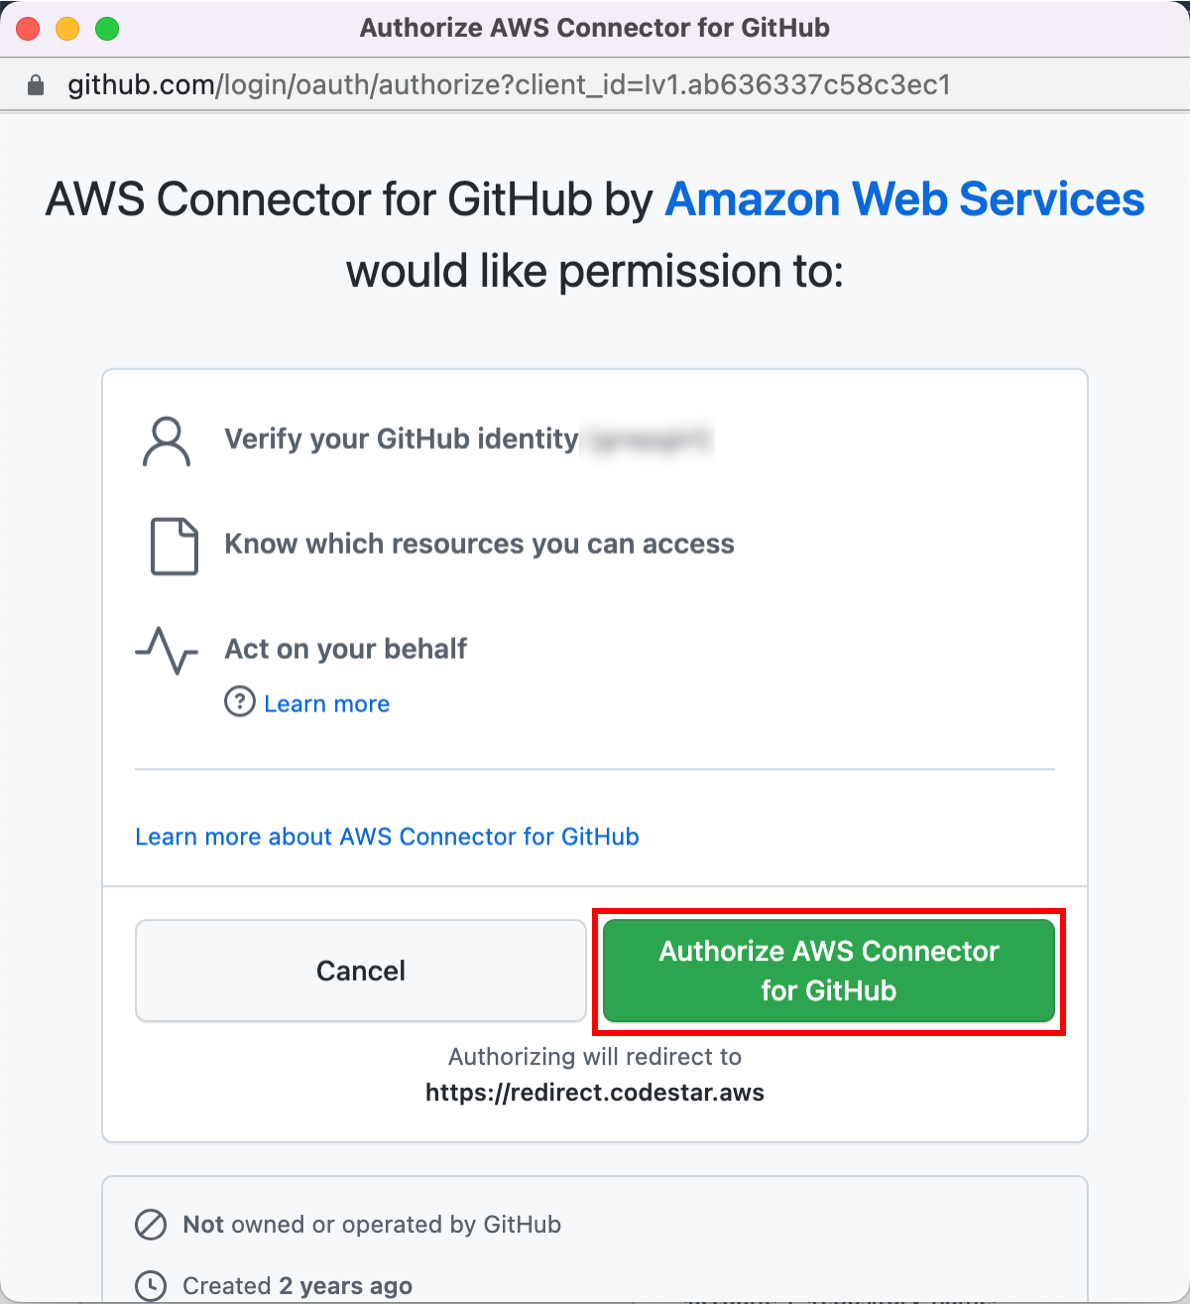
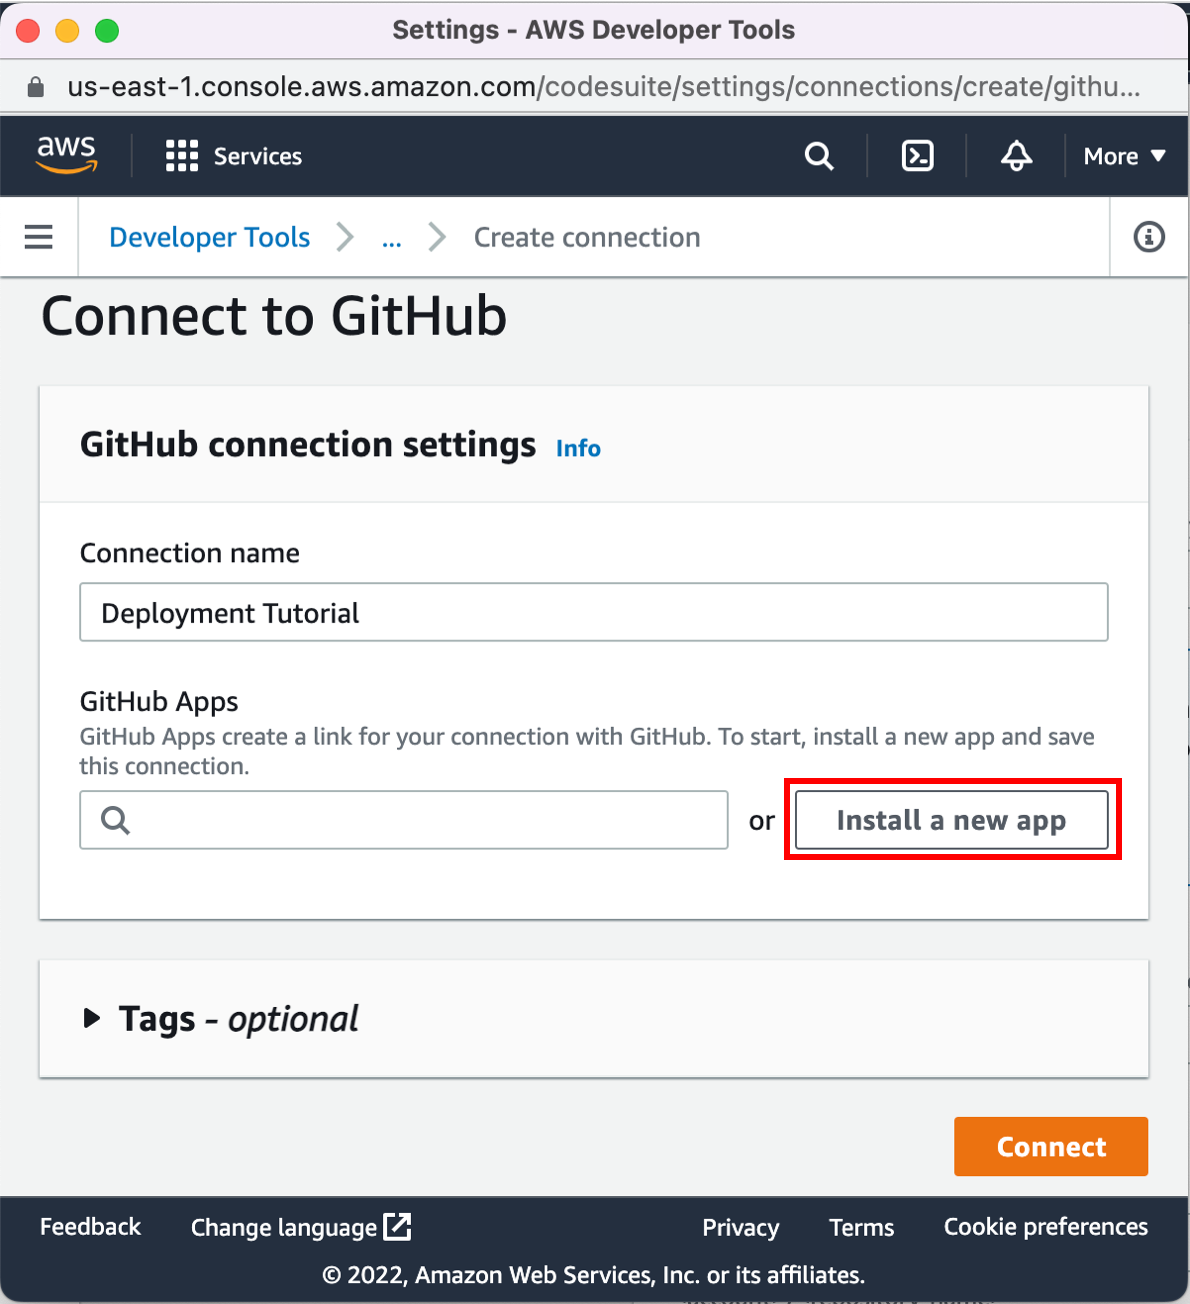
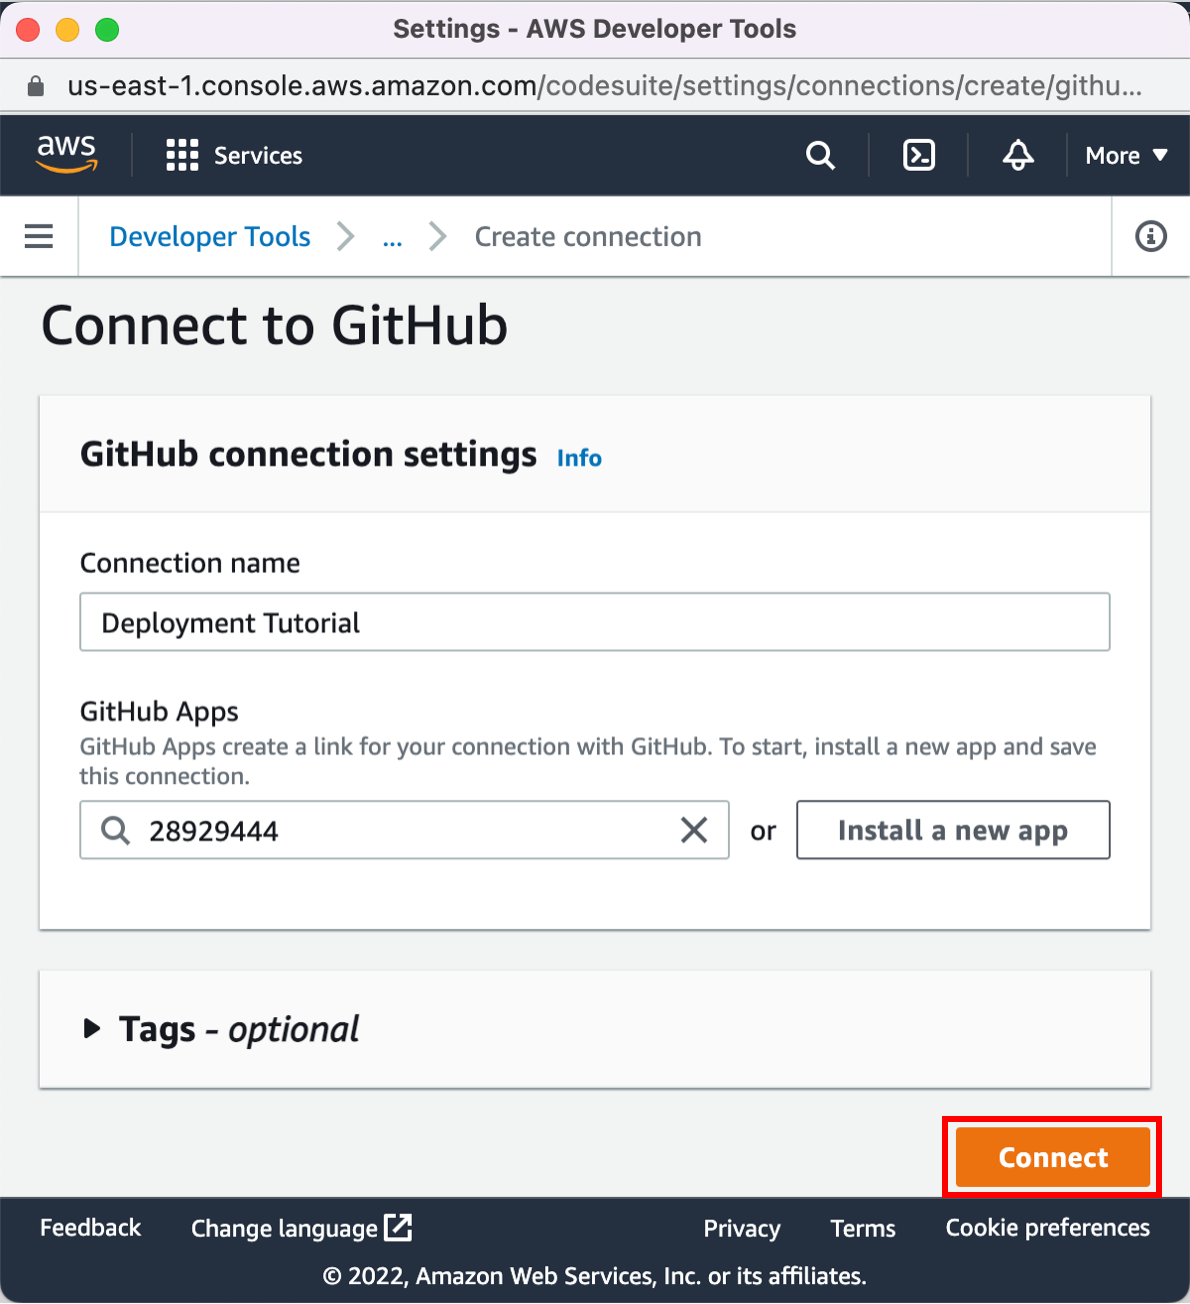
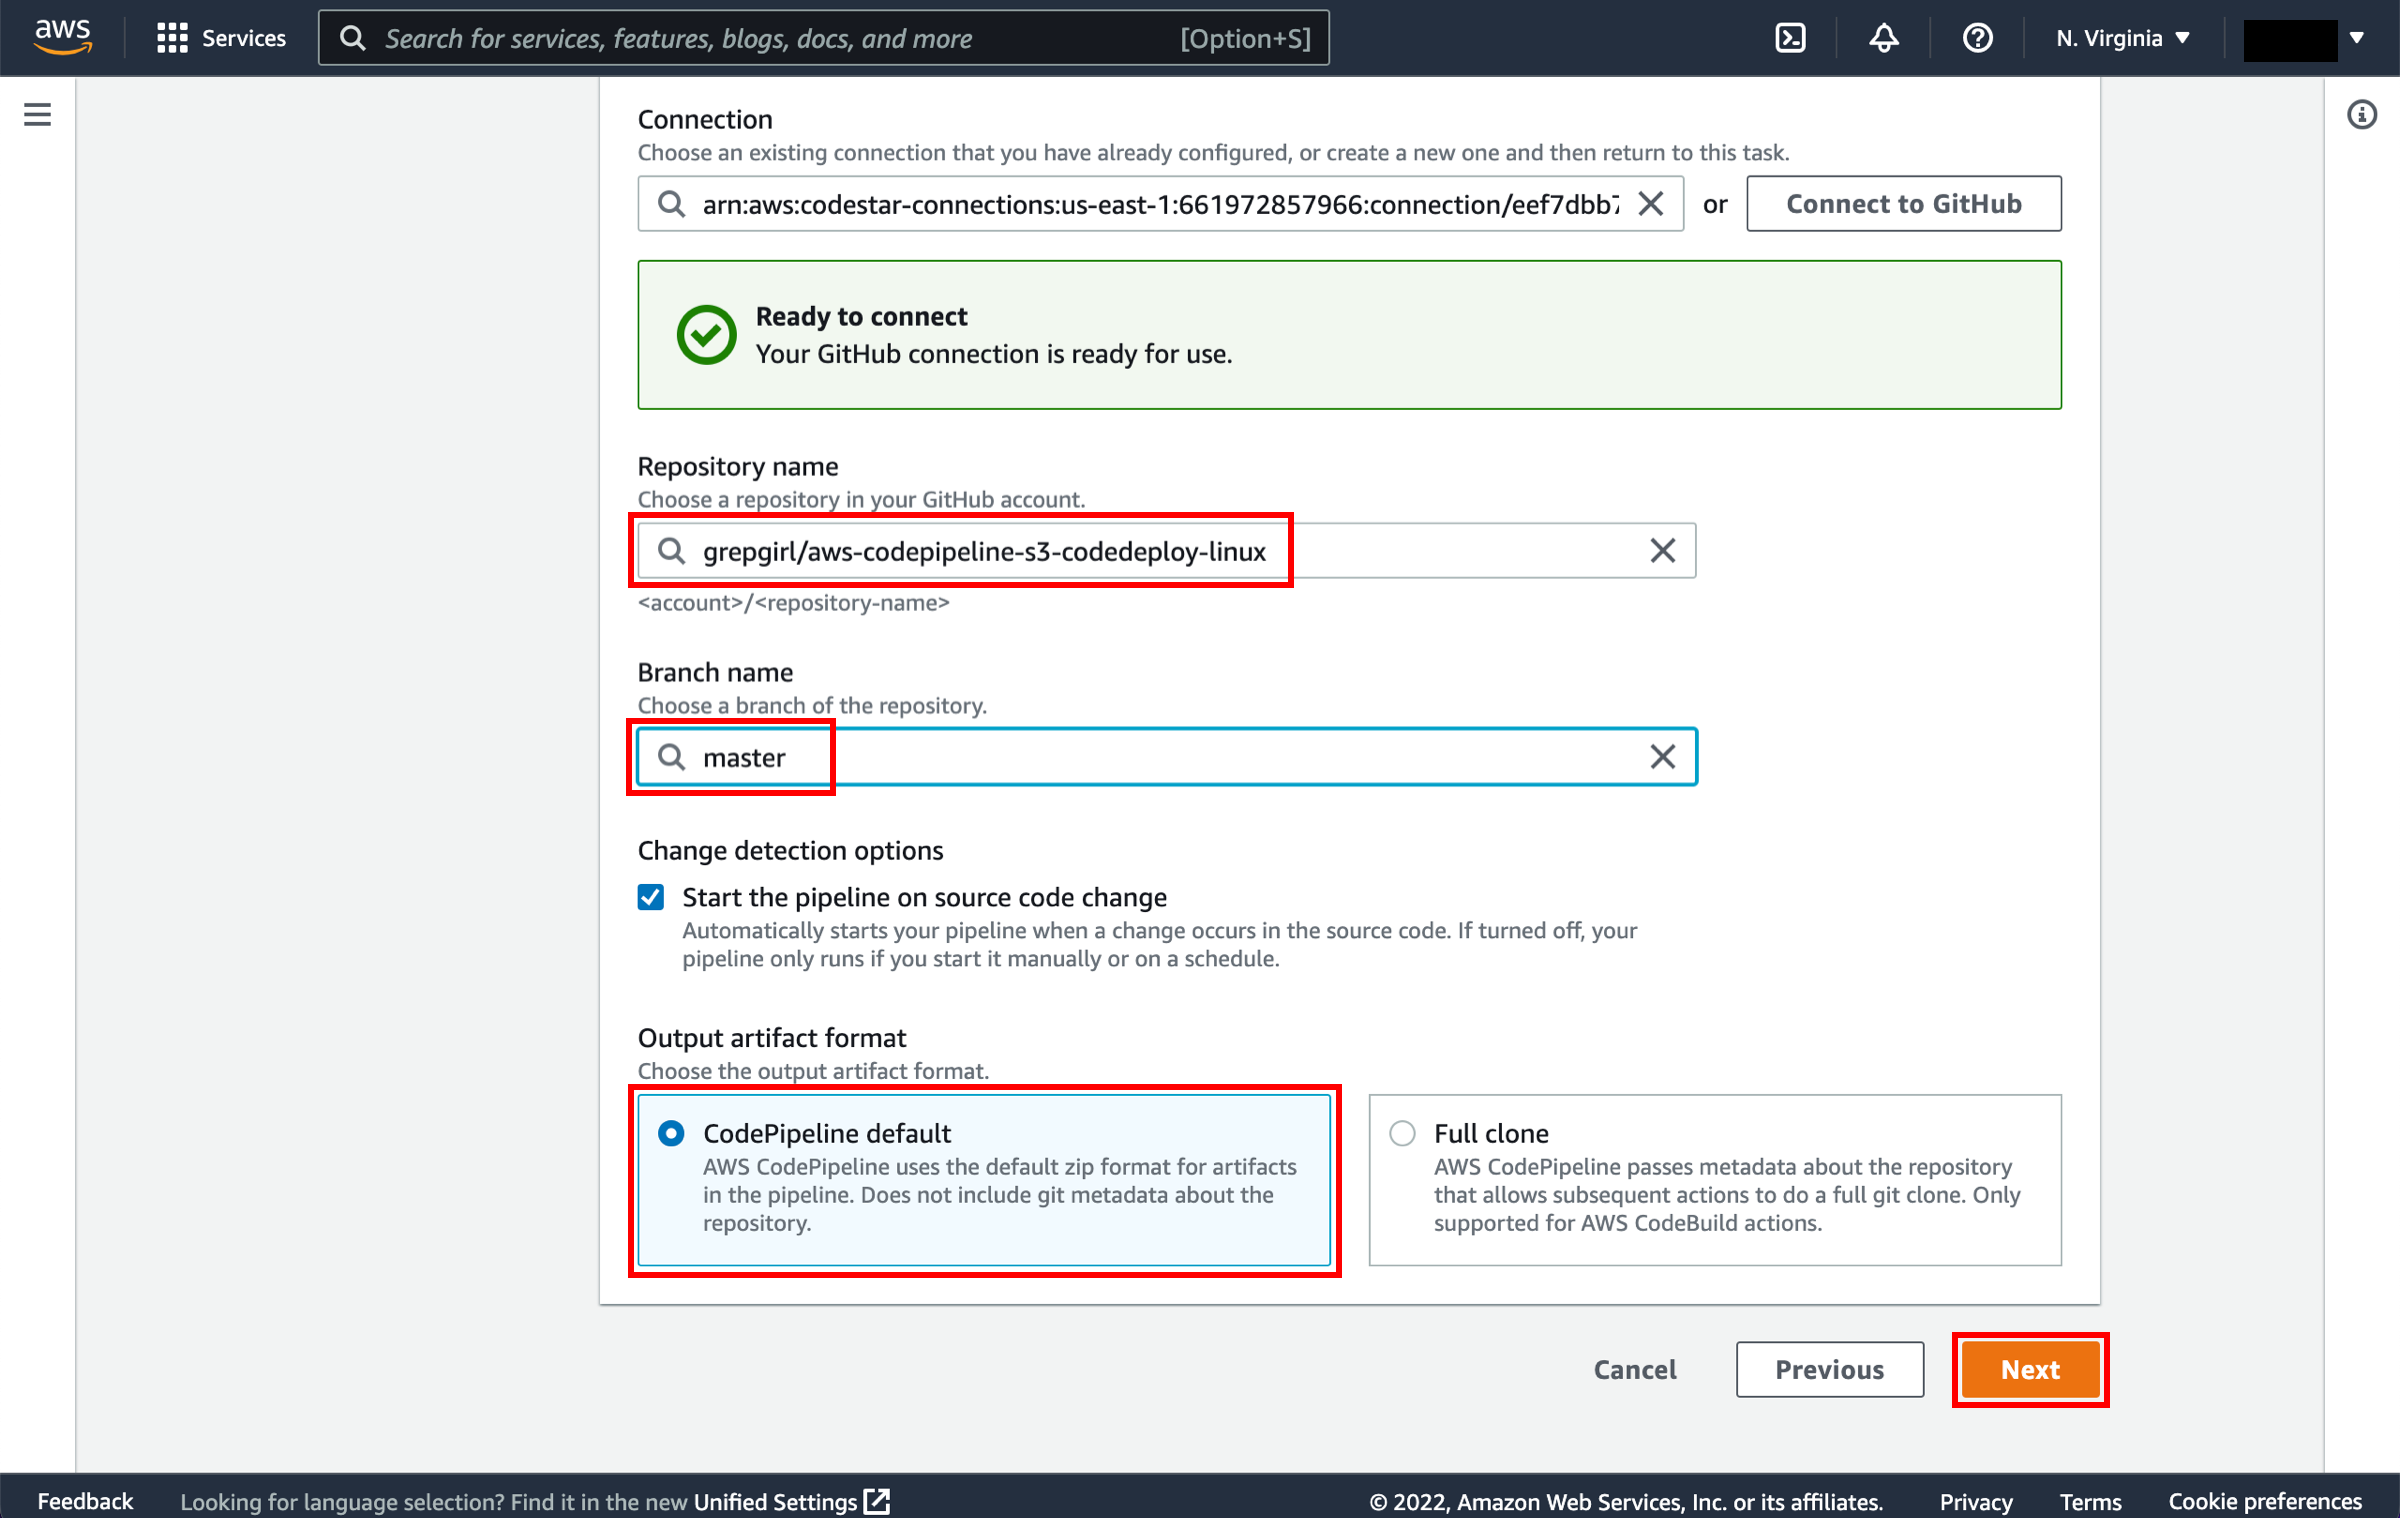
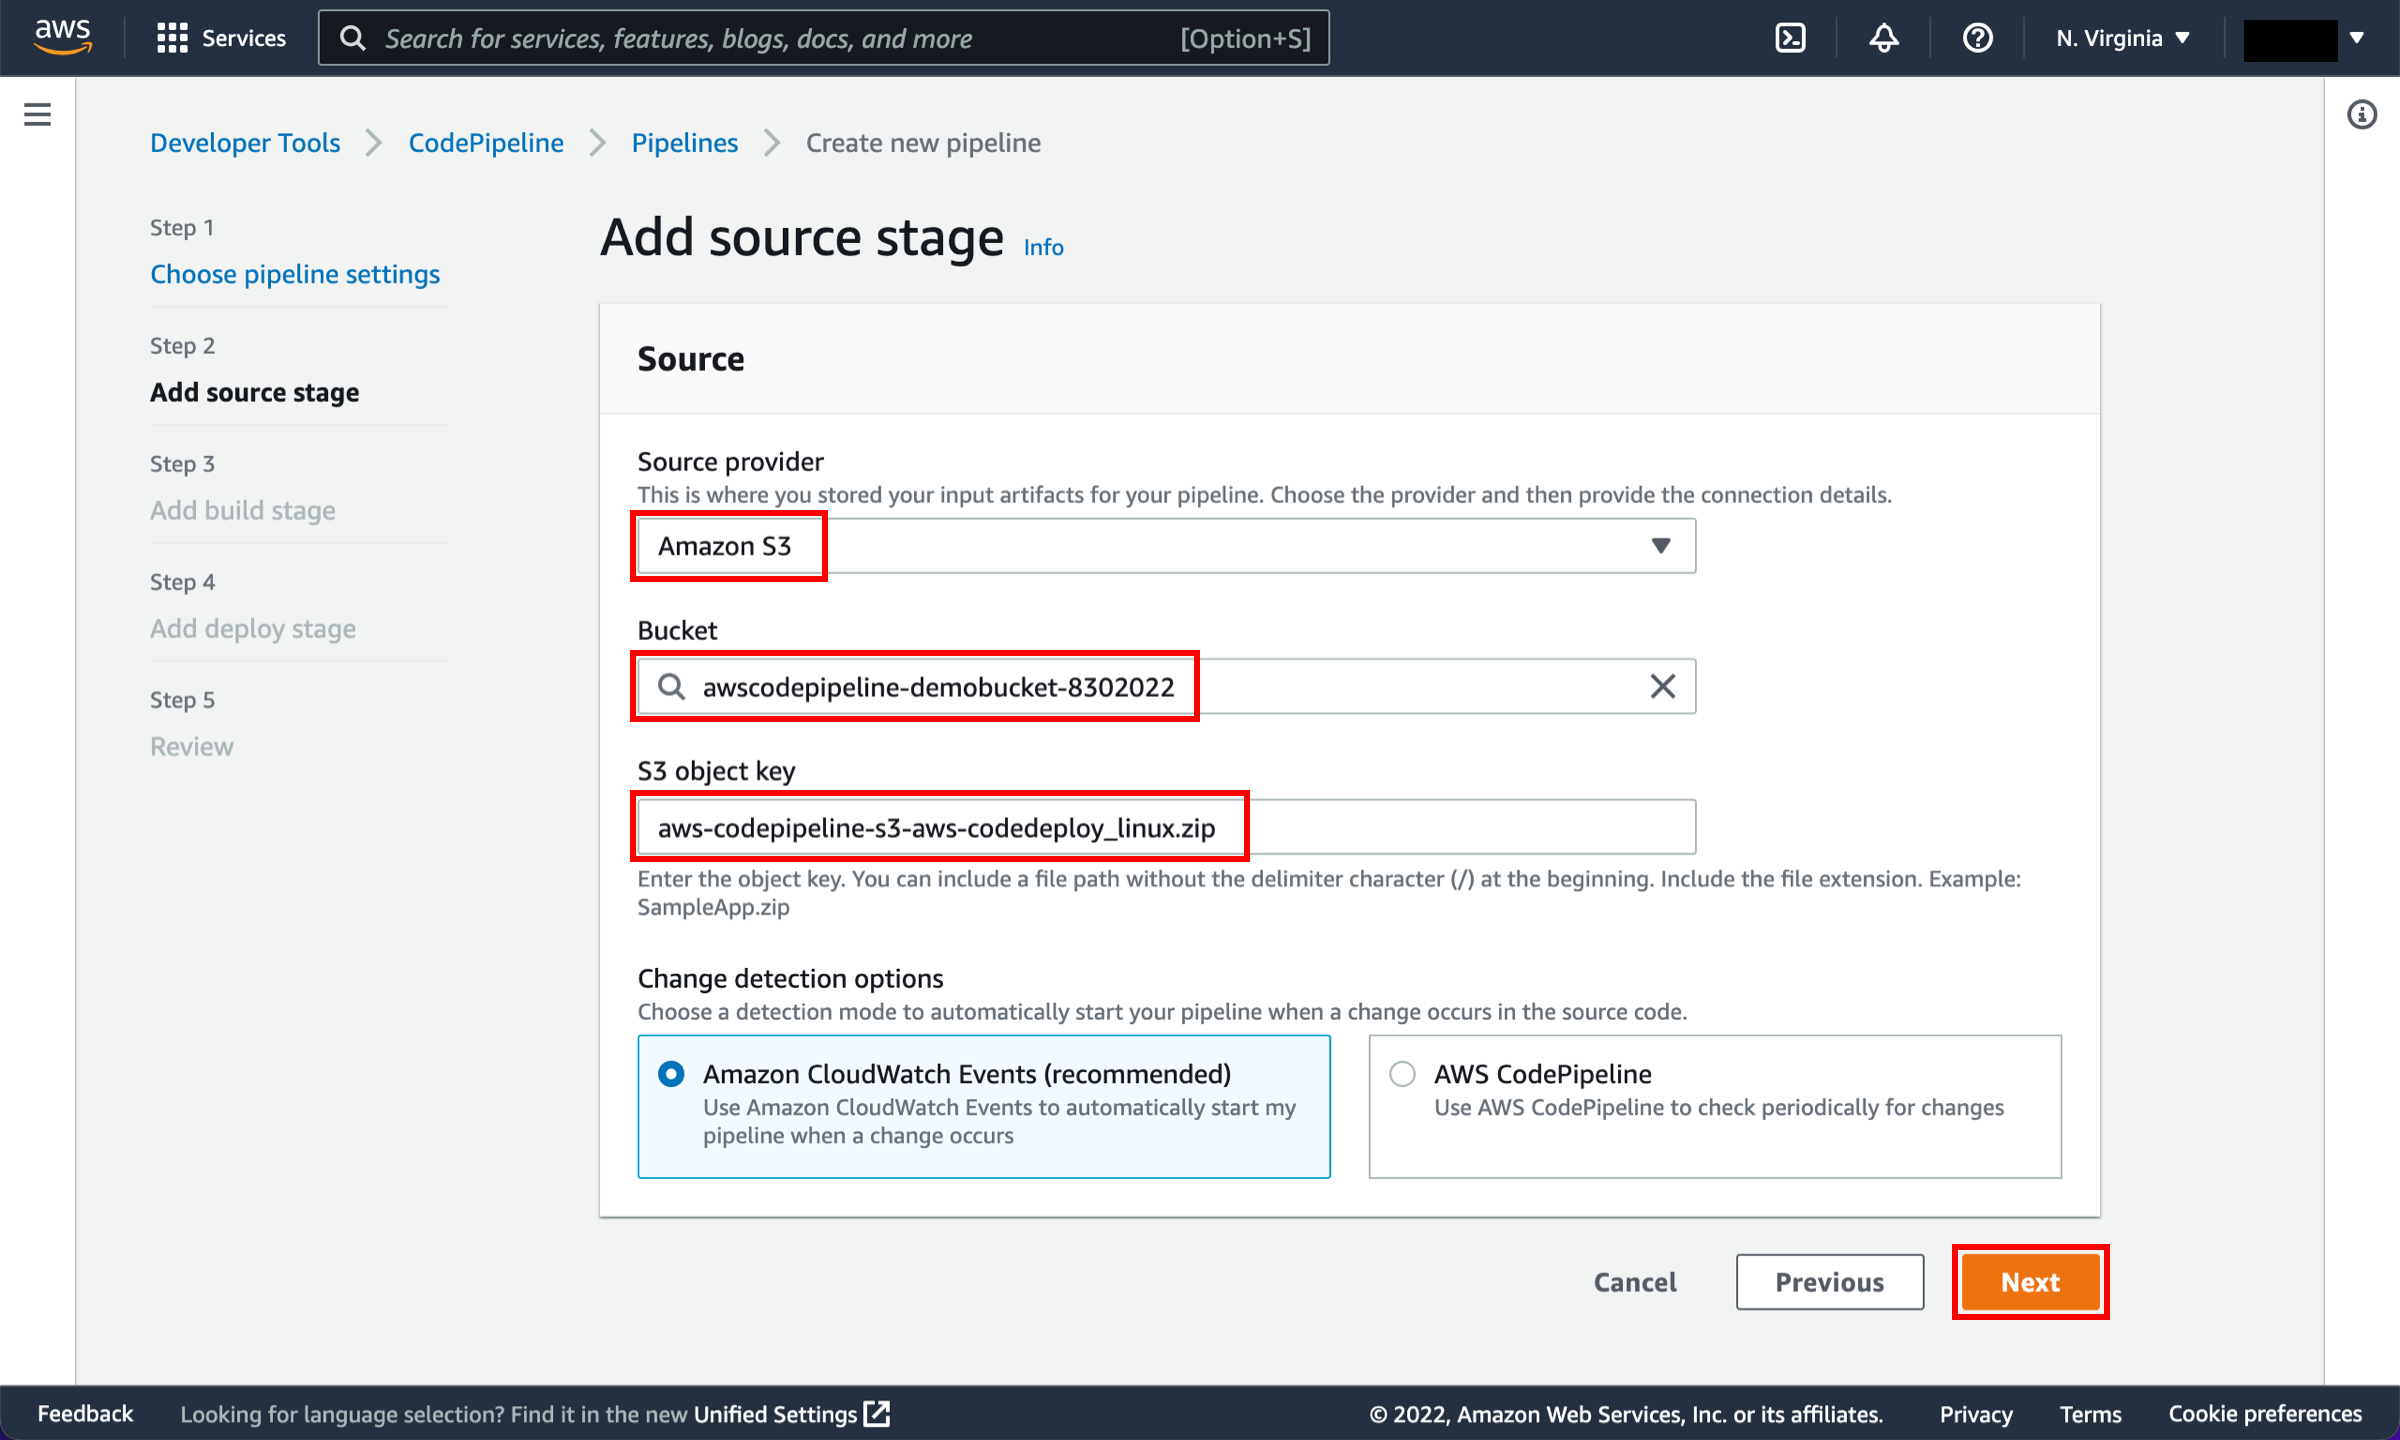
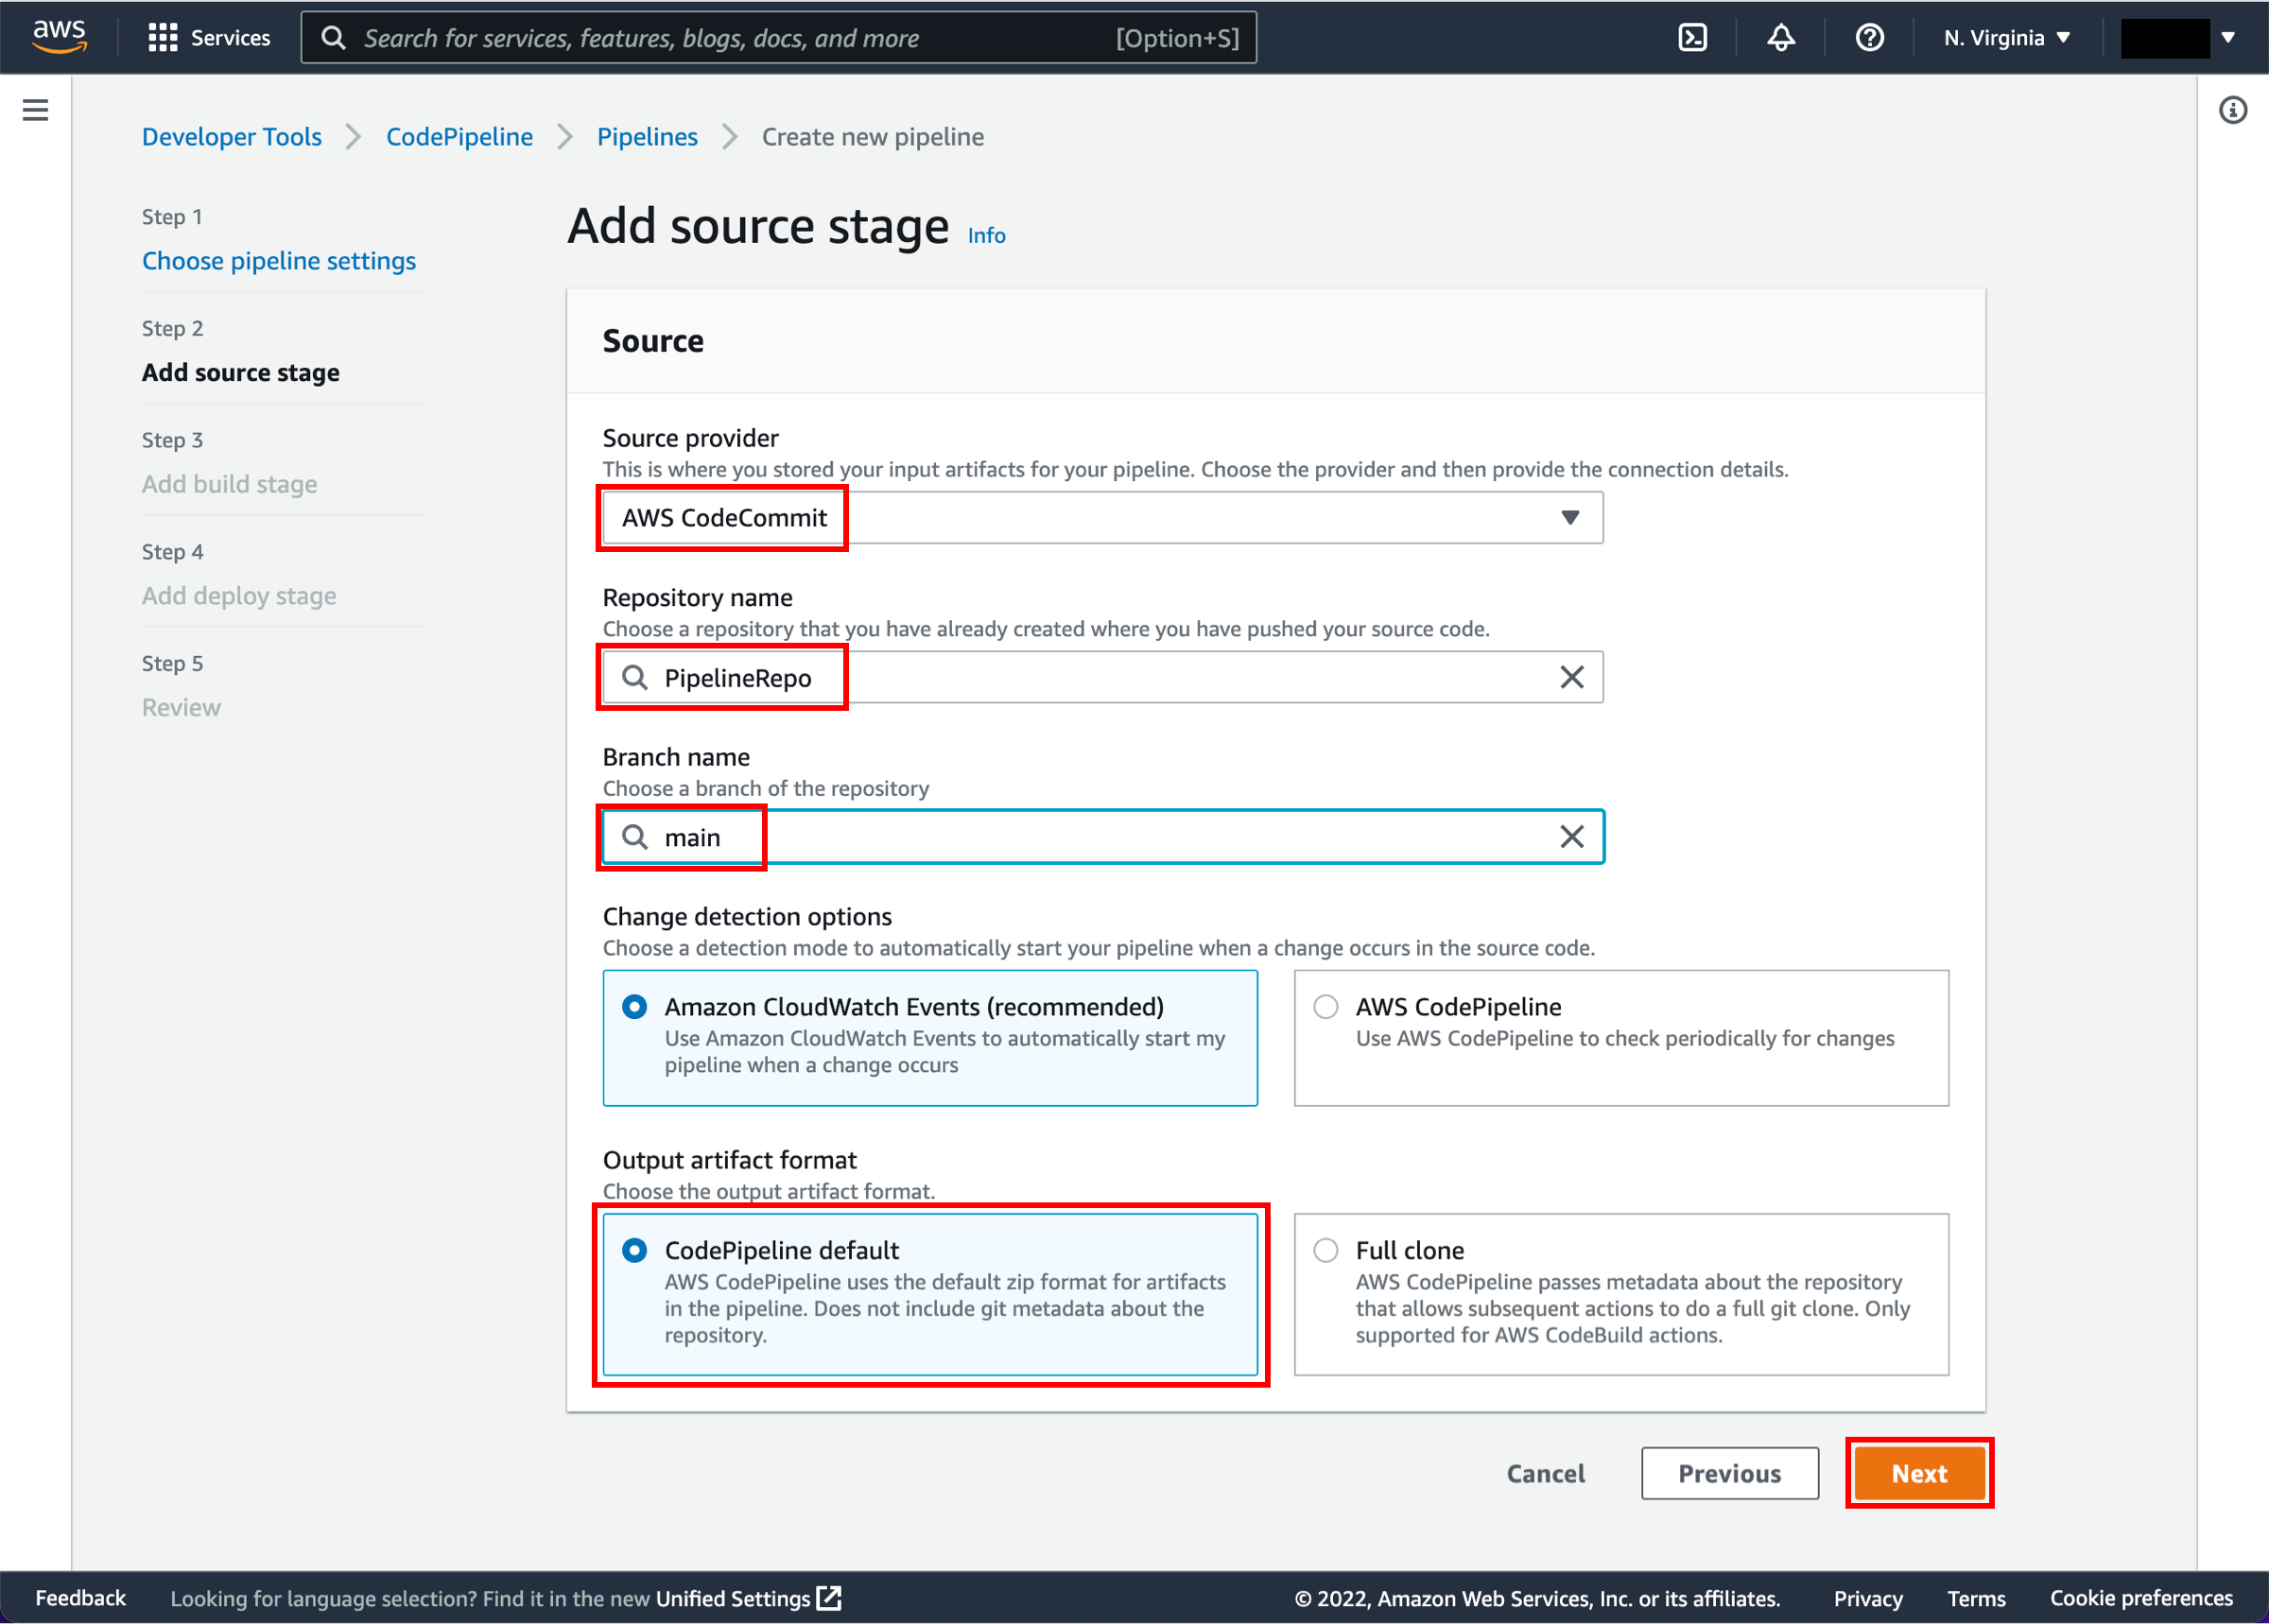
Choose your source
On the Step 2: Add source stage page, select the location of the source you selected using the following instructions.
In this step, you will launch your pipeline. Once your pipeline has been created, it will start to run automatically. First, it detects the sample app code in your source location, bundles up the files, and then moves them to the second stage that you defined. During this stage, it passes the code to Elastic Beanstalk, which contains the EC2 instance that will host your code. Elastic Beanstalk handles deploying the code to the EC2 instance.
-
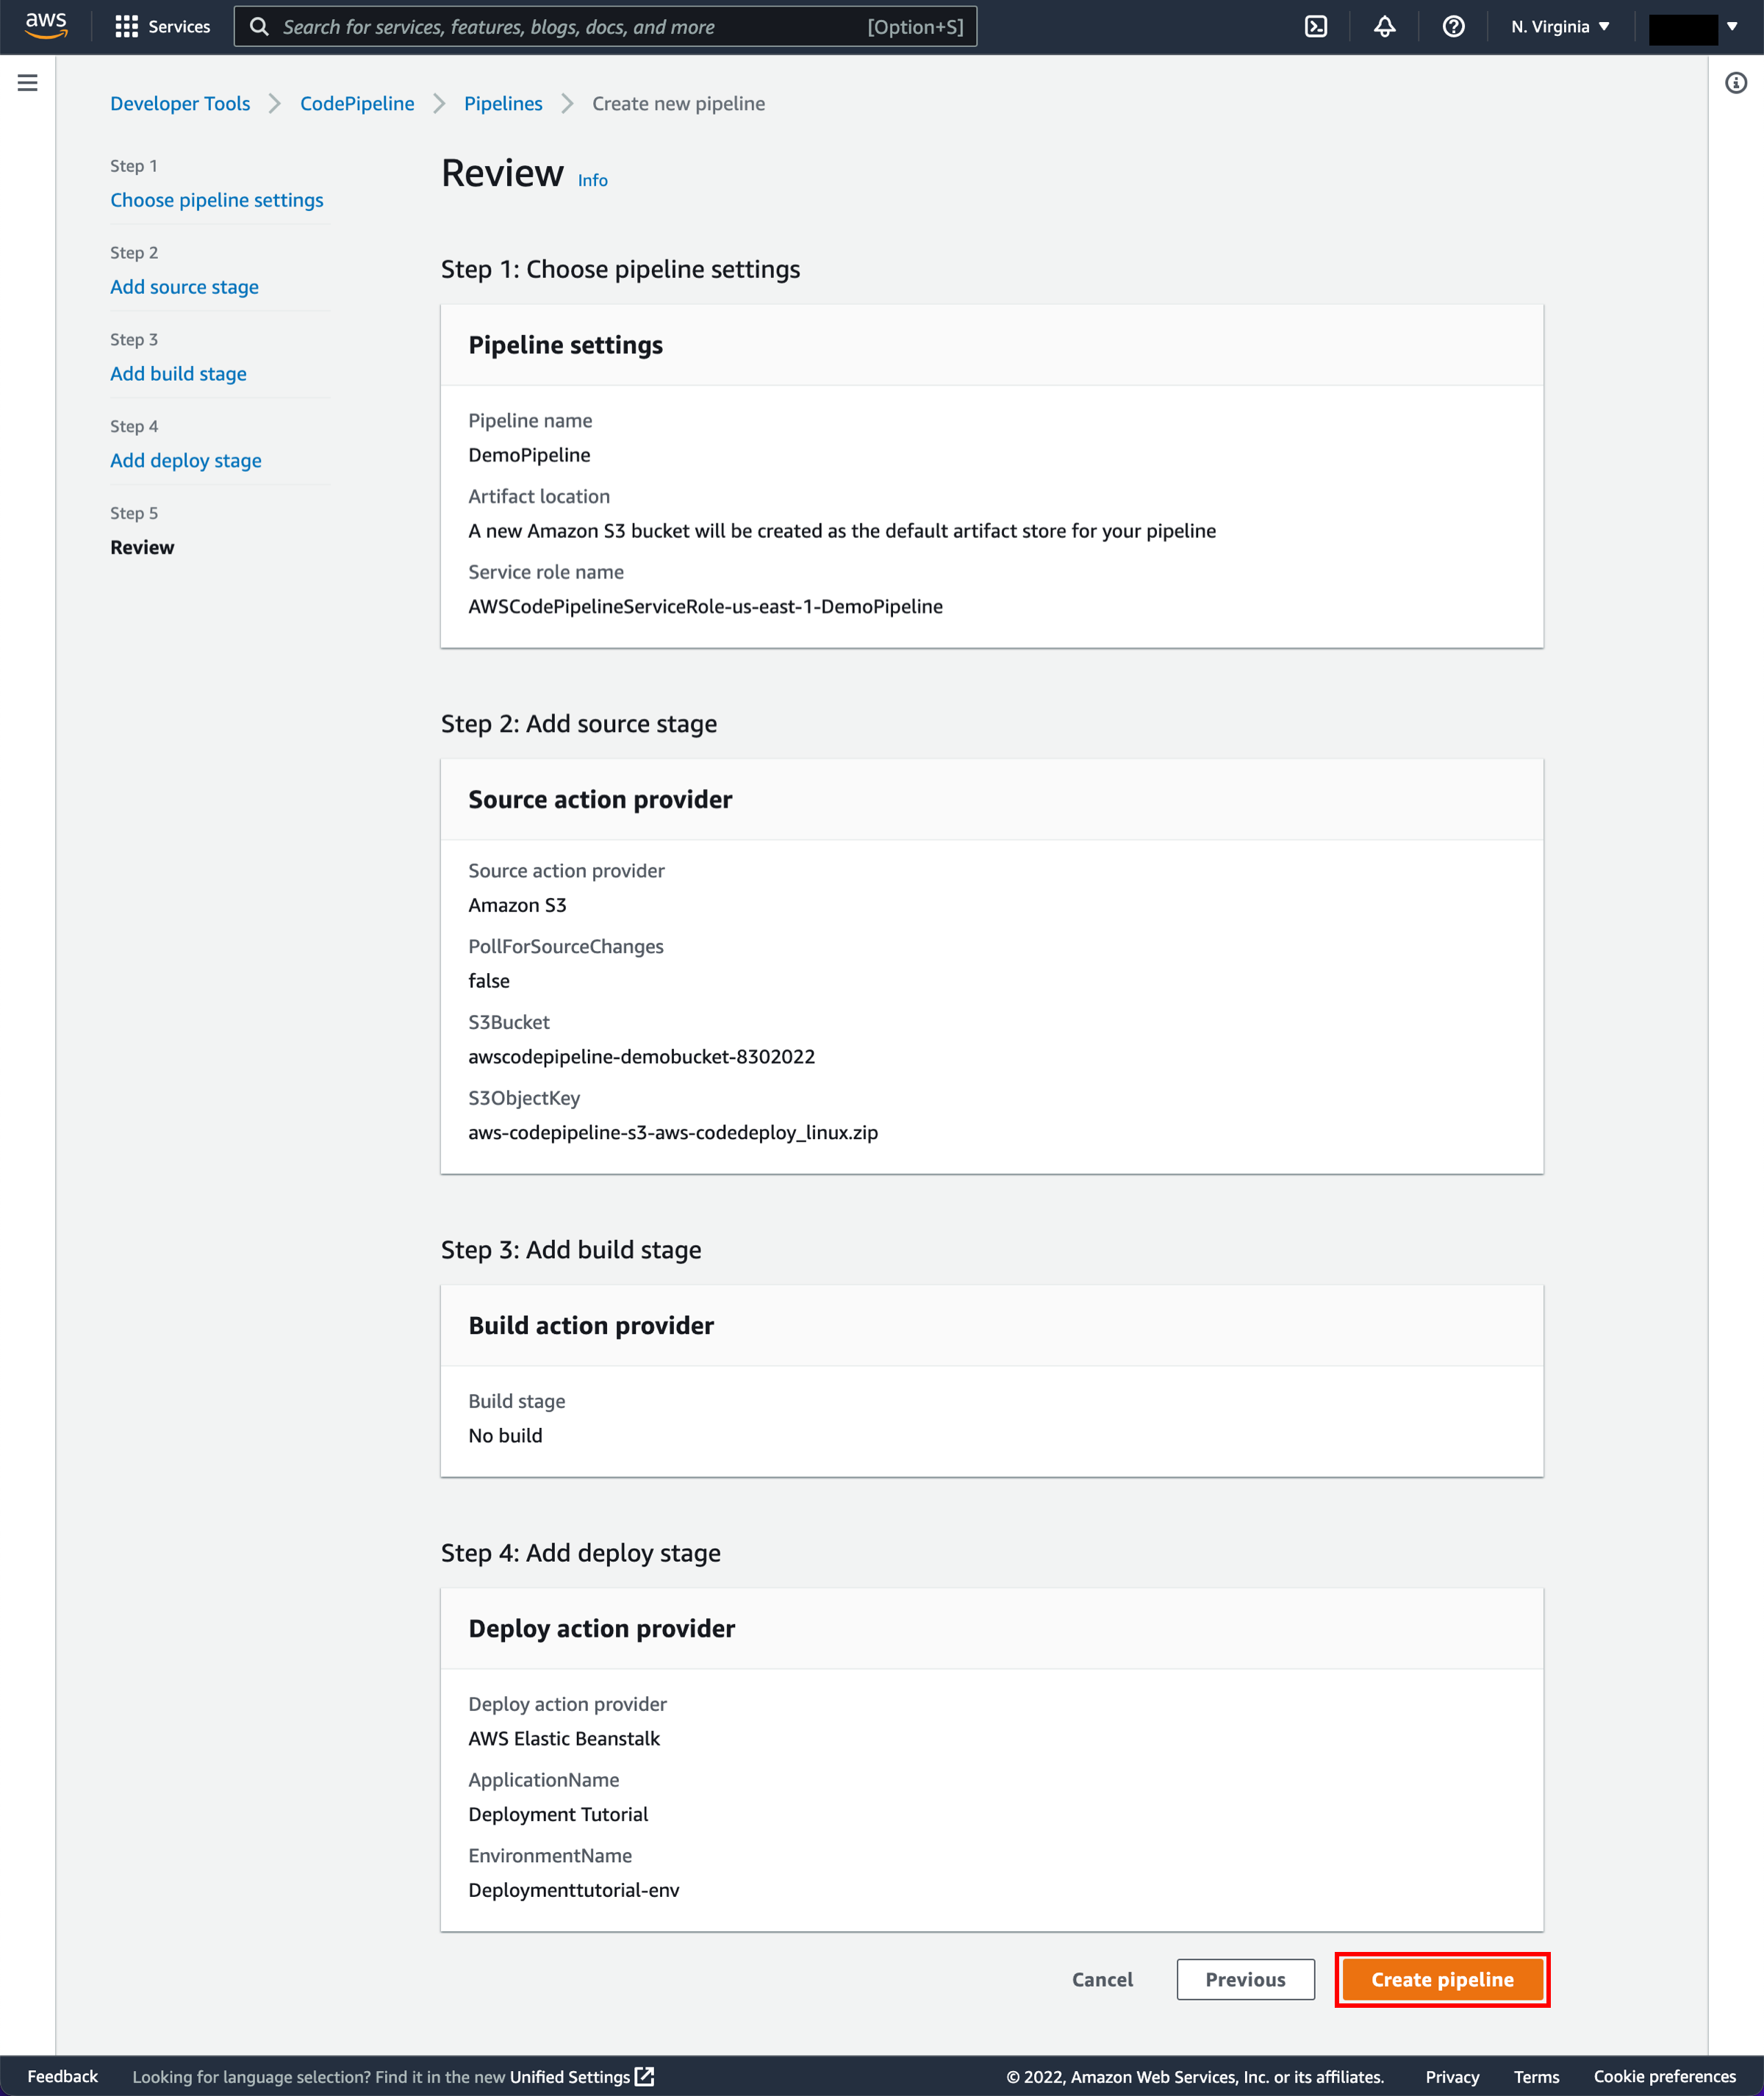
Review configuration and create pipeline
In the Step 5: Review page, review the information and choose Create pipeline.
-
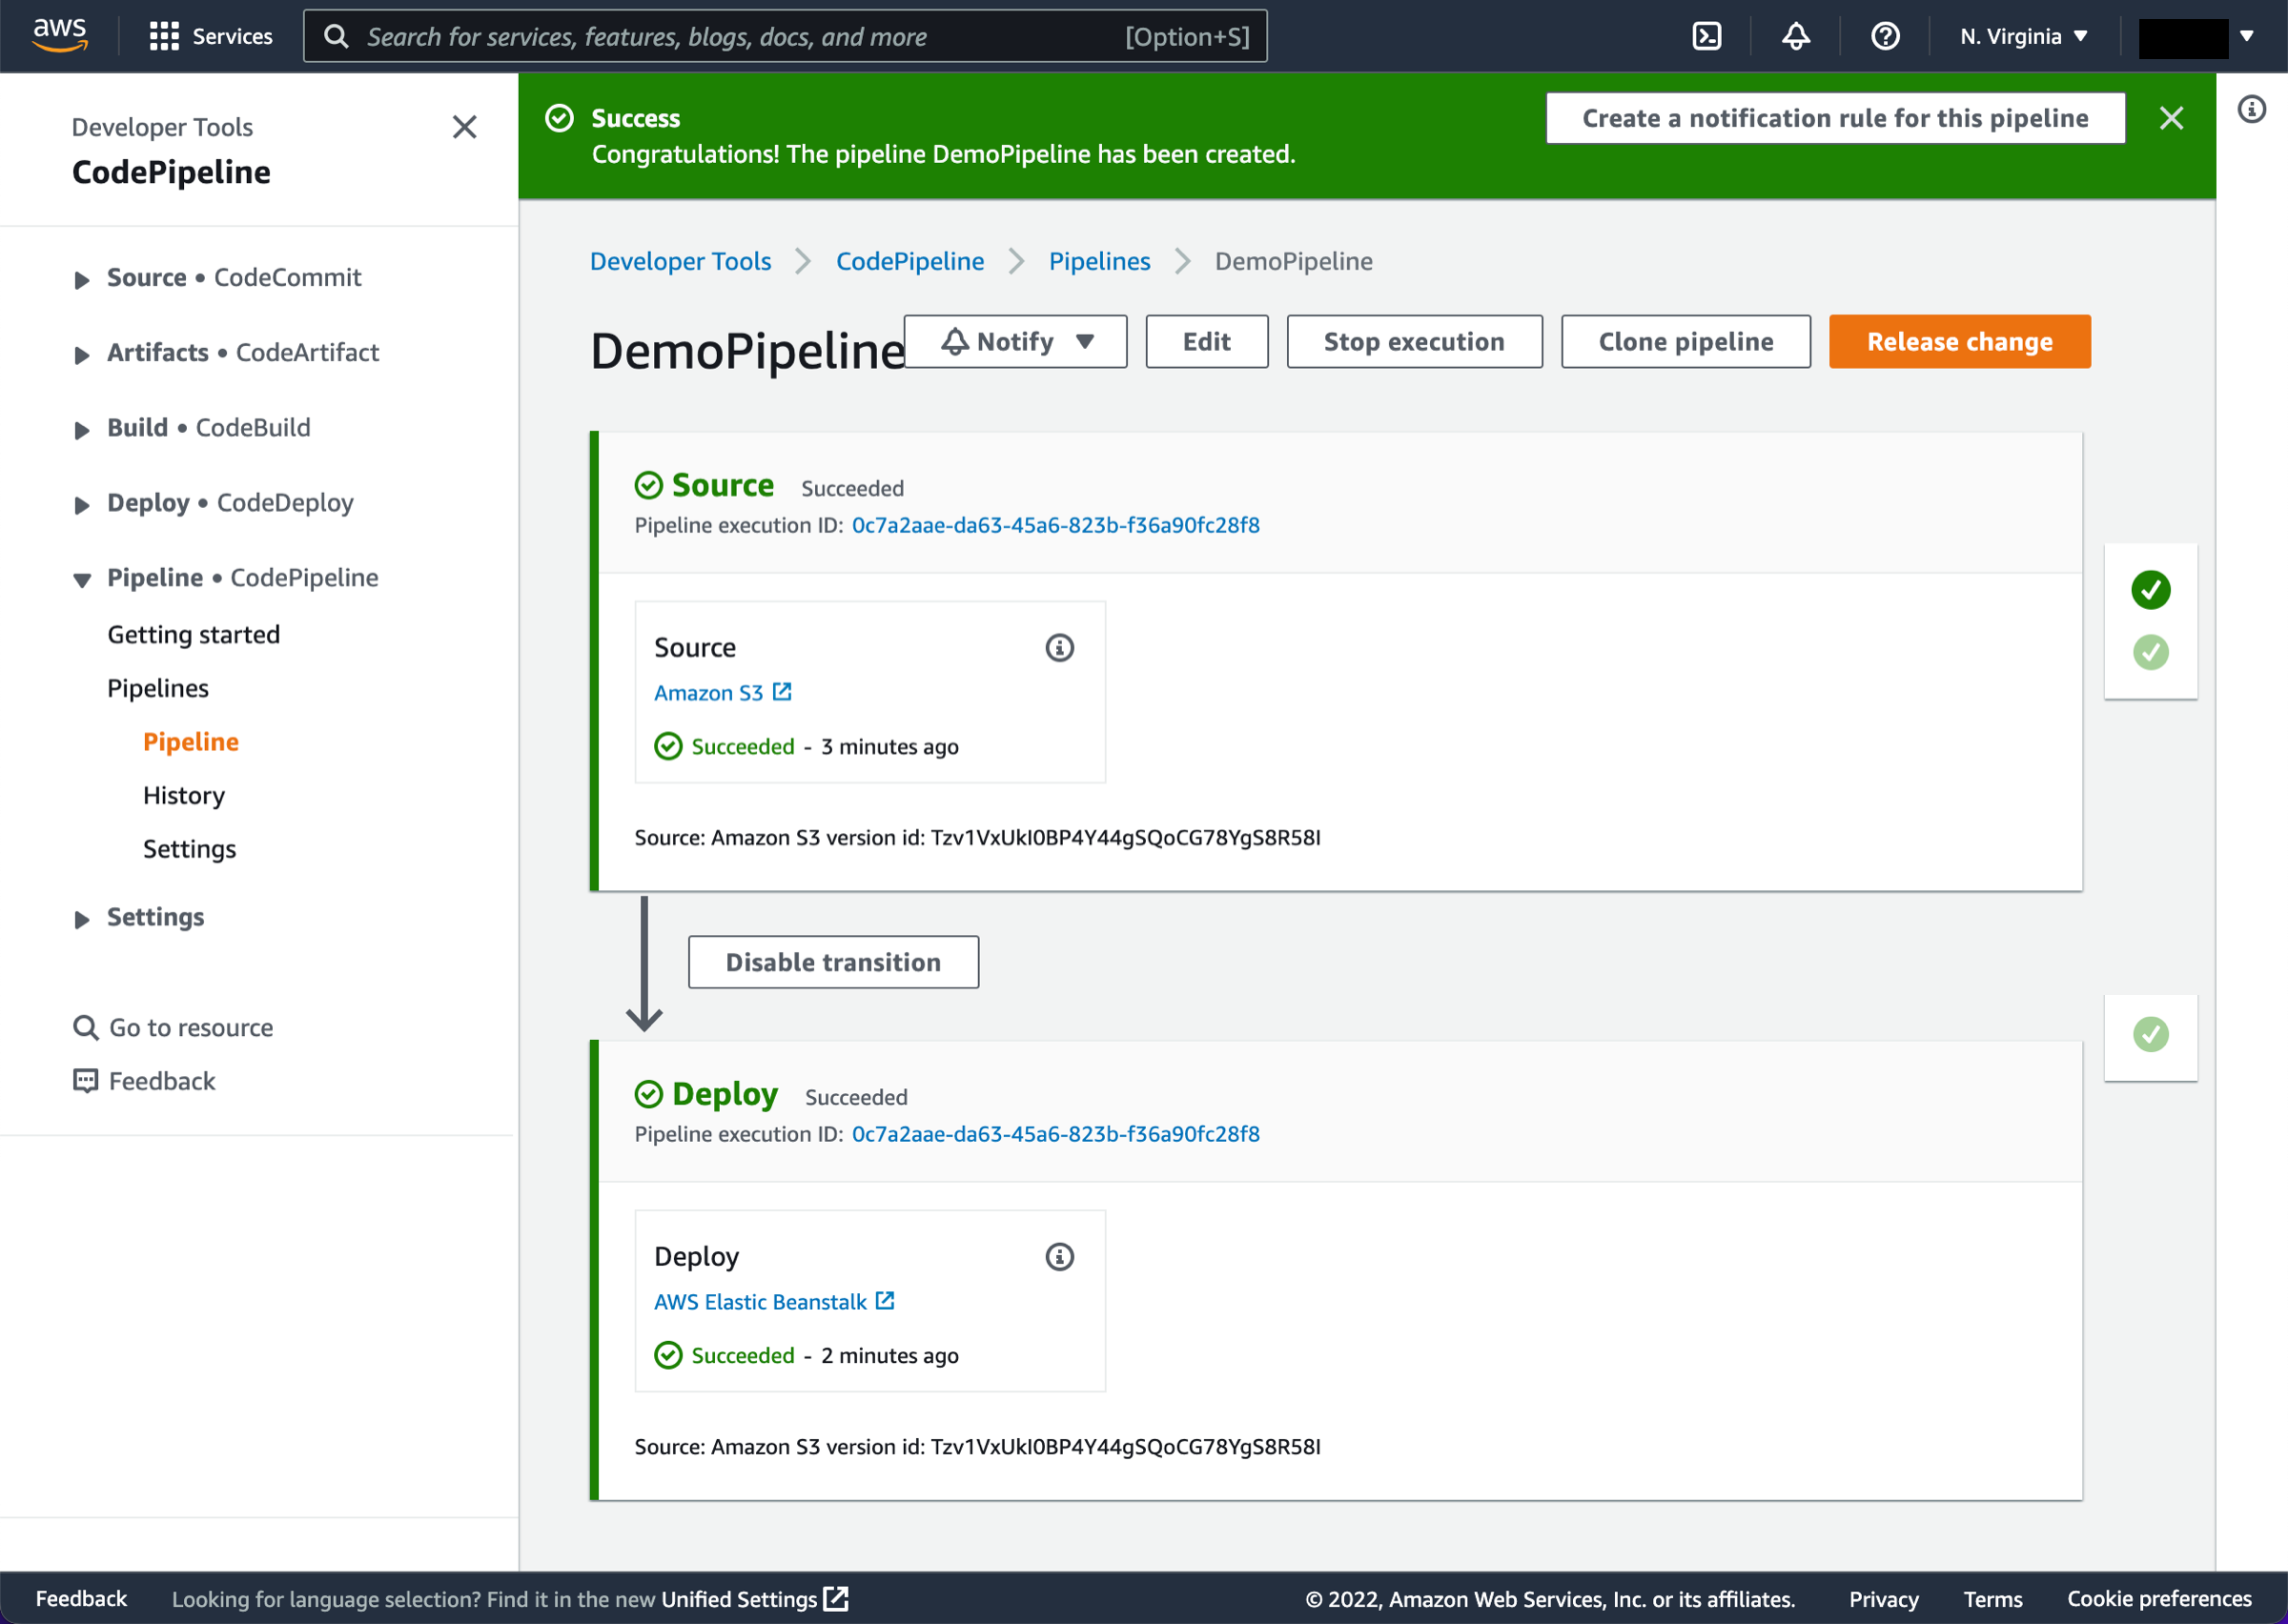
Monitor the pipeline status
After your pipeline is created, the pipeline status page appears and the pipeline automatically starts to run. You can view progress as well as success and failure messages as the pipeline performs each action.
To verify your pipeline ran successfully, monitor the progress of the pipeline as it moves through each stage. The status of each stage will change from No executions yet to In progress, and then to either Succeeded or Failed. The pipeline should complete the first run within a few minutes.
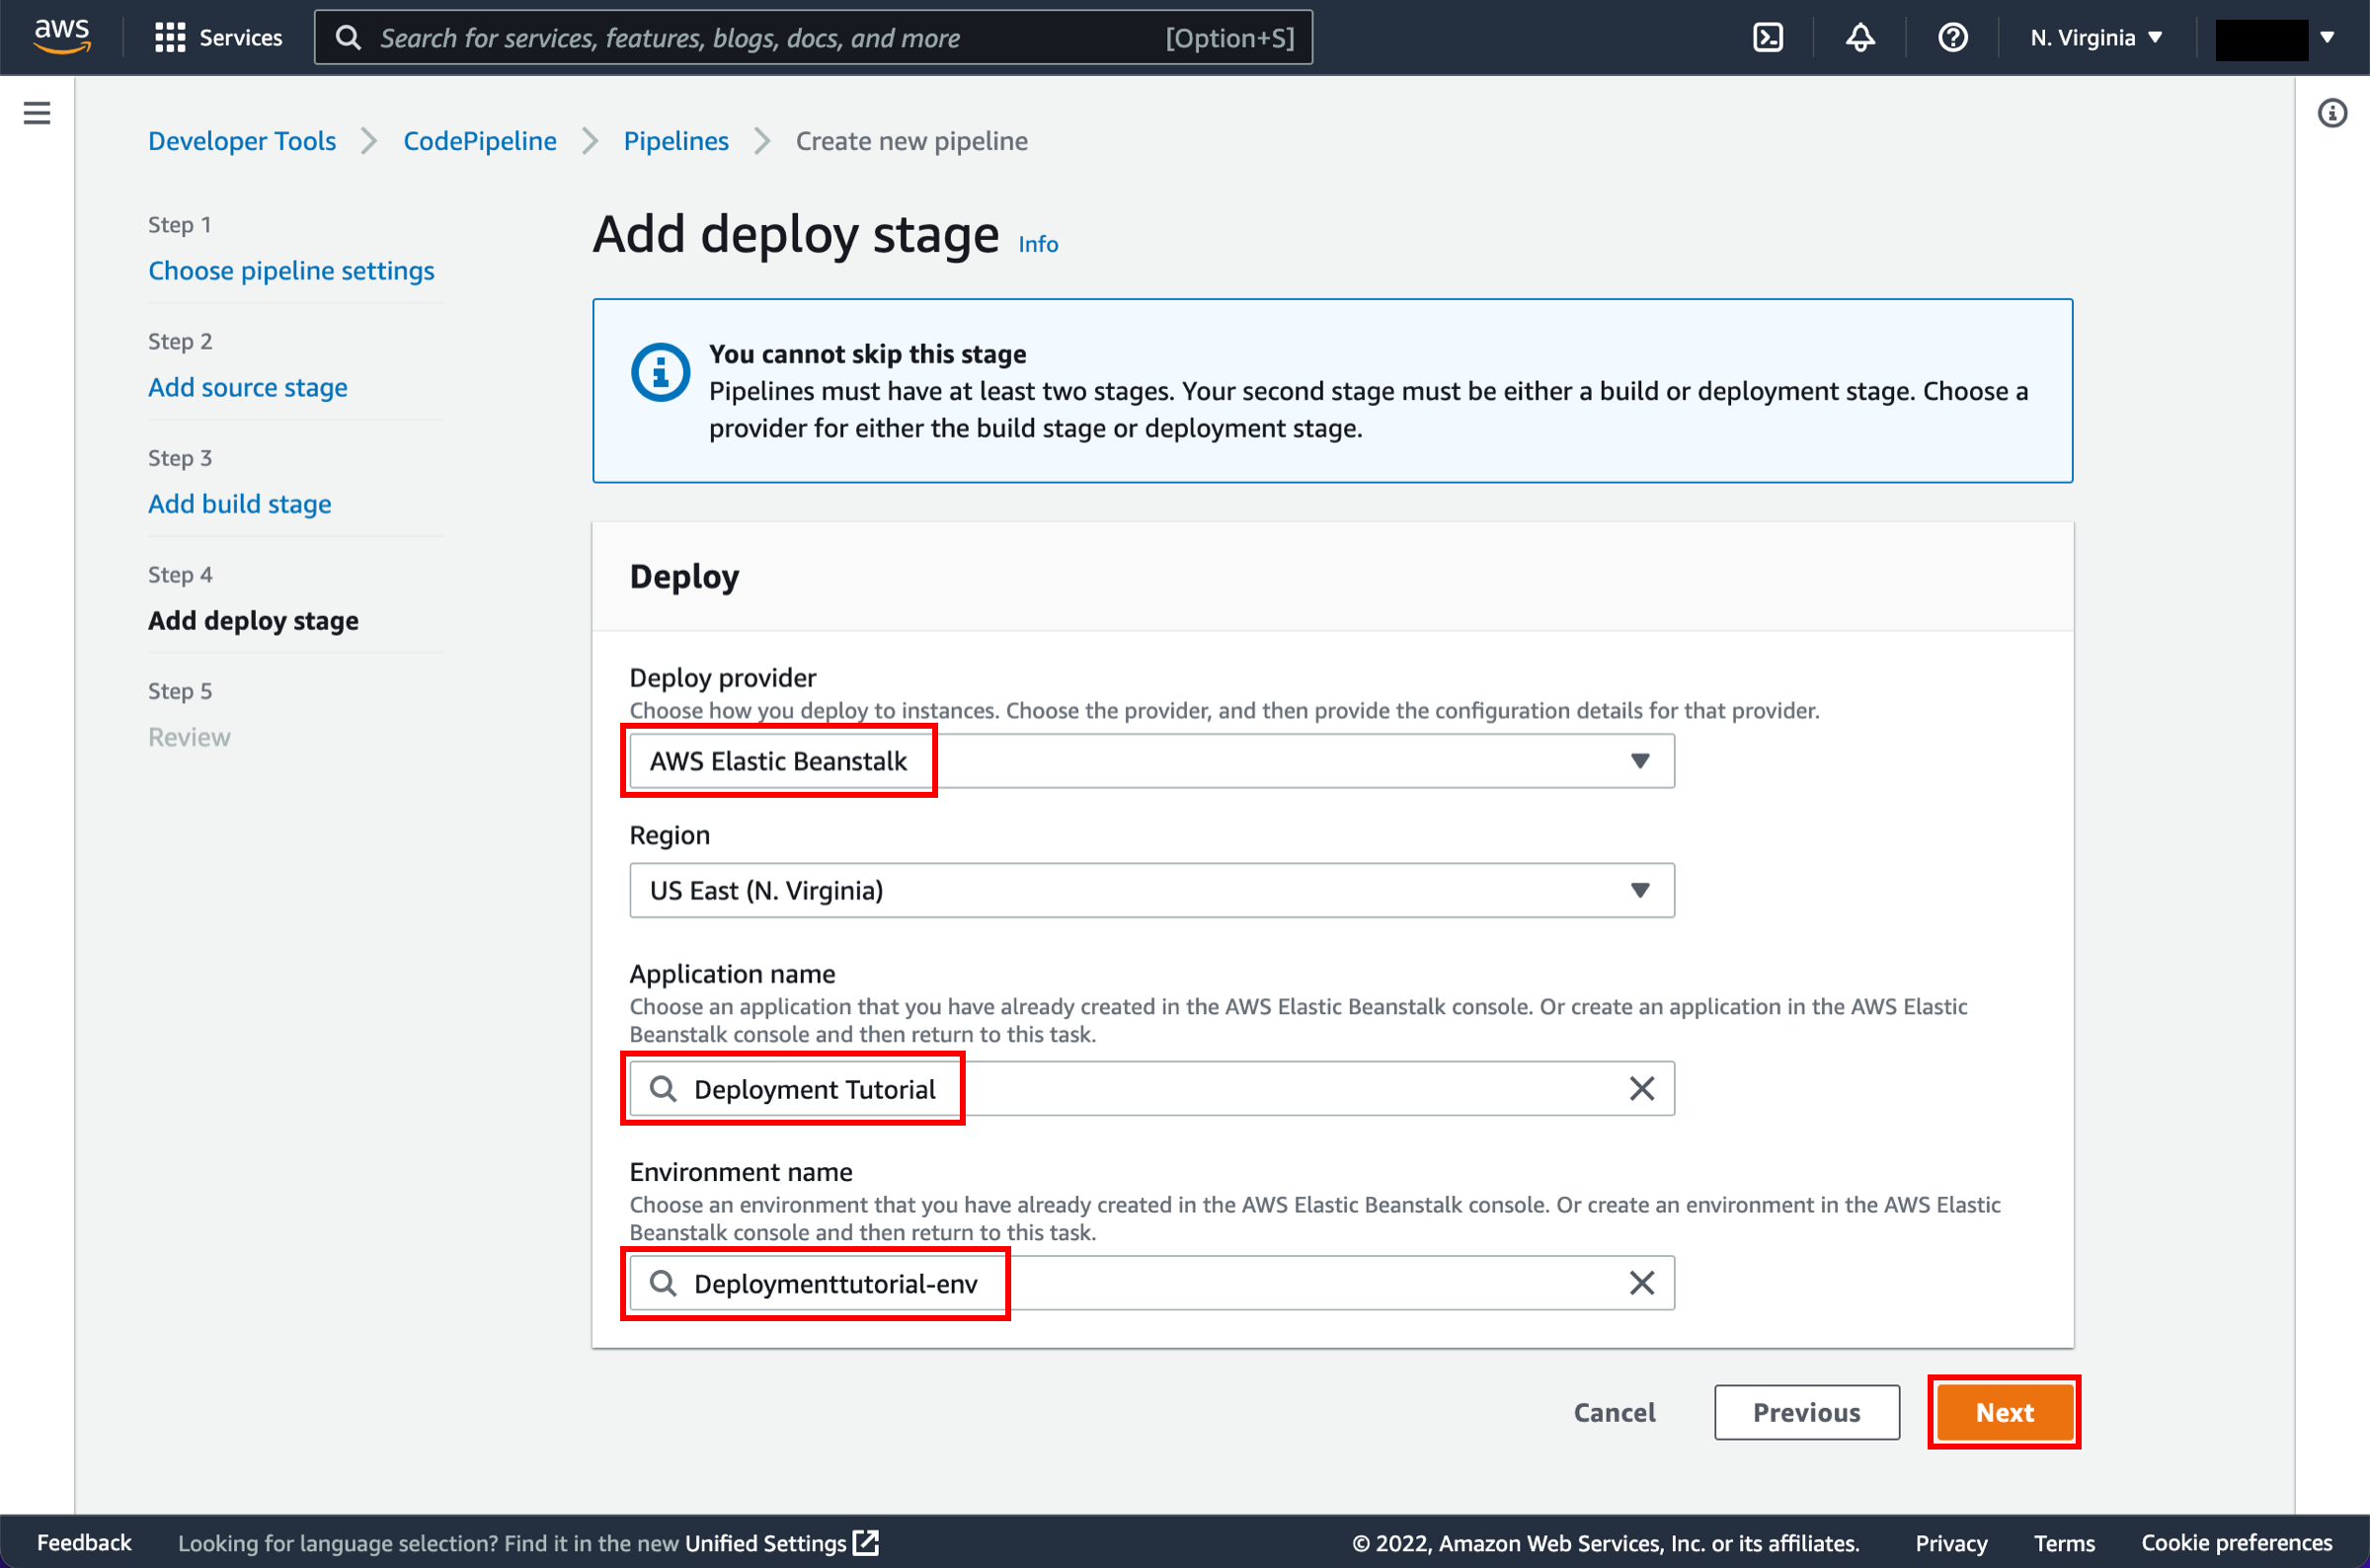
-
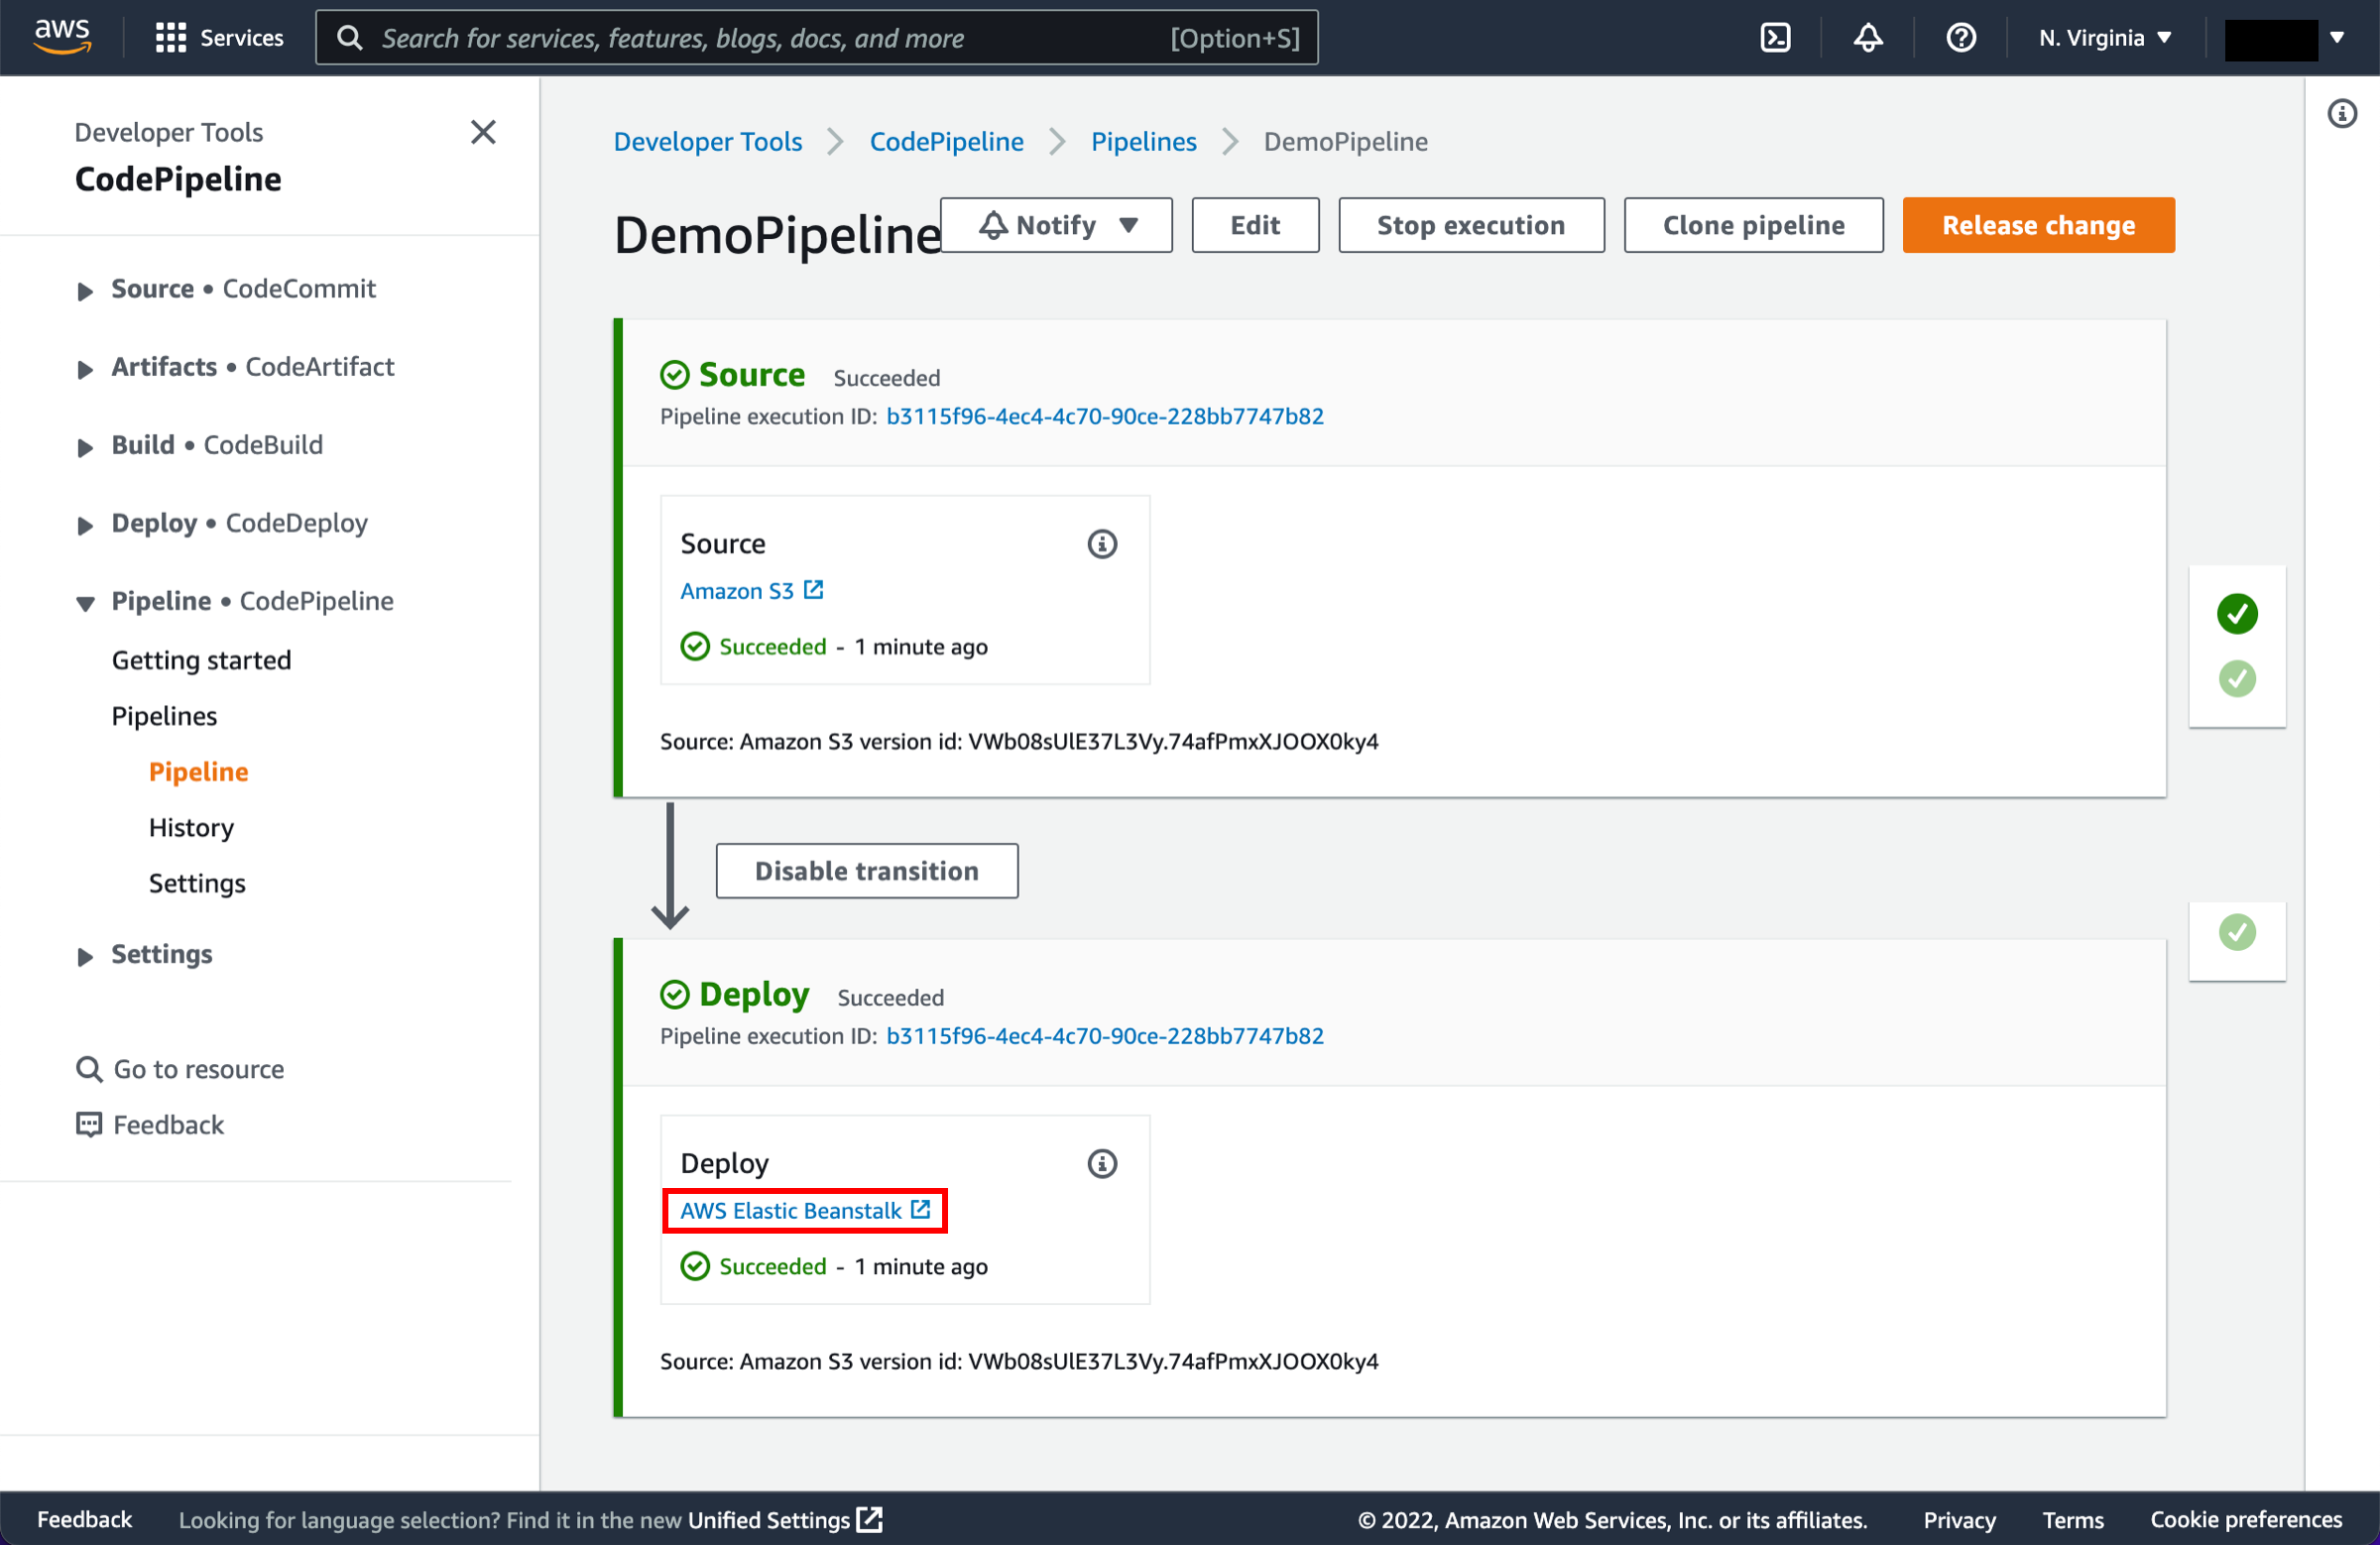
Select Elastic Beanstalk
In the status area for the Beta stage, select AWS Elastic Beanstalk.
-
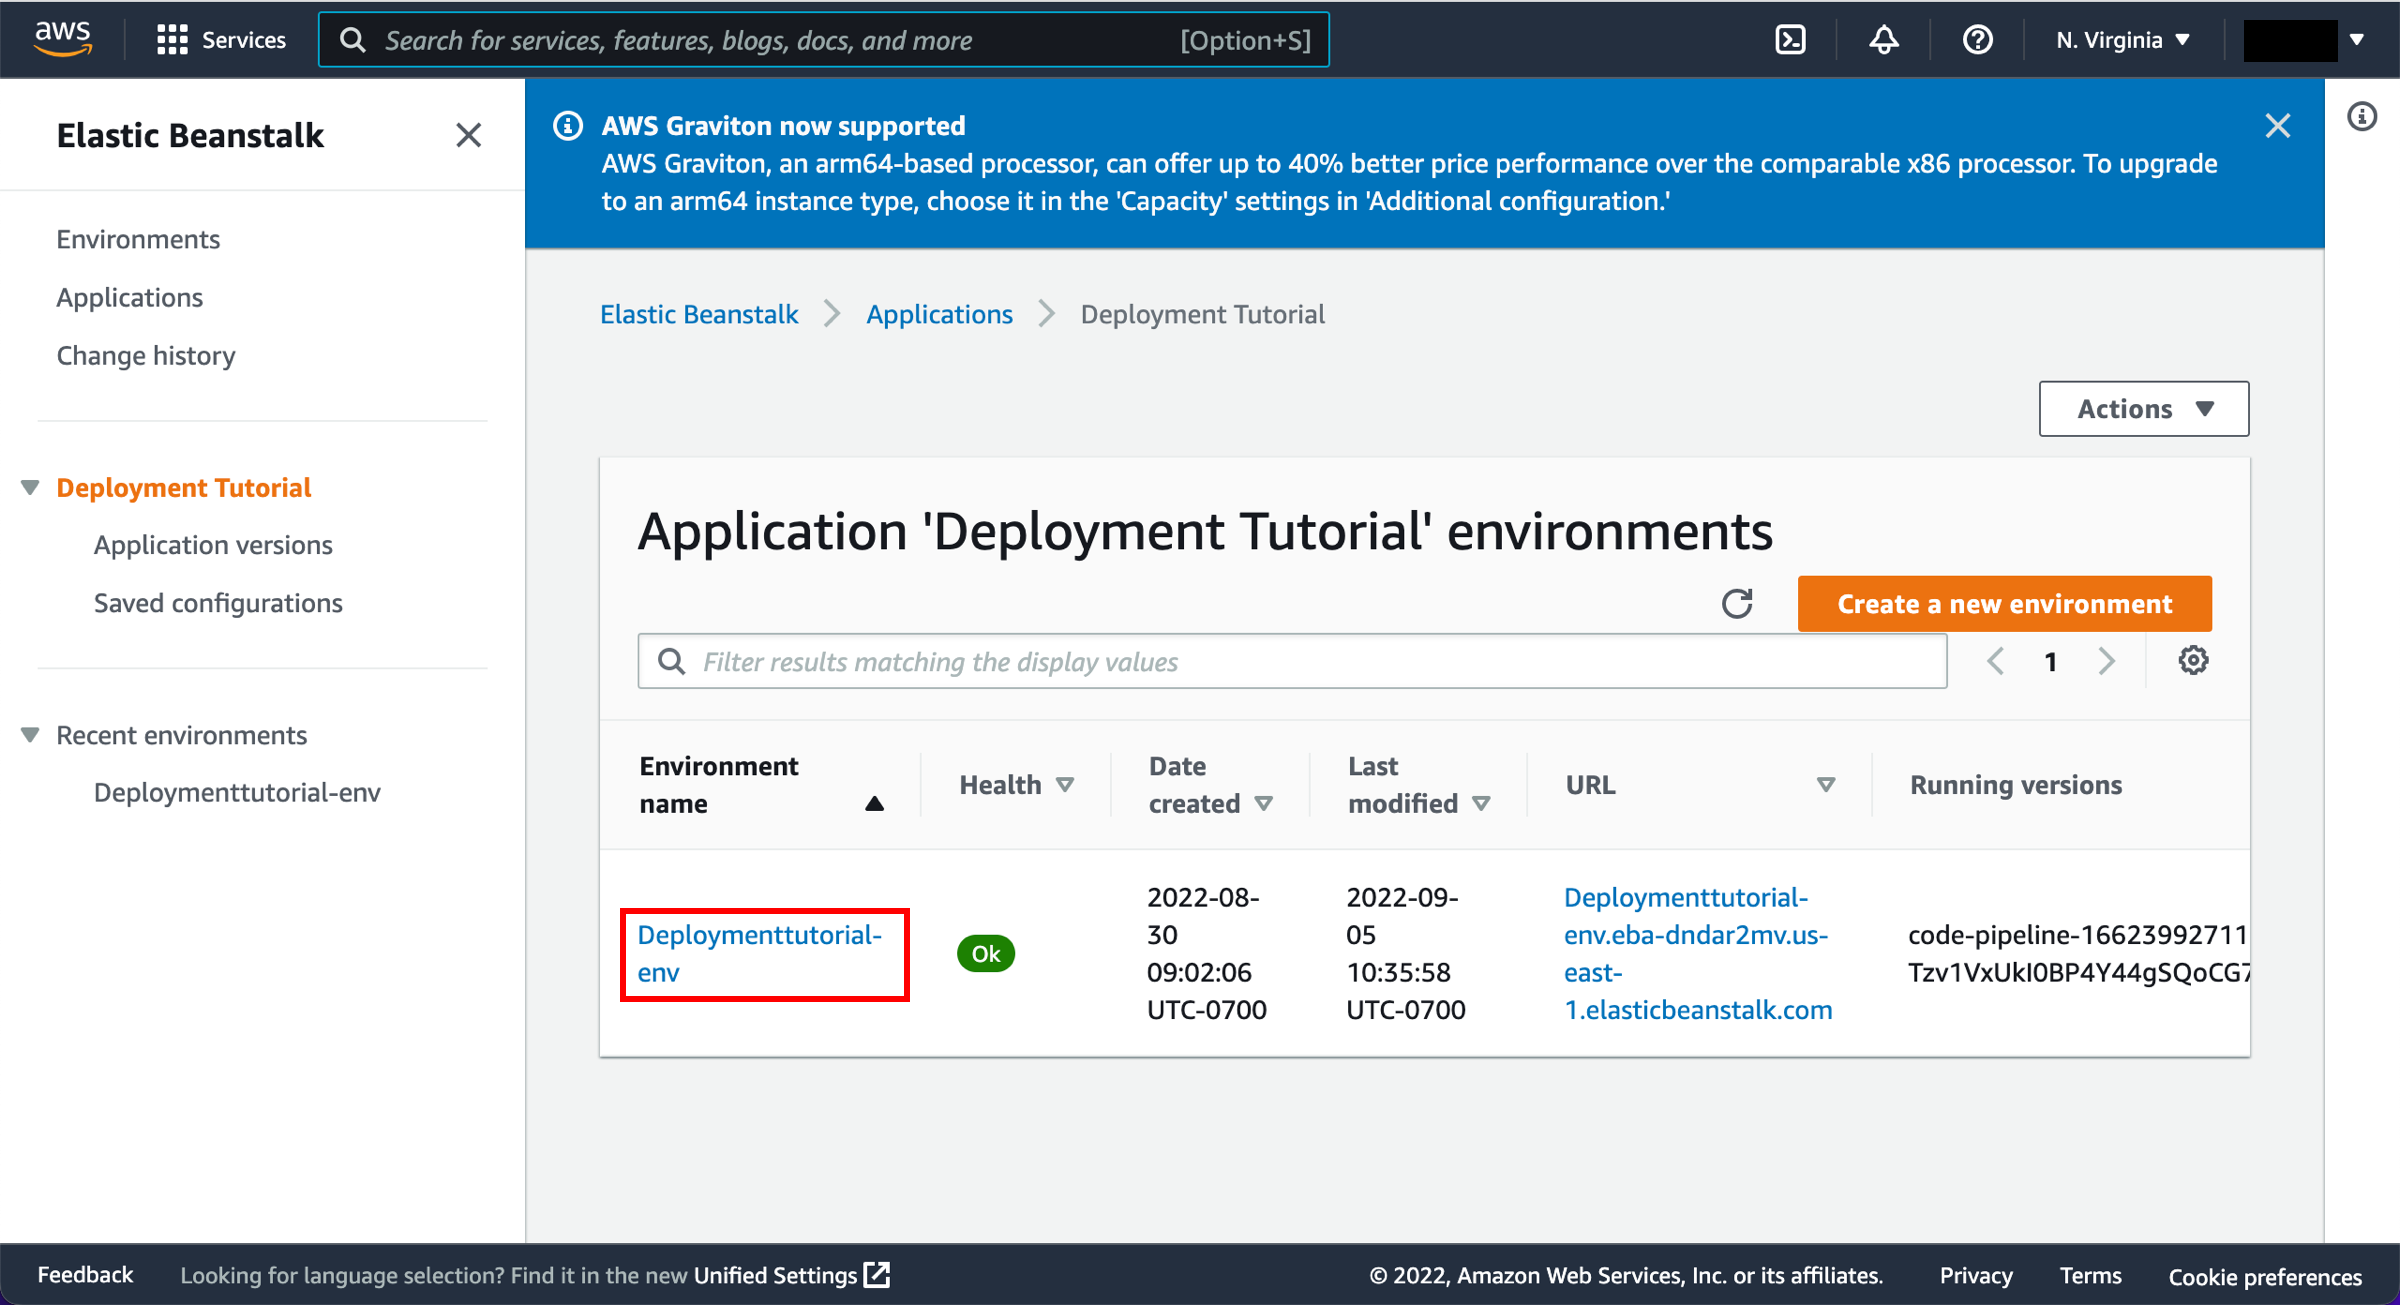
Select the environment
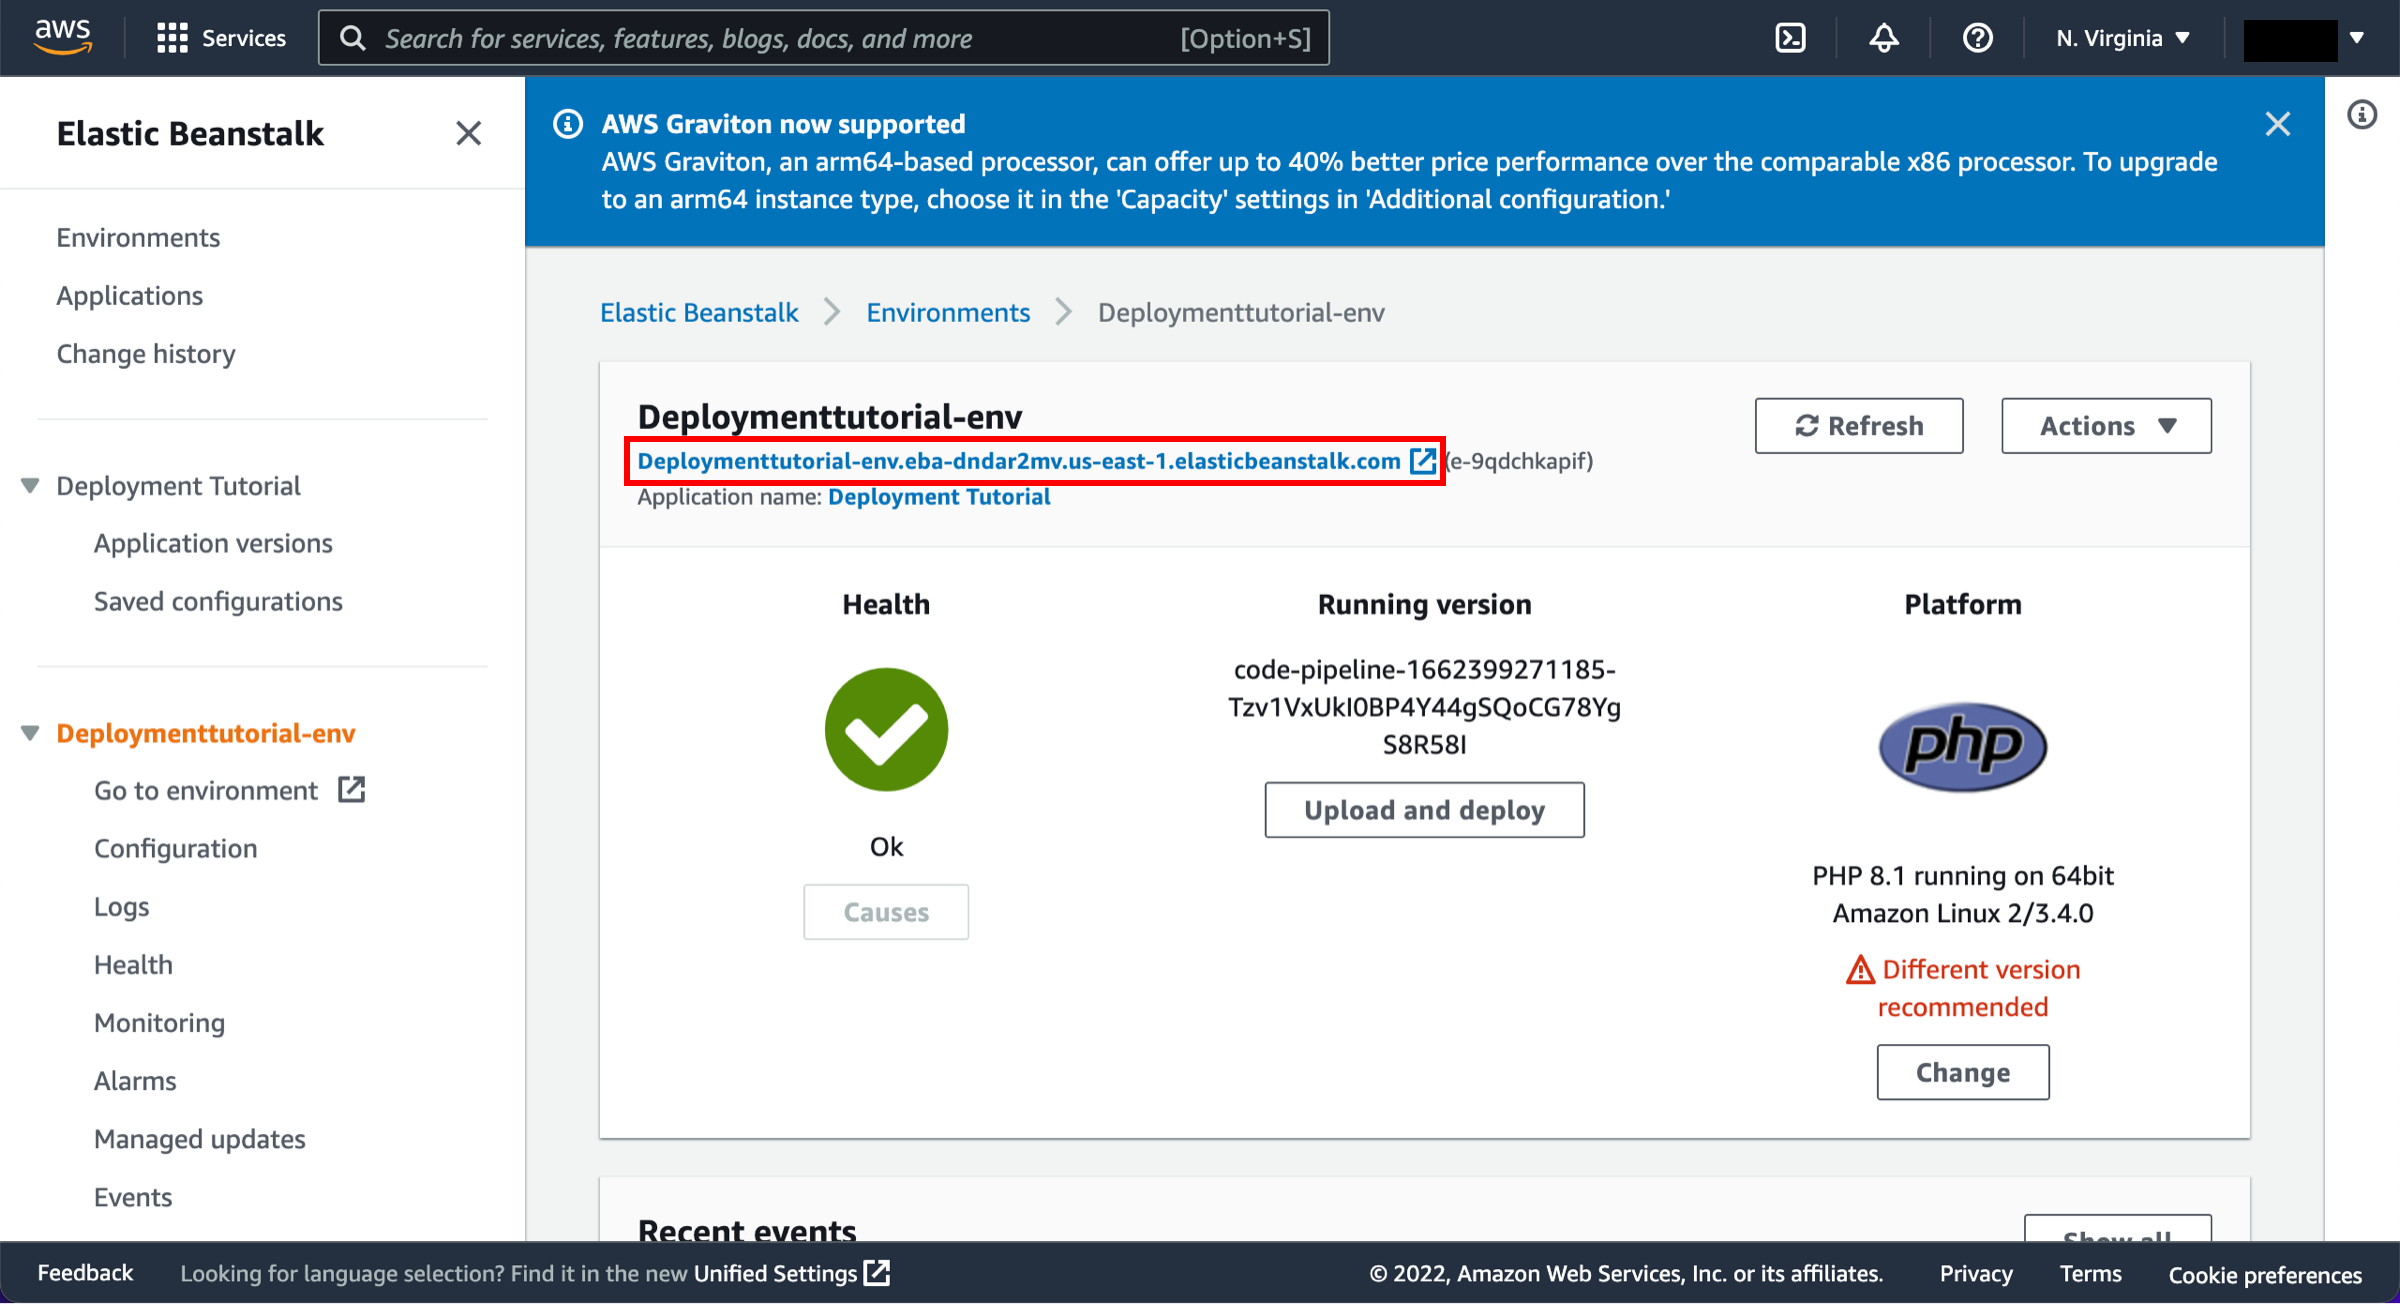
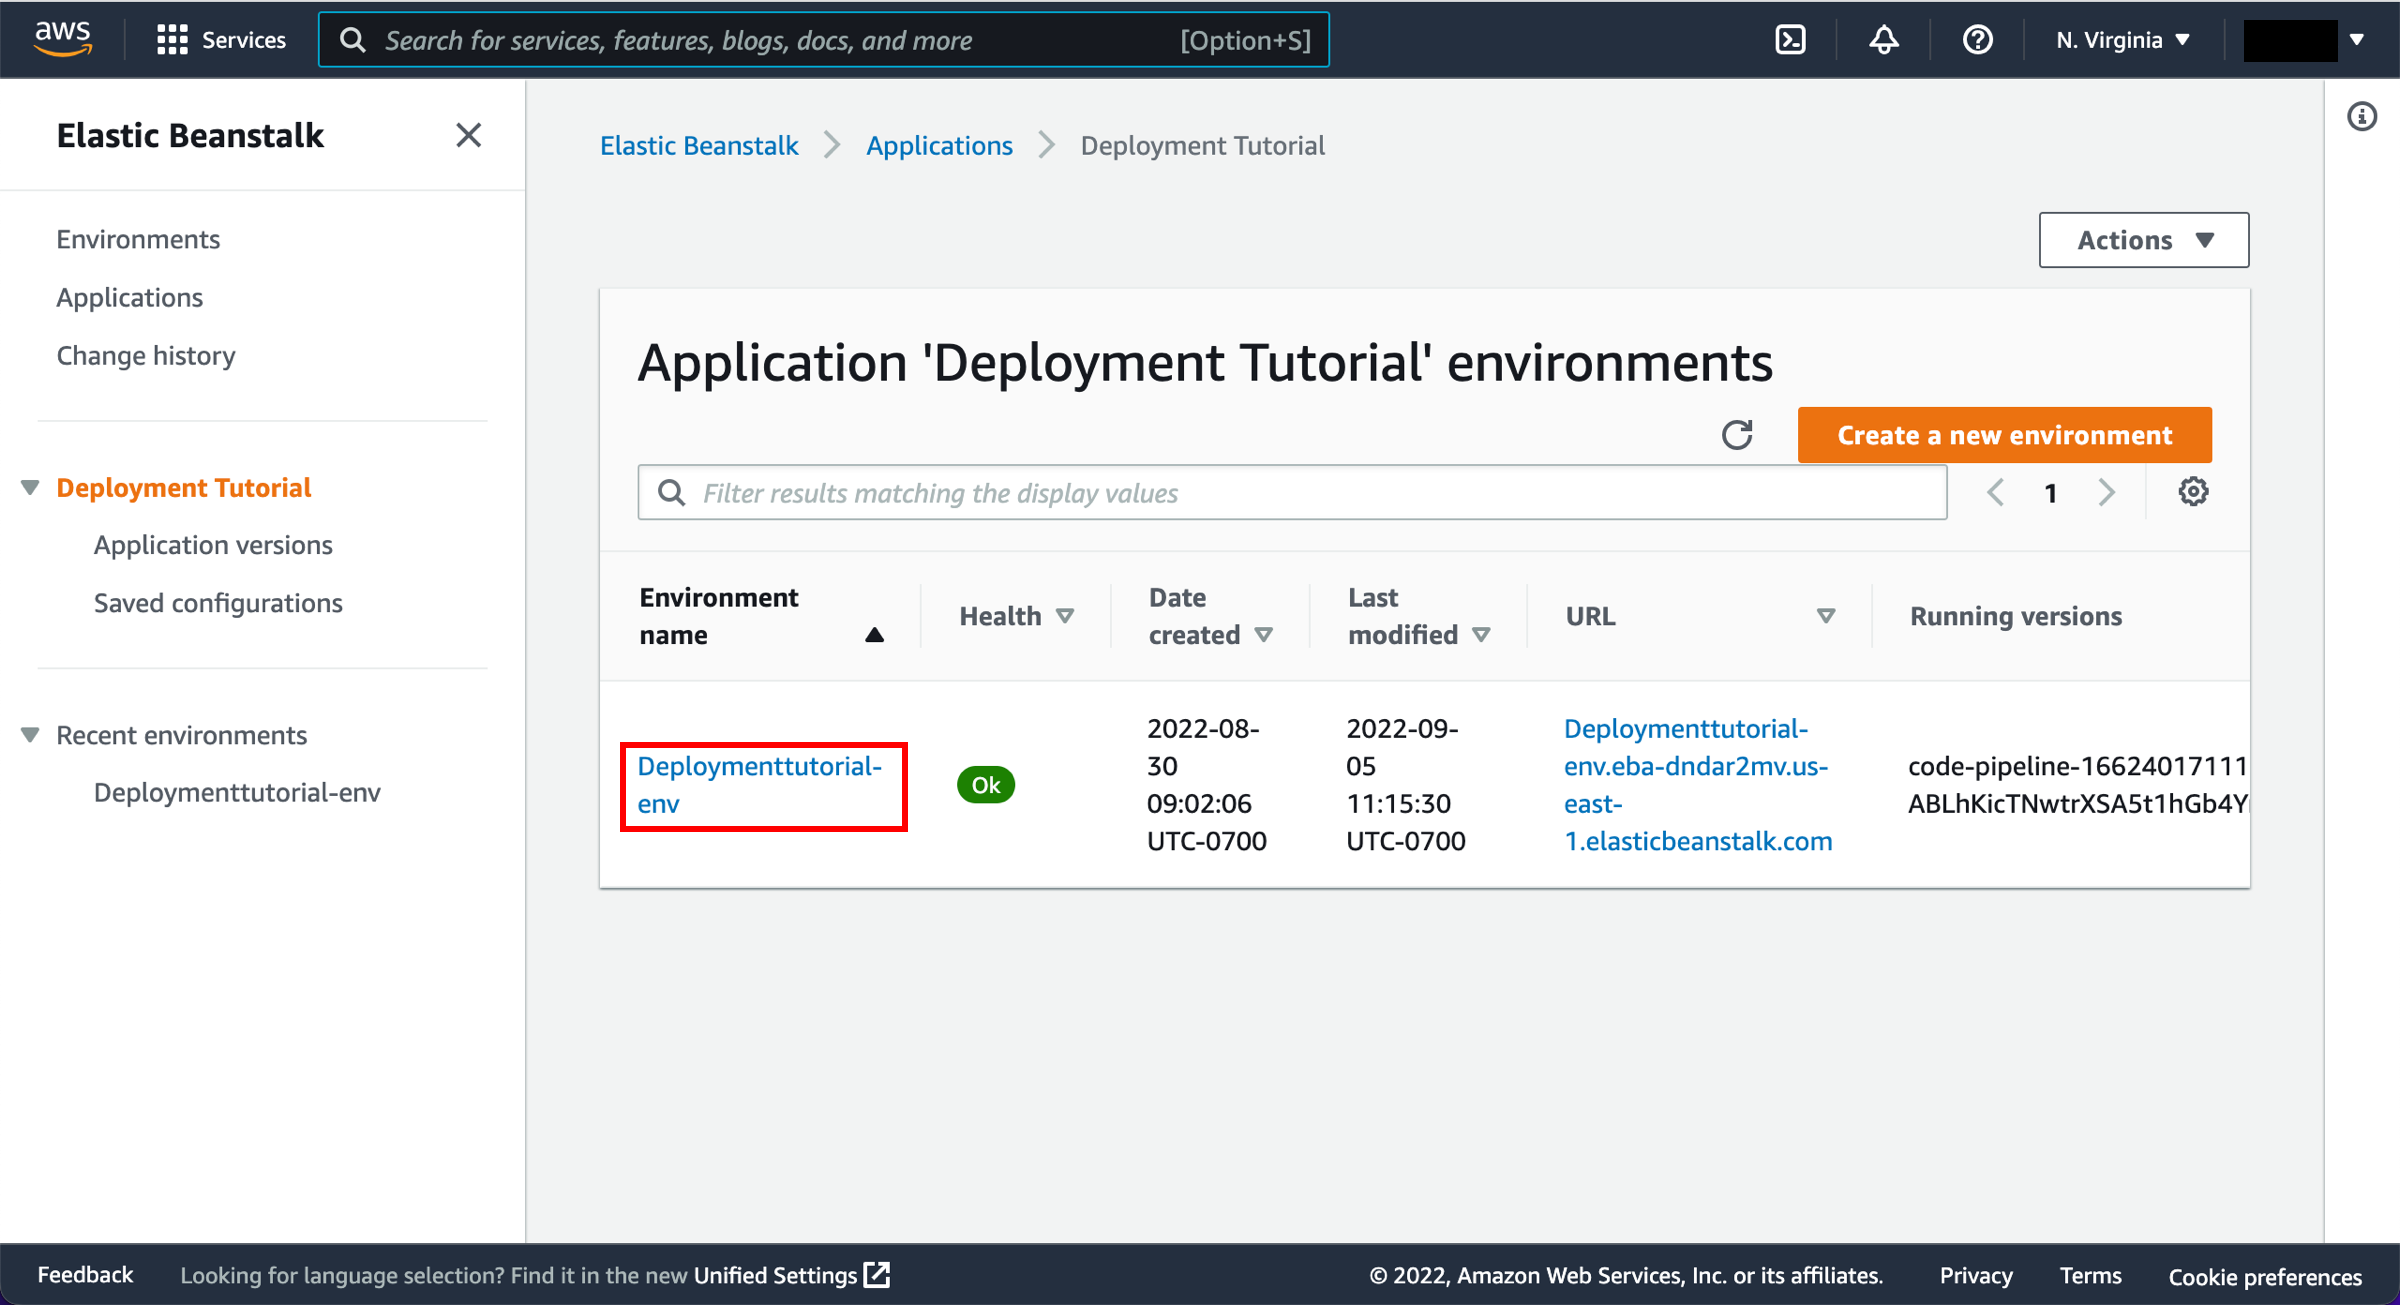
The AWS Elastic Beanstalk console opens with the details of the deployment.
Select the environment you created earlier, called Default-Environment Deploymenttutorial-env.
-
Select the URL of the sample website
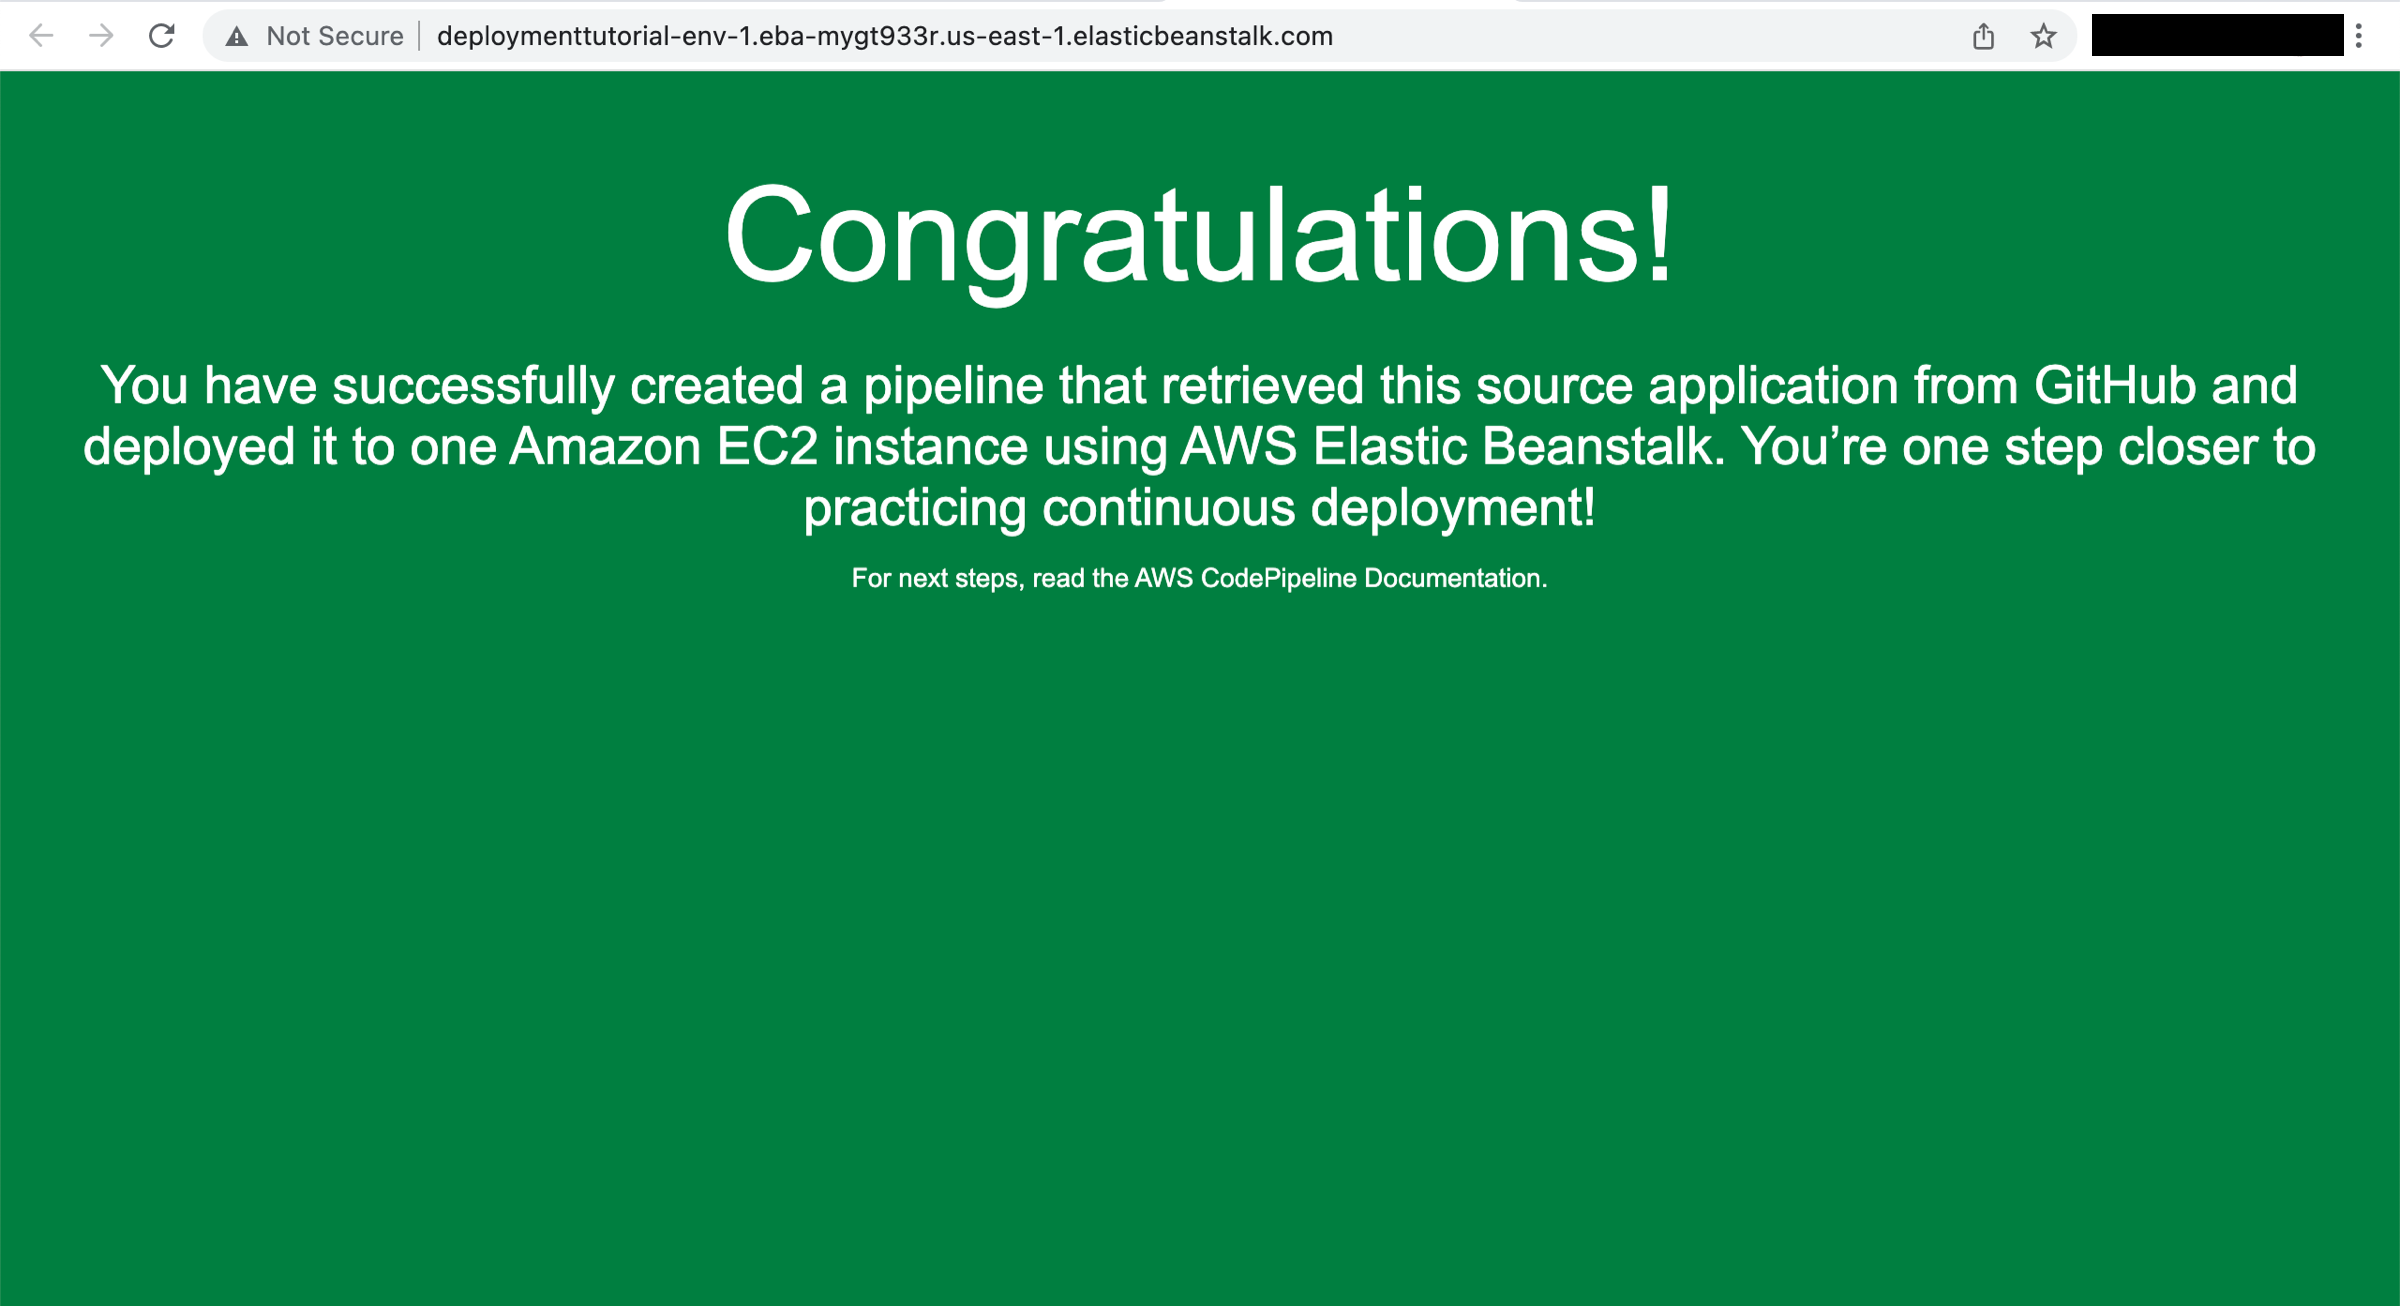
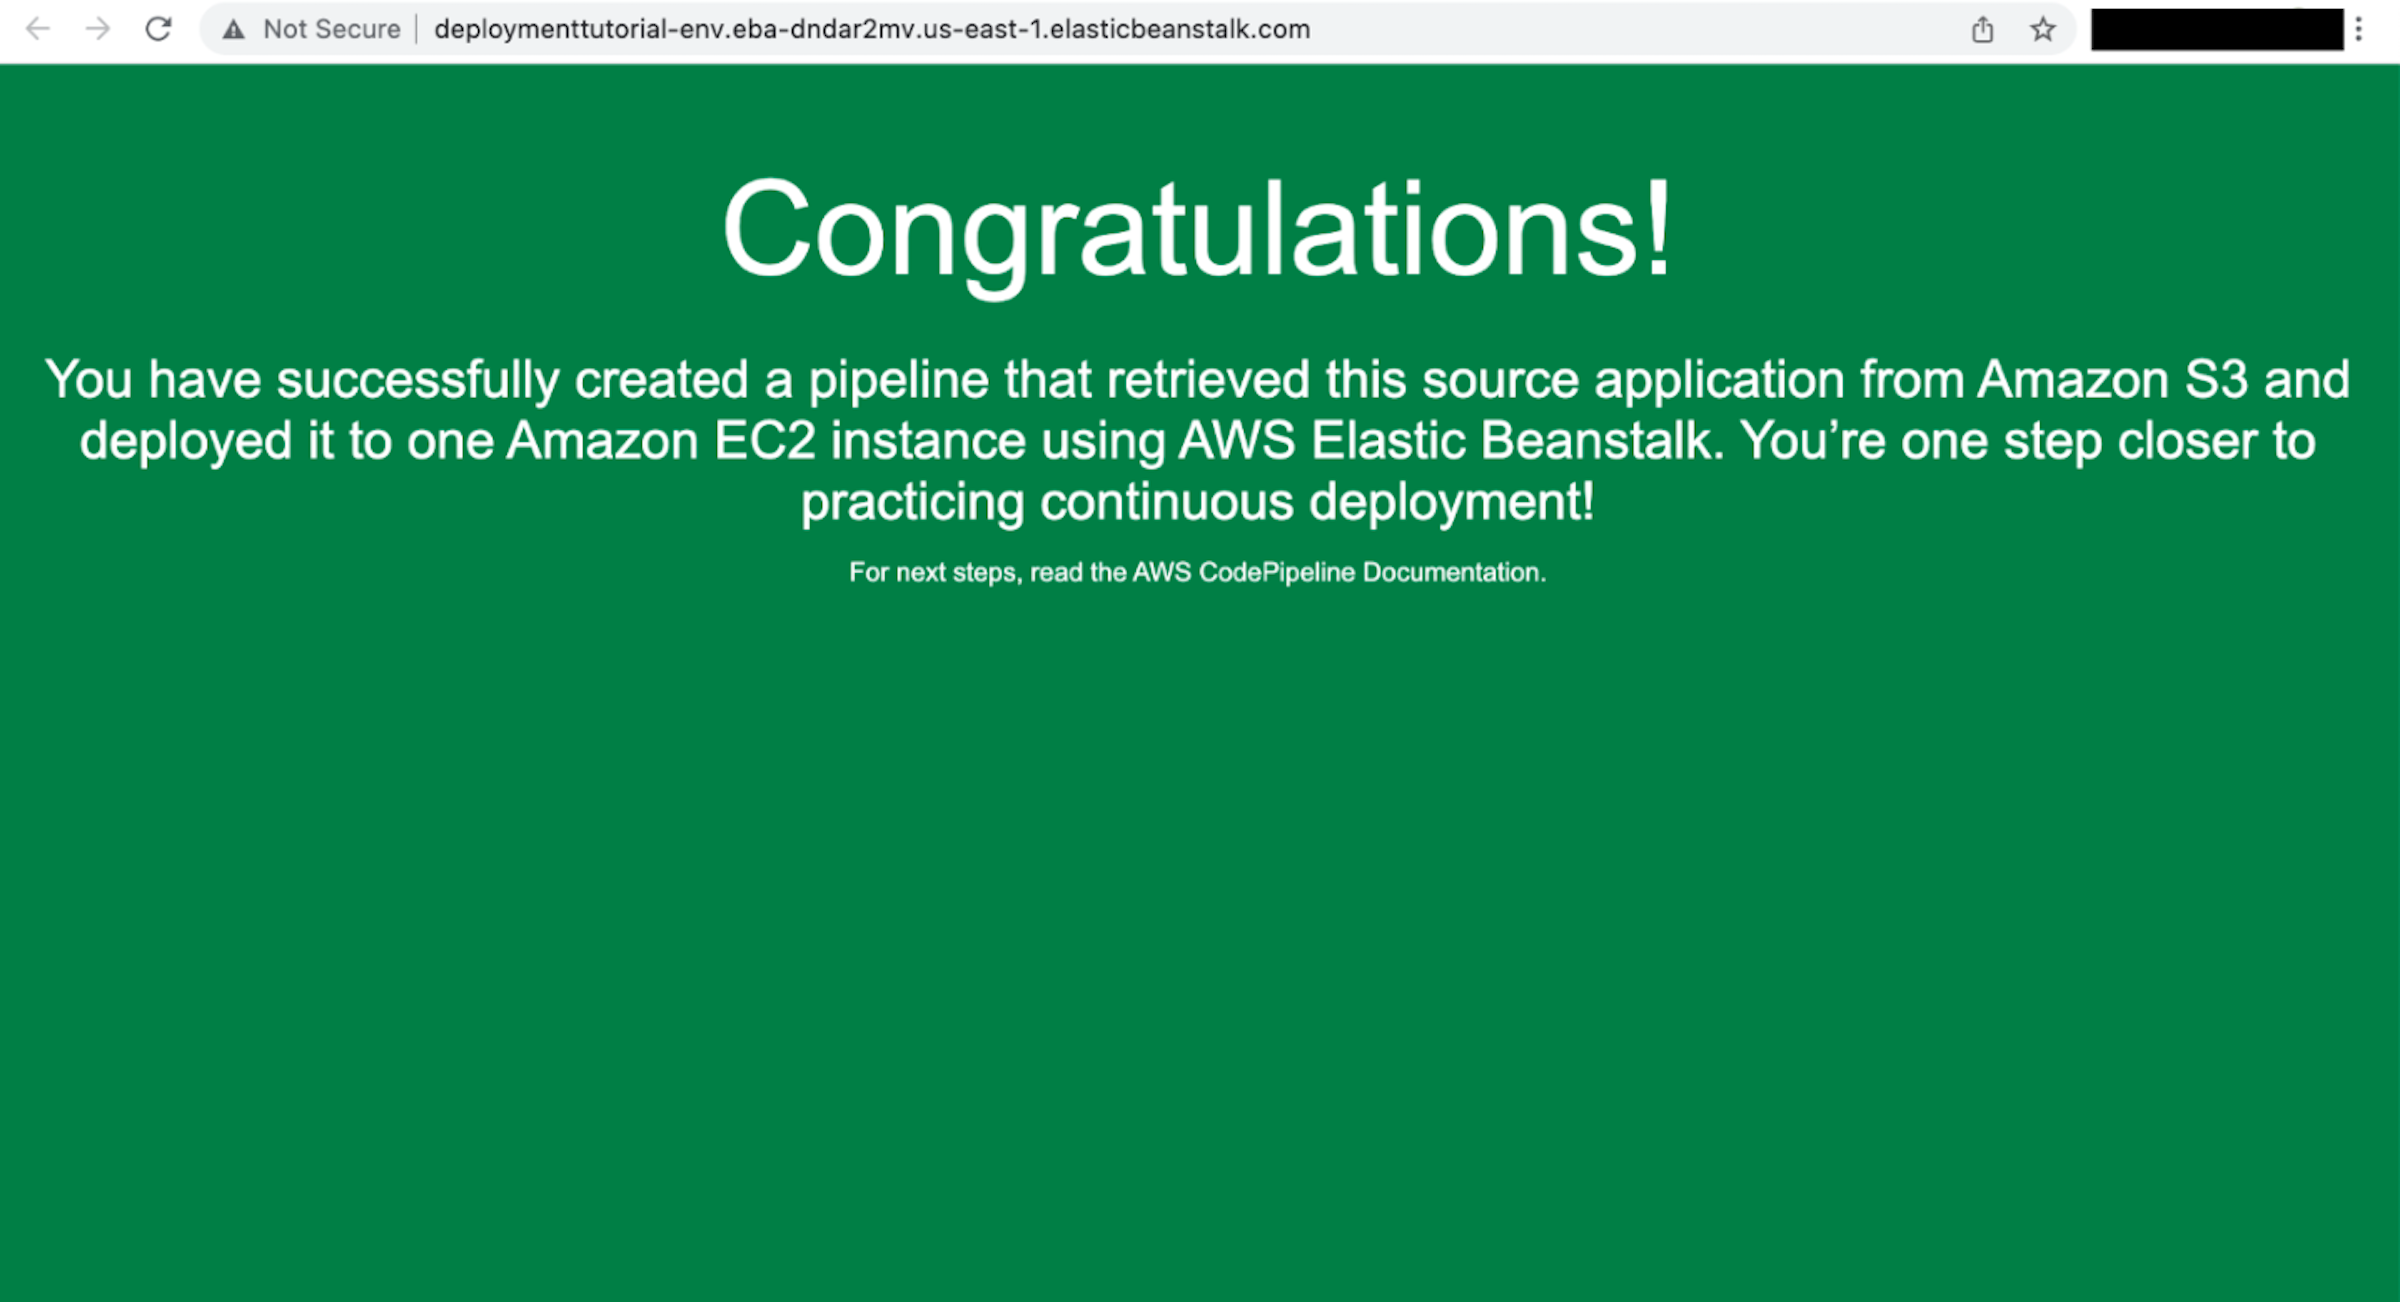
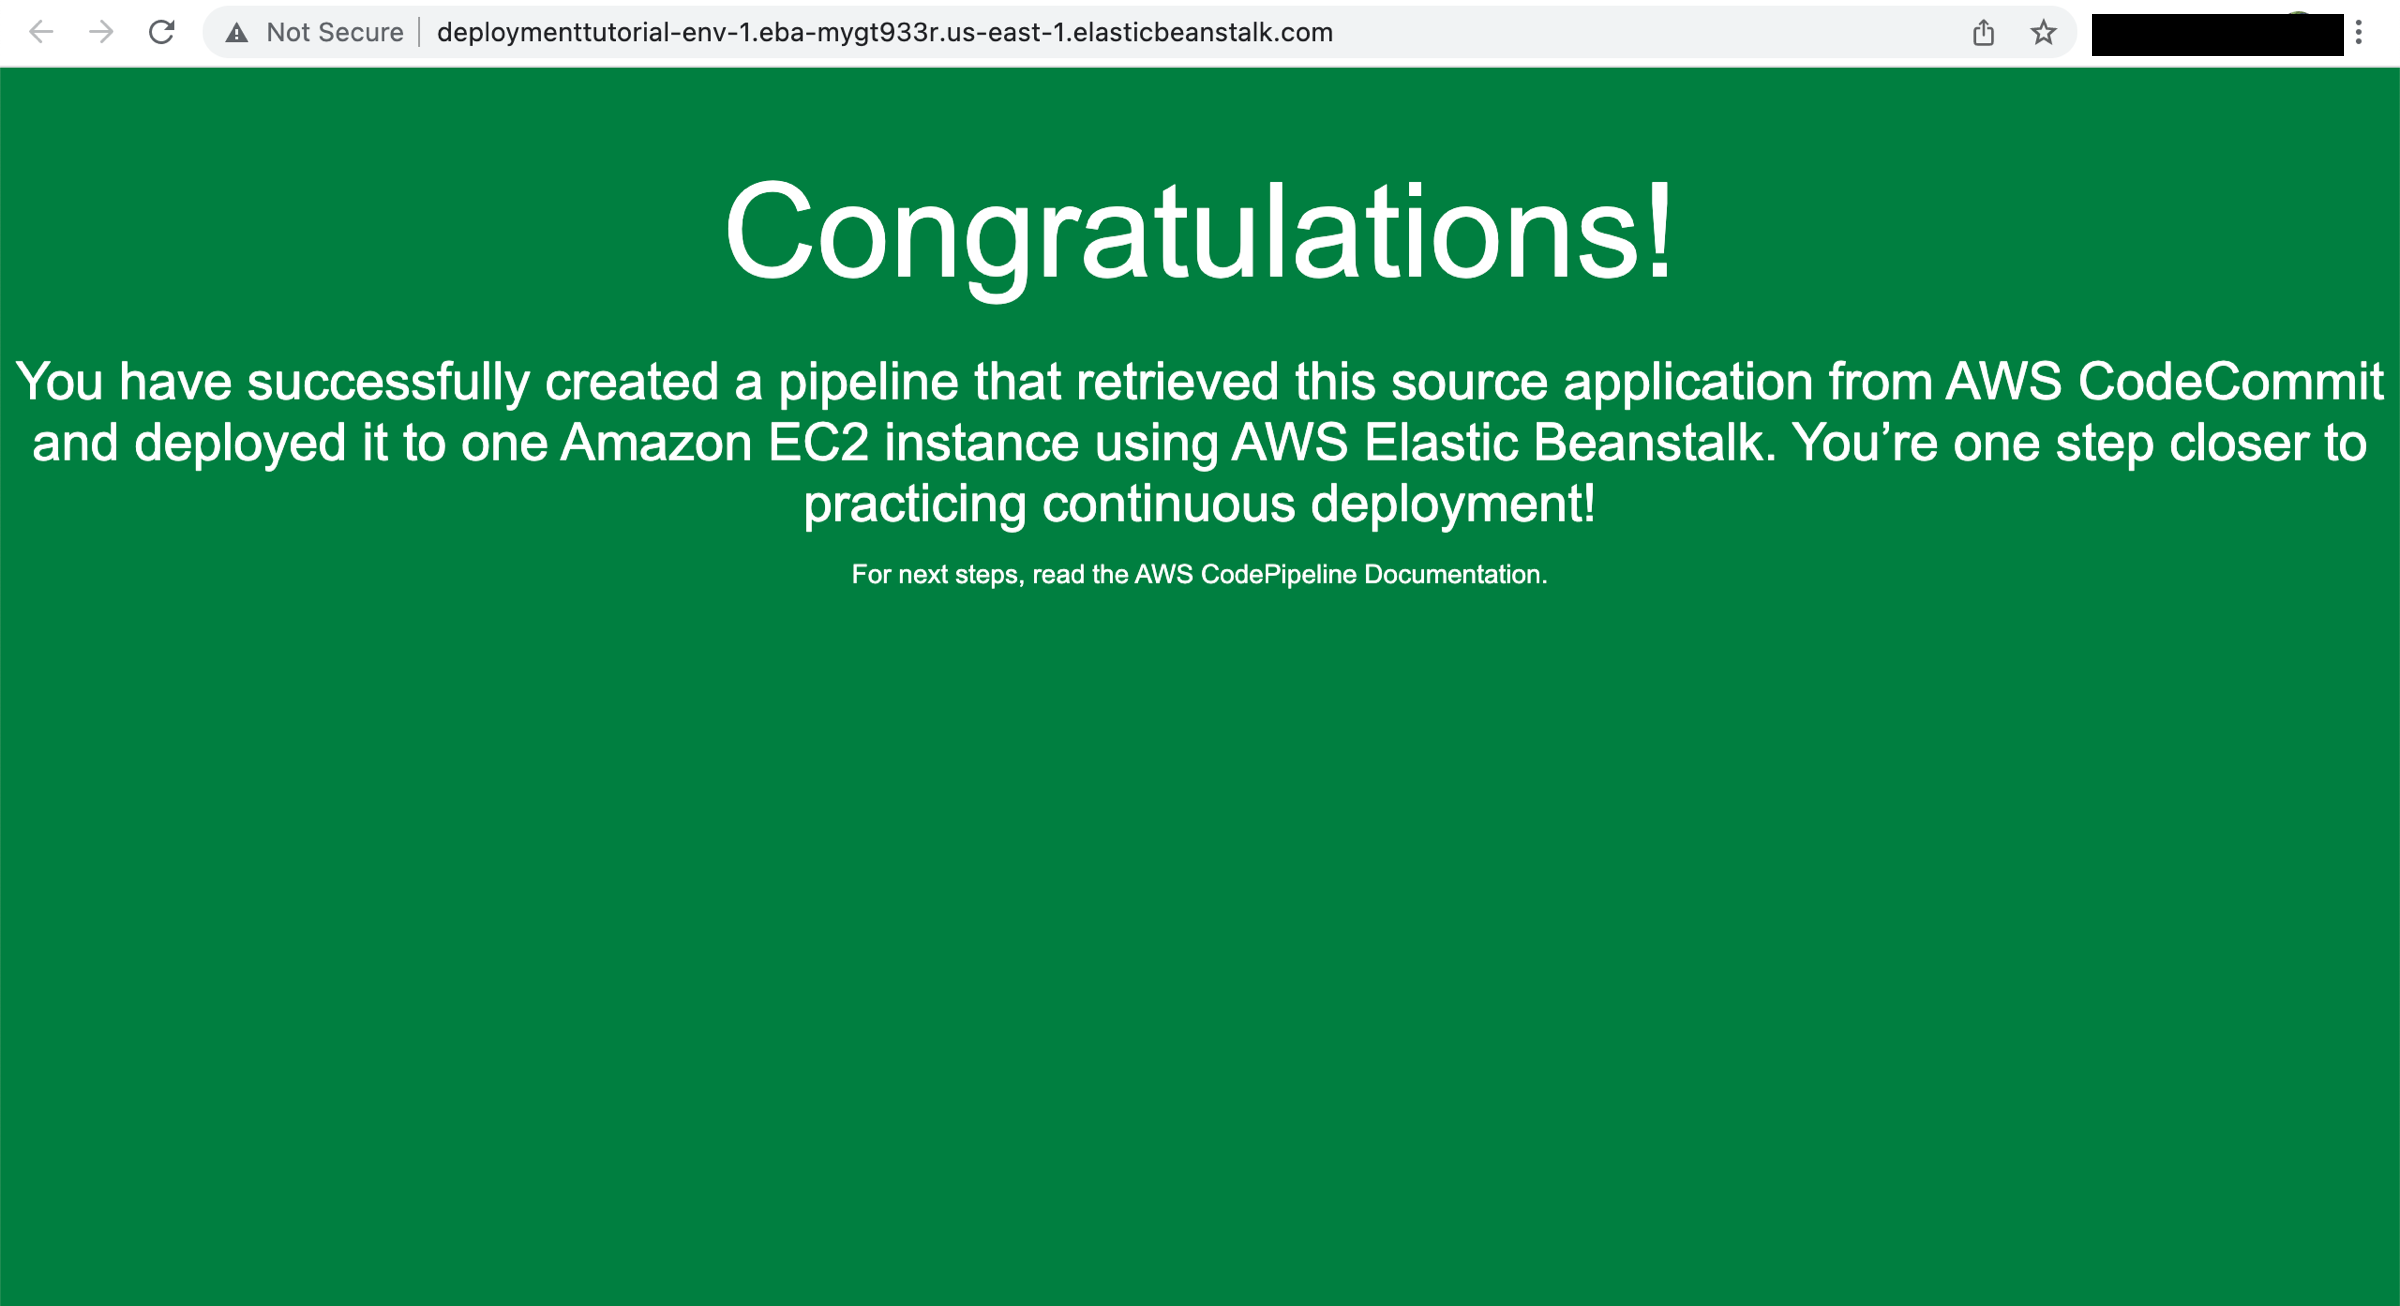
Select the URL to view the sample website you deployed.
A webpage with a congratulations message indicating you successfully created a pipeline from your source to Amazon EC2 will open.
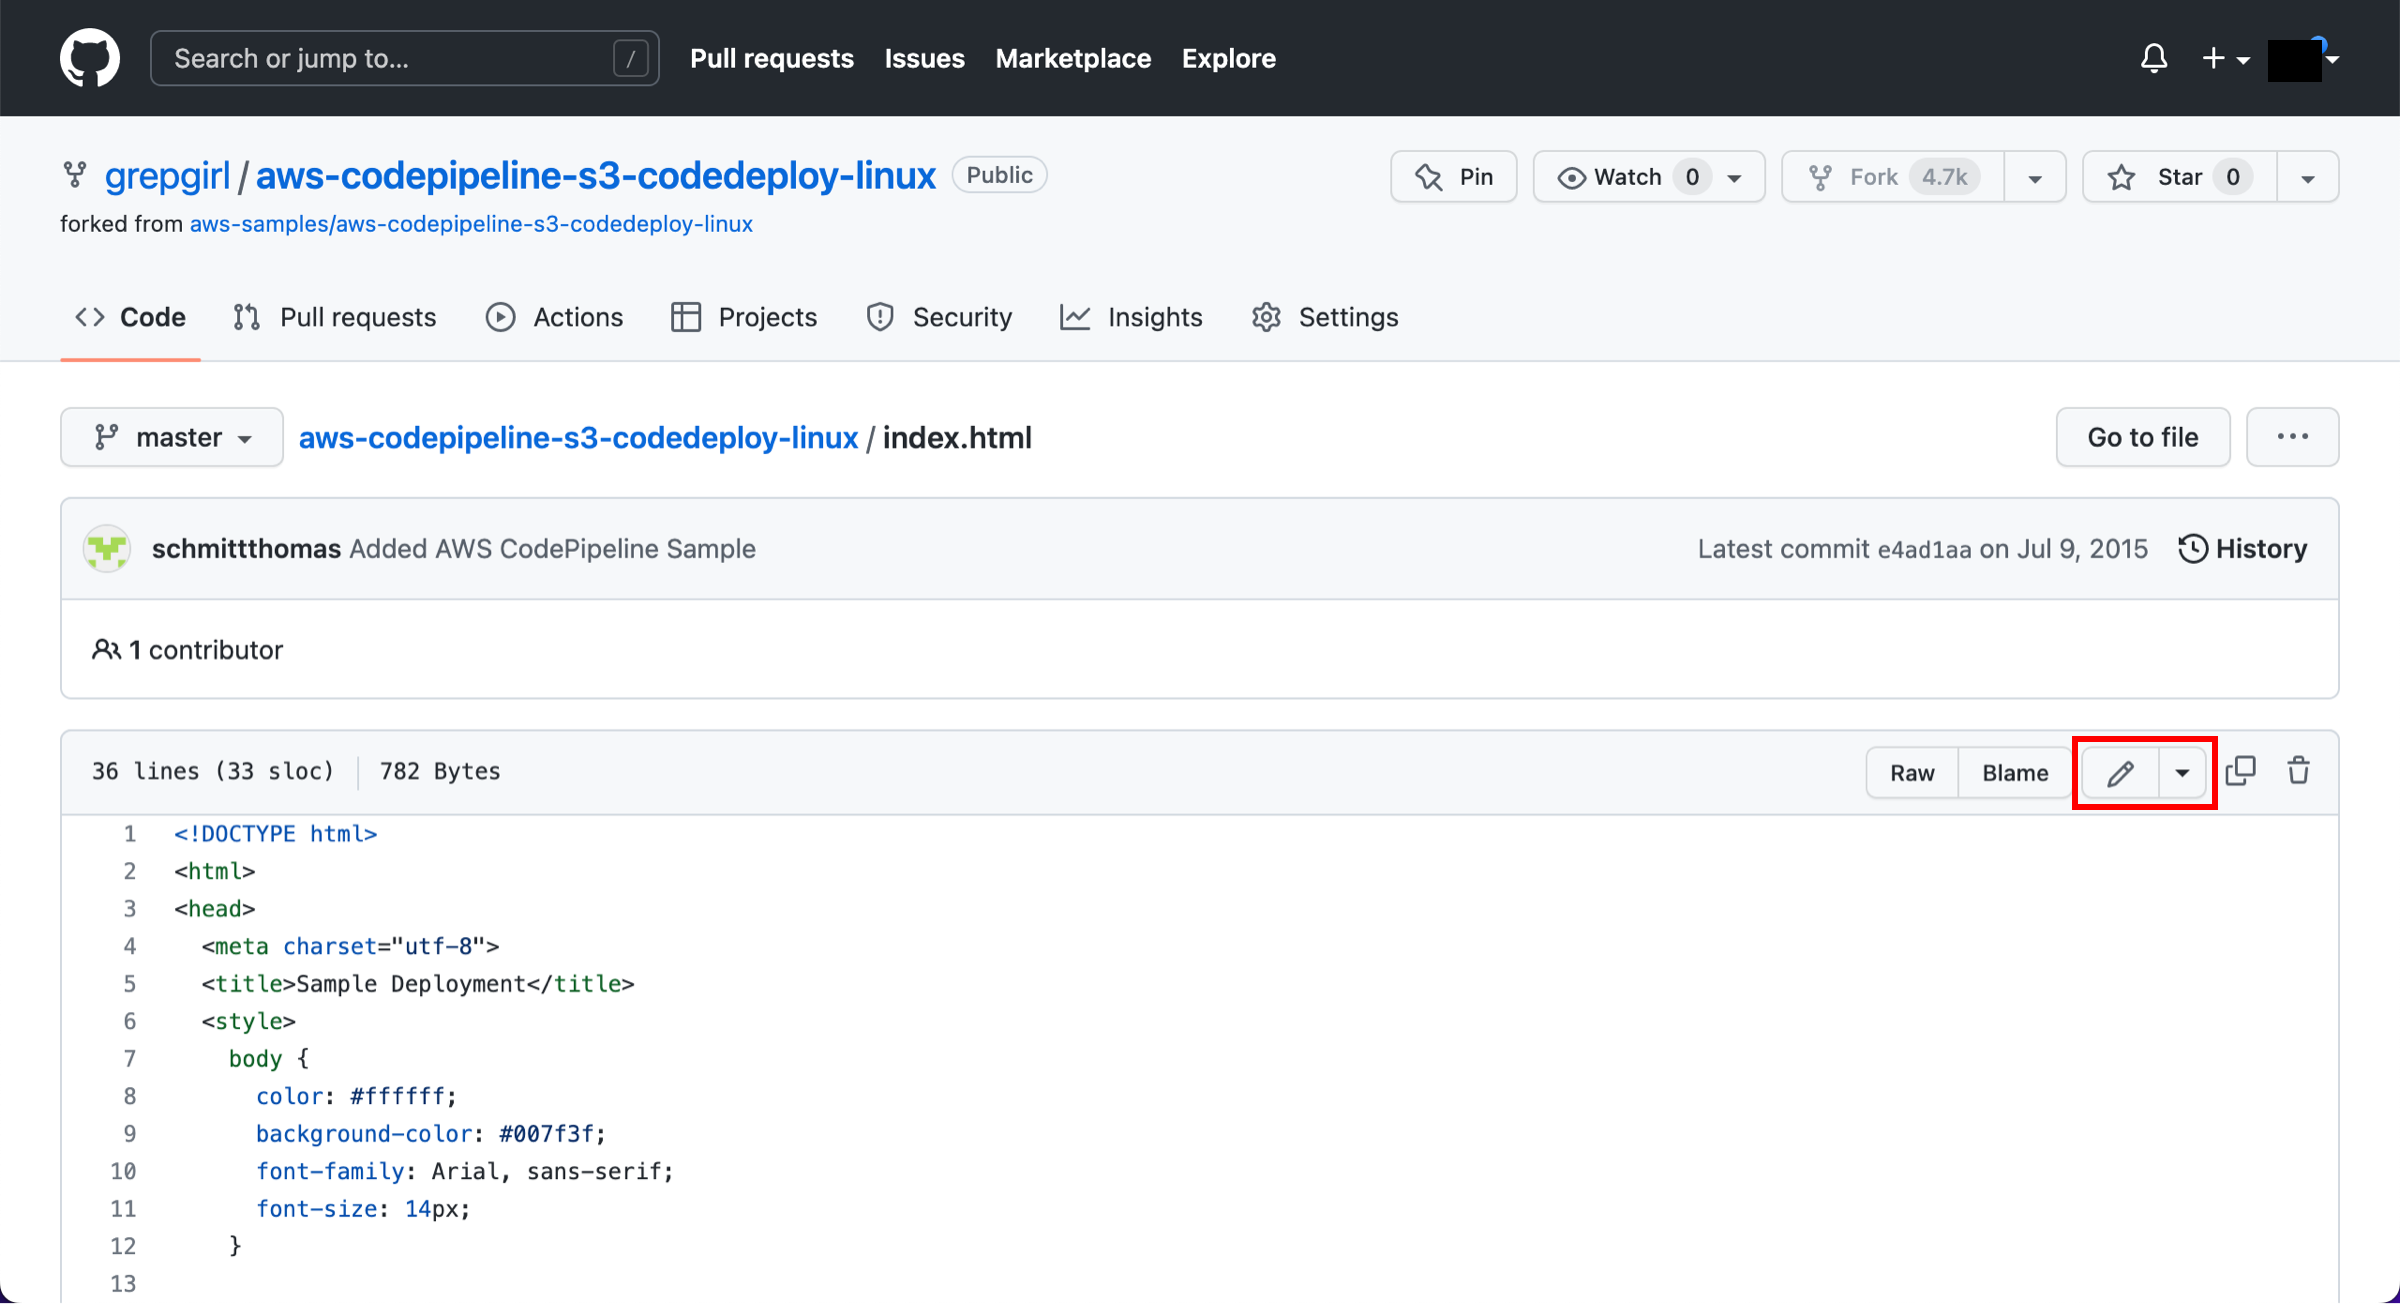
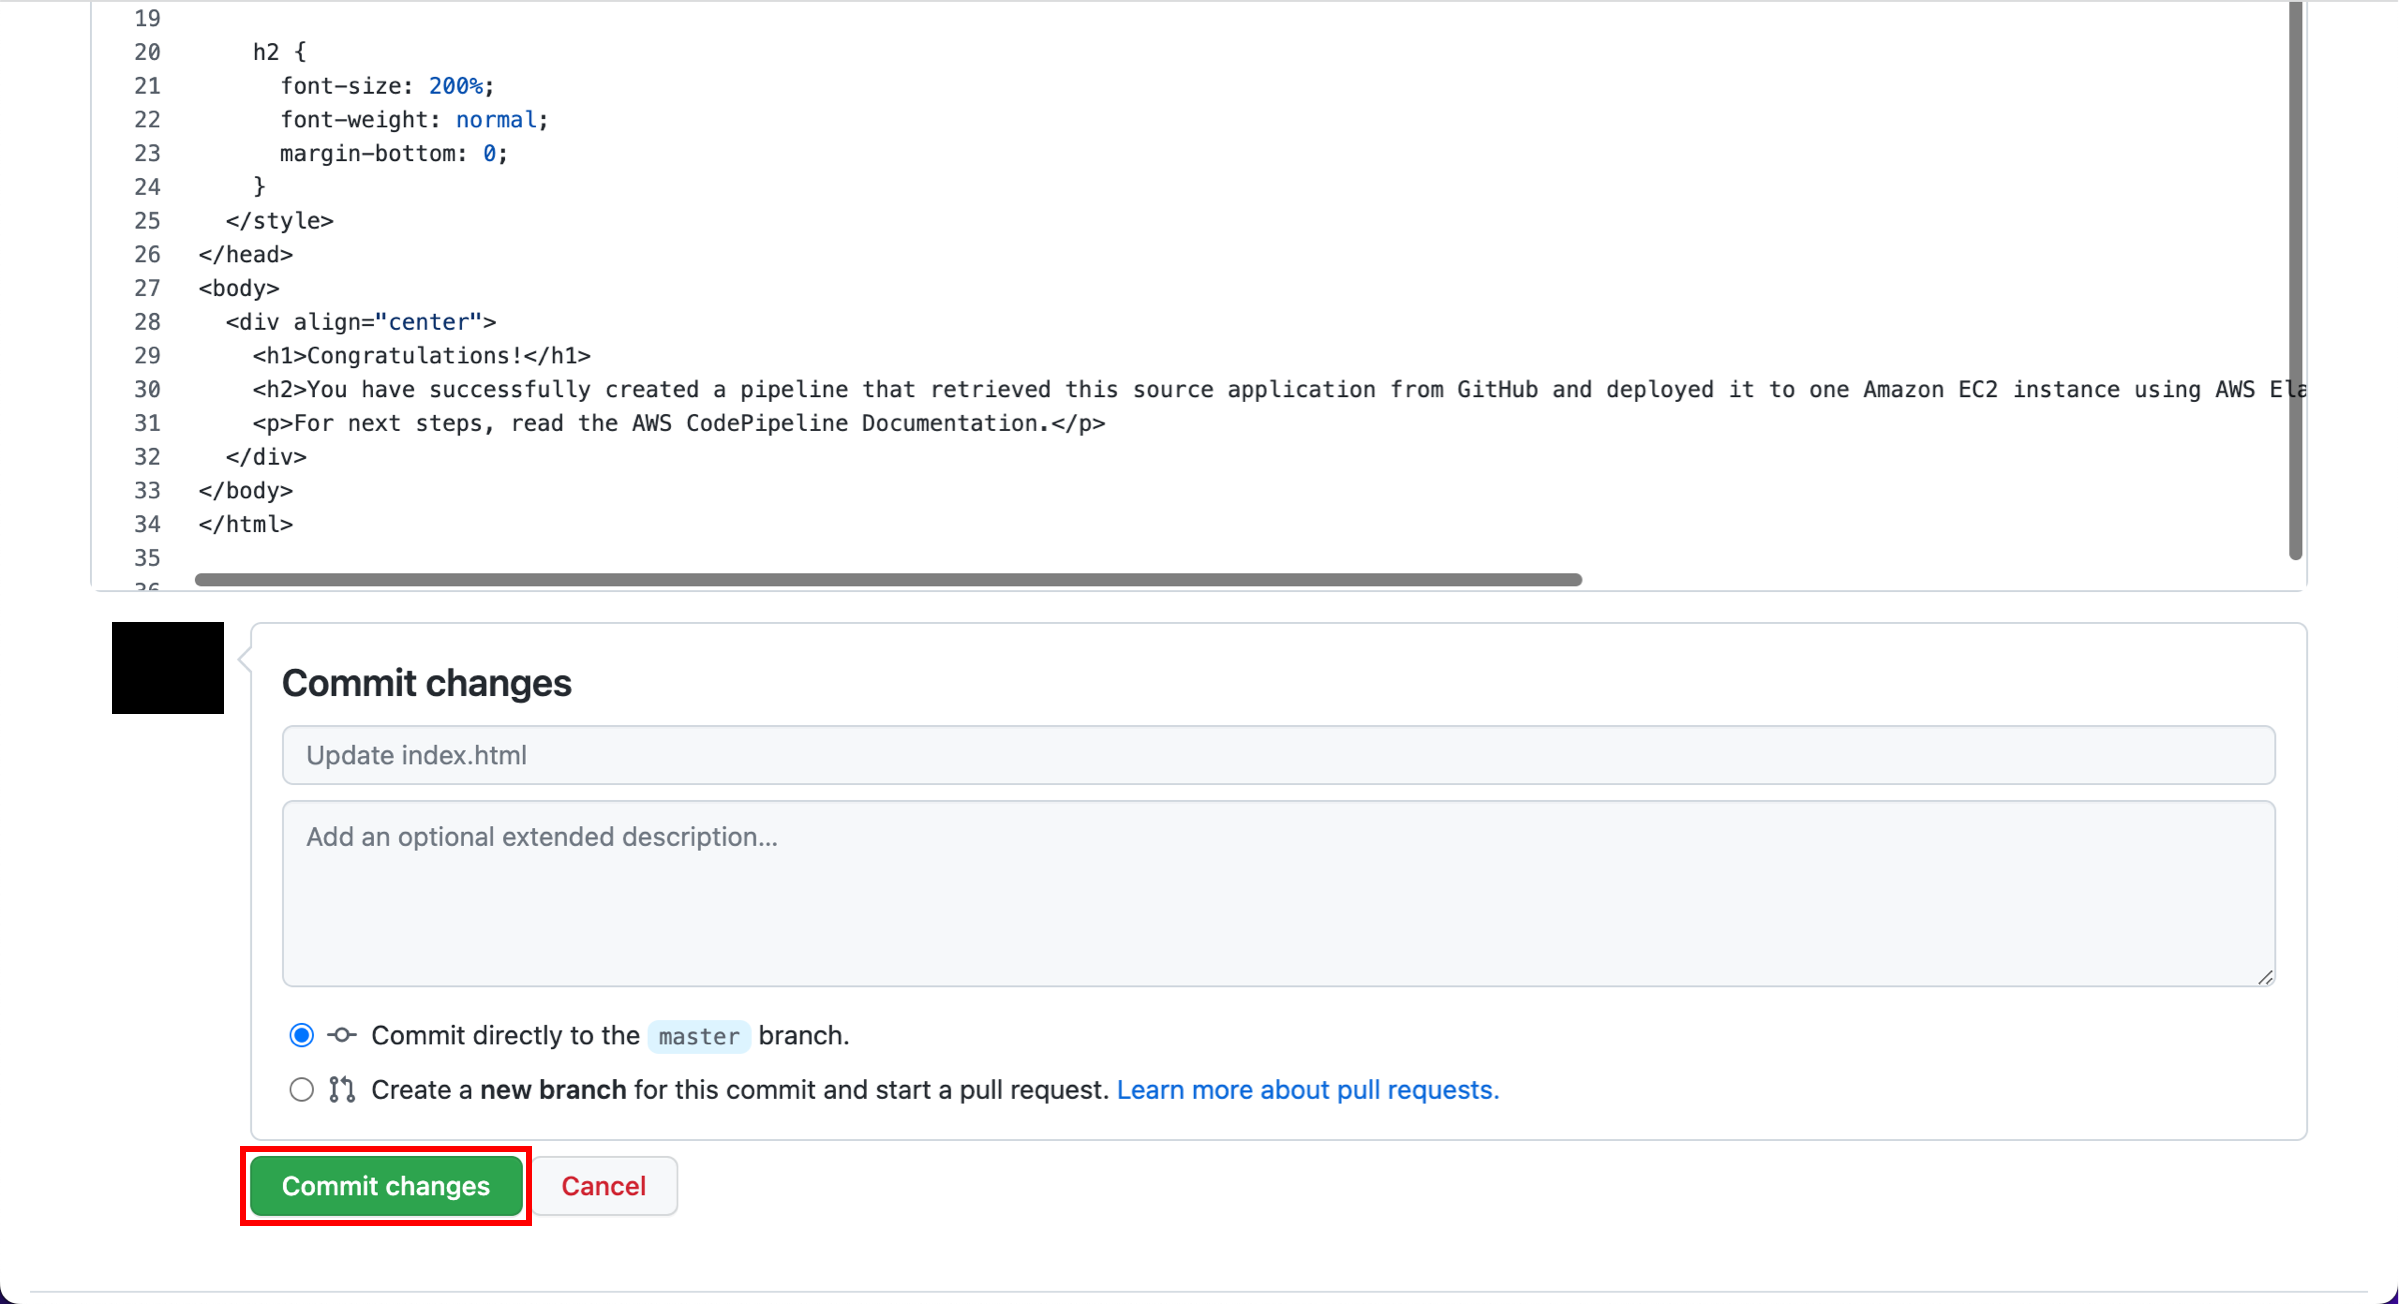
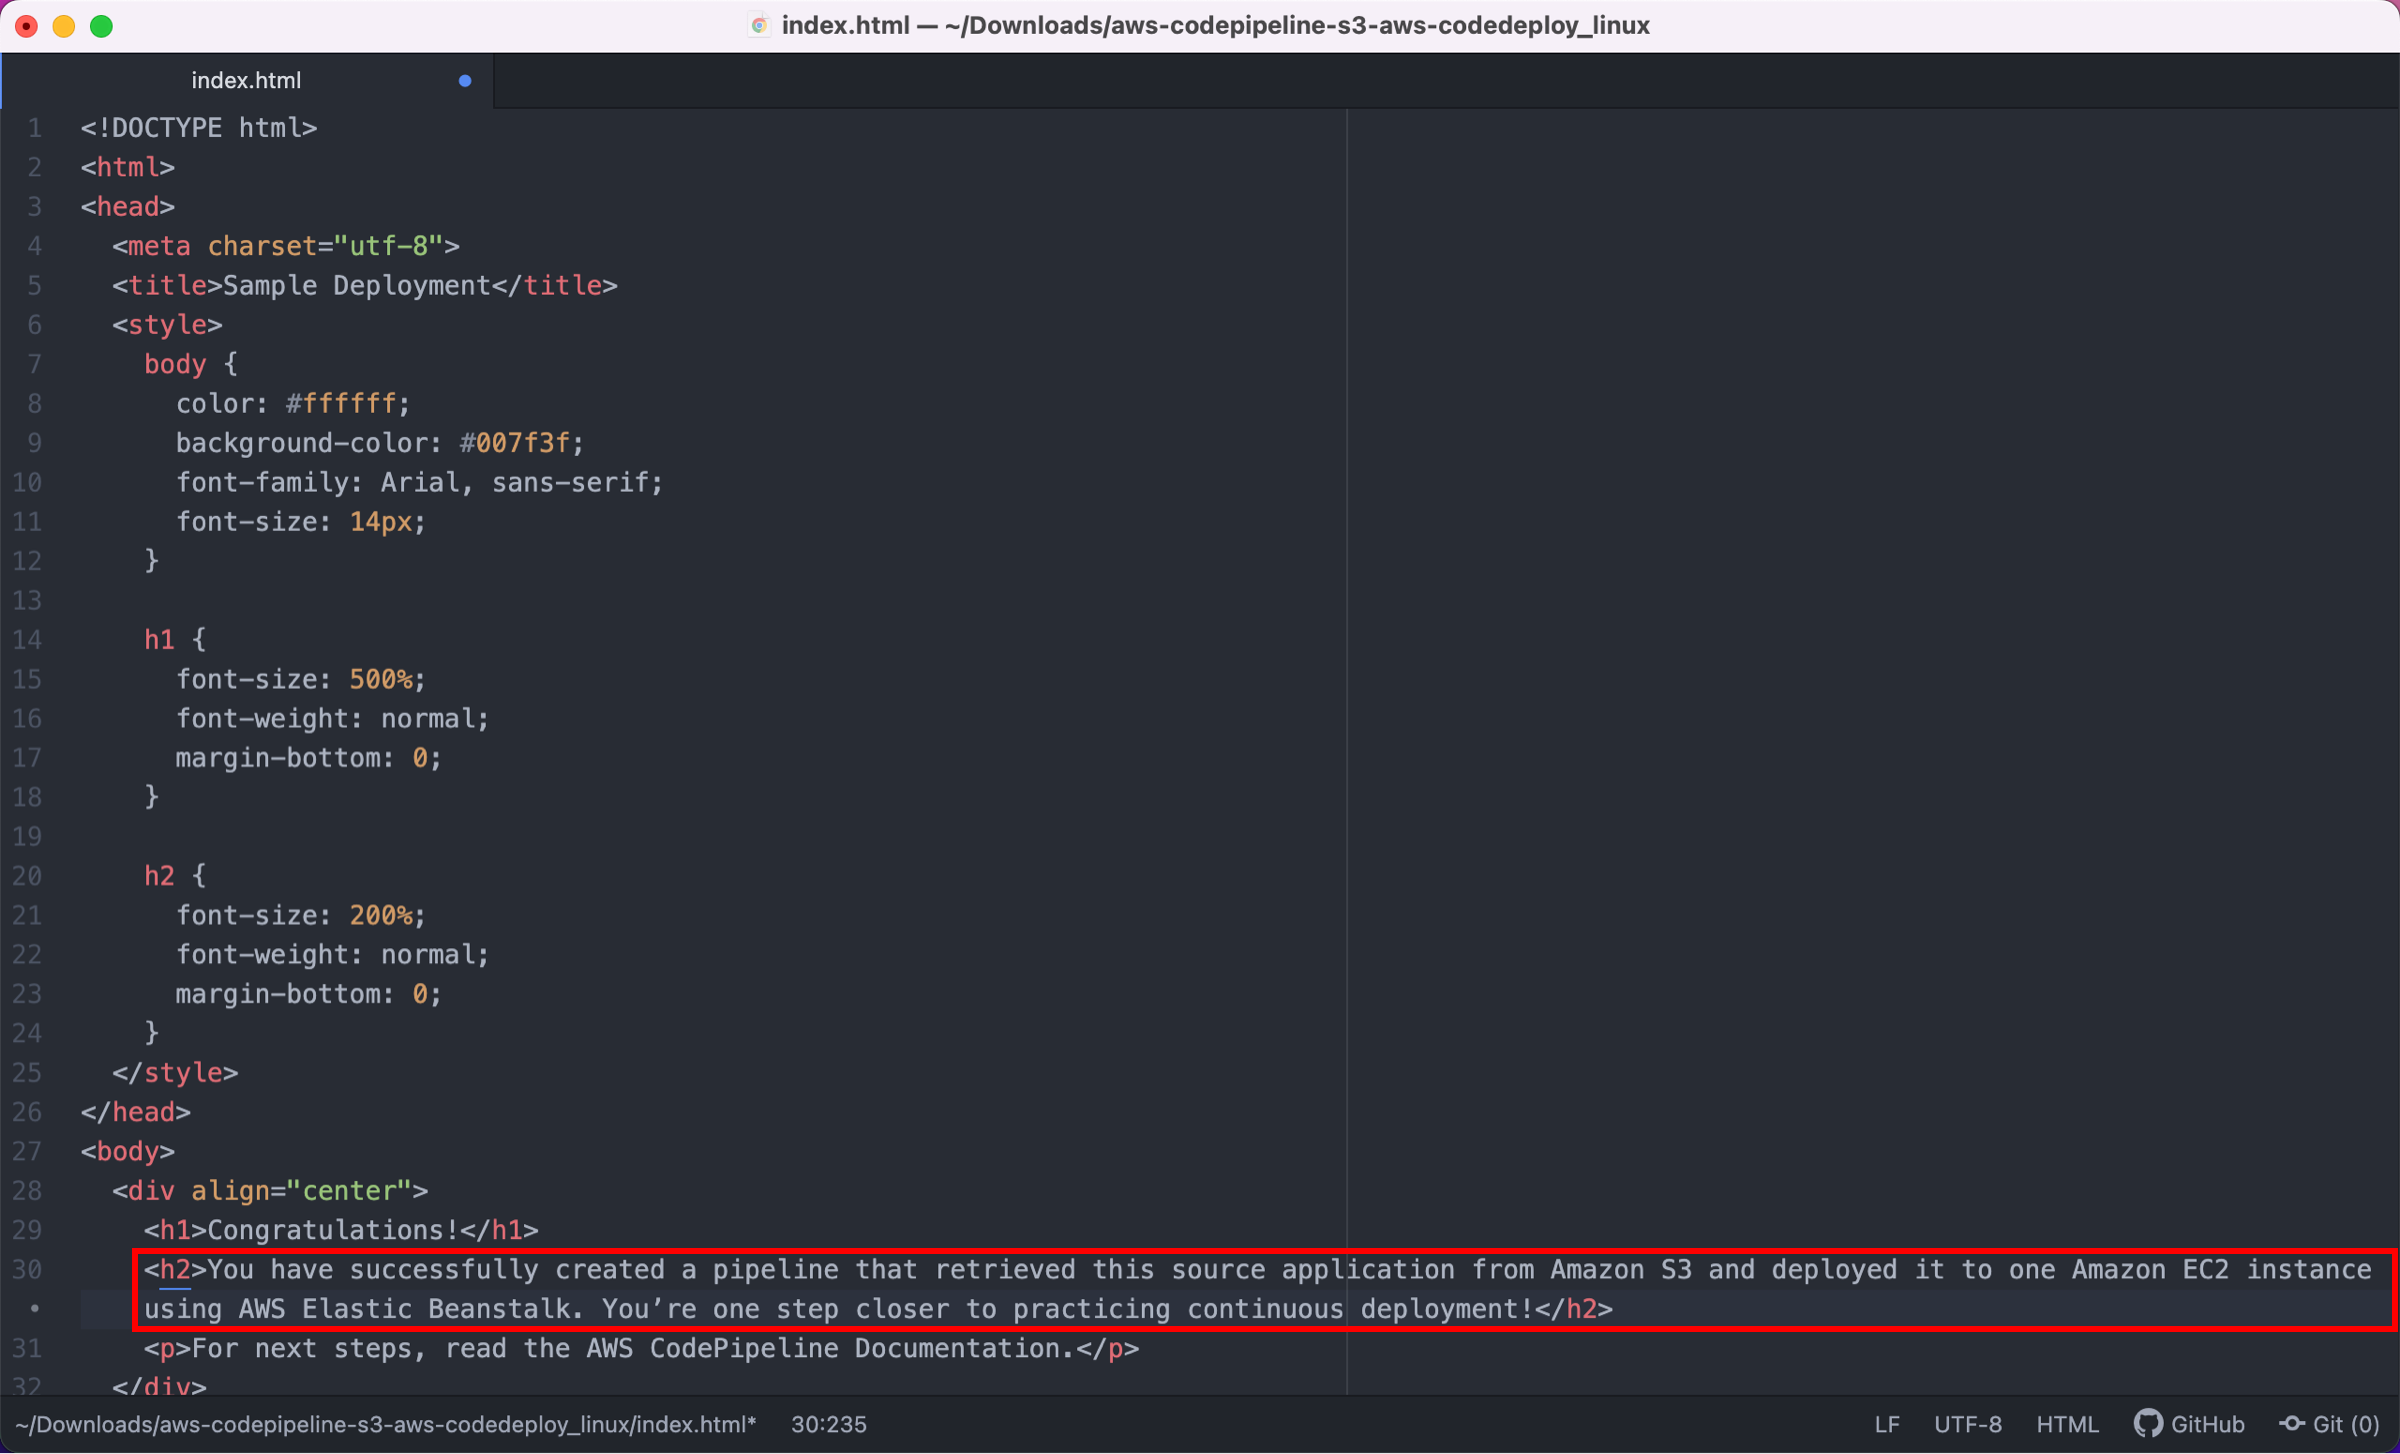
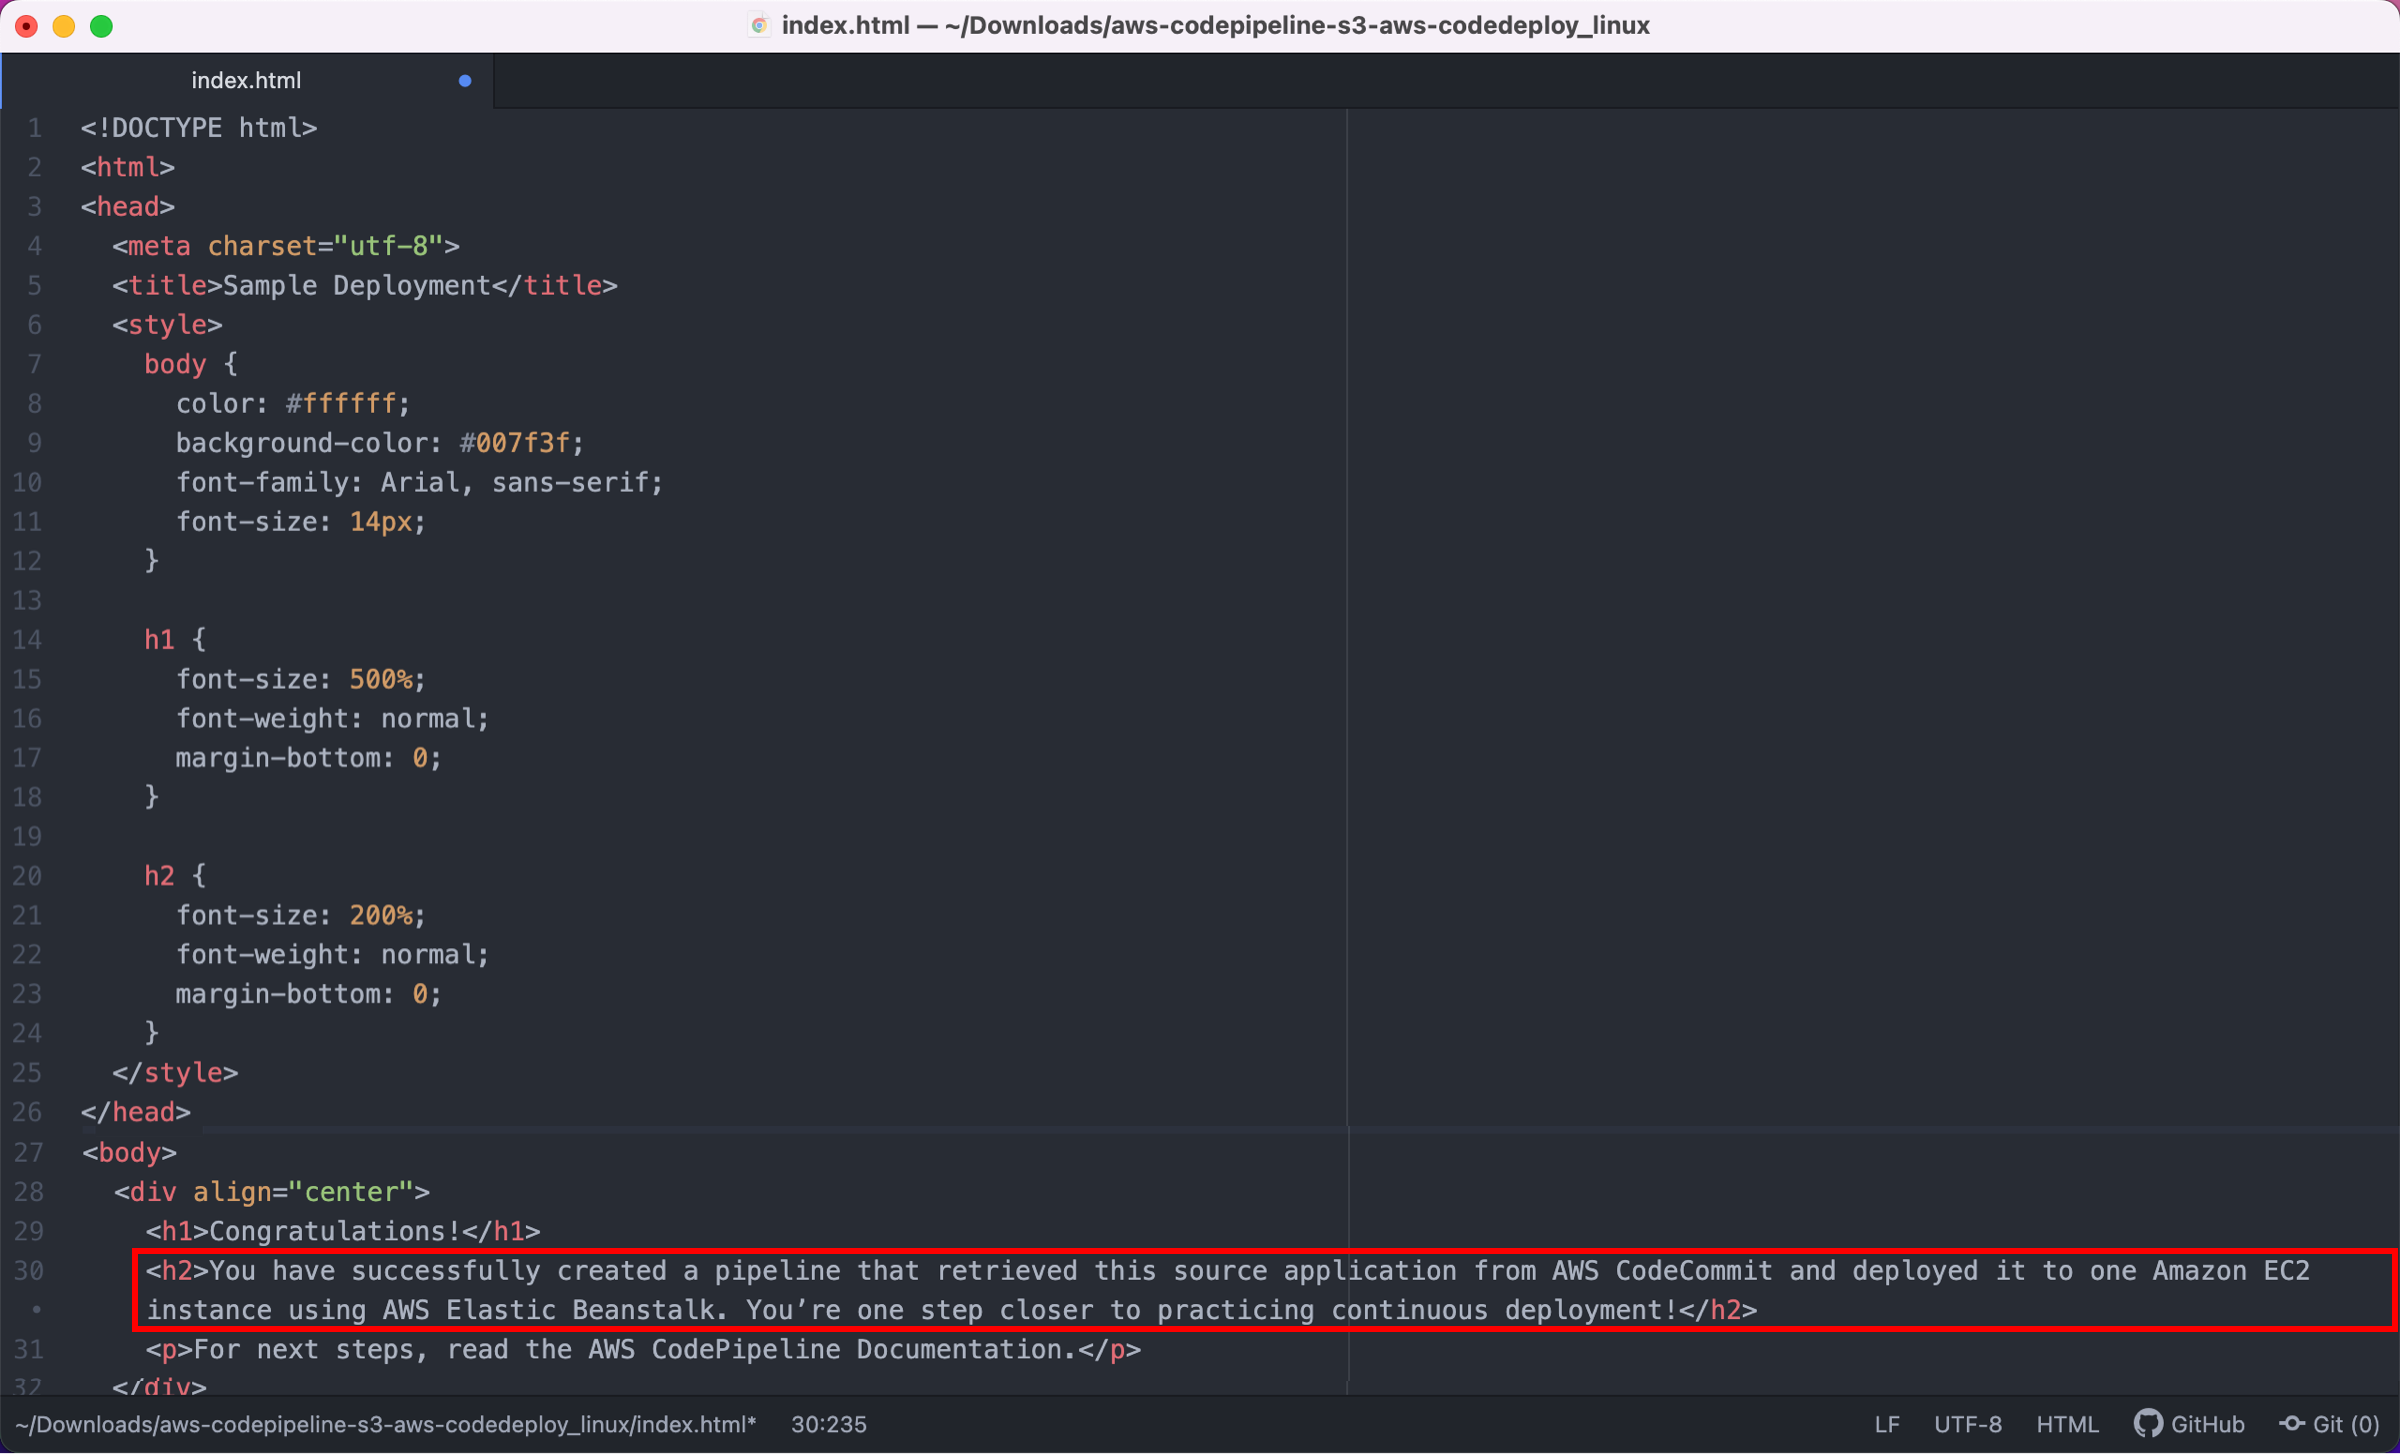
In this step, you will revise the sample code and commit the change to your repository. CodePipeline will detect your updated sample code and then automatically initiate deploying it to your EC2 instance by way of Elastic Beanstalk.
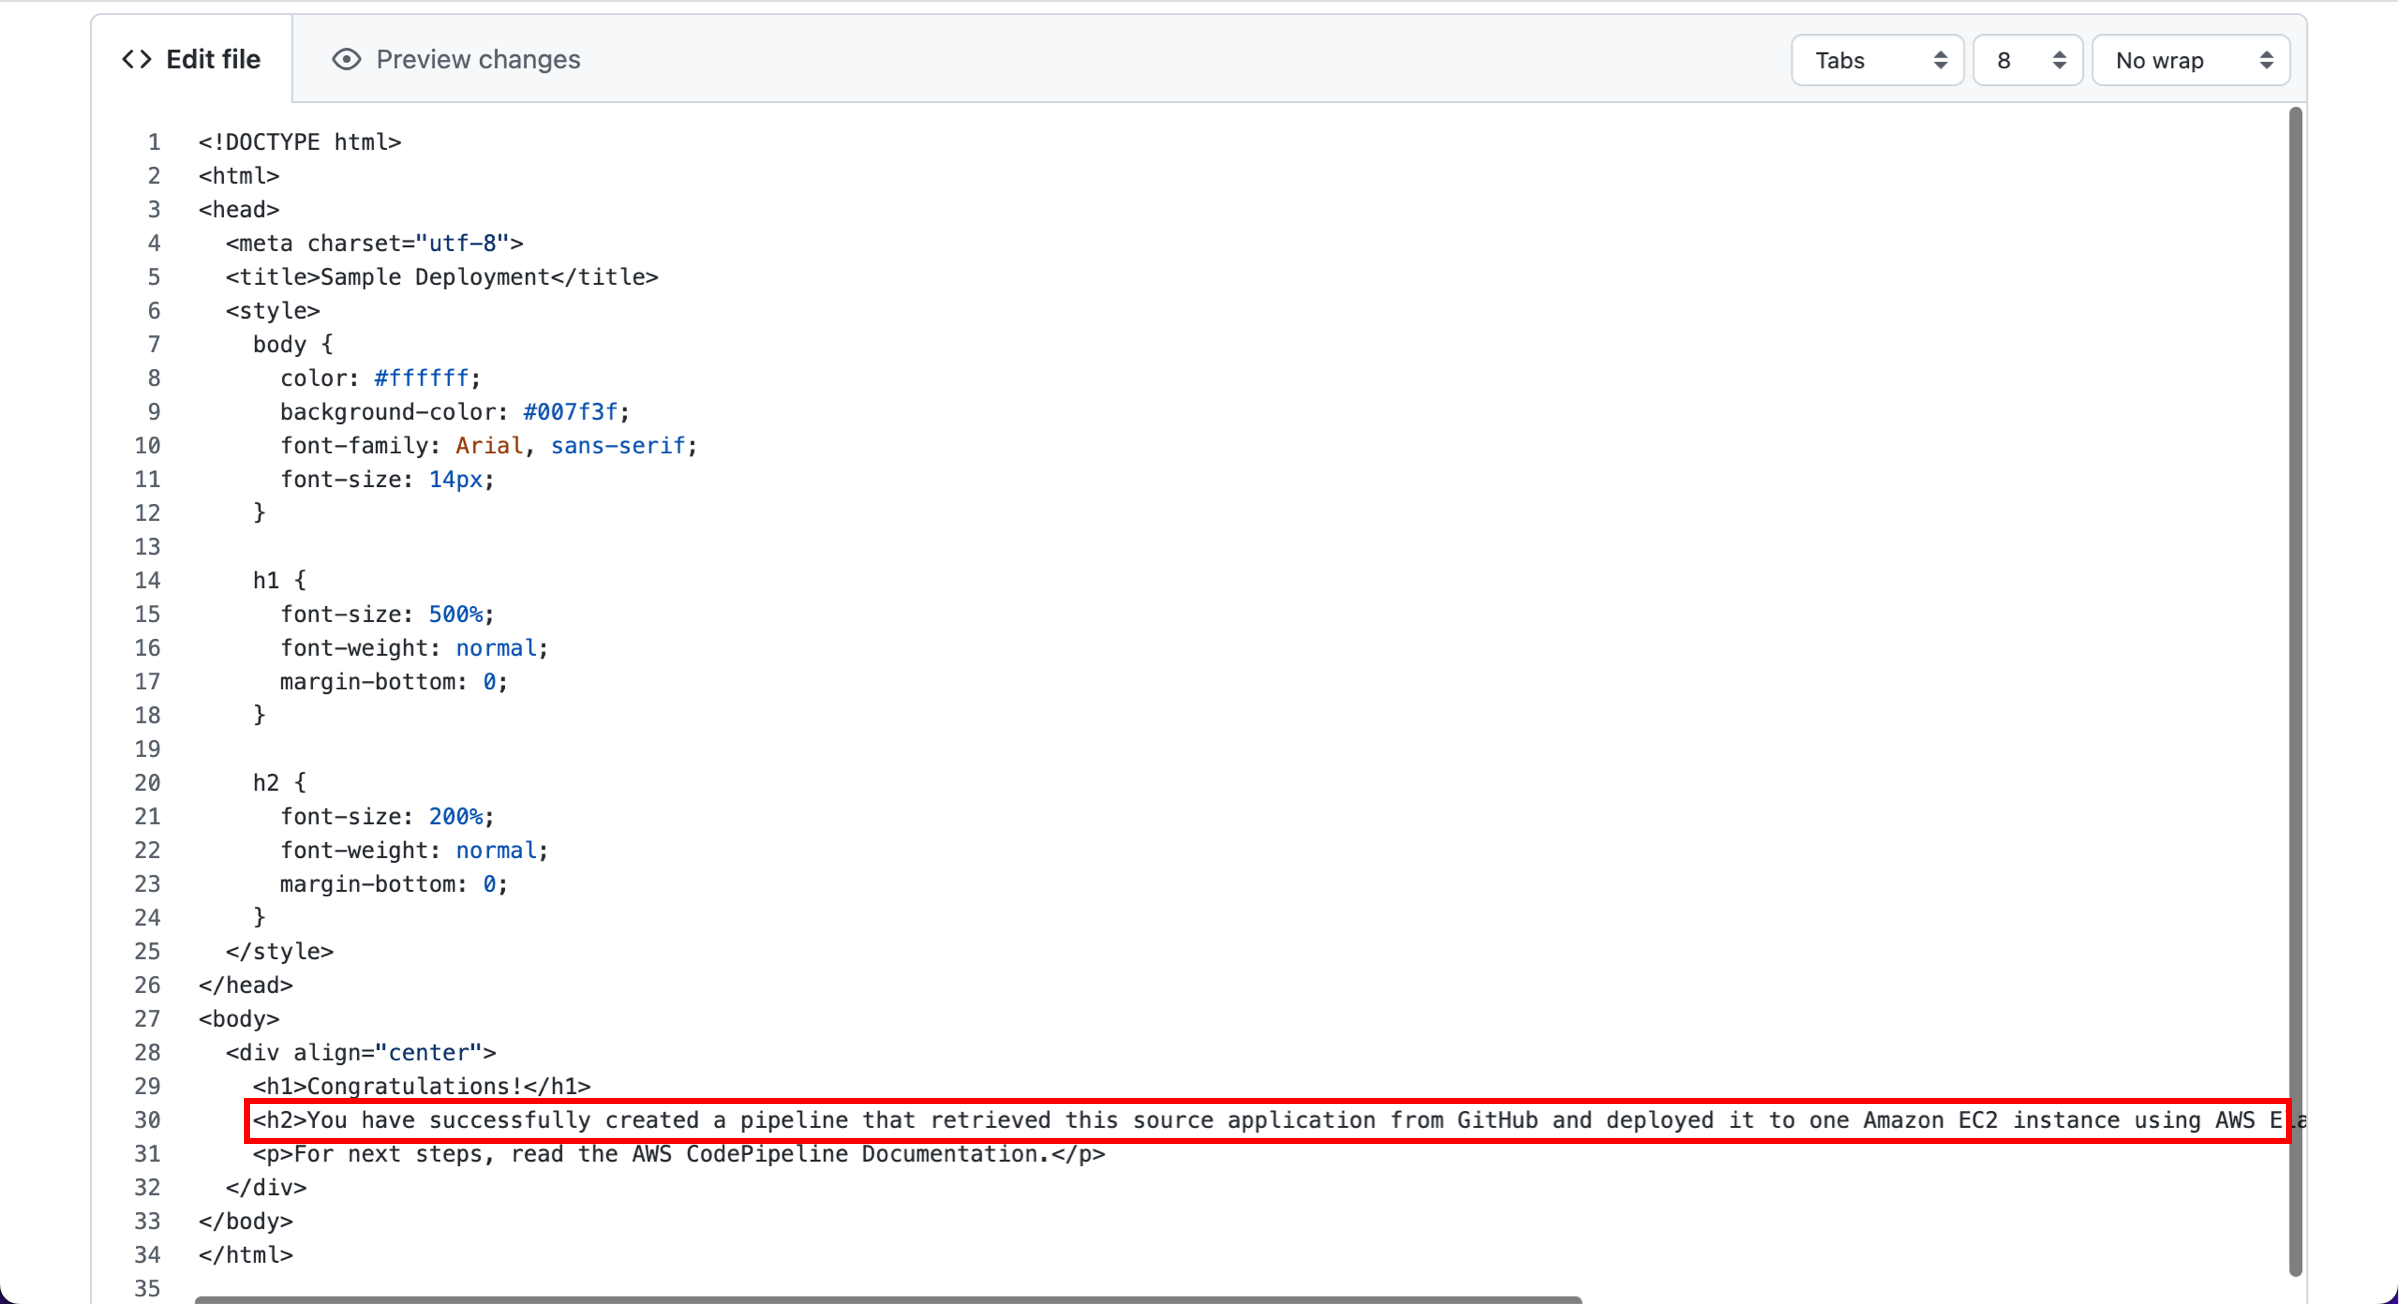
Note that the sample web page you deployed refers to AWS CodeDeploy, a service that automates code deployments. In CodePipeline, CodeDeploy is an alternative to using Elastic Beanstalk for deployment actions. Let’s update the sample code so that it correctly states that you deployed the sample using Elastic Beanstalk.
Choose the appropriate tab based on the code source you used.
In this step, you will view the page you updated.
Choose the appropriate tab based on the code source you used.
To avoid future charges, you will delete all the resources you launched throughout this tutorial, which includes the pipeline, the Elastic Beanstalk application, and the source you set up to host the code.
-
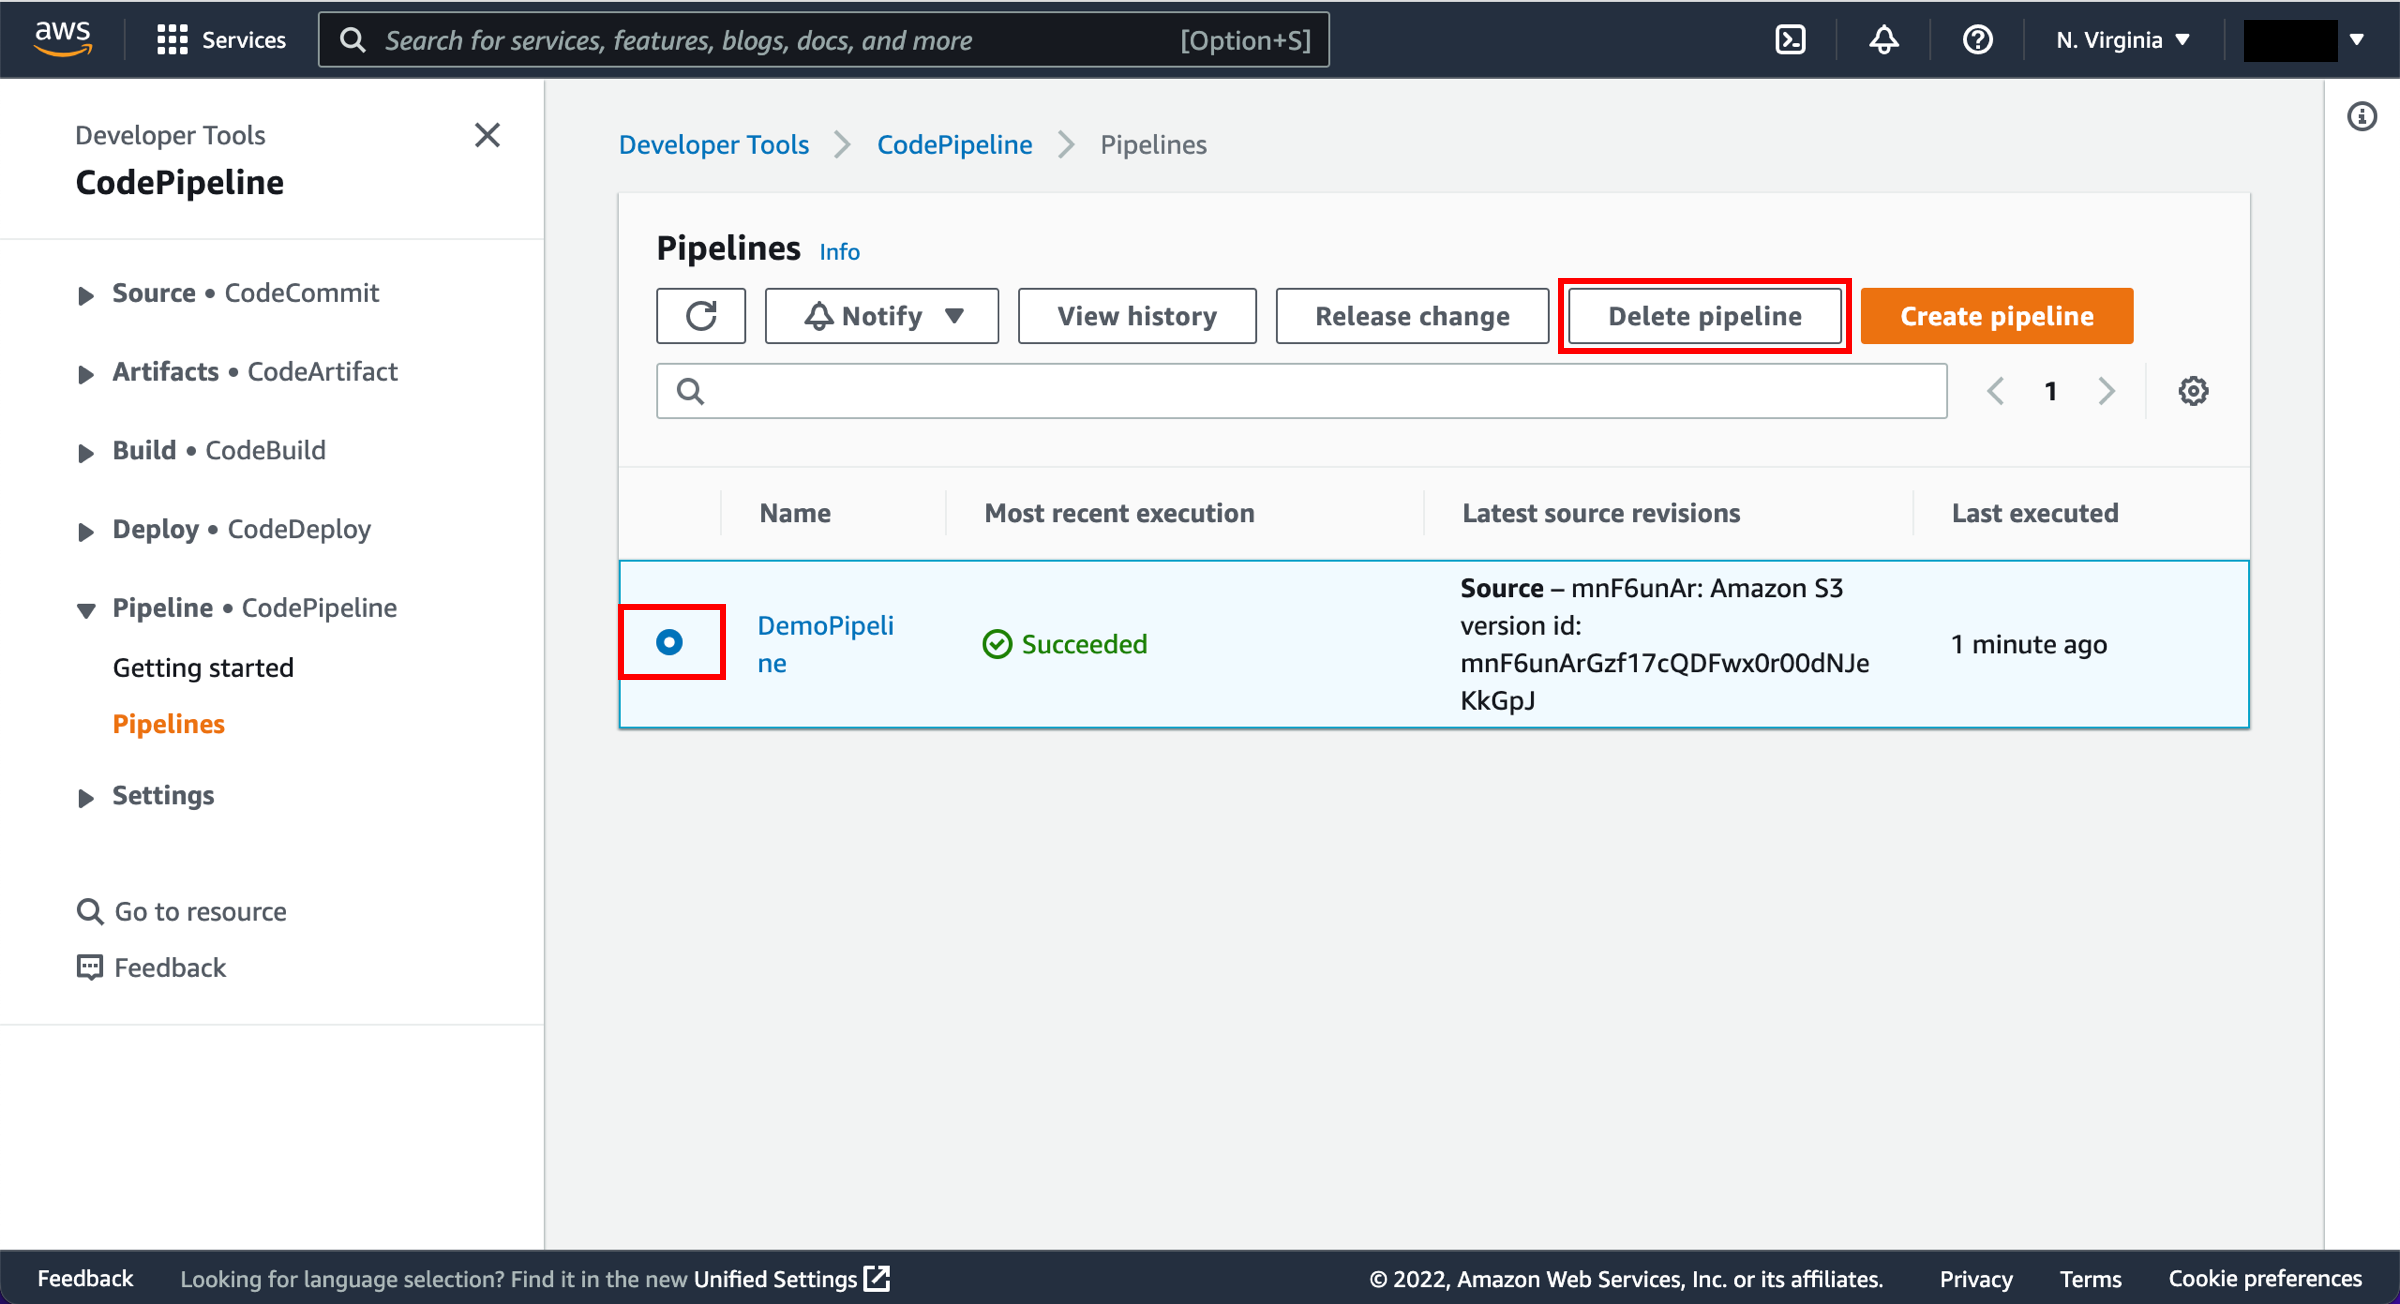
Delete the pipeline
First, you will delete your pipeline. In the Pipelines view, select the pipeline radio button and select Delete pipeline.
-
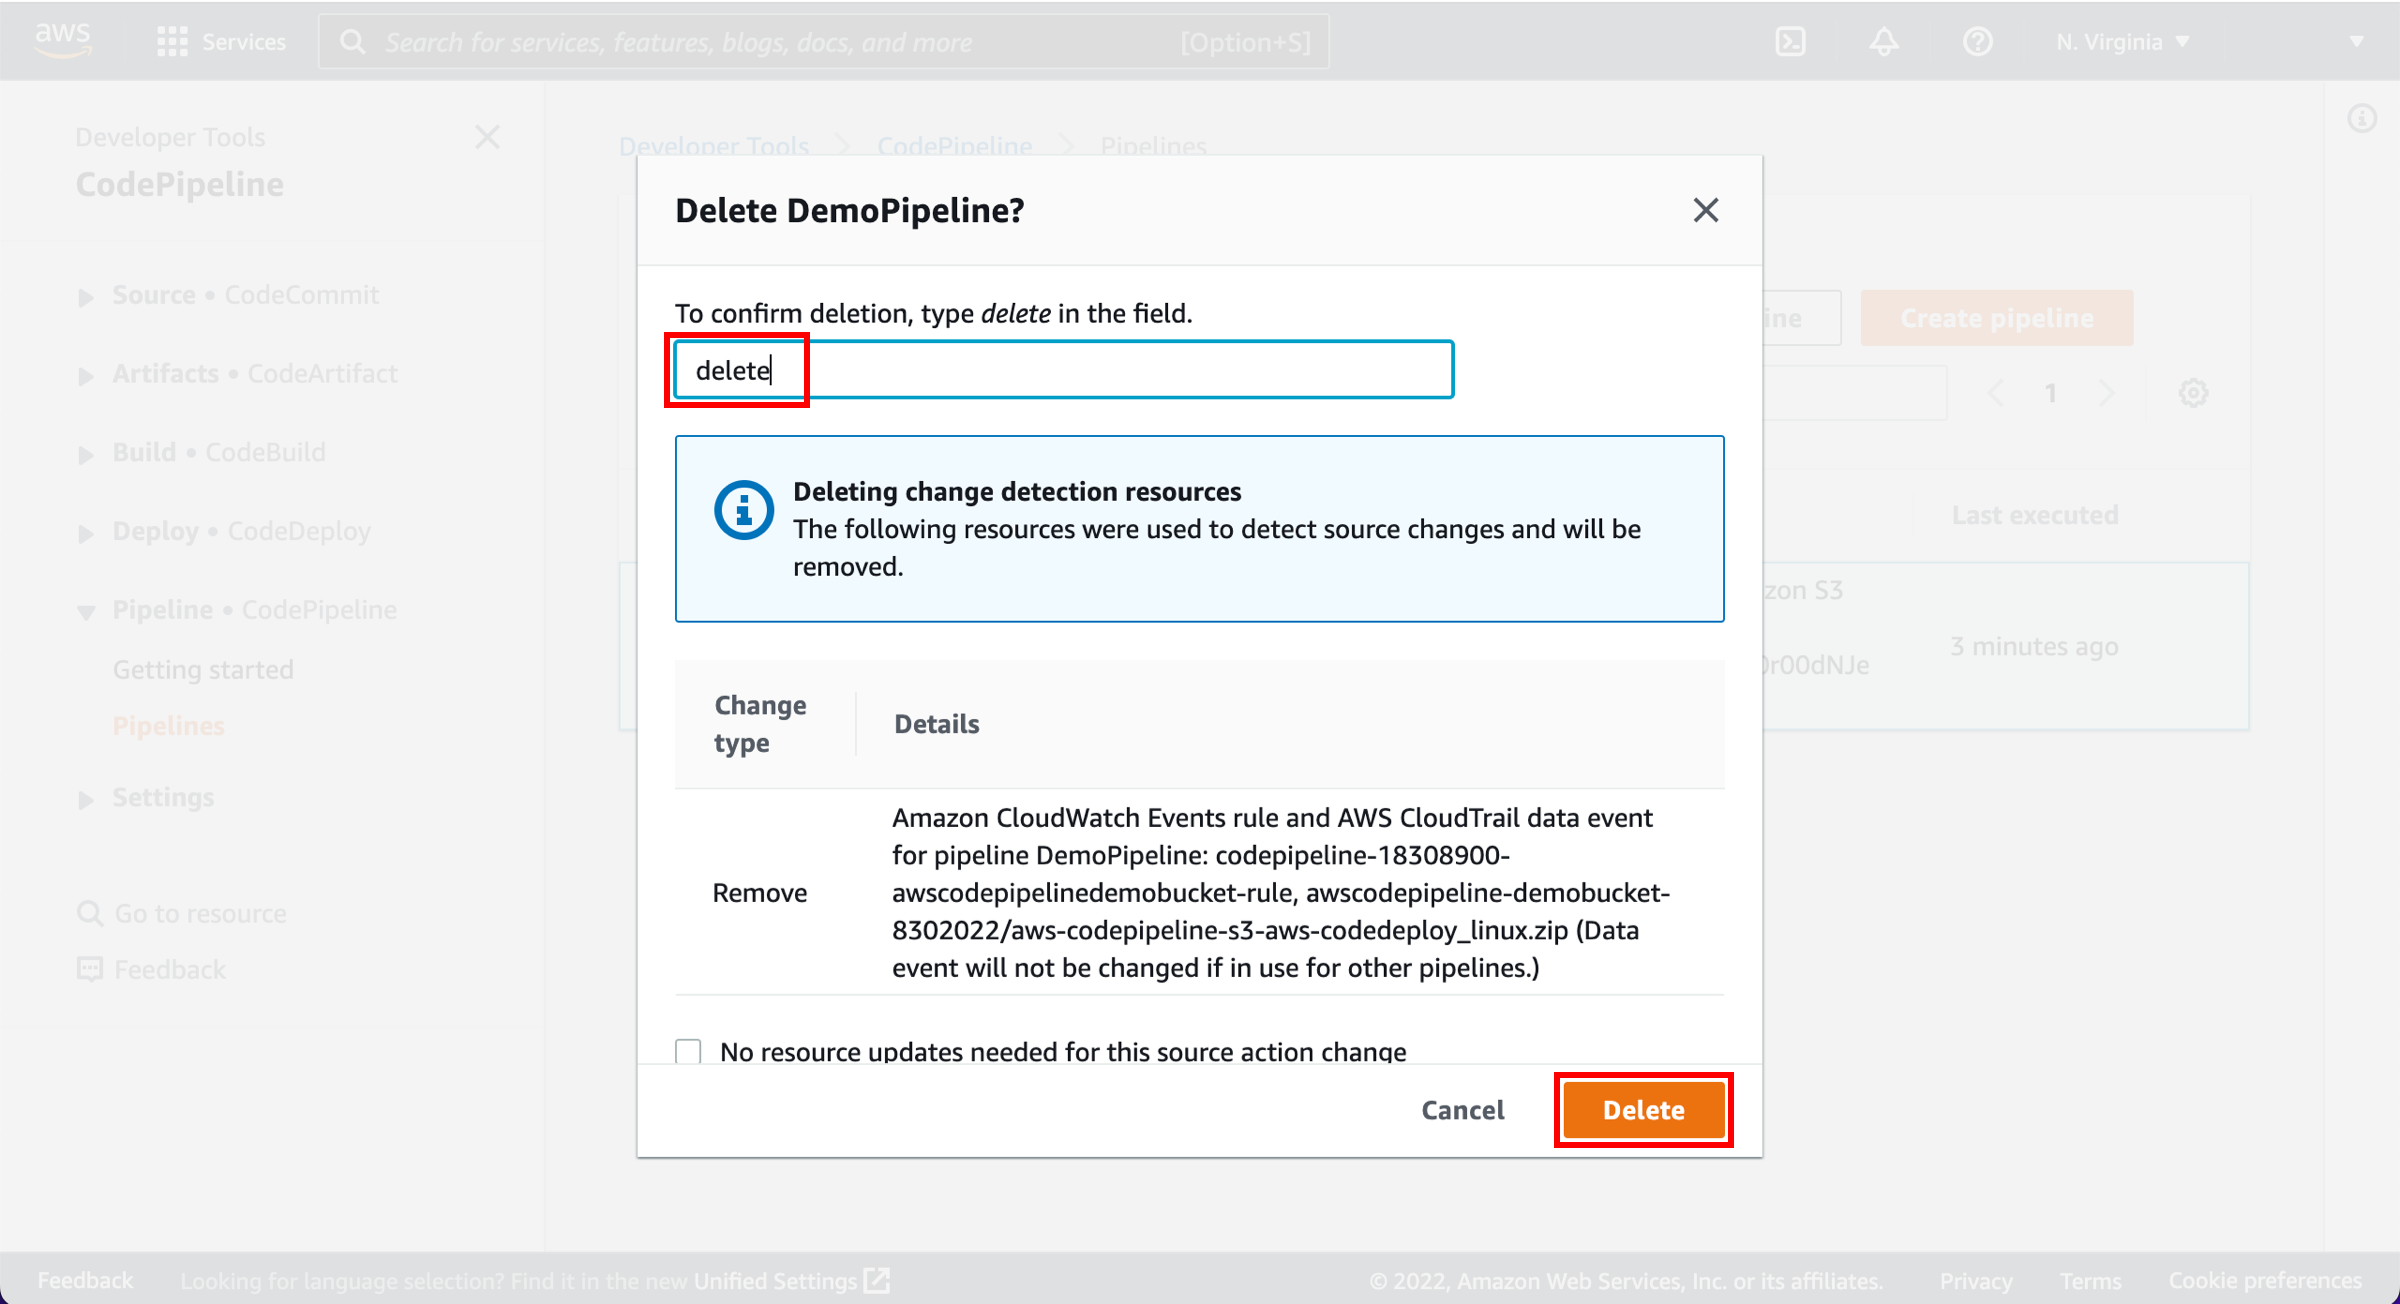
Confirm deletion
To confirm deletion, enter delete in the field and choose Delete.
-
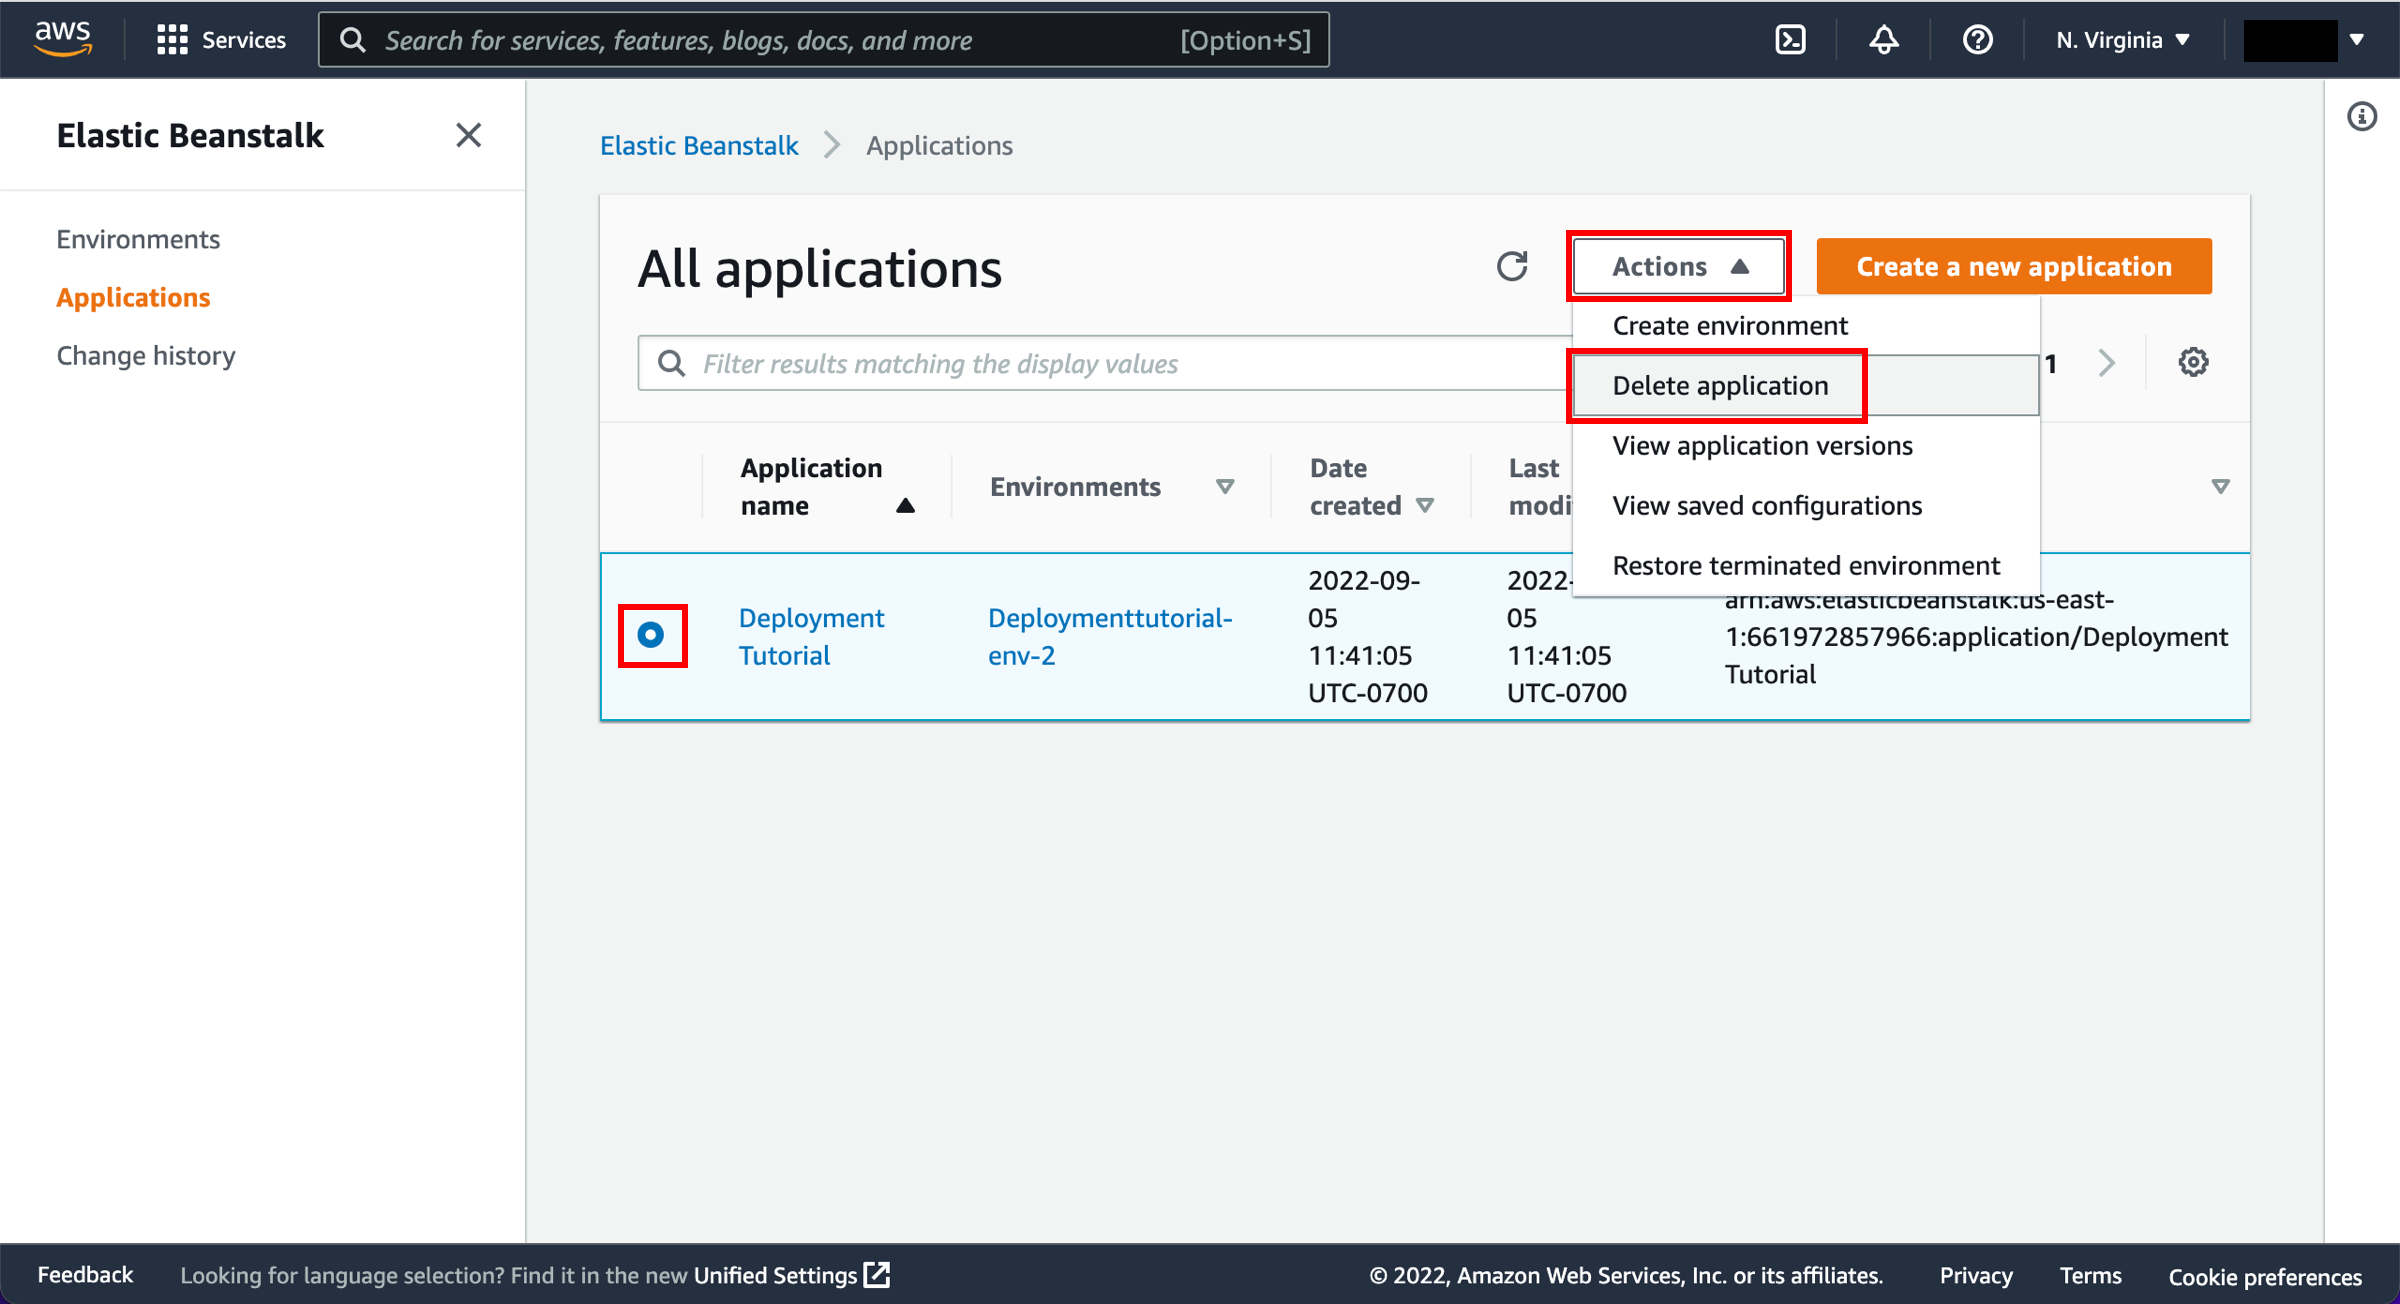
Delete the Beanstalk application
Second, delete your Elastic Beanstalk application. Visit the Elastic Beanstalk Applications page. Select the radio button for the Deployment Tutorial. Select Actions and Delete application.
-
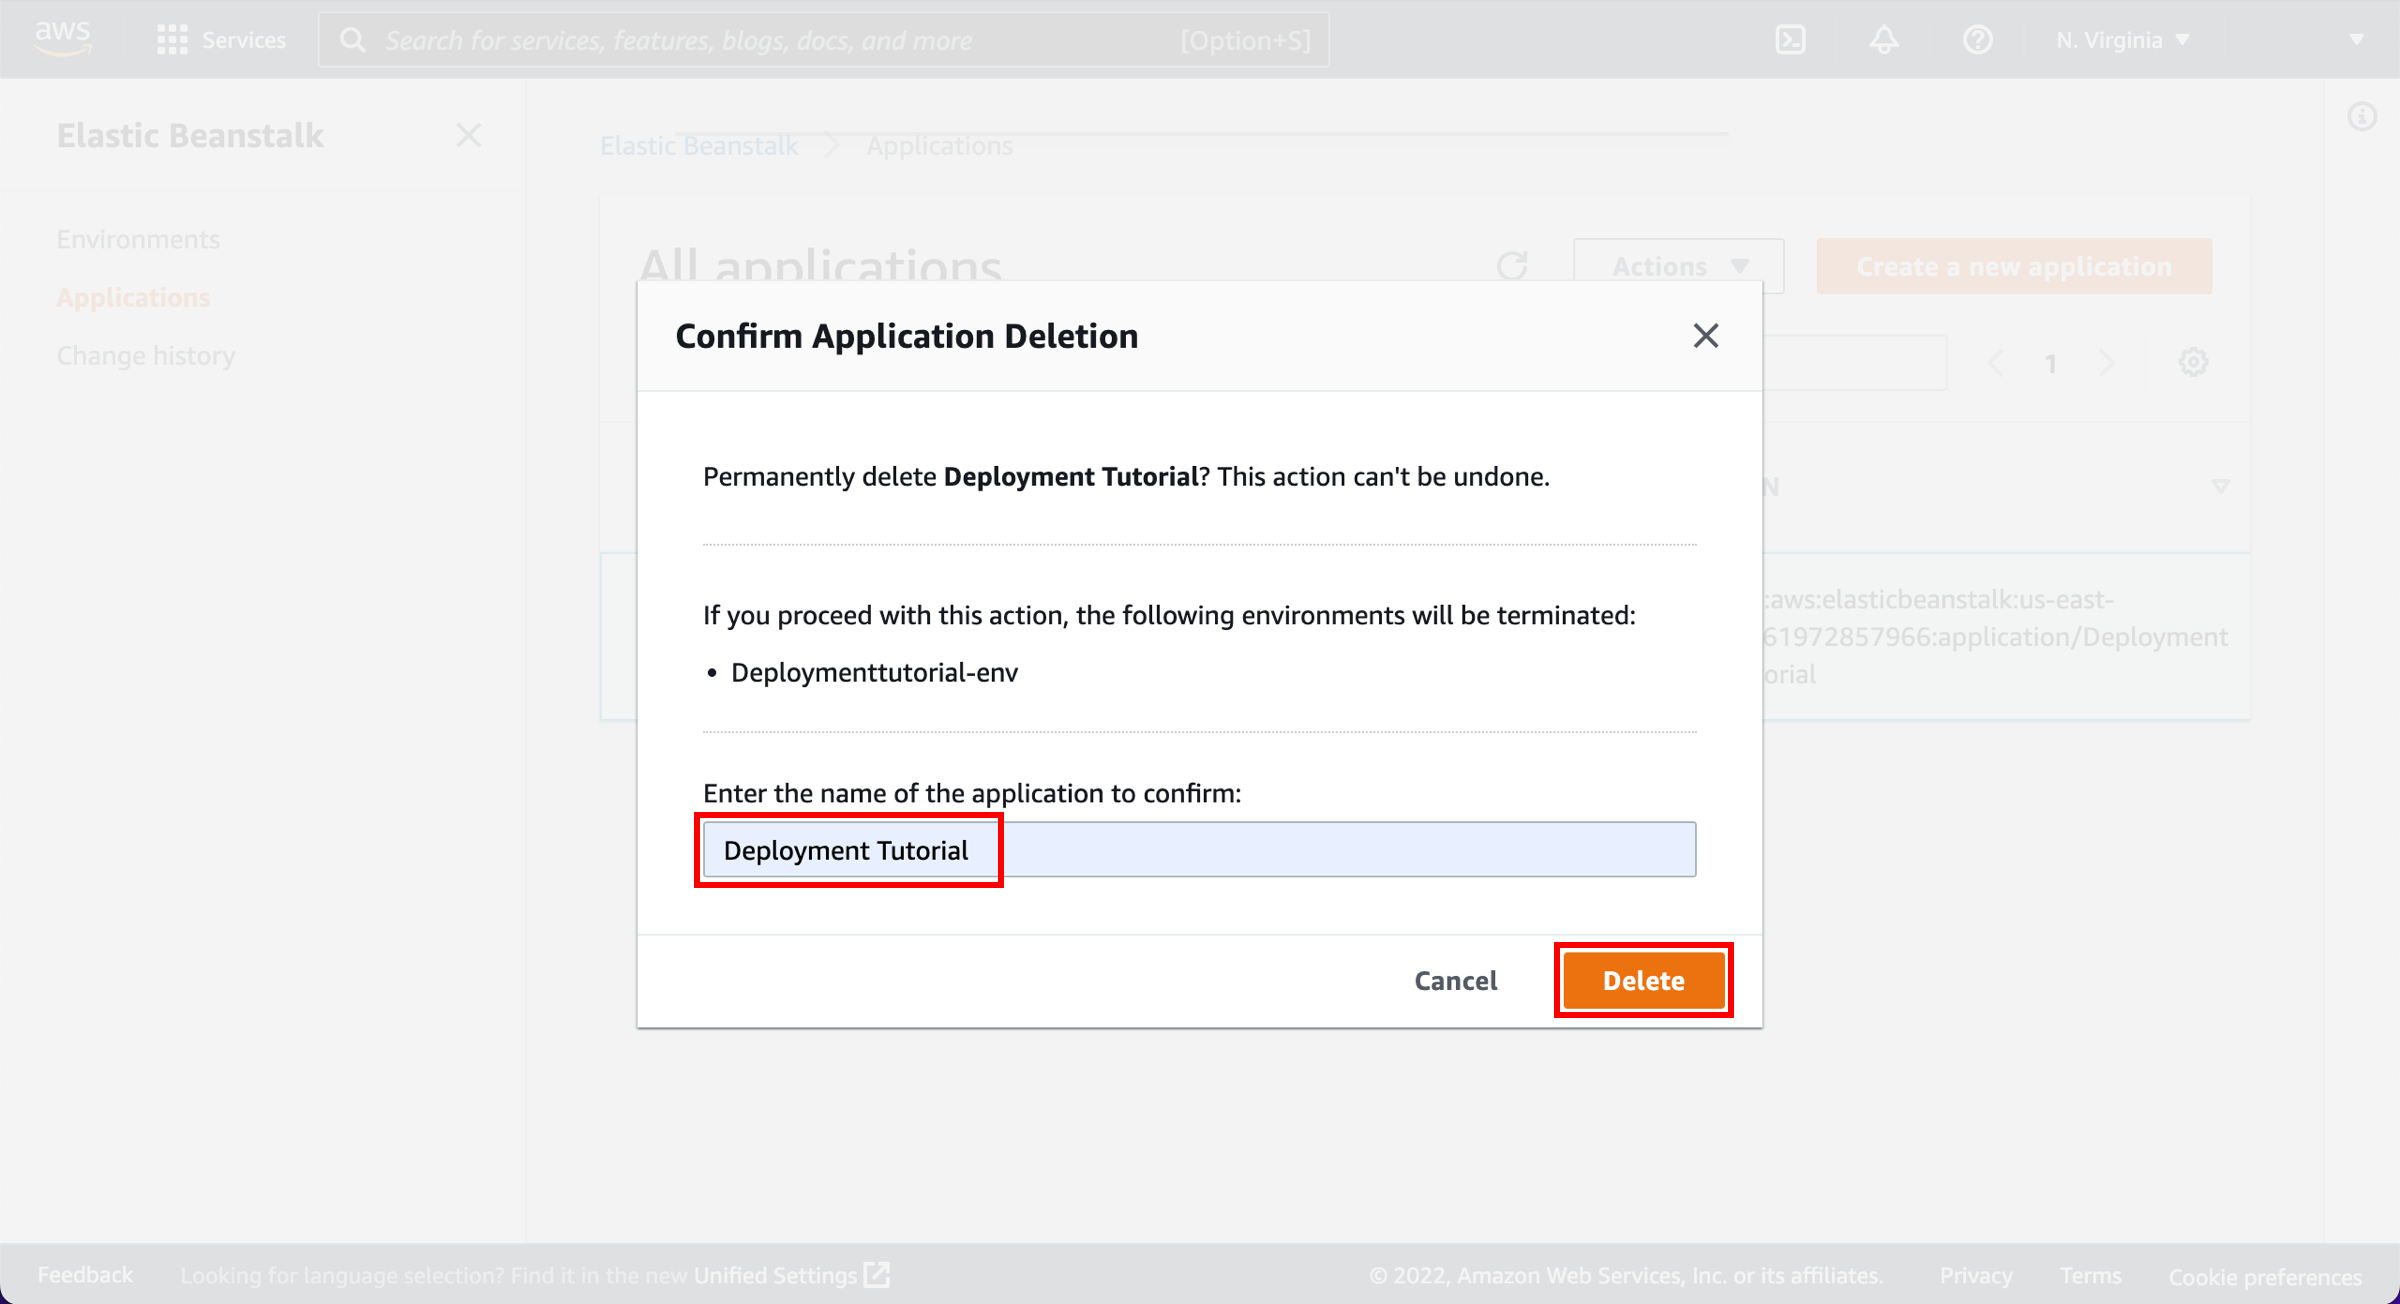
Confirm deletion
In the Confirm Application Deletion window, enter the name of the application to be deleted and choose Delete.
If you used Amazon S3 as your source, you can delete the resources to avoid future charges.
-
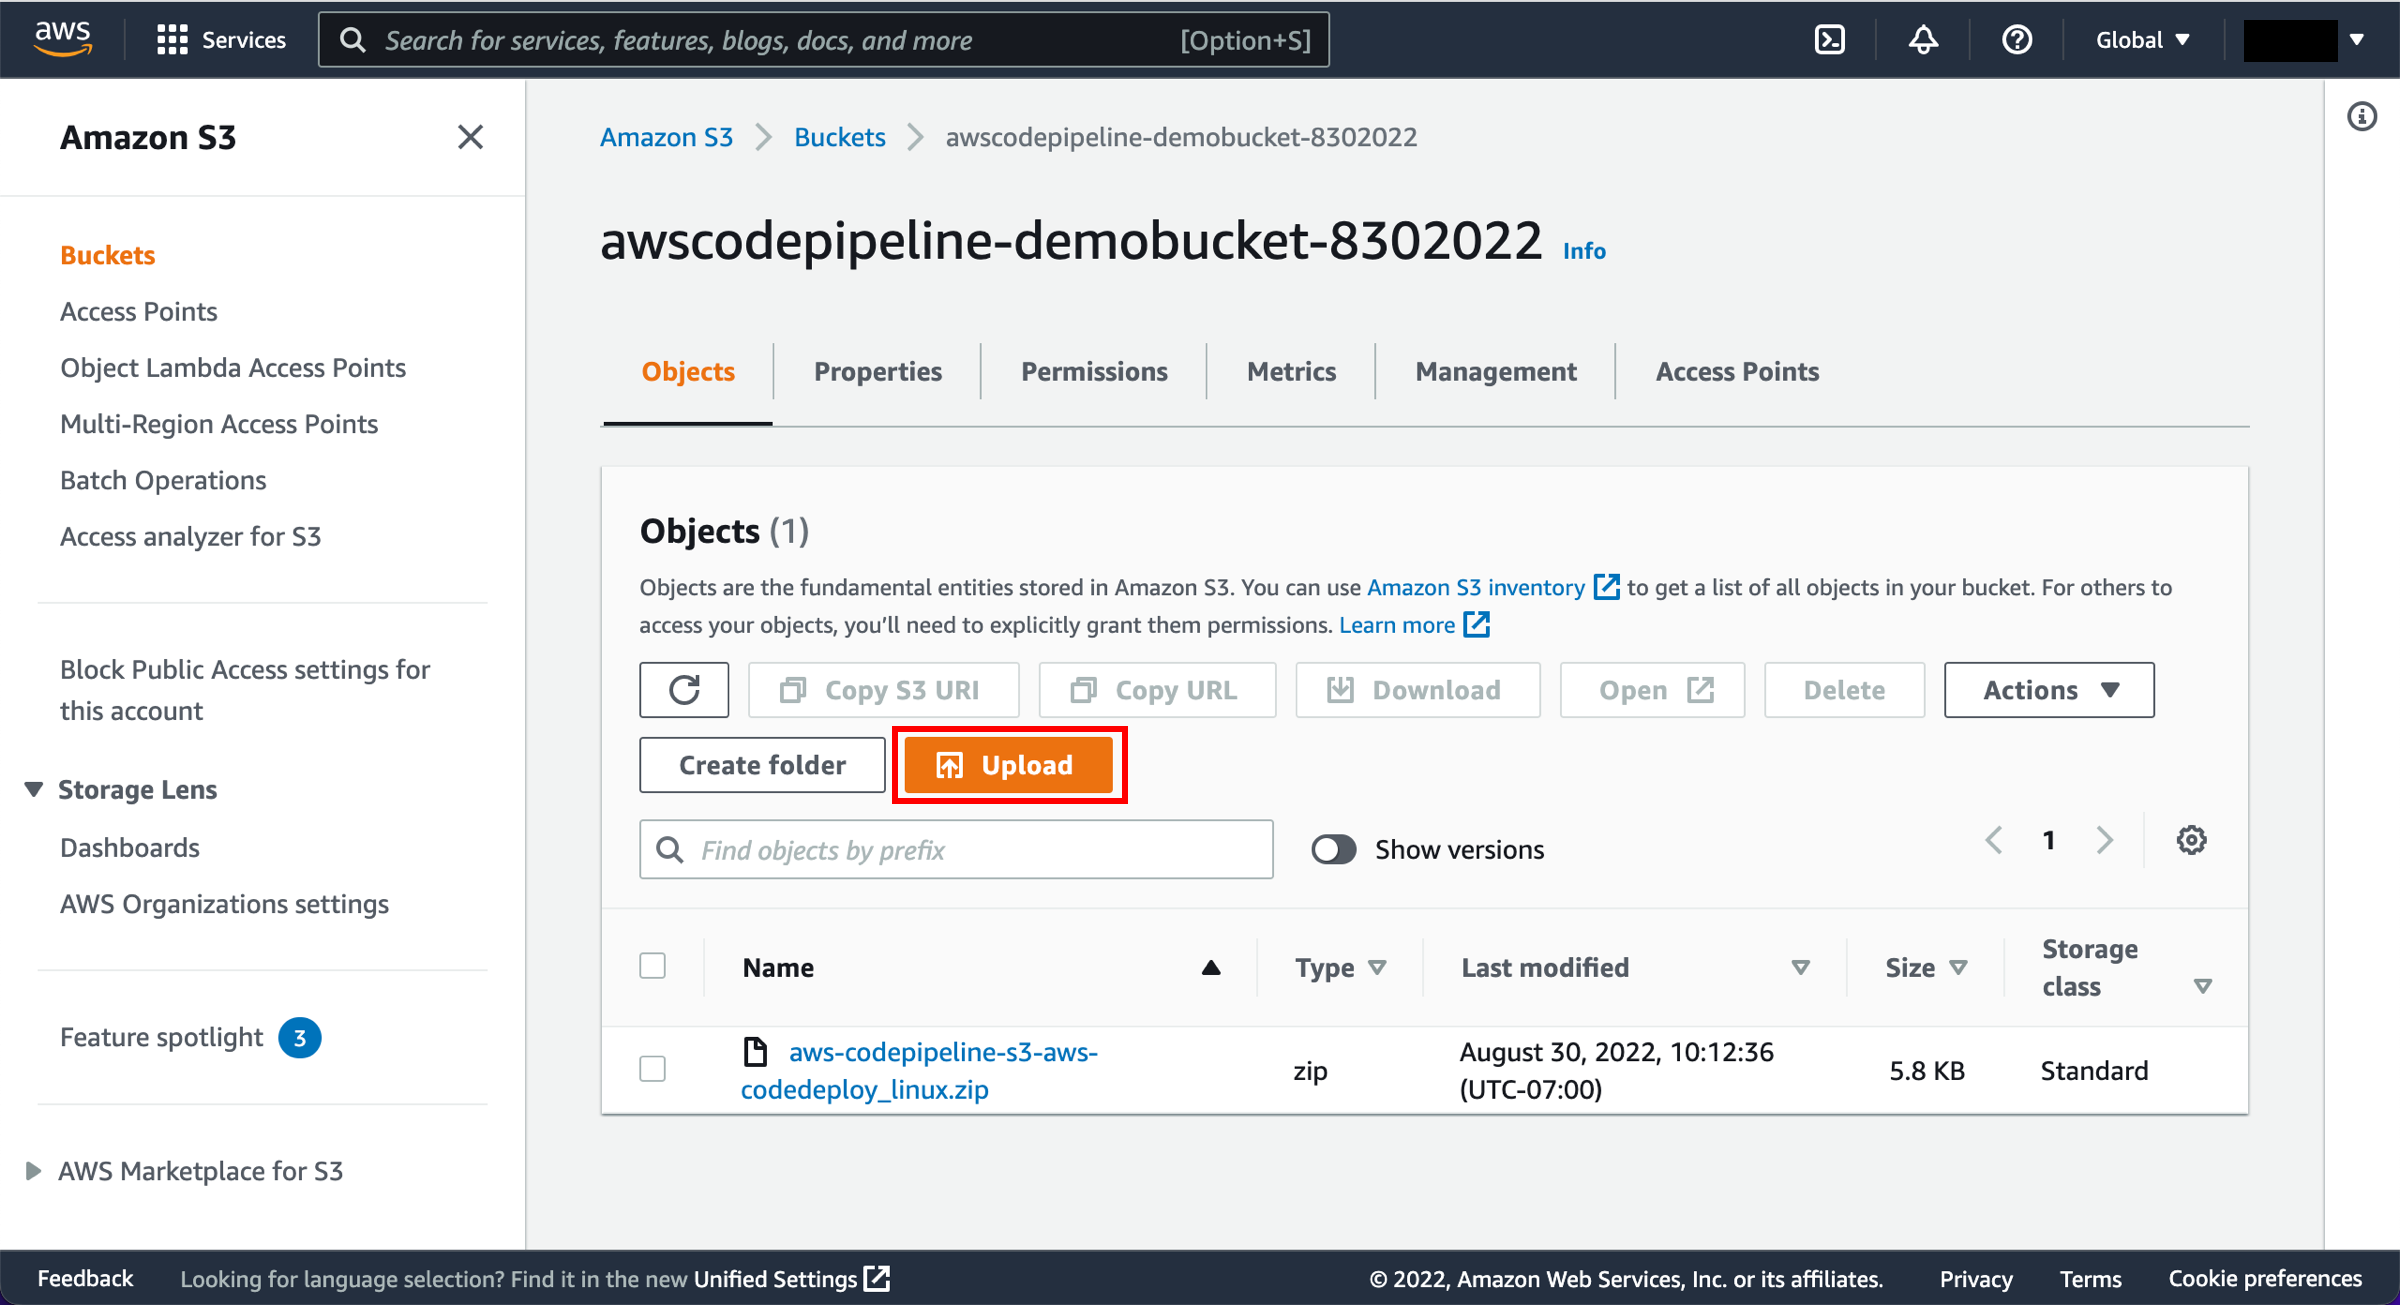
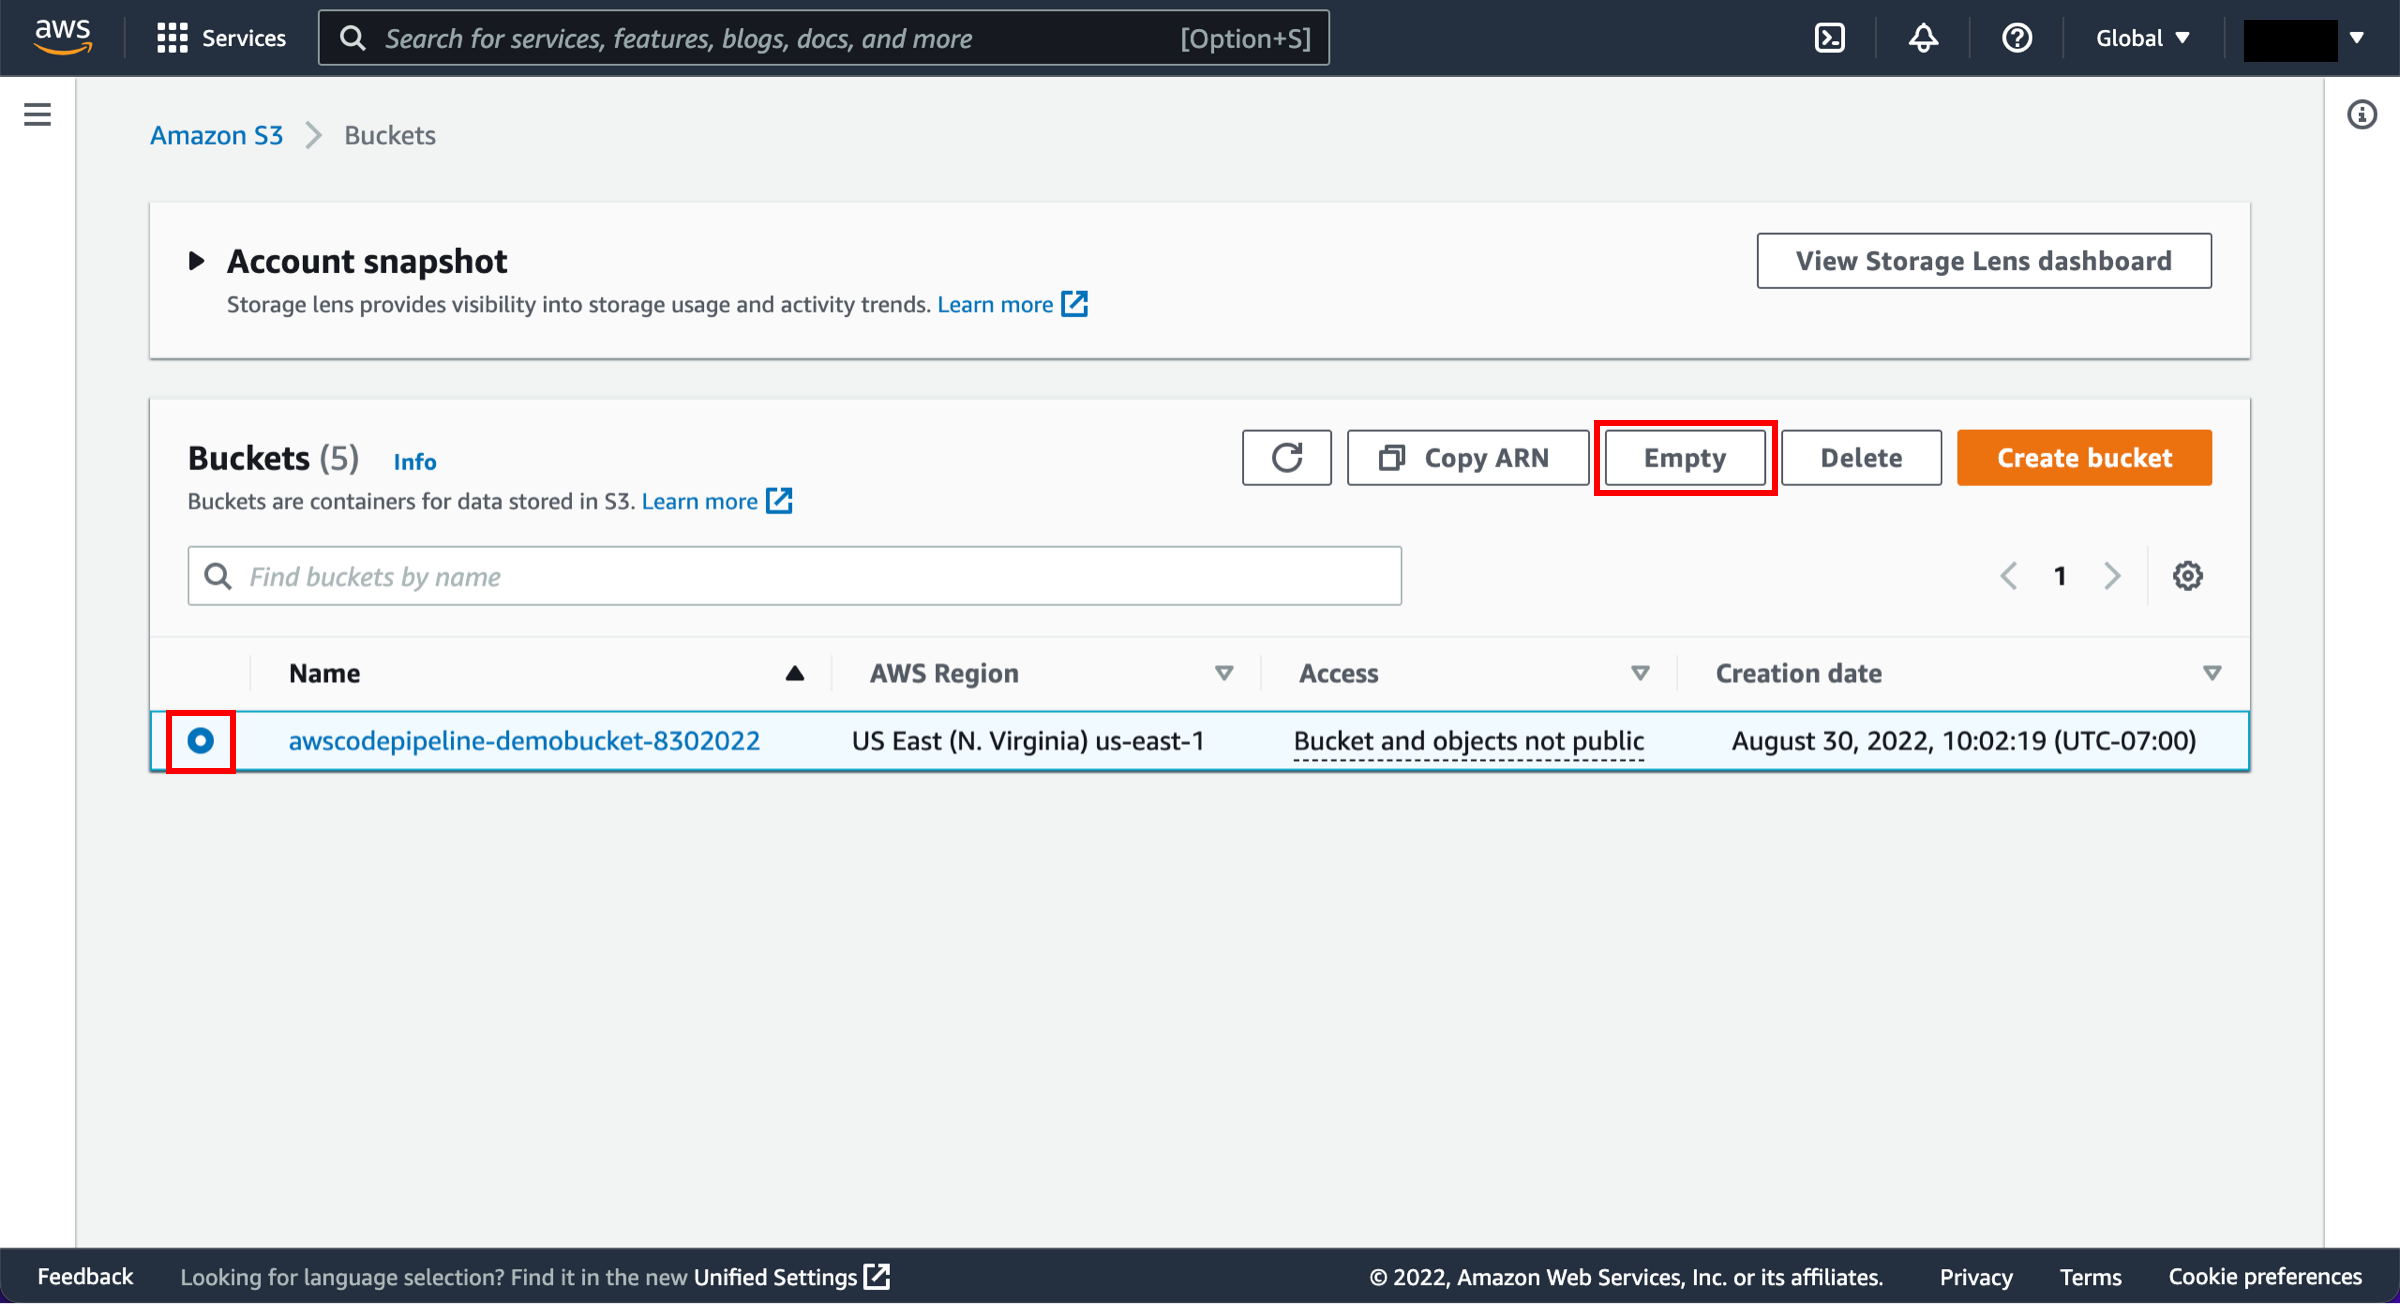
Empty the bucket contents
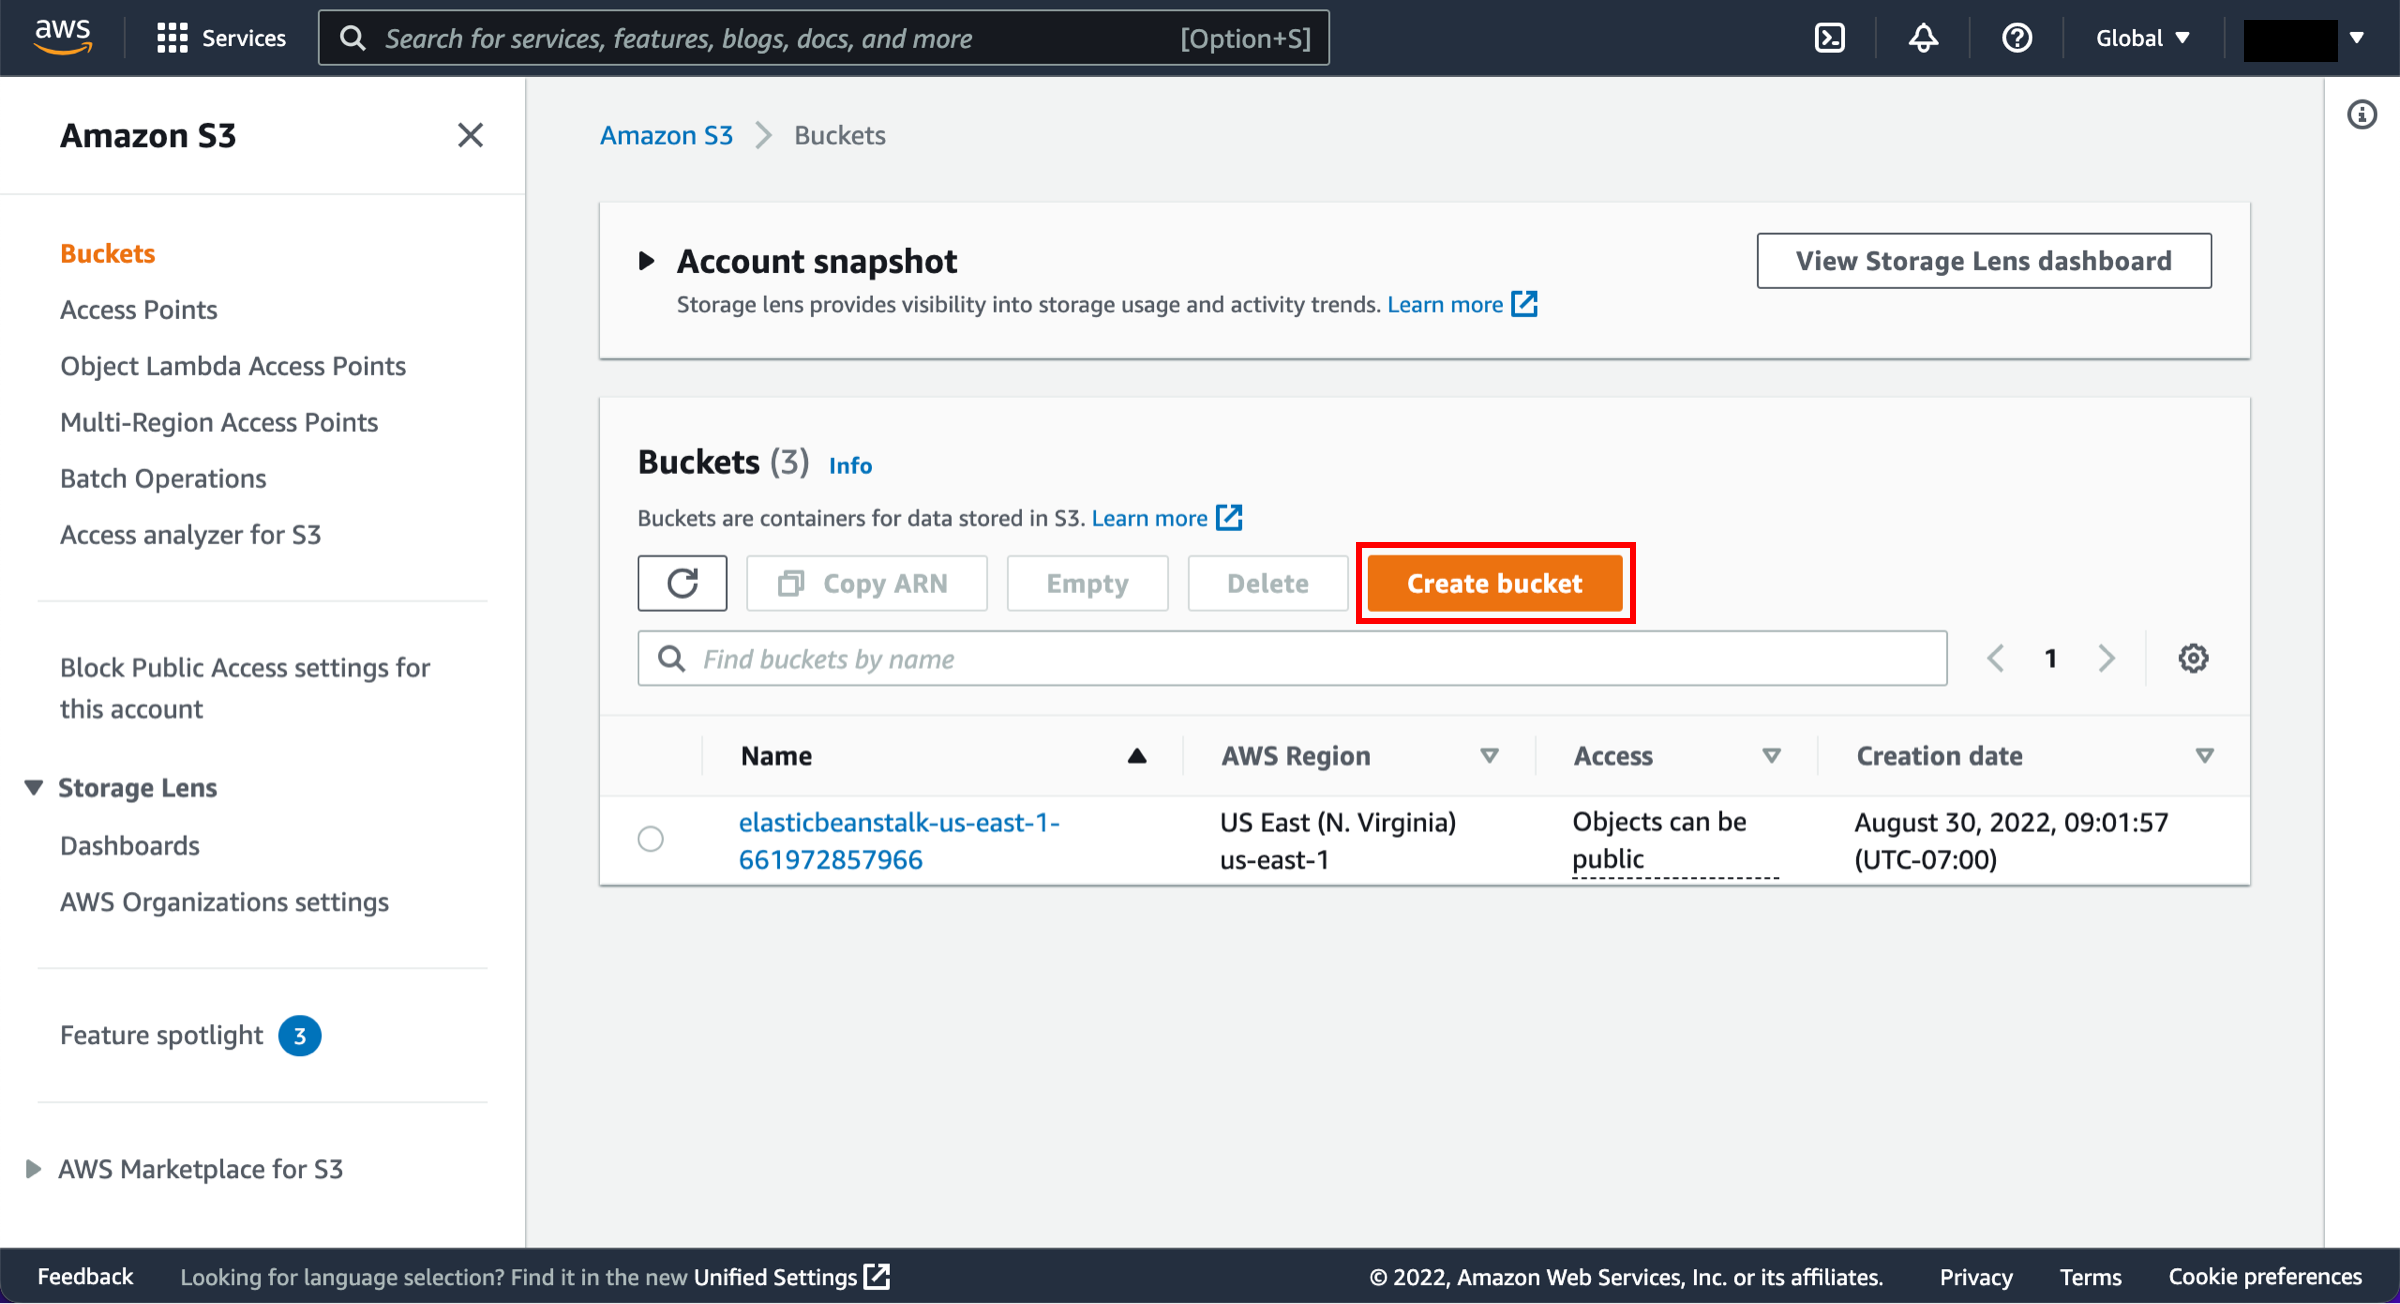
Visit the S3 console. First, we will empty the S3 bucket. Select the radio button next to the awscodepipeline bucket and choose Empty.
-
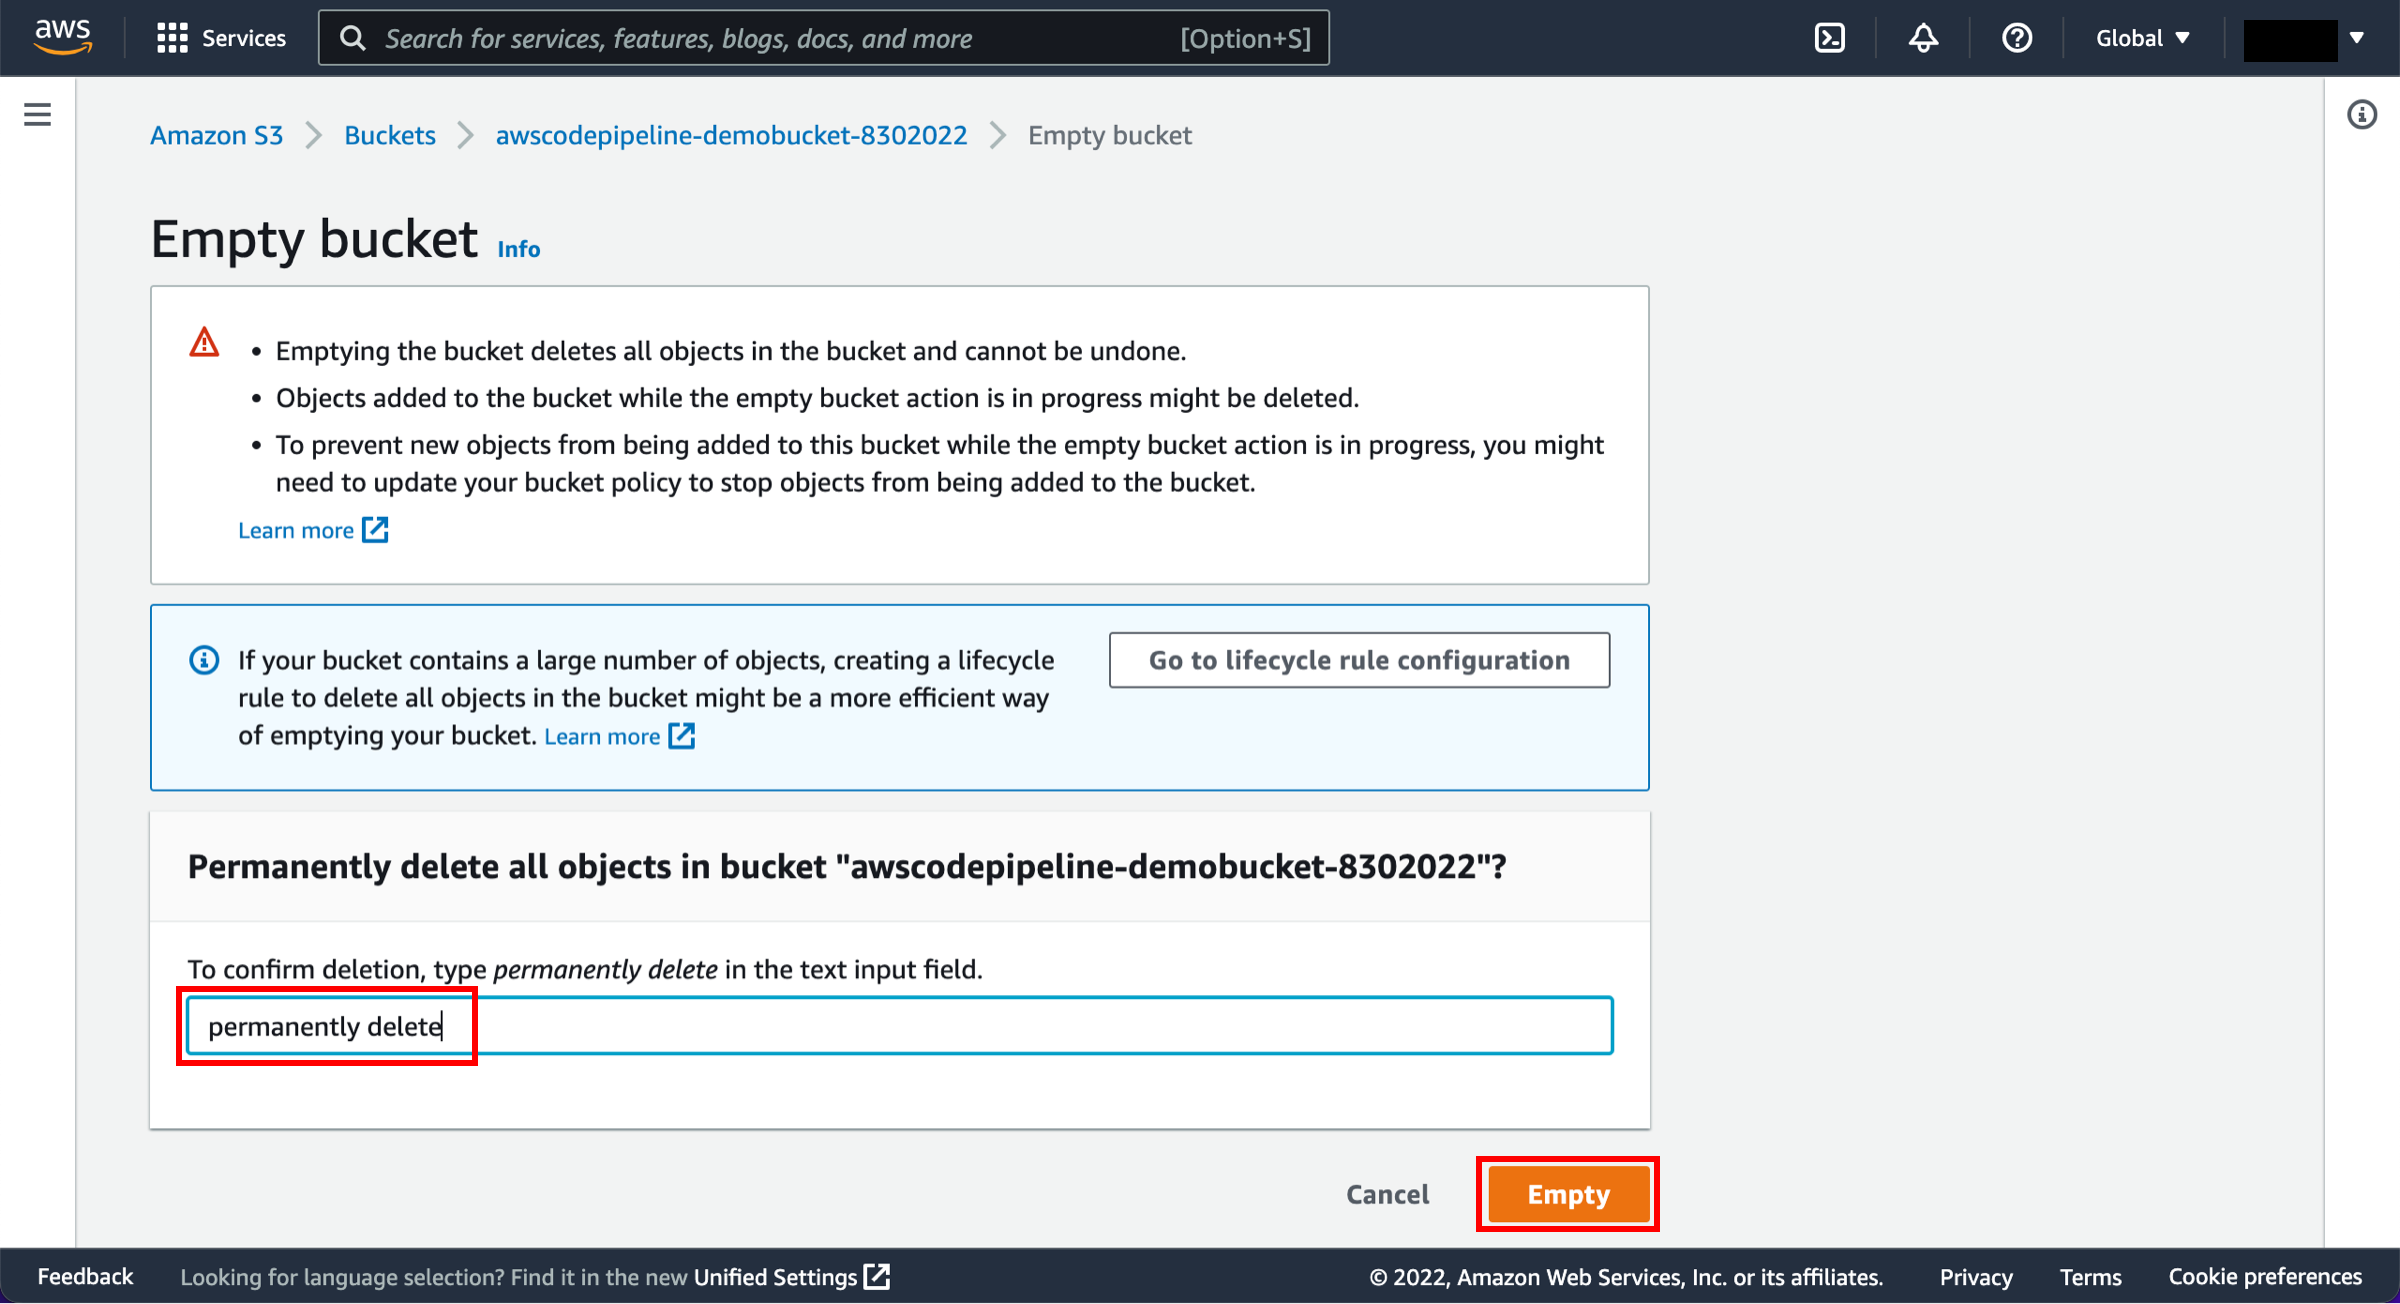
Confirm deletion
When a confirmation message appears, enter permanently delete in the text input field and choose Empty.
-
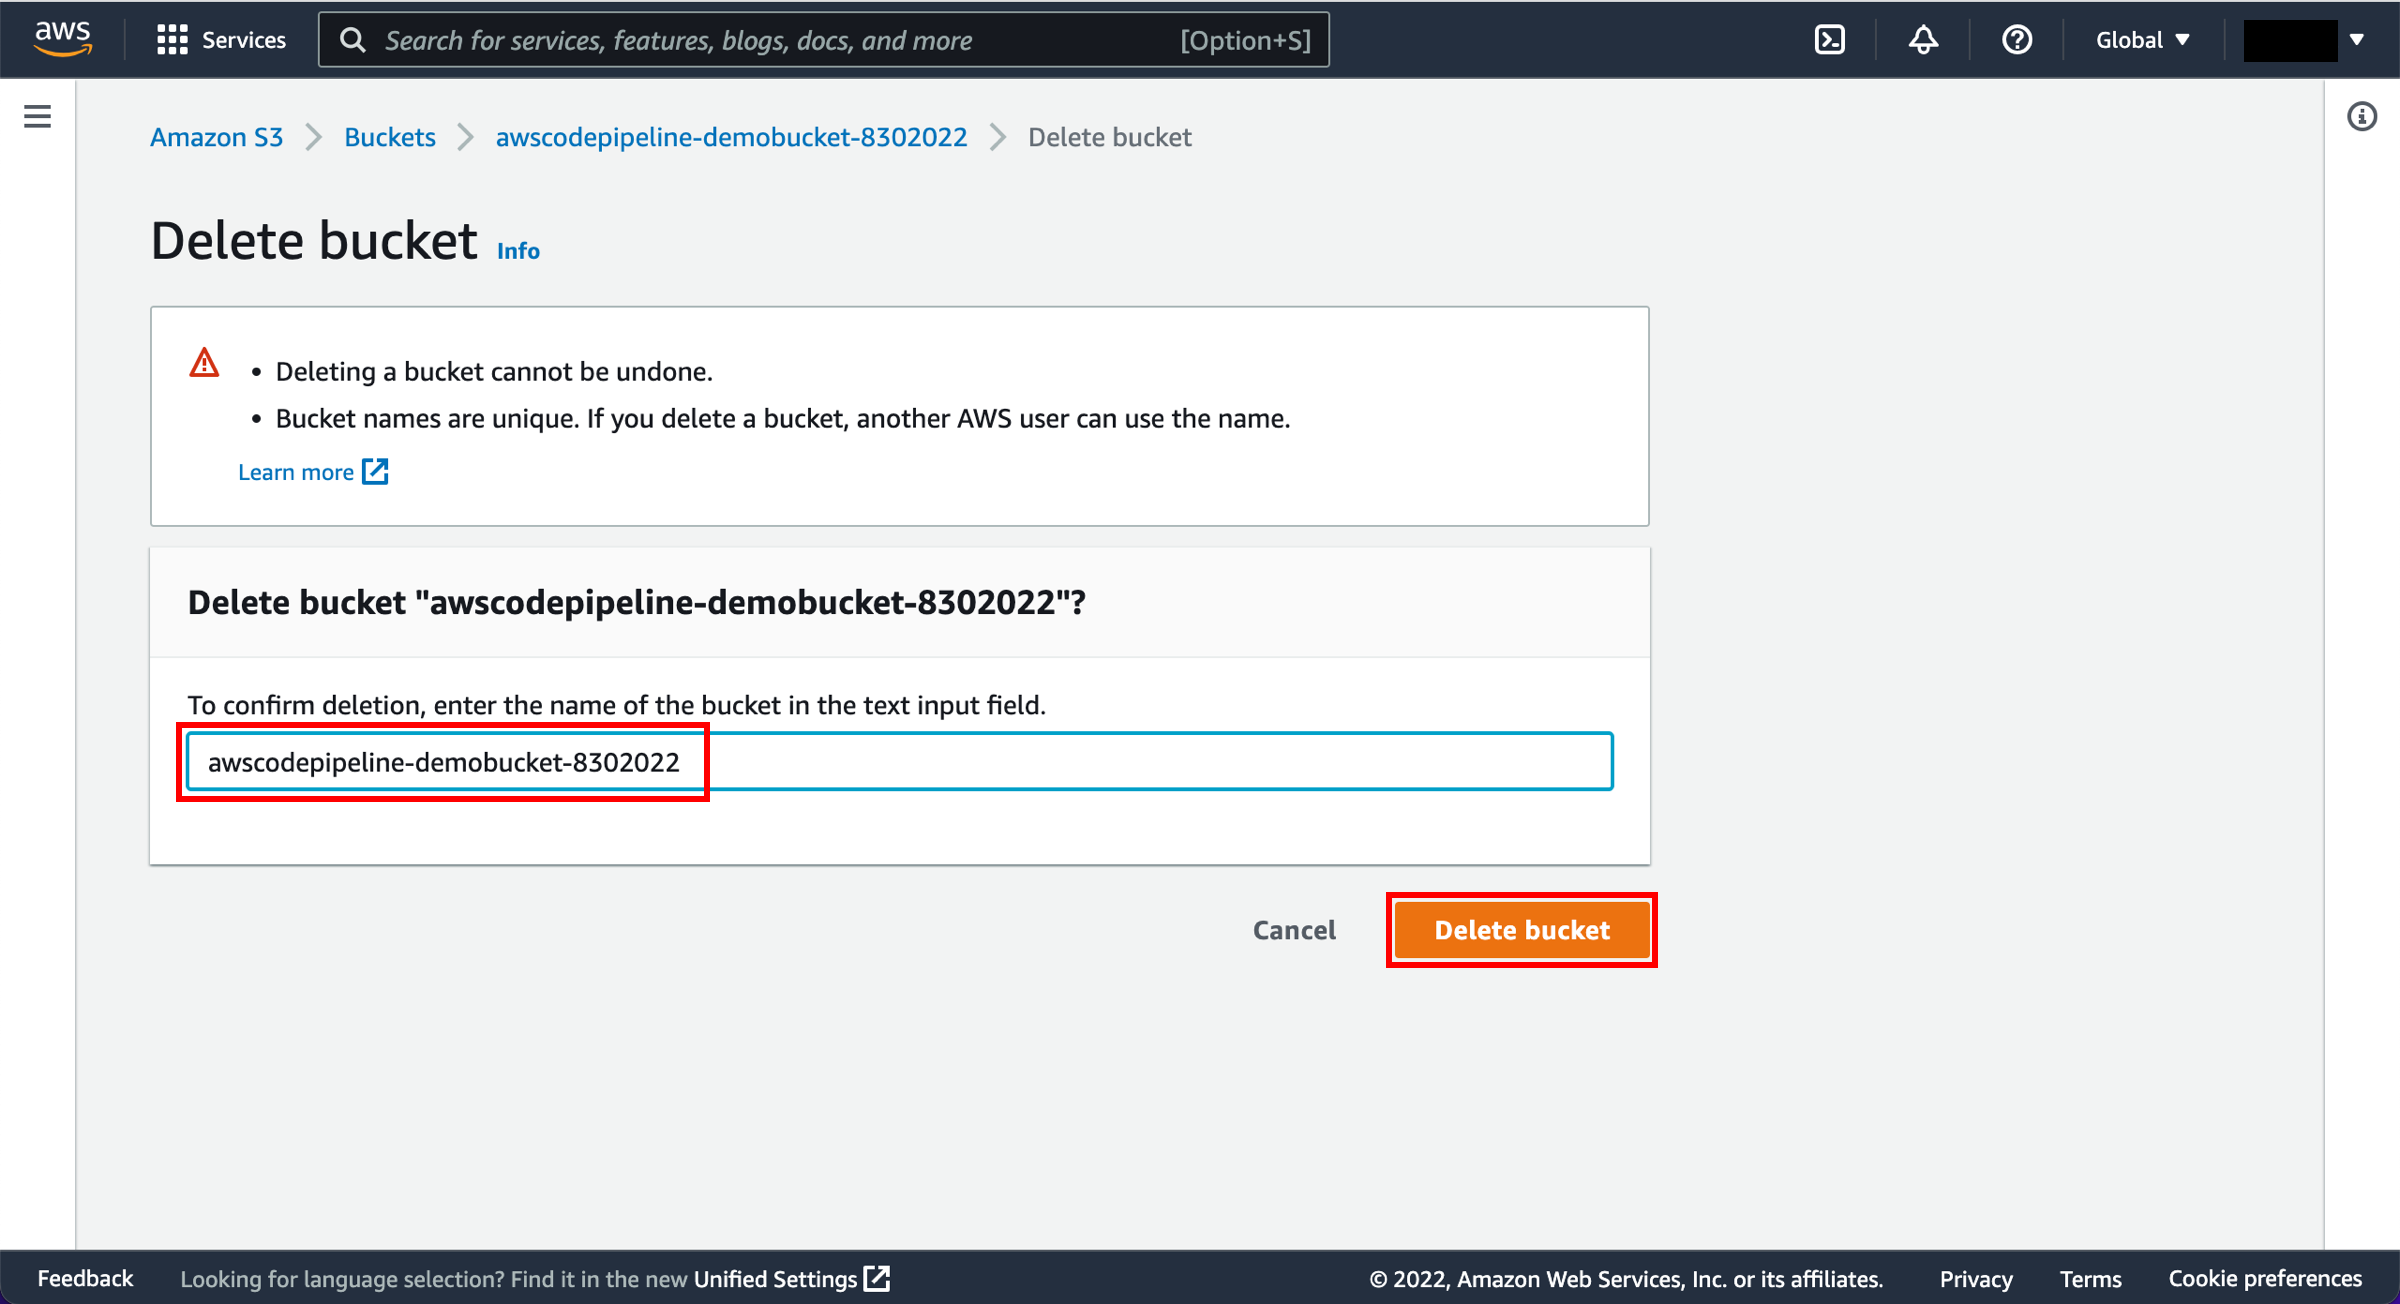
Delete the bucket
Now we will delete the bucket. Select the radio button next to the awscodepipeline bucket and choose Delete.
-
Confirm deletion
When a confirmation message appears, enter the bucket name and then choose Delete bucket.
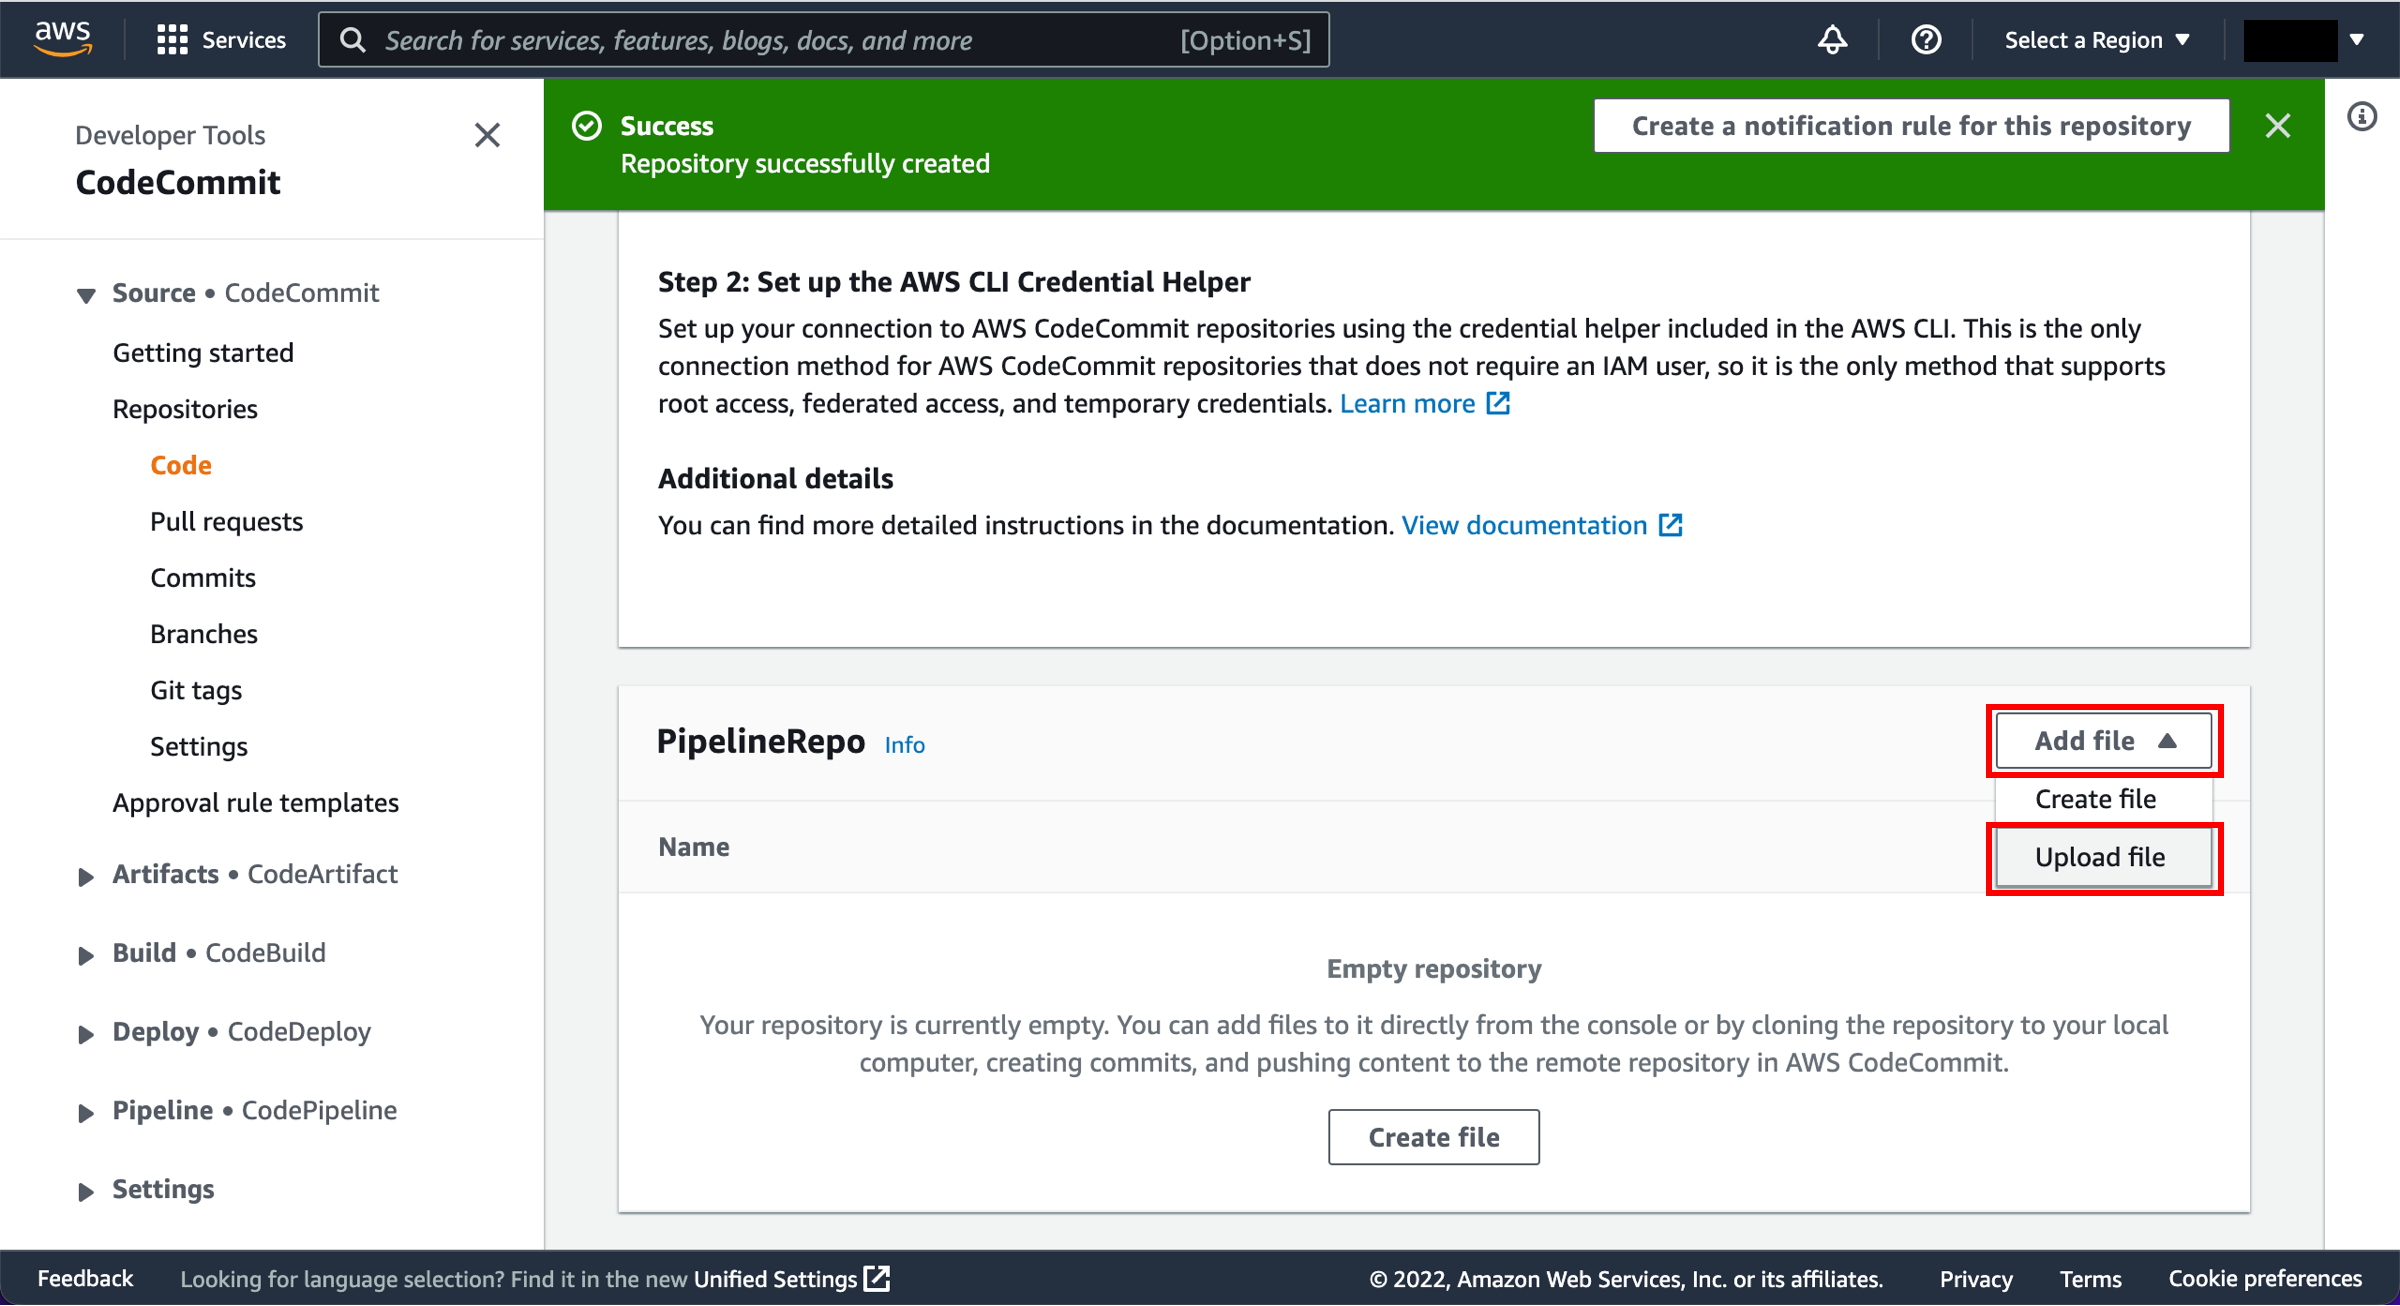
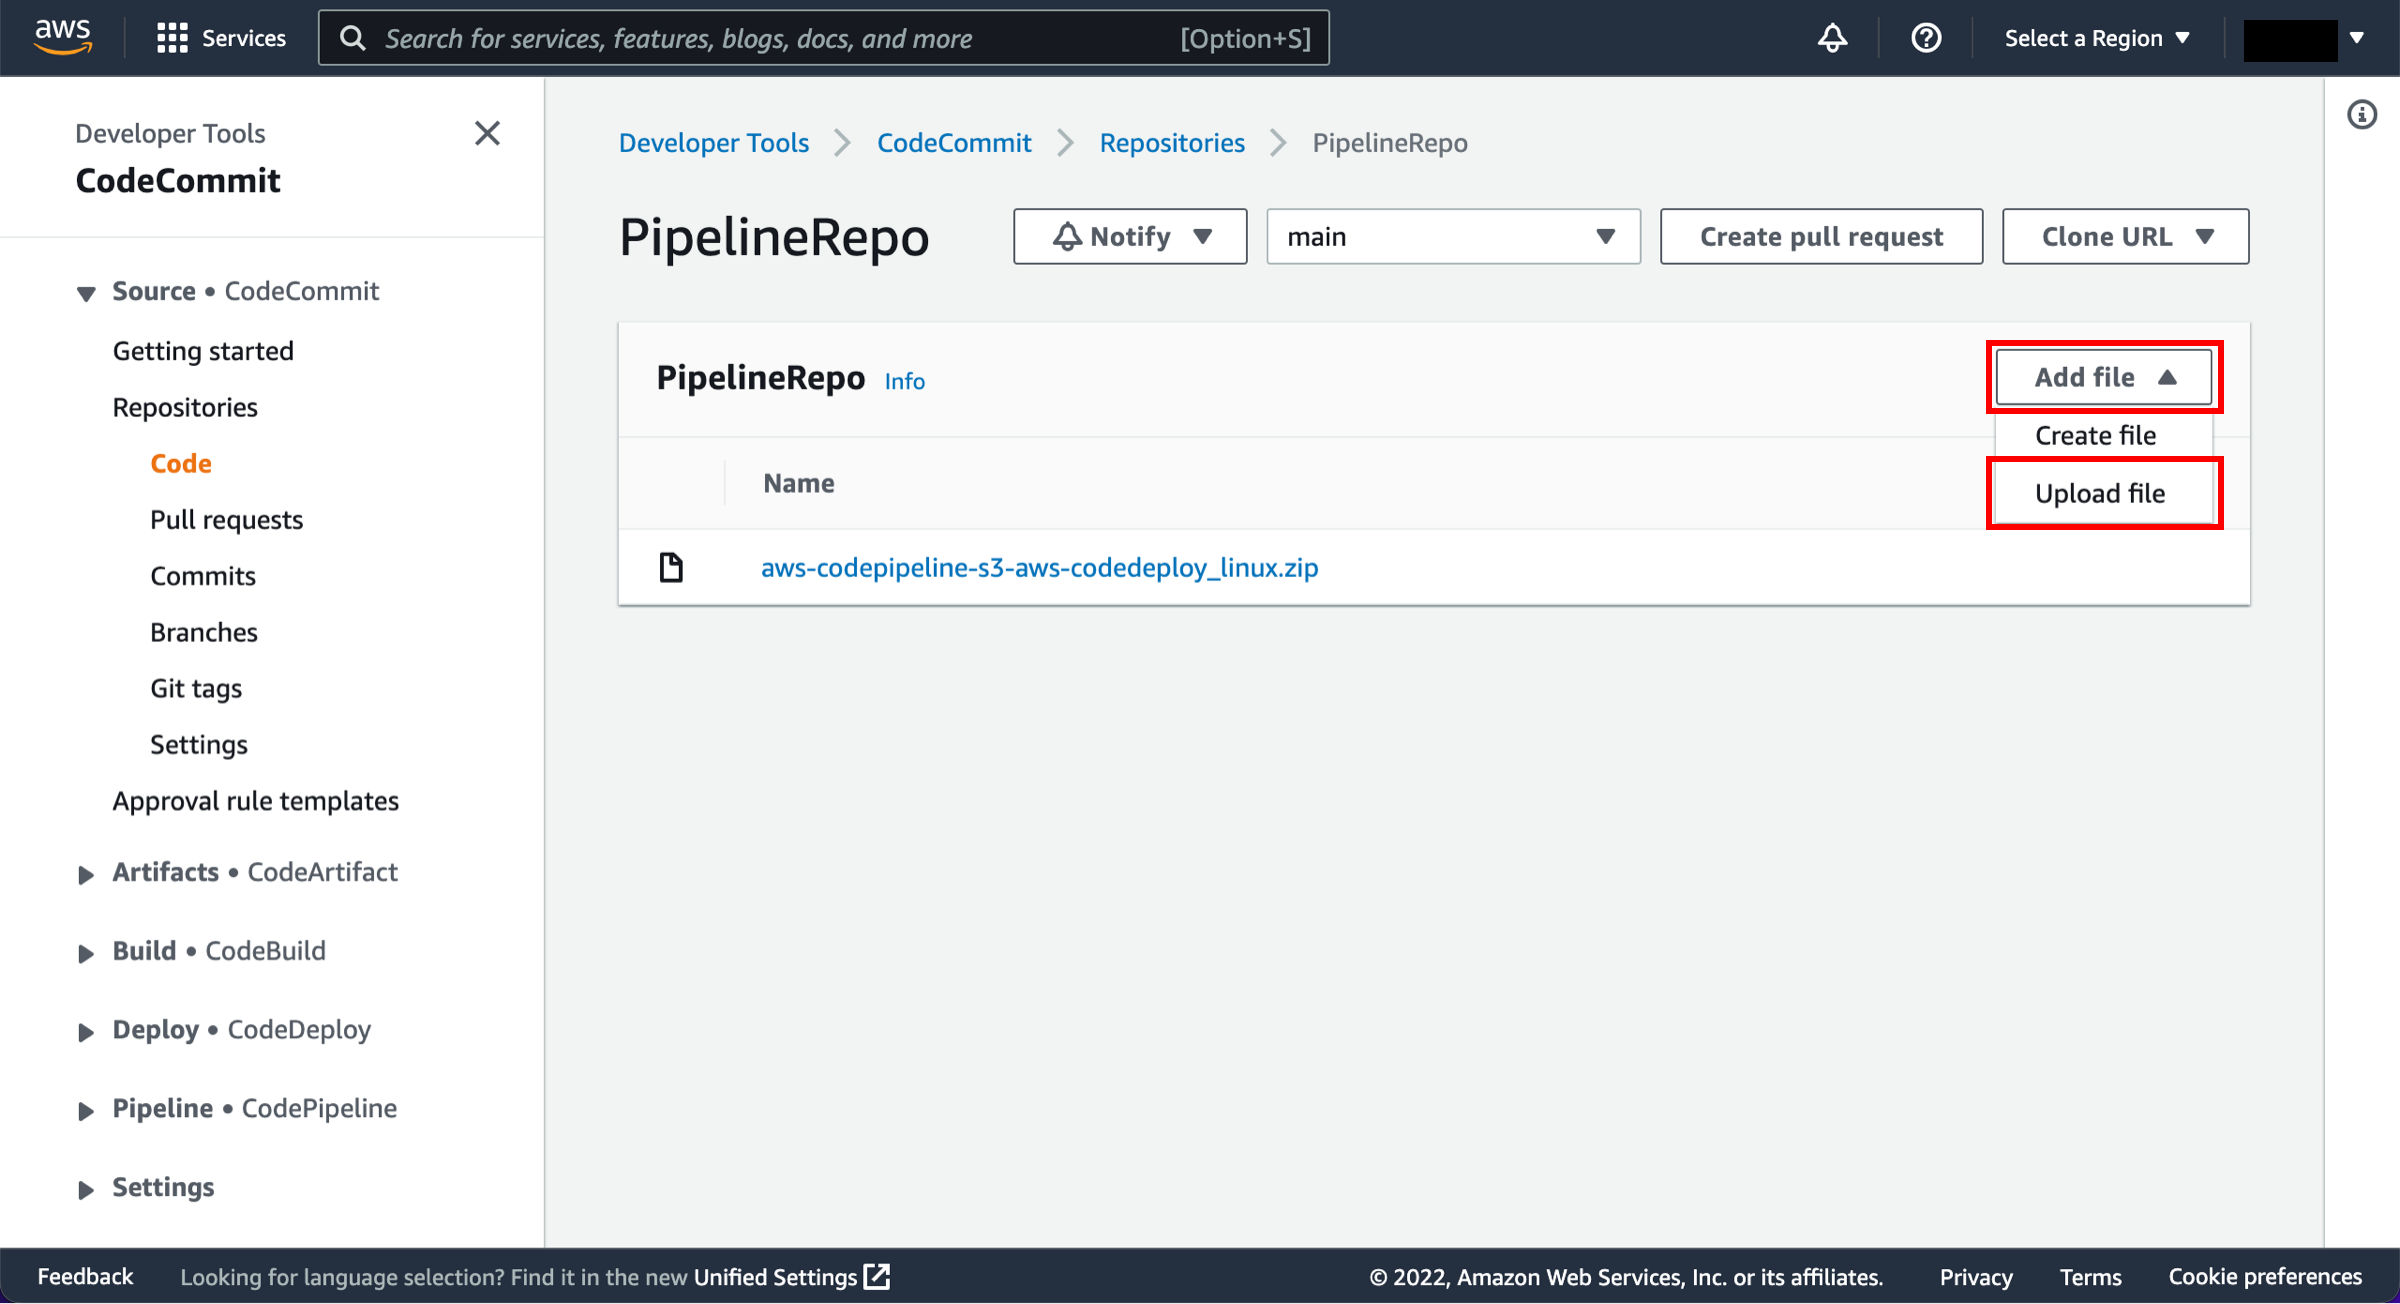
If you used AWS CodeCommit as your source, you can delete the resources to avoid future charges.
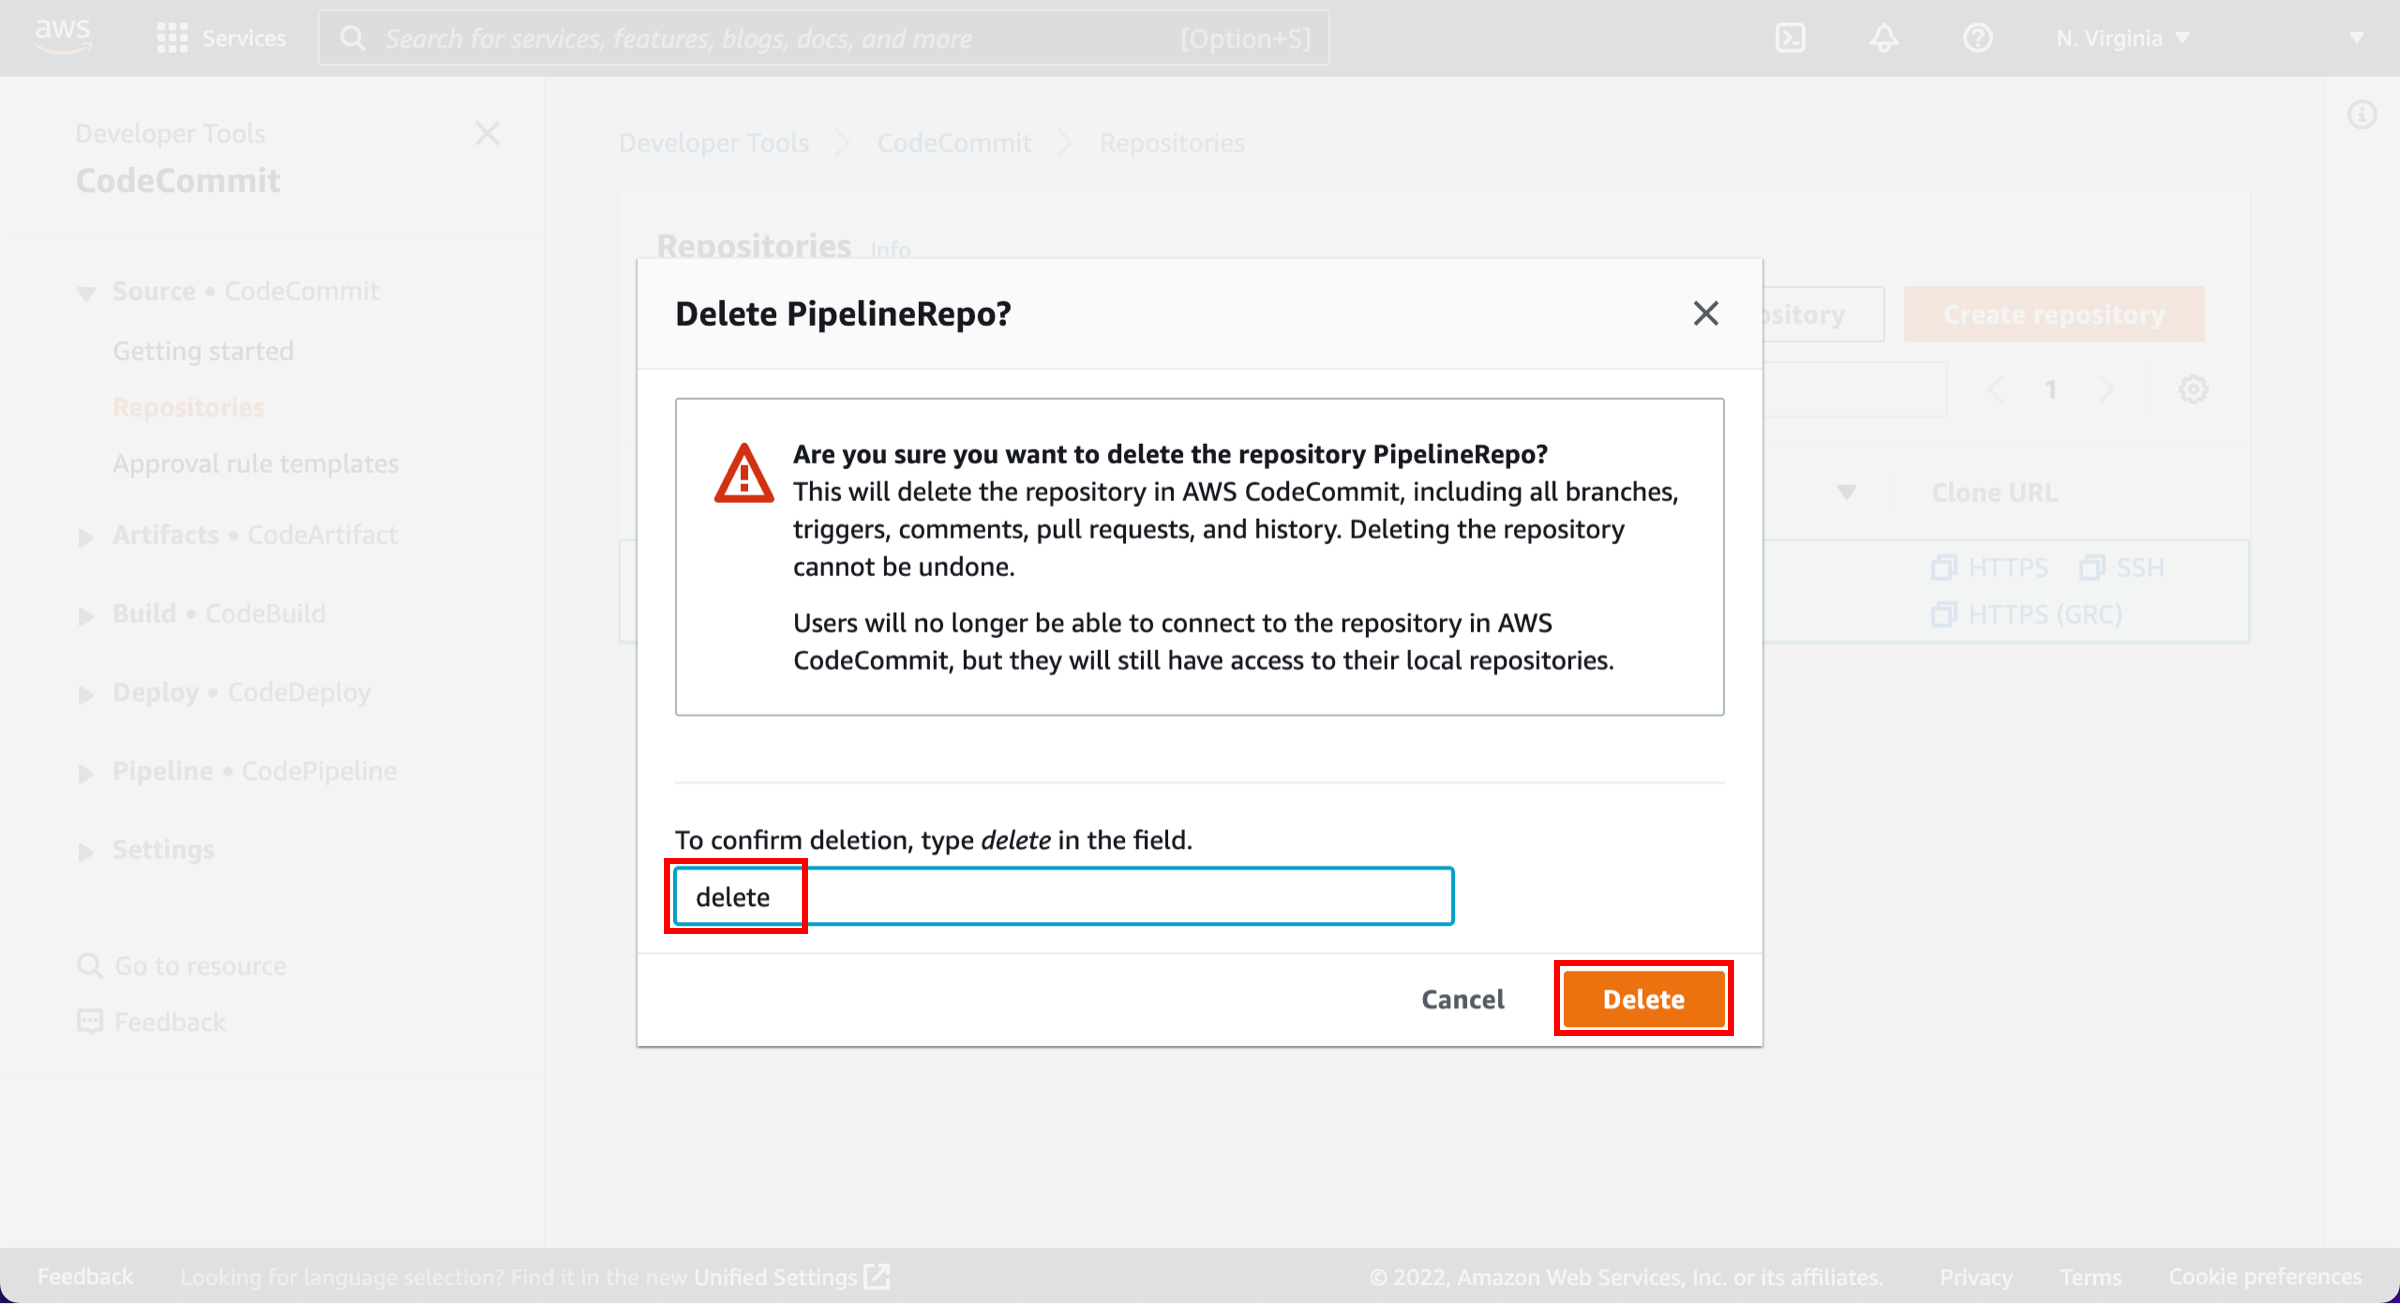
-
Delete the repository
Open the AWS CodeCommit repository.
Select the radio button next to the repository you created and choose Delete repository. 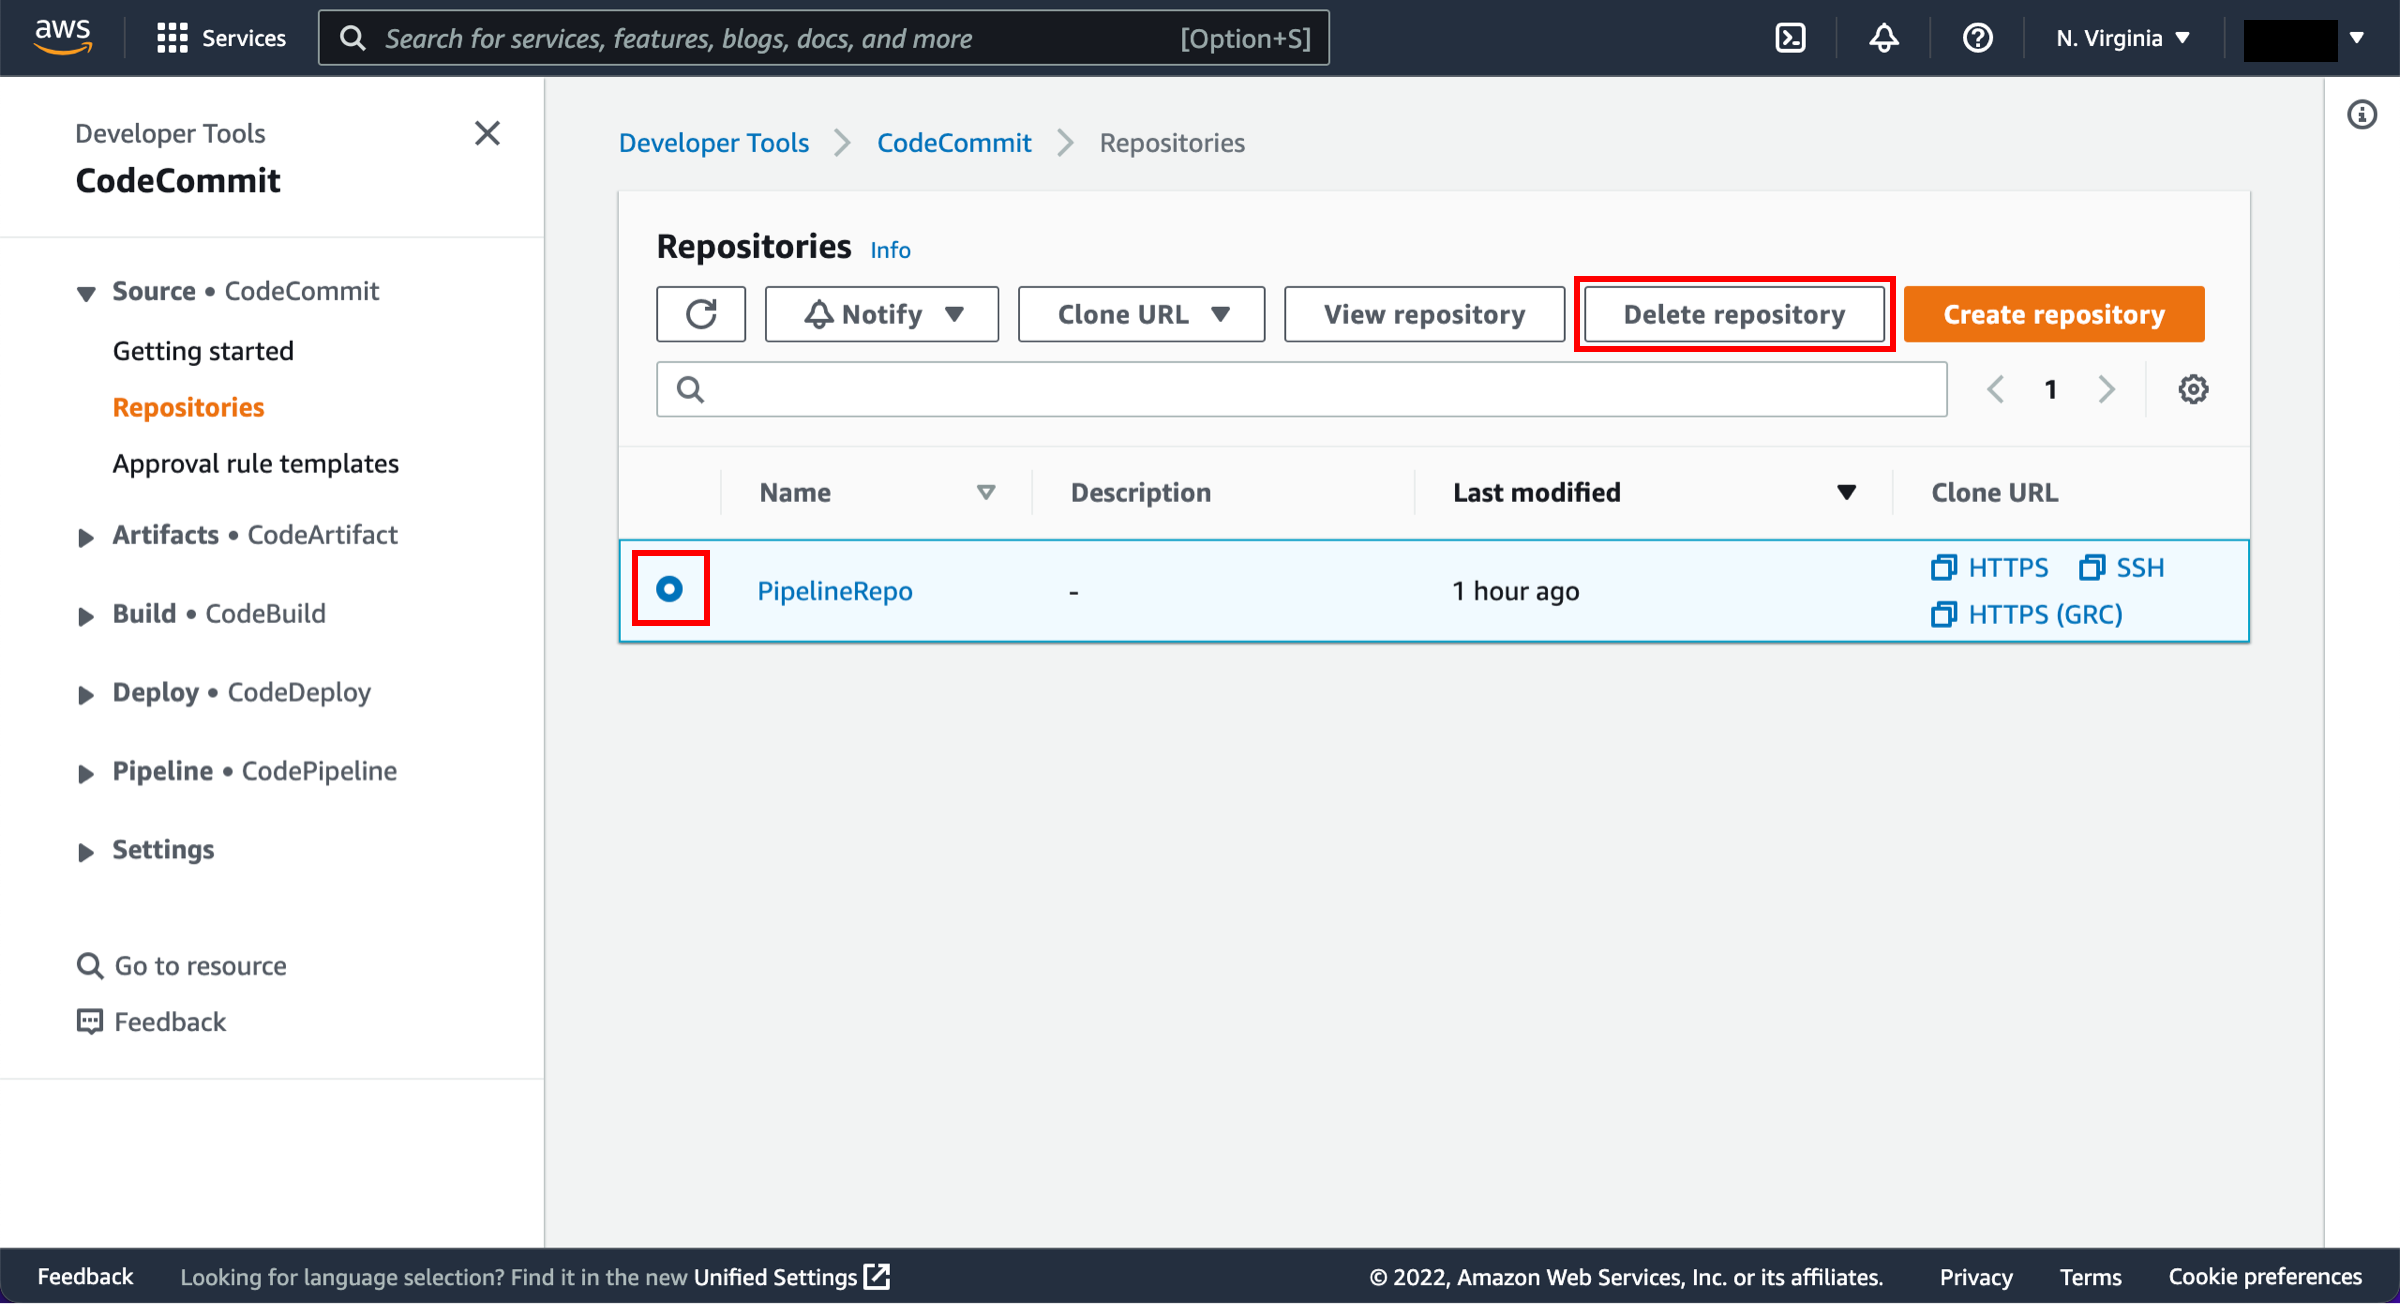
-
Confirm deletion
A confirmation window will pop up. Enter delete and choose Delete.
Conclusion
Congratulations! You have successfully created an automated software release pipeline using AWS CodePipeline. Using CodePipeline, you created a pipeline that uses GitHub, Amazon S3, or AWS CodeCommit as the source location for application code and then deploys the code to an Amazon EC2 instance managed by AWS Elastic Beanstalk. Your pipeline will automatically deploy your code every time there is a code change. You are one step closer to practicing continuous deployment!
