Step 1: Create an Amazon S3 Bucket
Important
This quick start guide uses a new version of the AWS
Management Console
First, you need to create an Amazon S3 bucket where you will store your objects.
-
Sign in to the preview version of the AWS Management Console
. -
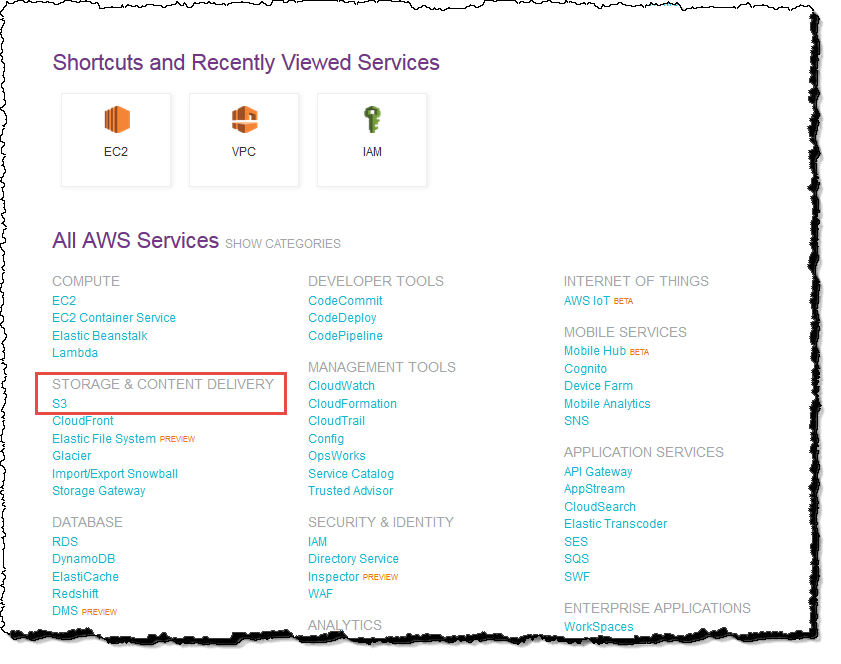
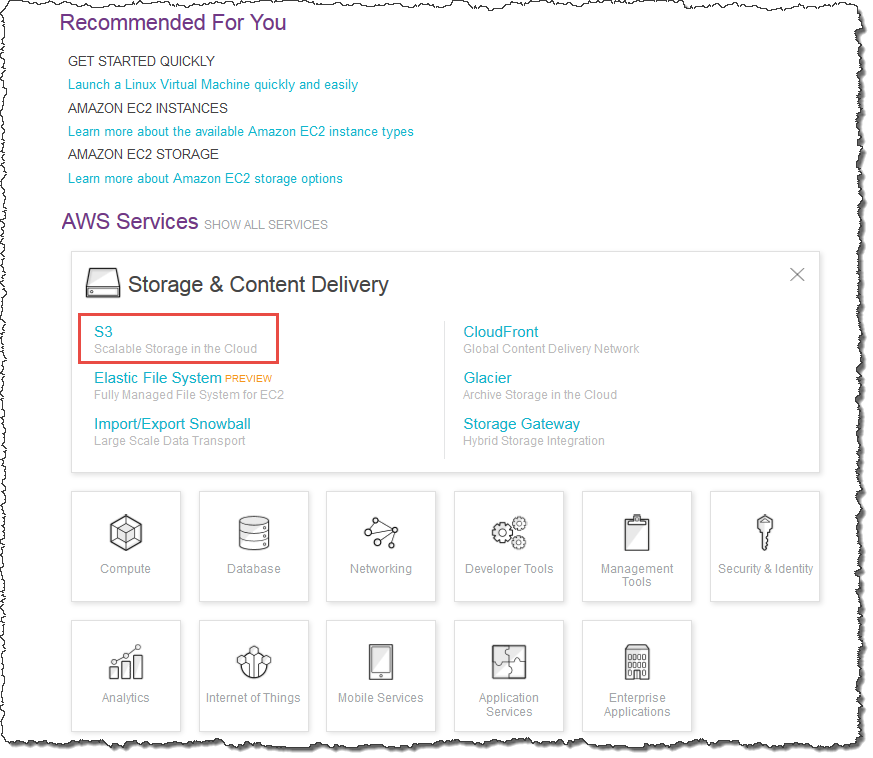
Under Storage & Content Delivery, choose S3 to open the Amazon S3 console.
If you are using the Show All Services view, your screen looks like this:

If you are using the Show Categories view, your screen looks like this with Storage & Content Delivery expanded:

-
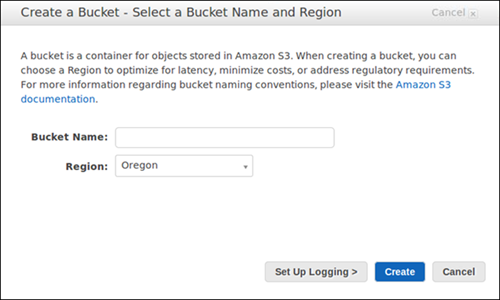
From the Amazon S3 console dashboard, choose Create Bucket.
-
In Create a Bucket, type a bucket name in Bucket Name.
The bucket name you choose must be globally unique across all existing bucket names in Amazon S3 (that is, across all AWS customers). For more information, see Bucket Restrictions and Limitations.

-
In Region, choose Oregon.
-
Choose Create.
When Amazon S3 successfully creates your bucket, the console displays your empty bucket in the Buckets pane.