Getting started with the Nuvoton NuMaker-IoT-M487
Important
This reference integration is hosted on the Amazon-FreeRTOS repository which is deprecated. We recommend that you start here when you create a new project. If you already have an existing FreeRTOS project based on the now deprecated Amazon-FreeRTOS repository, see the Amazon-FreeRTOS Github Repository Migration Guide.
This tutorial provides instructions for getting started with the Nuvoton NuMaker-IoT-M487
development board. The
series microcontroller, and includes built-in RJ45 Ethernet and Wi-Fi modules. If you don't have
the Nuvoton NuMaker-IoT-M487, visit the AWS Partner Device
Catalog
Before you begin, you must configure AWS IoT and your FreeRTOS software to connect your development
board to the AWS Cloud. For instructions, see First steps. In this tutorial, the path to the FreeRTOS download directory is
referred to as freertos
Overview
This tutorial guides you through the following steps:
-
Install software on your host machine for developing and debugging embedded applications for your microcontroller board.
-
Cross-compile a FreeRTOS demo application to a binary image.
-
Load the application binary image to your board, and then run the application.
Set up your development environment
The Keil MDK Nuvoton edition is designed for developing and debugging applications for Nuvoton M487 boards. The Keil MDK v5 Essential, Plus, or Pro version should also work for the Nuvoton M487 (Cortex-M4 core) MCU. You can download the Keil MDK Nuvoton edition with a price discount for the Nuvoton Cortex-M4 series MCUs. The Keil MDK is only supported on Windows.
To install the development tool for the NuMaker-IoT-M487
-
Download the Keil MDK Nuvoton Edition
from the Keil MDK website. -
Install the Keil MDK on your host machine using your license. The Keil MDK includes the Keil µVision IDE, a C/C++ compilation toolchain, and the µVision debugger.
If you experience issues during installation, contact Nuvoton
for assistance. -
Install the Nu-Link_Keil_Driver_V3.06.7215r (or latest version), which is on the Nuvoton Development Tool
page.
Build and run the FreeRTOS demo project
To build the FreeRTOS demo project
-
Open the Keil µVision IDE.
-
On the File menu, choose Open. In the Open file dialog box, make sure the file type selector is set to Project Files.
-
Choose either the Wi-Fi or Ethernet demo project to build.
-
To open the Wi-Fi demo project, choose the target project
aws_demos.uvprojin thefreertos\projects\nuvoton\numaker_iot_m487_wifi\uvision\aws_demos -
To open the Ethernet demo project, choose the target project
aws_demos_eth.uvprojin thefreertos\projects\nuvoton\numaker_iot_m487_wifi\uvision\aws_demos_eth
-
-
To make sure your settings are correct to flash the board, right-click the
aws_demoproject in the IDE, and then choose Options. (See Troubleshooting for more details.) -
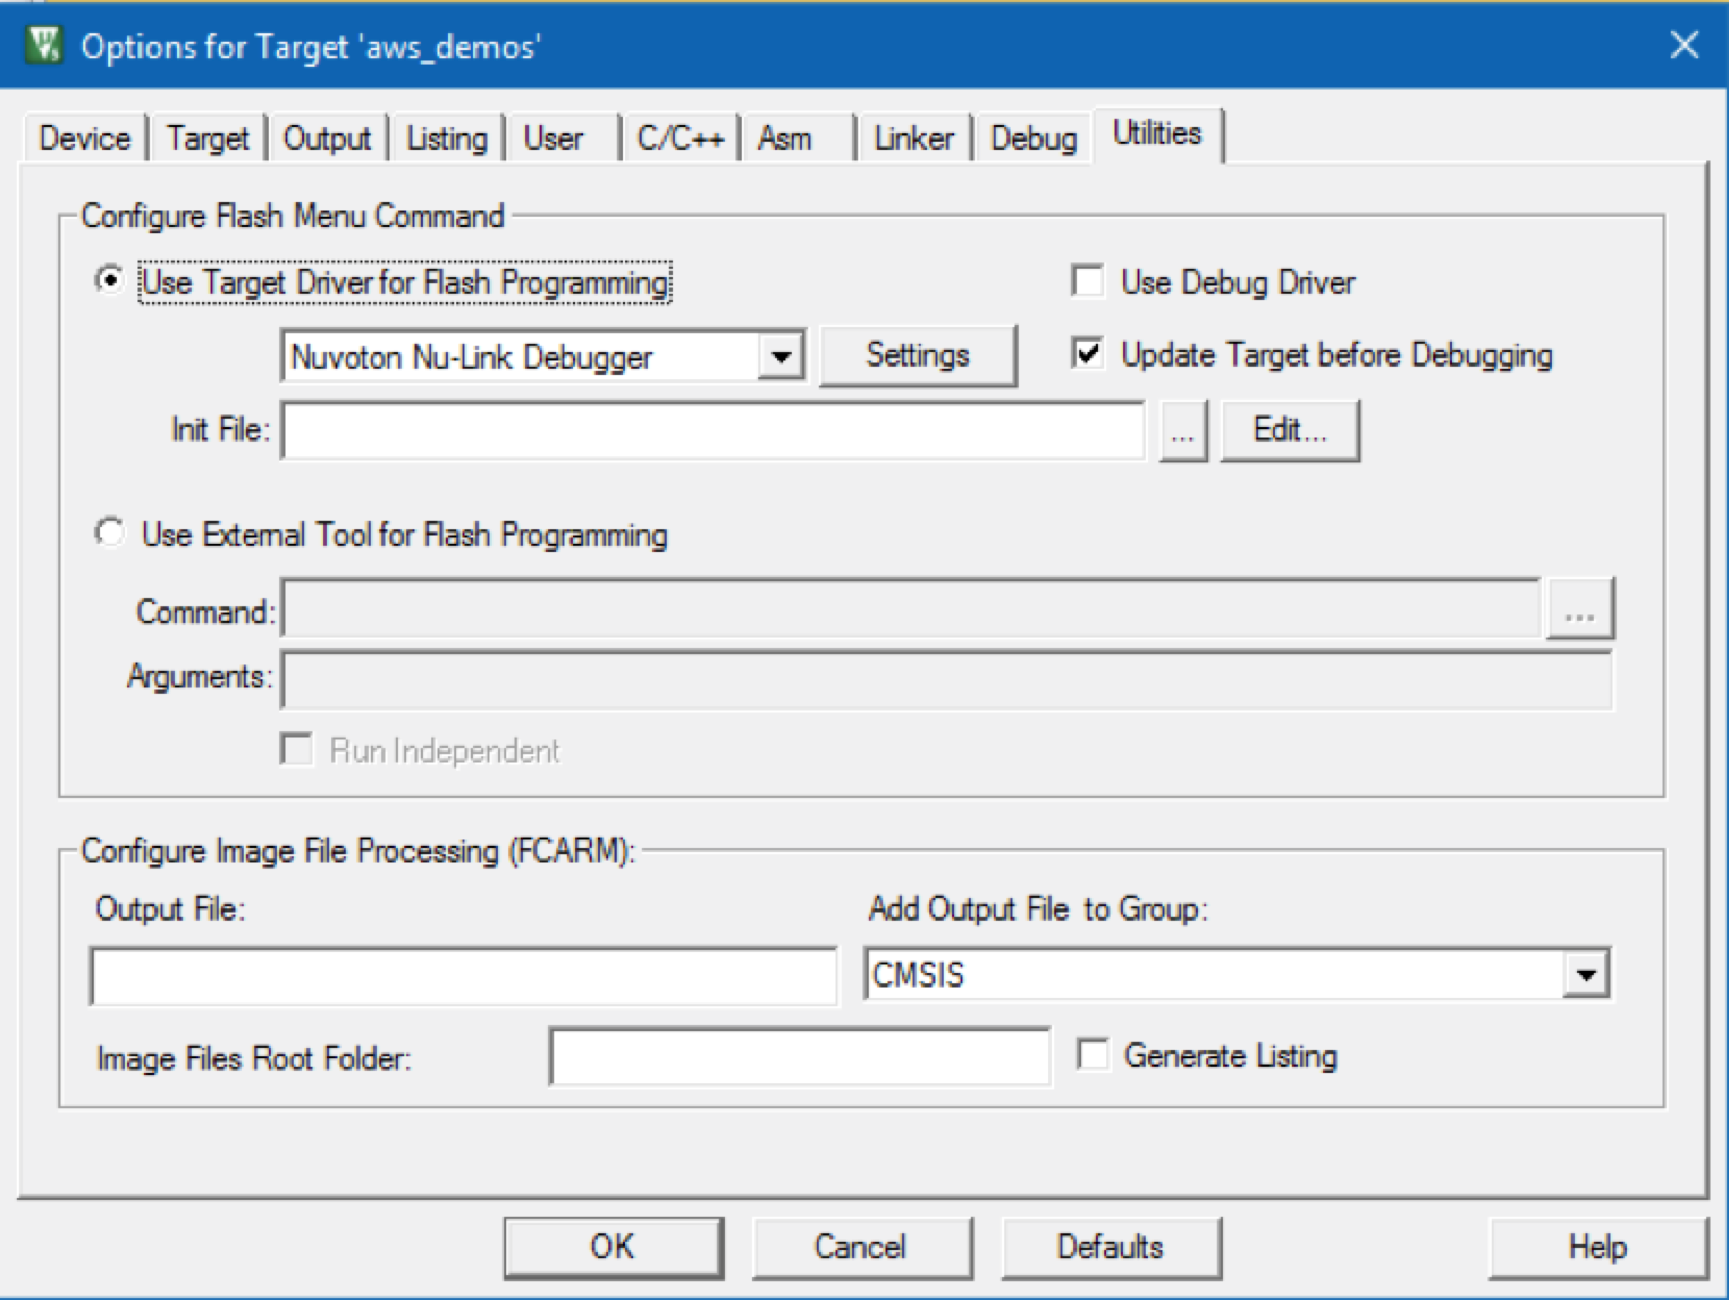
On the Utilities tab, verify that Use Target Driver for Flash Programming is selected, and that Nuvoton Nu-Link Debugger is set as the target driver.
-
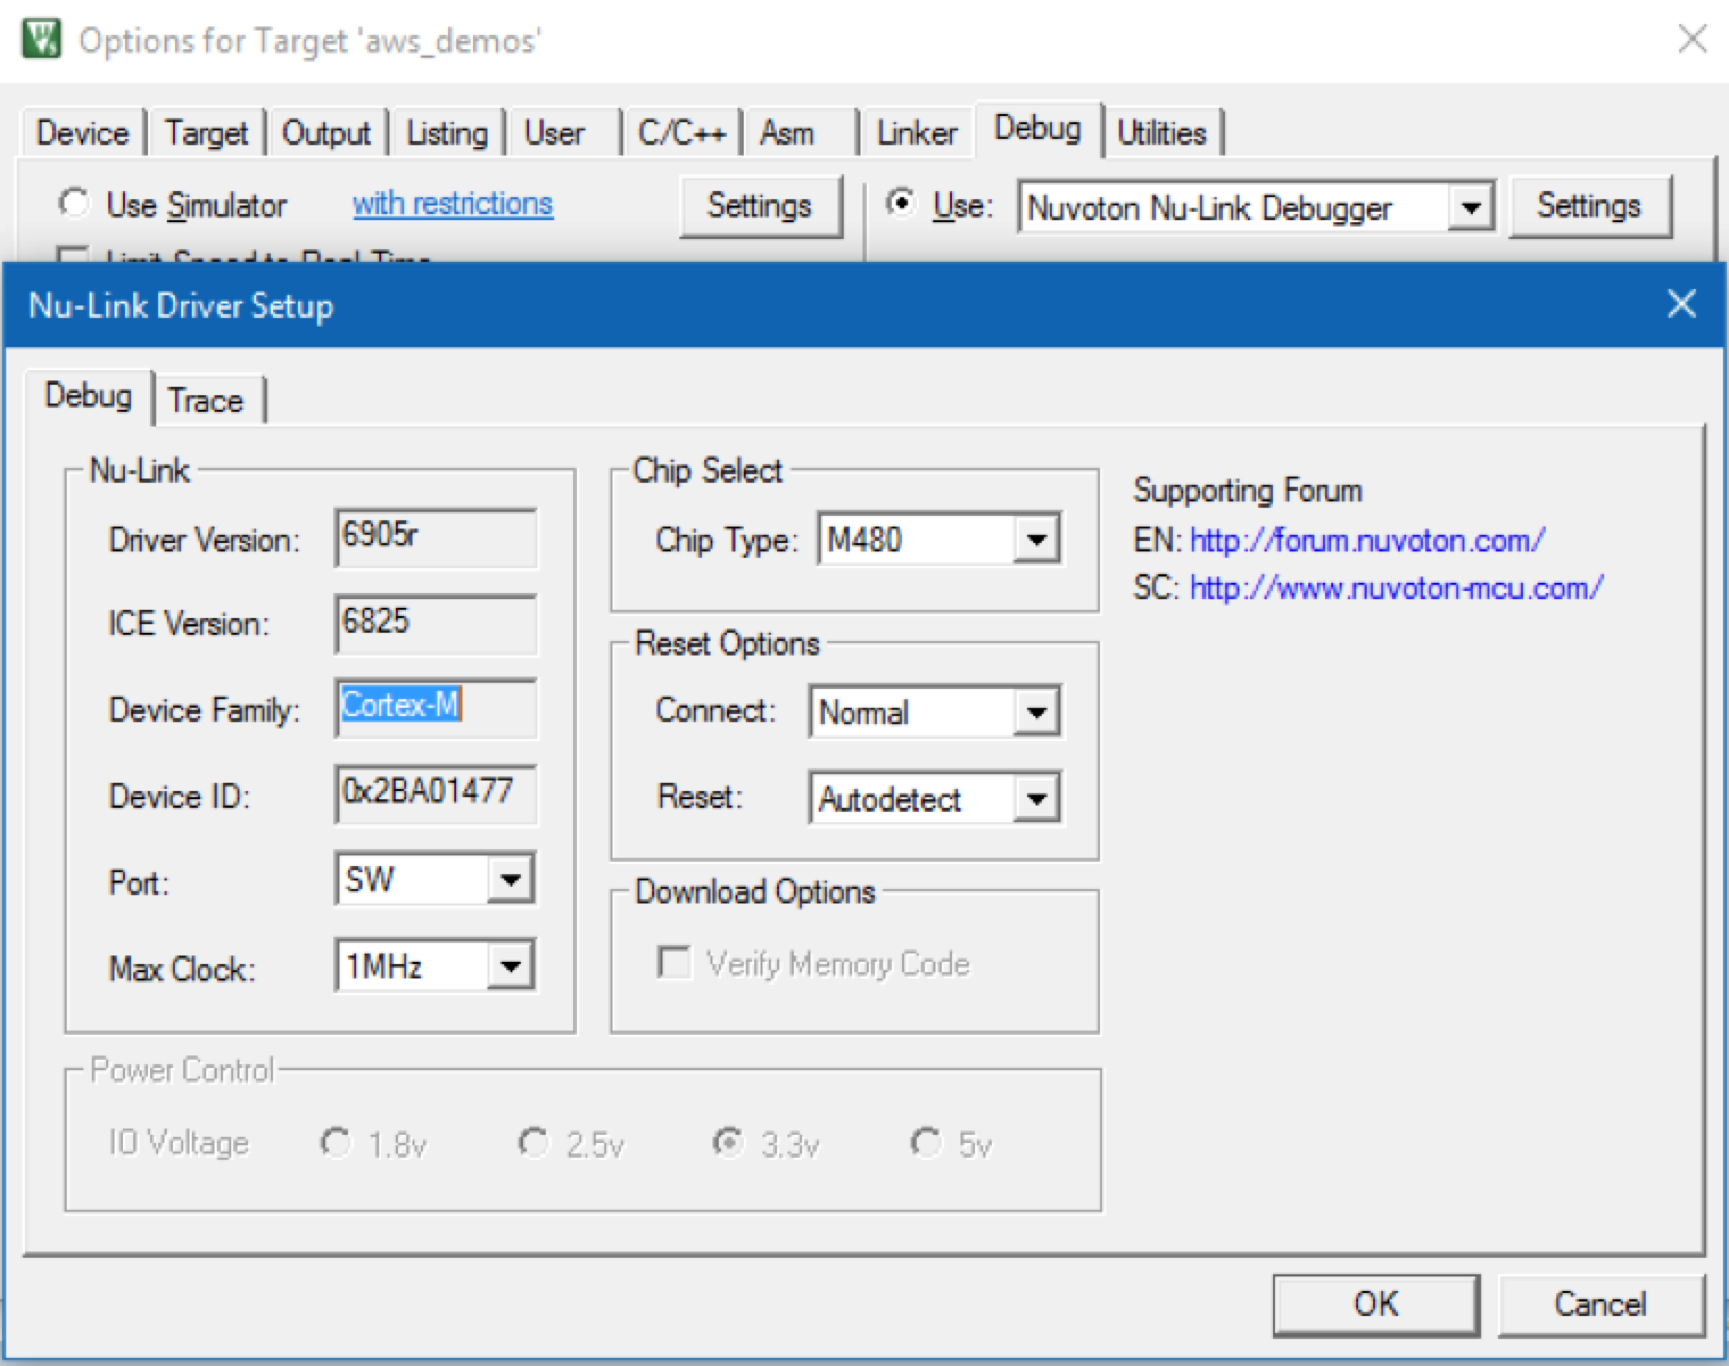
On the Debug tab, next to Nuvoton Nu-Link Debugger, choose Settings.
-
Verify that the Chip Type is set to M480.
-
In the Keil µVision IDE Project navigation pane, choose the
aws_demosproject. On the Project menu, choose Build Target.
You can use the MQTT client in the AWS IoT console to monitor the messages that your device sends to the AWS Cloud.
To subscribe to the MQTT topic with the AWS IoT MQTT client
-
Sign in to the AWS IoT console
. -
In the navigation pane, choose Test, then choose MQTT test client to open the MQTT client.
-
In Subscription topic, enter
your-thing-name/example/topic
To run the FreeRTOS demo project
-
Connect your Numaker-IoT-M487 board to your host machine (computer).
-
Rebuild the project.
-
In the Keil µVision IDE, on the Flash menu, choose Download.
-
On the Debug menu, choose Start/Stop Debug Session.
-
When the debugger stops at the breakpoint in
main(), open the Run menu, and then choose Run (F5).You should see MQTT messages sent by your device in the MQTT client in the AWS IoT console.
Using CMake with FreeRTOS
You can also use CMake to build and run the FreeRTOS demo applications or applications you have developed using third-party code editors and debugging tools.
Make sure you have installed the CMake build system. Follow the instructions in Using CMake with FreeRTOS, and then follow the steps in this section.
Note
Be sure the path to the location of the compiler (Keil) is in your Path system variable,
for example, C:\Keil_v5\ARM\ARMCC\bin.
You can also use the MQTT client in the AWS IoT console to monitor the messages that your device sends to the AWS Cloud.
To subscribe to the MQTT topic with the AWS IoT MQTT client
-
Sign in to the AWS IoT console
. -
In the navigation pane, choose Test, then choose MQTT test client to open the MQTT client.
-
In Subscription topic, enter
your-thing-name/example/topic
To generate build files from source files and run the demo project
-
On your host machine, open the command prompt and navigate to the
freertosfolder. -
Create a folder to contain the generated build file. We will refer to this folder as the
BUILD_FOLDER. -
Generate the build files for either the Wi-Fi or Ethernet demo.
-
For Wi-Fi:
Navigate to the directory that contains the source files for the FreeRTOS demo project. Then, generate the build files by running the following command.
cmake -DVENDOR=nuvoton -DBOARD=numaker_iot_m487_wifi -DCOMPILER=arm-keil -S . -BBUILD_FOLDER-G Ninja -
For Ethernet:
Navigate to the directory that contains the source files for the FreeRTOS demo project. Then, generate the build files by running the following command.
cmake -DVENDOR=nuvoton -DBOARD=numaker_iot_m487_wifi -DCOMPILER=arm-keil -DAFR_ENABLE_ETH=1 -S . -BBUILD_FOLDER-G Ninja
-
-
Generate the binary to flash onto the M487 by running the following command.
cmake --buildBUILD_FOLDERAt this point, the binary file
aws_demos.binshould be in theBUILD_FOLDER/vendors/Nuvoton/boards/numaker_iot_m487_wifi -
To configure the board for flashing mode, make sure the MSG switch (No.4 of ISW1 on ICE) is switched ON. When you plug in the board, a window (and drive) will be assigned. (See Troubleshooting.)
-
Open a terminal emulator to view the messages over UART. Follow the instructions at Installing a terminal emulator.
-
Run the demo project by copying the generated binary onto the device.
If you subscribed to the MQTT topic with the AWS IoT MQTT client, you should see MQTT messages sent by your device in the AWS IoT console.
Troubleshooting
-
If your windows can’t recognize the device
VCOM, install the NuMaker windows serial port driver from the link Nu-Link USB Driver v1.6. -
If you connect your device to the Keil MDK (IDE) through Nu-Link, make sure the MSG switch (No.4 of ISW1 on ICE) is OFF, as shown.

If you experience issues setting up your development environment or connecting to your board, contact
Nuvoton
Debugging FreeRTOS projects in Keil μVision
To start a debug session in Keil μVision
-
Open Keil μVision.
-
Follow the steps to build the FreeRTOS demo project in Build and run the FreeRTOS demo project.
-
On the Debug menu, choose Start/Stop Debug Session.
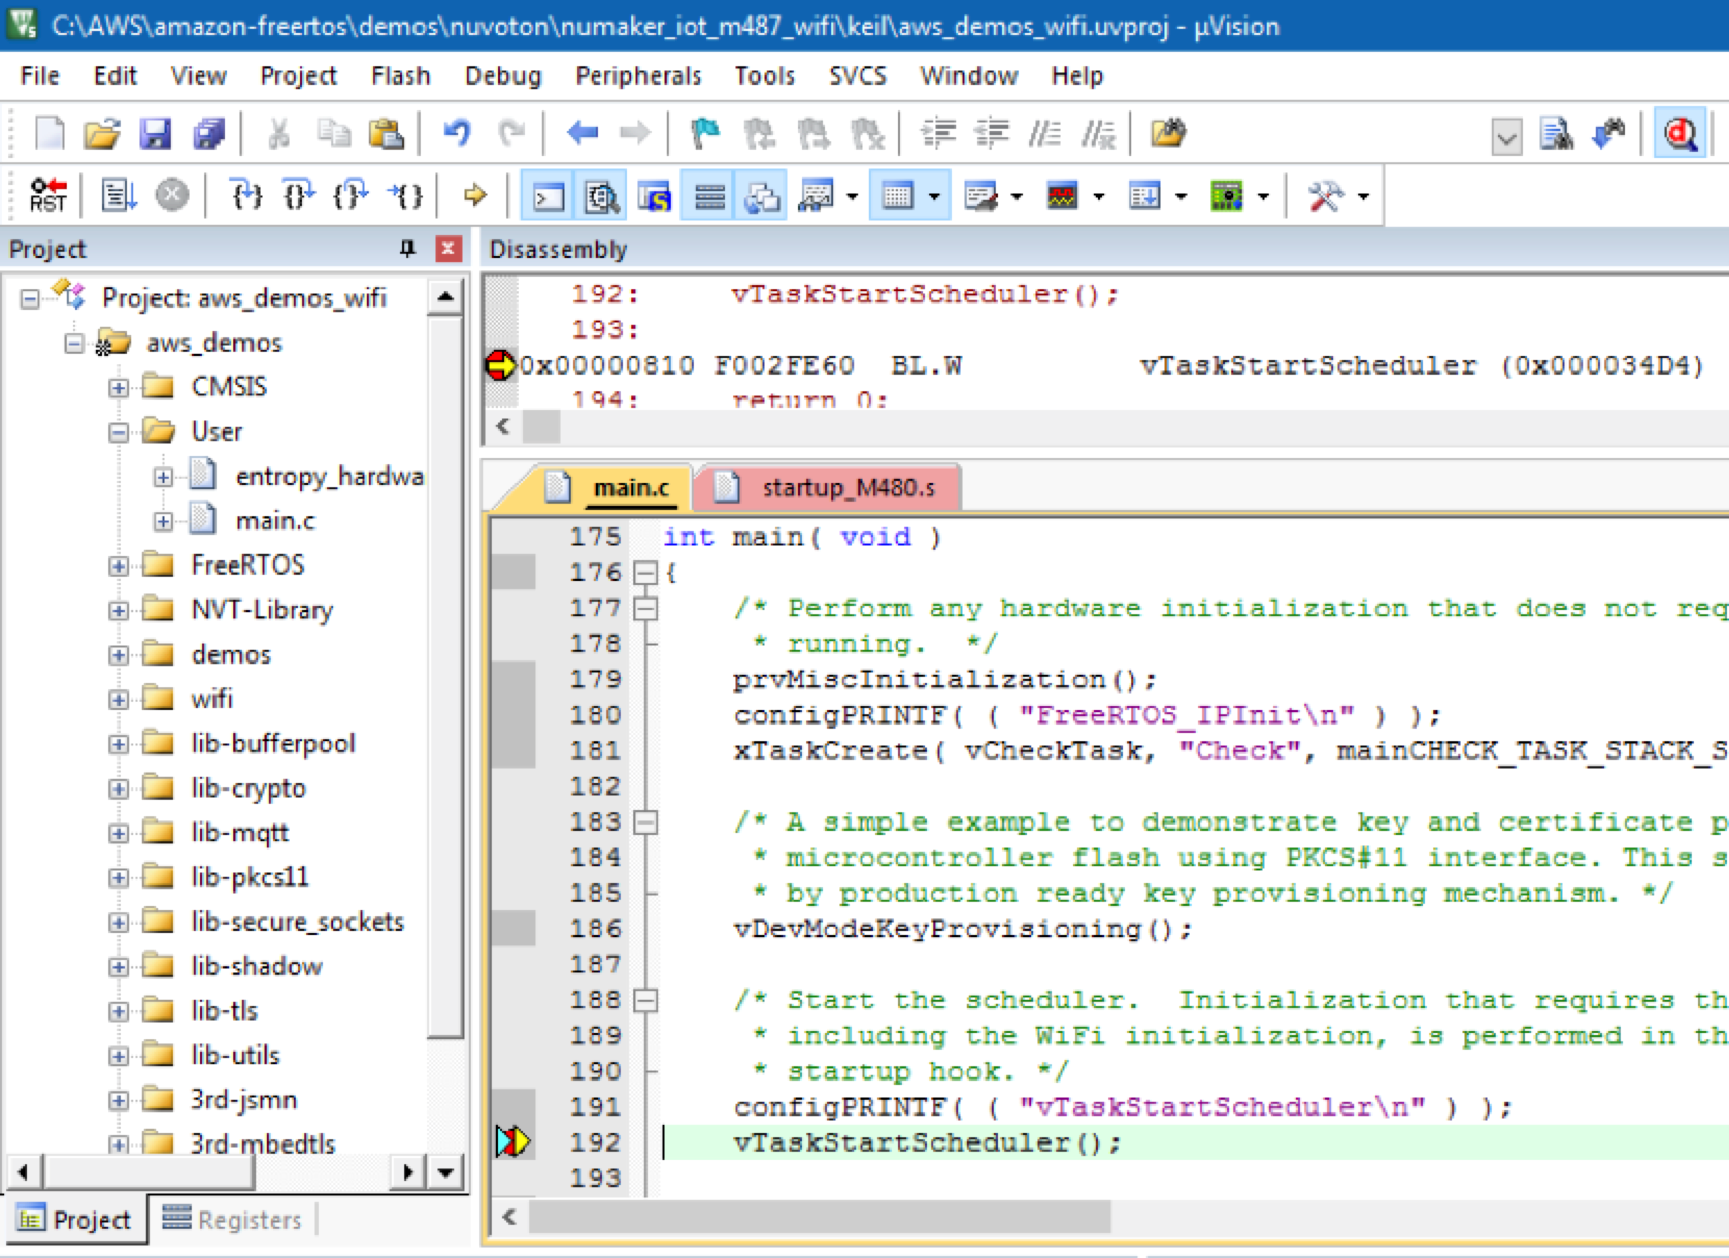
The Call Stack + Locals window appears when you start a debug session. μVision flashes the demo to the board, runs the demo, and stops at the beginning of the
main()function. -
Set breakpoints in your project's source code, and then run the code. The project should look something like the following.

Troubleshooting μVision debug settings
If you encounter problems while debugging an application, check that your debug settings are set correctly in Keil μVision.
To verify that the μVision debug settings are correct
-
Open Keil μVision.
-
Right-click the
aws_demoproject in the IDE, and then choose Options. -
On the Utilities tab, verify that Use Target Driver for Flash Programming is selected, and that Nuvoton Nu-Link Debugger is set as the target driver.

-
On the Debug tab, next to Nuvoton Nu-Link Debugger, choose Settings.

-
Verify that the Chip Type is set to M480.