Manually adding the Athena data source
Prerequisites
-
The AWS CLI is installed and configured in your environment.
-
You have access to Amazon Athena from your account.
To manually add the Athena data source:
-
In the Grafana console side menu, pause on the Configuration (gear) icon, then choose Data Sources.
-
Choose Add data source.
-
Choose the AWS Athena data source. If necessary, you can start typing
Athenain the search box to help you find it. -
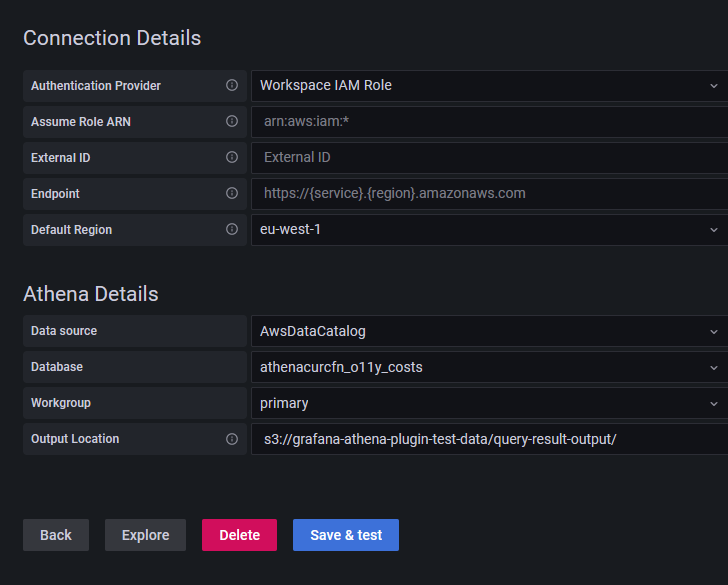
In Connection Details menu, configure the authentication provider (recommended: Workspace IAM Role)
-
Select your targeted Athena data source, database, and workgroup.
To create a new Athena account, follow the instructions at Getting started with Athena.
-
If your workgroup doesn't have an output location configured already, specify an S3 bucket and folder to use for query results. For example,
s3://grafana-athena-plugin-test-data/query-result-output/. -
Select Save & Test.
The following is an example of the Athena Details settings.