Launch a Windows Virtual Machine in Amazon Lightsail
|
AWS experience |
Beginner |
|
Time to complete |
10 minutes |
|
Cost to complete |
Free Tier |
|
Requires |
|
|
Last updated |
August 23, 2022 |
Overview
Amazon Lightsail
In this tutorial, you create a Windows Server 2019 instance in Amazon Lightsail in seconds. After the instance is up and running, you connect to it via RDP within the Lightsail console using the browser-based RDP client.
Get started with Amazon Lightsail for free.
This three-minute video provides an introduction to the tutorial.
Implementation
-
Create an Amazon Lightsail account
Already have an account? Sign-in
This tutorial is free tier eligible.
-
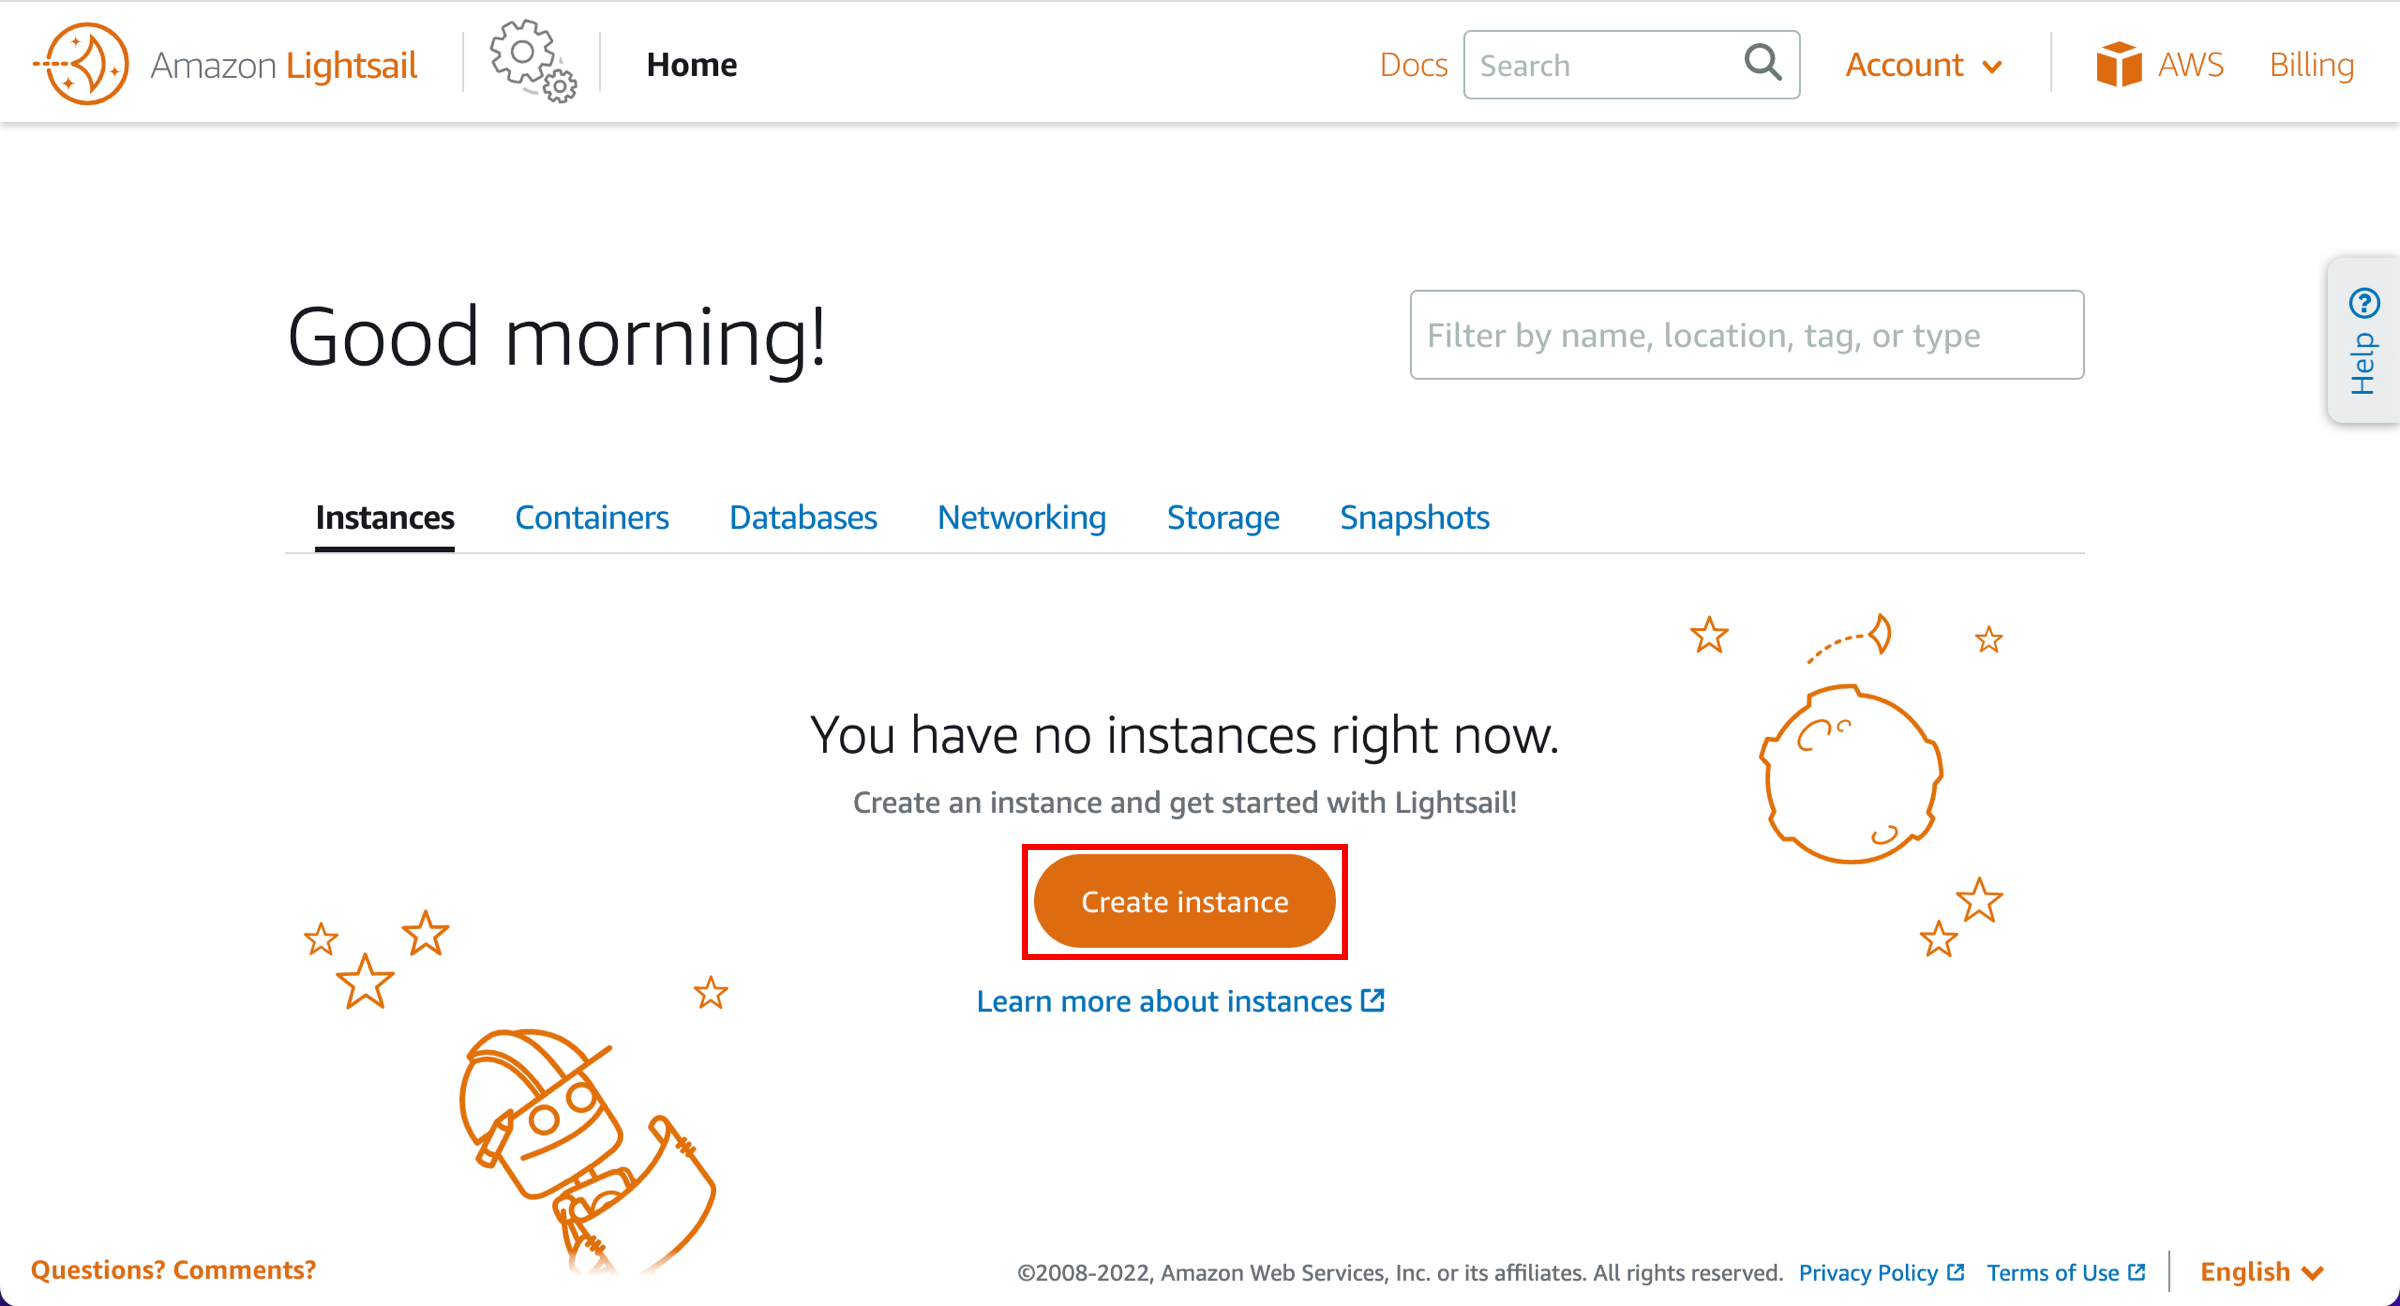
Create a Windows Server 2019 instance in Amazon Lightsail
Choose the Create instance button on the Instances tab of the Lightsail home page.
-
Specify a Region and Availability Zone
An AWS Region and Availability Zone is selected for you. Choose Change Region and Availability Zone to create your instance in another location.

-
Choose a platform and image
Choose the Microsoft Windows platform option, and choose OS only to view the operating system-only instance images available in Lightsail. Select the Windows Server 2019 image.
To learn more about Lightsail instance images, see Choose an Amazon Lightsail instance image
. 
-
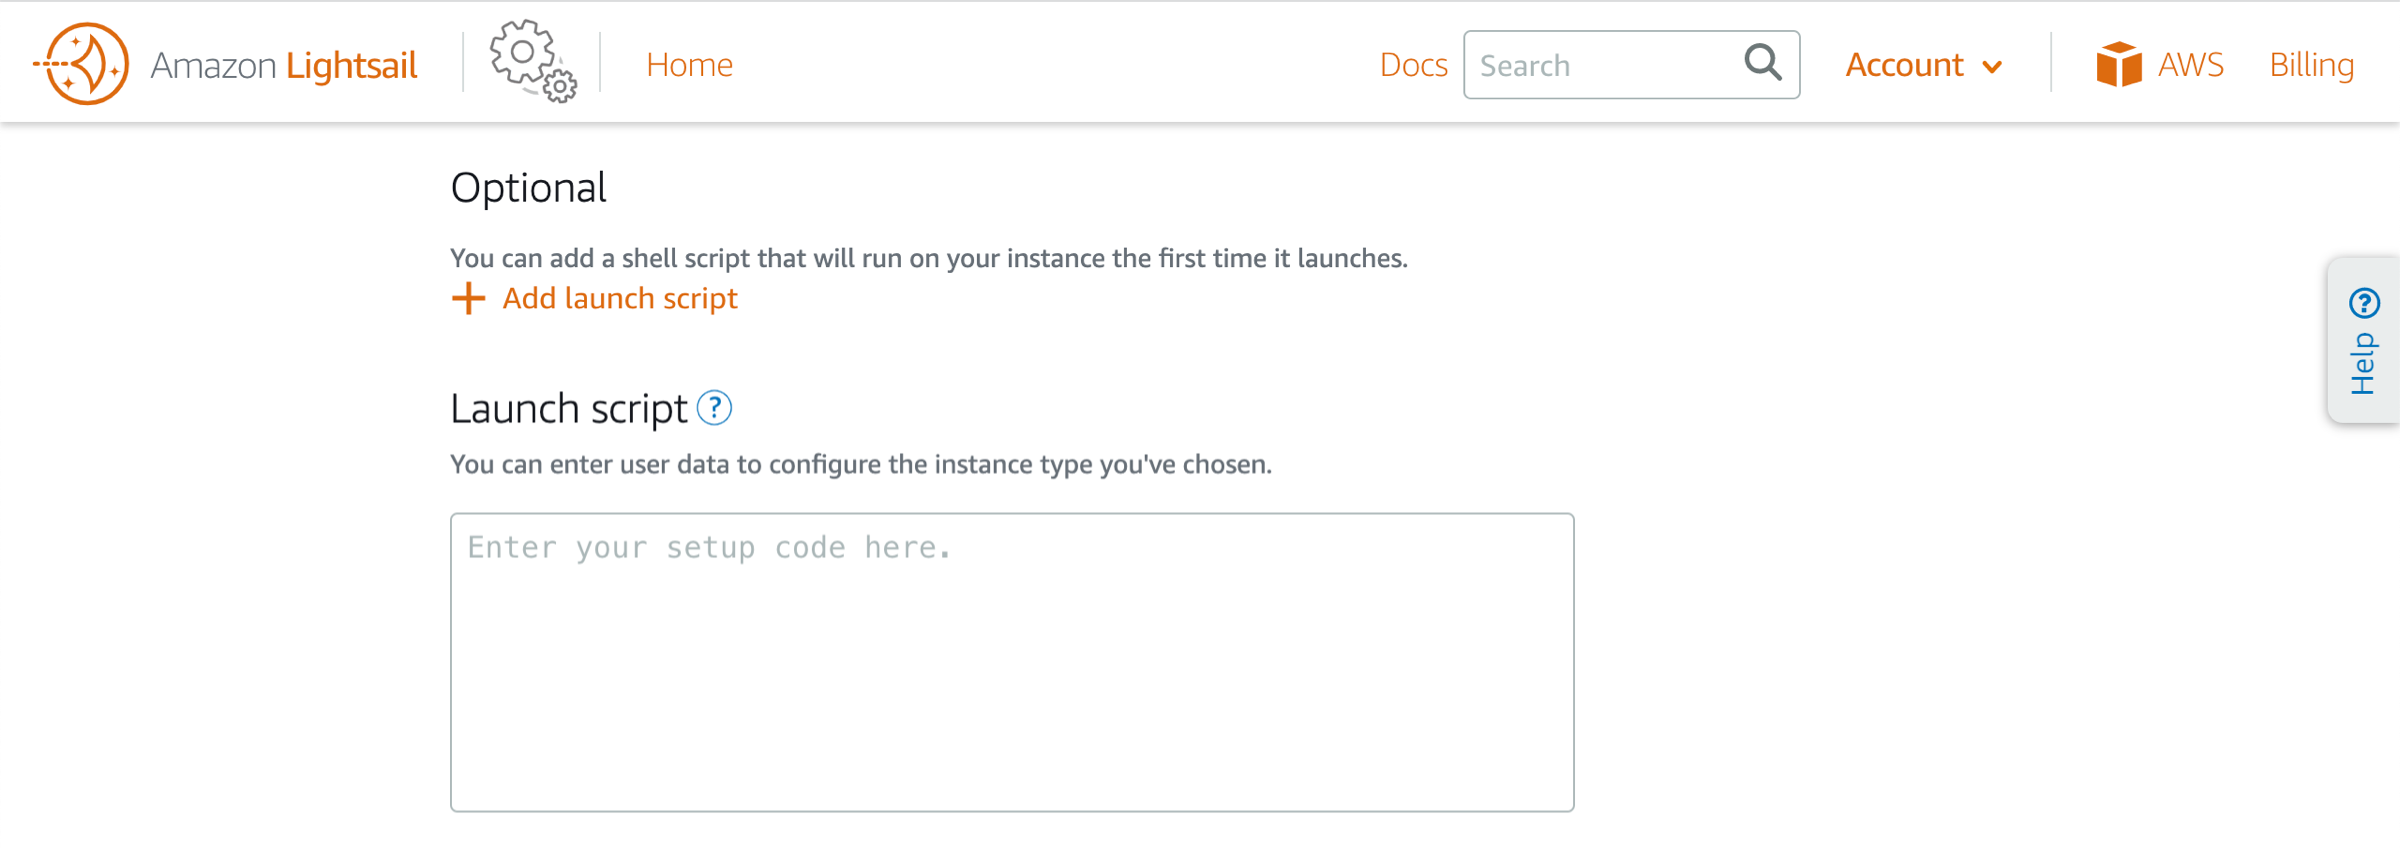
(Optional) Add a launch script
Choose Add launch script to add a PowerShell script that will run on your instance when it launches.
-
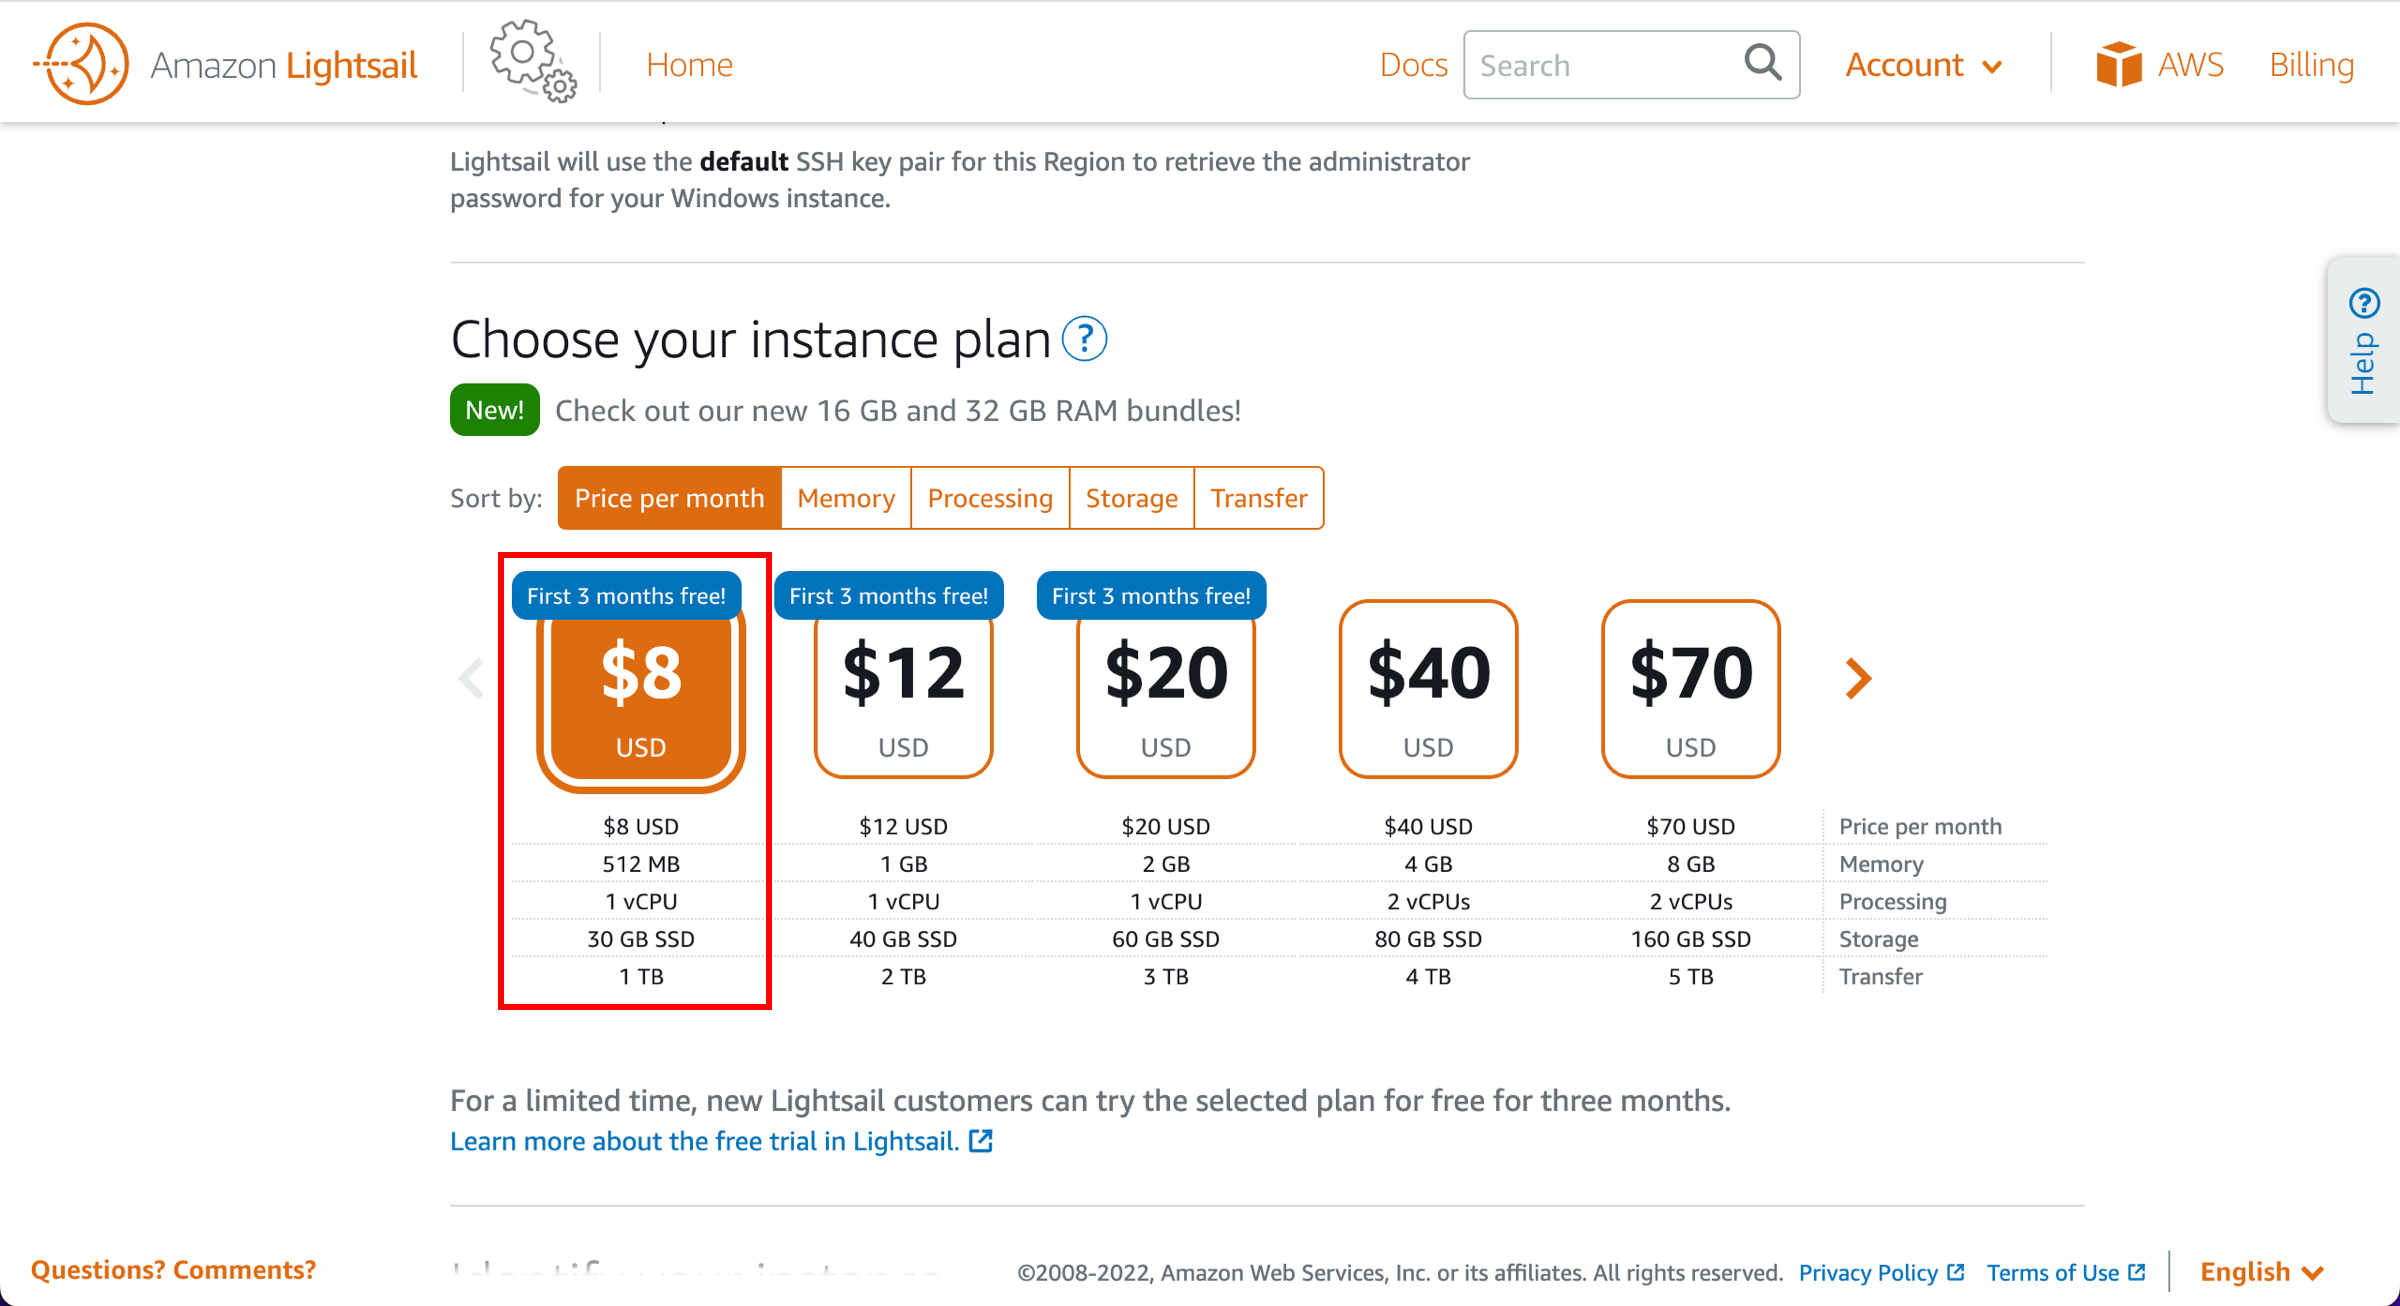
Select an instance plan
Choose your instance plan.
You can try the $8 USD Lightsail plan free for three months (up to 750 hours). We'll credit three free months to your account.
Learn more on the Lightsail pricing page
. 
-
Enter an instance name
Enter a name for your instance.

-
(Optional) Add tags
Choose one of the following options to add tags to your instance:
-
Add key-only tags — Enter your new tag into the tag key text box, and press Enter. Choose Save when you’re done entering your tags to add them, or choose Cancel to not add them.
-
Create a key-value tag — Enter a key into the Key text box, and a value into the Value text box. Choose Save when you’re done entering your tags, or choose Cancel to not add them.
Key-value tags can only be added one at a time before saving. To add more than one key-value tag, repeat the previous steps.
For more information about key-only and key-value tags, see Tags in Amazon Lightsail
. 
-
-
Create instance
Choose Create instance.

-
Connect using RDP
On the Instances tab of the Lightsail home page
, choose the RDP icon, or the ellipsis (⋮) icon next to the Windows Server 2019 instance you just created and choose Connect. 
-
Use RDP to manage instance
The browser-based RDP client window appears. You can use and manage your instance without configuring a third-party RDP client.

-
Choose the instance
Choose the name of the Windows Server 2019 instance on the Instances tab of the Lightsail homepage.

-
Get the password
Select the Connect tab, scroll down to the Default login credentials section of the page, and choose Retrieve default password.
Important
If you changed the administrator password after signing in to your Windows Server 2019 instance, then the administrator password displayed in the Lightsail console is no longer valid.

-
Delete the instance
On the Instances tab of the Lightsail home page
, choose the ellipsis (⋮) icon next to the Windows Server instance you just created and choose Delete. 
-
Confirm deletion
Choose Yes, delete from the prompt.

Conclusion
Congratulations! You used Amazon Lightsail to spin up and configure a Windows instance.
Amazon Lightsail is great for developers, web pros, and anyone looking to get started on AWS in a quick and cheap way. You can launch instances, databases, and SSD-based storage; transfer data; monitor your resources; and so much more in a managed way.
