This whitepaper is for historical reference only. Some content might be outdated and some links might not be available.
Containerization
Because you are using the worker machine for all of your App2container process, you will use a remote process. After you run the remote commands from your worker machine, it will connect with your application web server and run the commands on it.
The following steps will allow you to containerize .NET applications running on a remote server using App2Container:
-
Run the
app2container remote inventorycommand (as follows) for App2Container to gather the .NET applications that are running on your web server.app2container remote inventory --target <webserver-private-ip>
App2Container output for retrieving the inventory of .NET applications from a server
-
Confirm that your application is listed in the
inventory.jsonfile at the location specified in the tool’s output.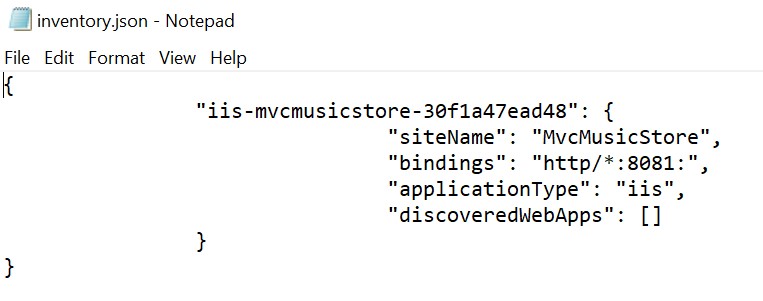
Confirm that your application is listed in the
inventory.jsonfile -
Locate the application ID for the application in the
inventory.jsonfile and then run the following command, replacingnet-app-idwith the application ID that you located in theinventory.json.app2container remote analyze --application-id <net-app-id> --target <webserver-private-ip>
App2Container successfully analyzes a .NET application for containerization
-
Open the
analysis.jsonfile at the location specified in the tool’s output.This file has two sections, EDITABLE and NON-EDITABLE. The EDITABLE section includes container parameters that specify settings such as
containerBaseImageor image tag. These parameters will be used in the subsequent containerization process.The
containerBaseImageis not populated in the file. This is because App2Container will automatically configure the image during the next containerization step using the worker machine version to determine thecontainerBaseImageto use. However, to provide visibility into the behavior, populate that field in theanalysis.jsonfile withmcr.microsoft.com/dotnet/framework/aspnet:4.8-windowsservercore-ltsc2019, as shown in the following figure, and save the file.Note
This guide recommends that you use the SAC version for container-based applications because it has the most up-to-date improvements for Windows containers. However, App2Container requires the
containerBaseImageto match the worker machine version and SAC version 2004 does not have a desktop experience. We chose LTSC version 2019 to provide a more effective walkthrough. If you use SAC version 2004, deploy a worker machine of that version and replacecontainerBaseImagewith the4.8-windowsservercore-2004tag.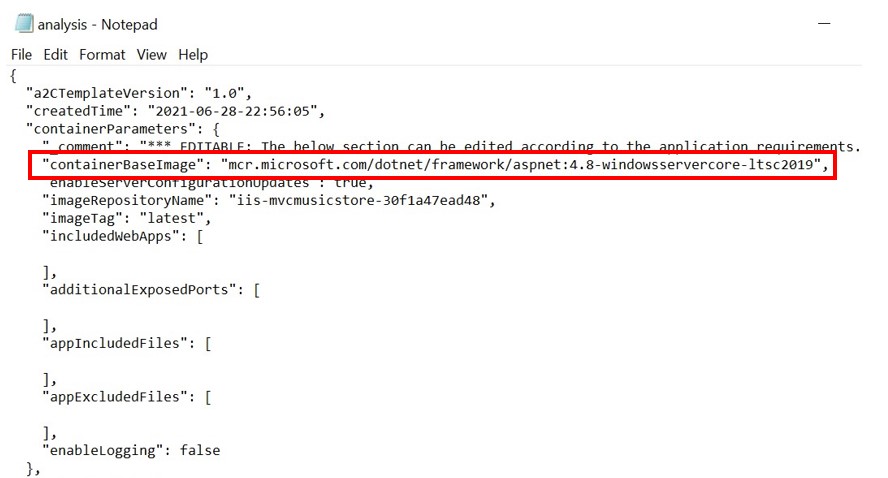
Populate the field in the
analysis.jsonfile withmcr.microsoft.com/dotnet/framework/aspnet:4.8-windowsservercore-ltsc2019The NON-EDITABLE section of
analysis.jsonincludes application-level information that App2Container uses during the containerization step such as OS data, ports in use, dependencies, software libraries, and so on. -
Now you will transform your application with App2Container by extracting the artifacts from the worker machine which will be used to produce the container image. The extraction process takes a few minutes and App2Container will create a ZIP file that includes all of the artifacts. As a suggested next step from the
app2container
            analyze
command output, run theapp2container remote extractcommand to retrieve all application artifacts to the worker machine. Update theapplication-idand target IP address based on your environment.app2container remote extract --application-id <net-app-id> --target <webserver-private-ip>
App2Container successfully extracting the artifacts required for containerization
-
Now you will run the
app2container containerizecommand to create the container image based on the extracted files. This process will take several minutes, because the worker machine needs to download the container image .NET framework base layers, extract, and build the container image.app2container containerize --input-archive C:\Users\Administrator\AppData\Local\app2container\remote\<webserver-private-ip>\<application-id>\<application-id>After the process completes, you will see the following output:
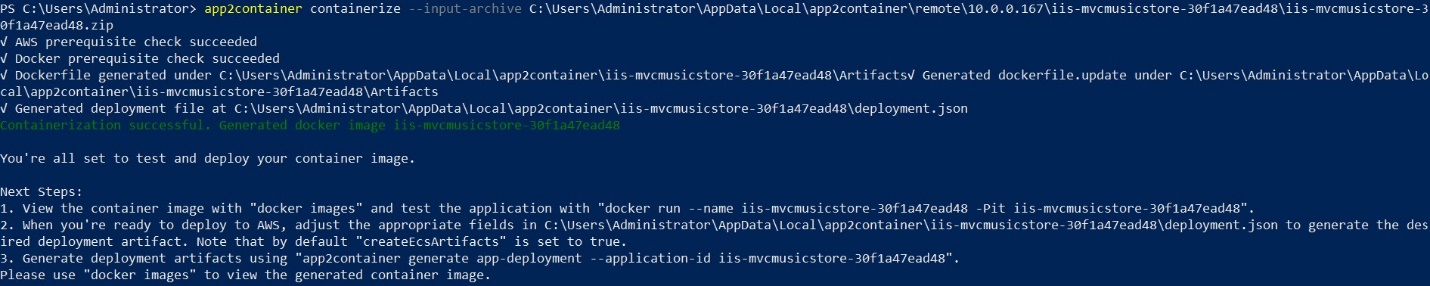
App2Container successfully creates a container image of the .NET application
-
Run docker images to see the container image that App2Container created for you using the
windowsservercore-ltsc-2019andlatestimage tag.
List of container images available on the local machine
-
Running the app2container containerize command creates a
deployment.jsonfile inside the application folder as noted in the output of the command. This file includes the AWS deployment configurations and you can update this file to fit your desired target environment such as changing the VPC or defining the CPU/memory allocation. Open thedeployment.jsonfile and ensure thatcreateEcsArtifactsis set to true and set the targetvpc-idto deploy the application to the target environment that you deployed previously. You can find the targetvpc-idin the VPC service in the AWS Management Console.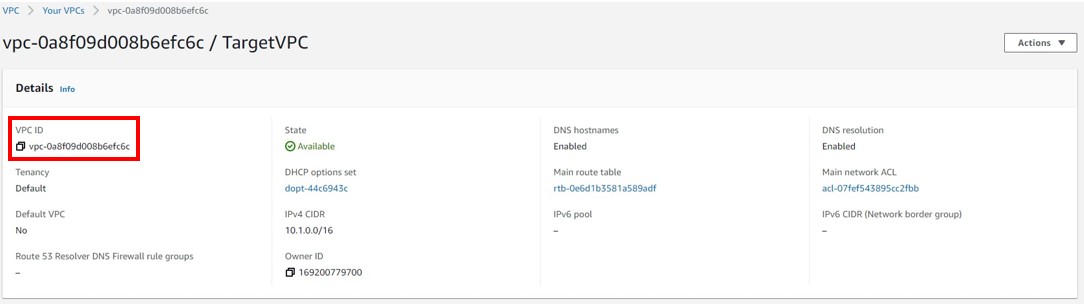
Target
vpc-id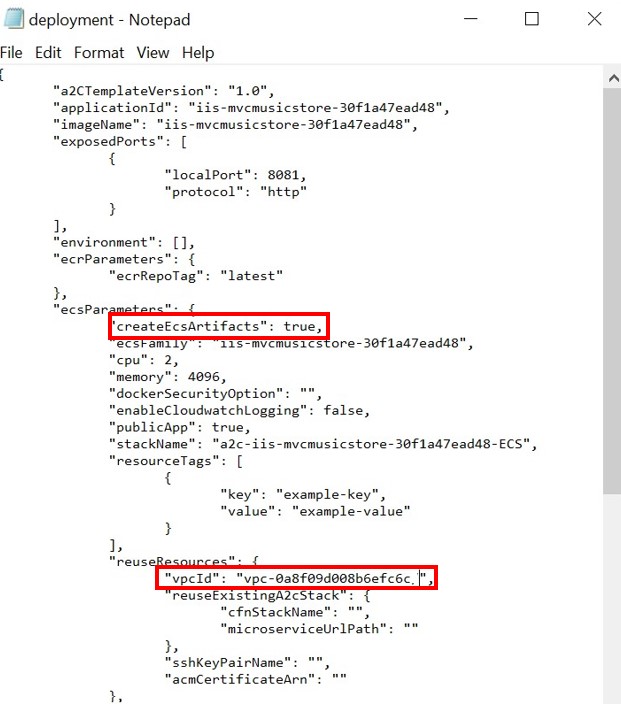
Sample
deployment.jsonfile
You have successfully containerized your application, and are ready to deploy your newly containerized application to AWS. In the next section you will deploy your application to Amazon ECS.
