Scene enhanced editing
AWS IoT TwinMaker scenes feature a set of tools for enhanced and editing and manipulation of resources present in your scene.
The following topics teach you how to used the enhanced editing features in your AWS IoT TwinMaker scenes.
Targeted placement of scene objects
AWS IoT TwinMaker allows you to precisely place and add objects into your scene. This enhanced editing feature gives you greater control of where you're placing tags, entities lights and models in your scene.
Navigate to your scene in the AWS IoT TwinMaker console
. Press the + button, and from the drop down options select one of the options. This could be a model, a light, a tag, or anything from the + menu.
When you move your cursor in the 3d space of your scene you should see a target around your cursor .
Use the target to precisely place elements in your scene.
Submodel selection
AWS IoT TwinMaker lets you select submodels of 3d models in scenes and apply standard properties to them, such as tags, lights, or rules.
3d model file formats contain metadata that can specify sub areas of the model as submodels within the larger model. For example a model could be a filtration system, individual parts of the system like tanks, pipes, or a motor are marked as submodels of the filtration's 3d model.
Supported 3D file formats in scenes: GLB, and GLTF.
Navigate to your scene in the AWS IoT TwinMaker console
. If you have no models in your scene, make sure to add one by selecting the option from the + menu.
Select model listed in your scene hierarchy, once selected the hierarchy should display any submodels beneath the model.
Note
If you do not see any submodels listed then it is likely the model was not configured to have any submodels.
To toggle the visibility of a submodel, press the eye icon, located to the right of the submodel's name in the hierarchy.
To edit submodel data, such as its name or position, the scene inspector will open when a submodel is selected. Use the inspector menu to update or change submodel data.
To add tags, lights, rules, or other properties to submodels, press the +, while the submodel is selected in the hierarchy.
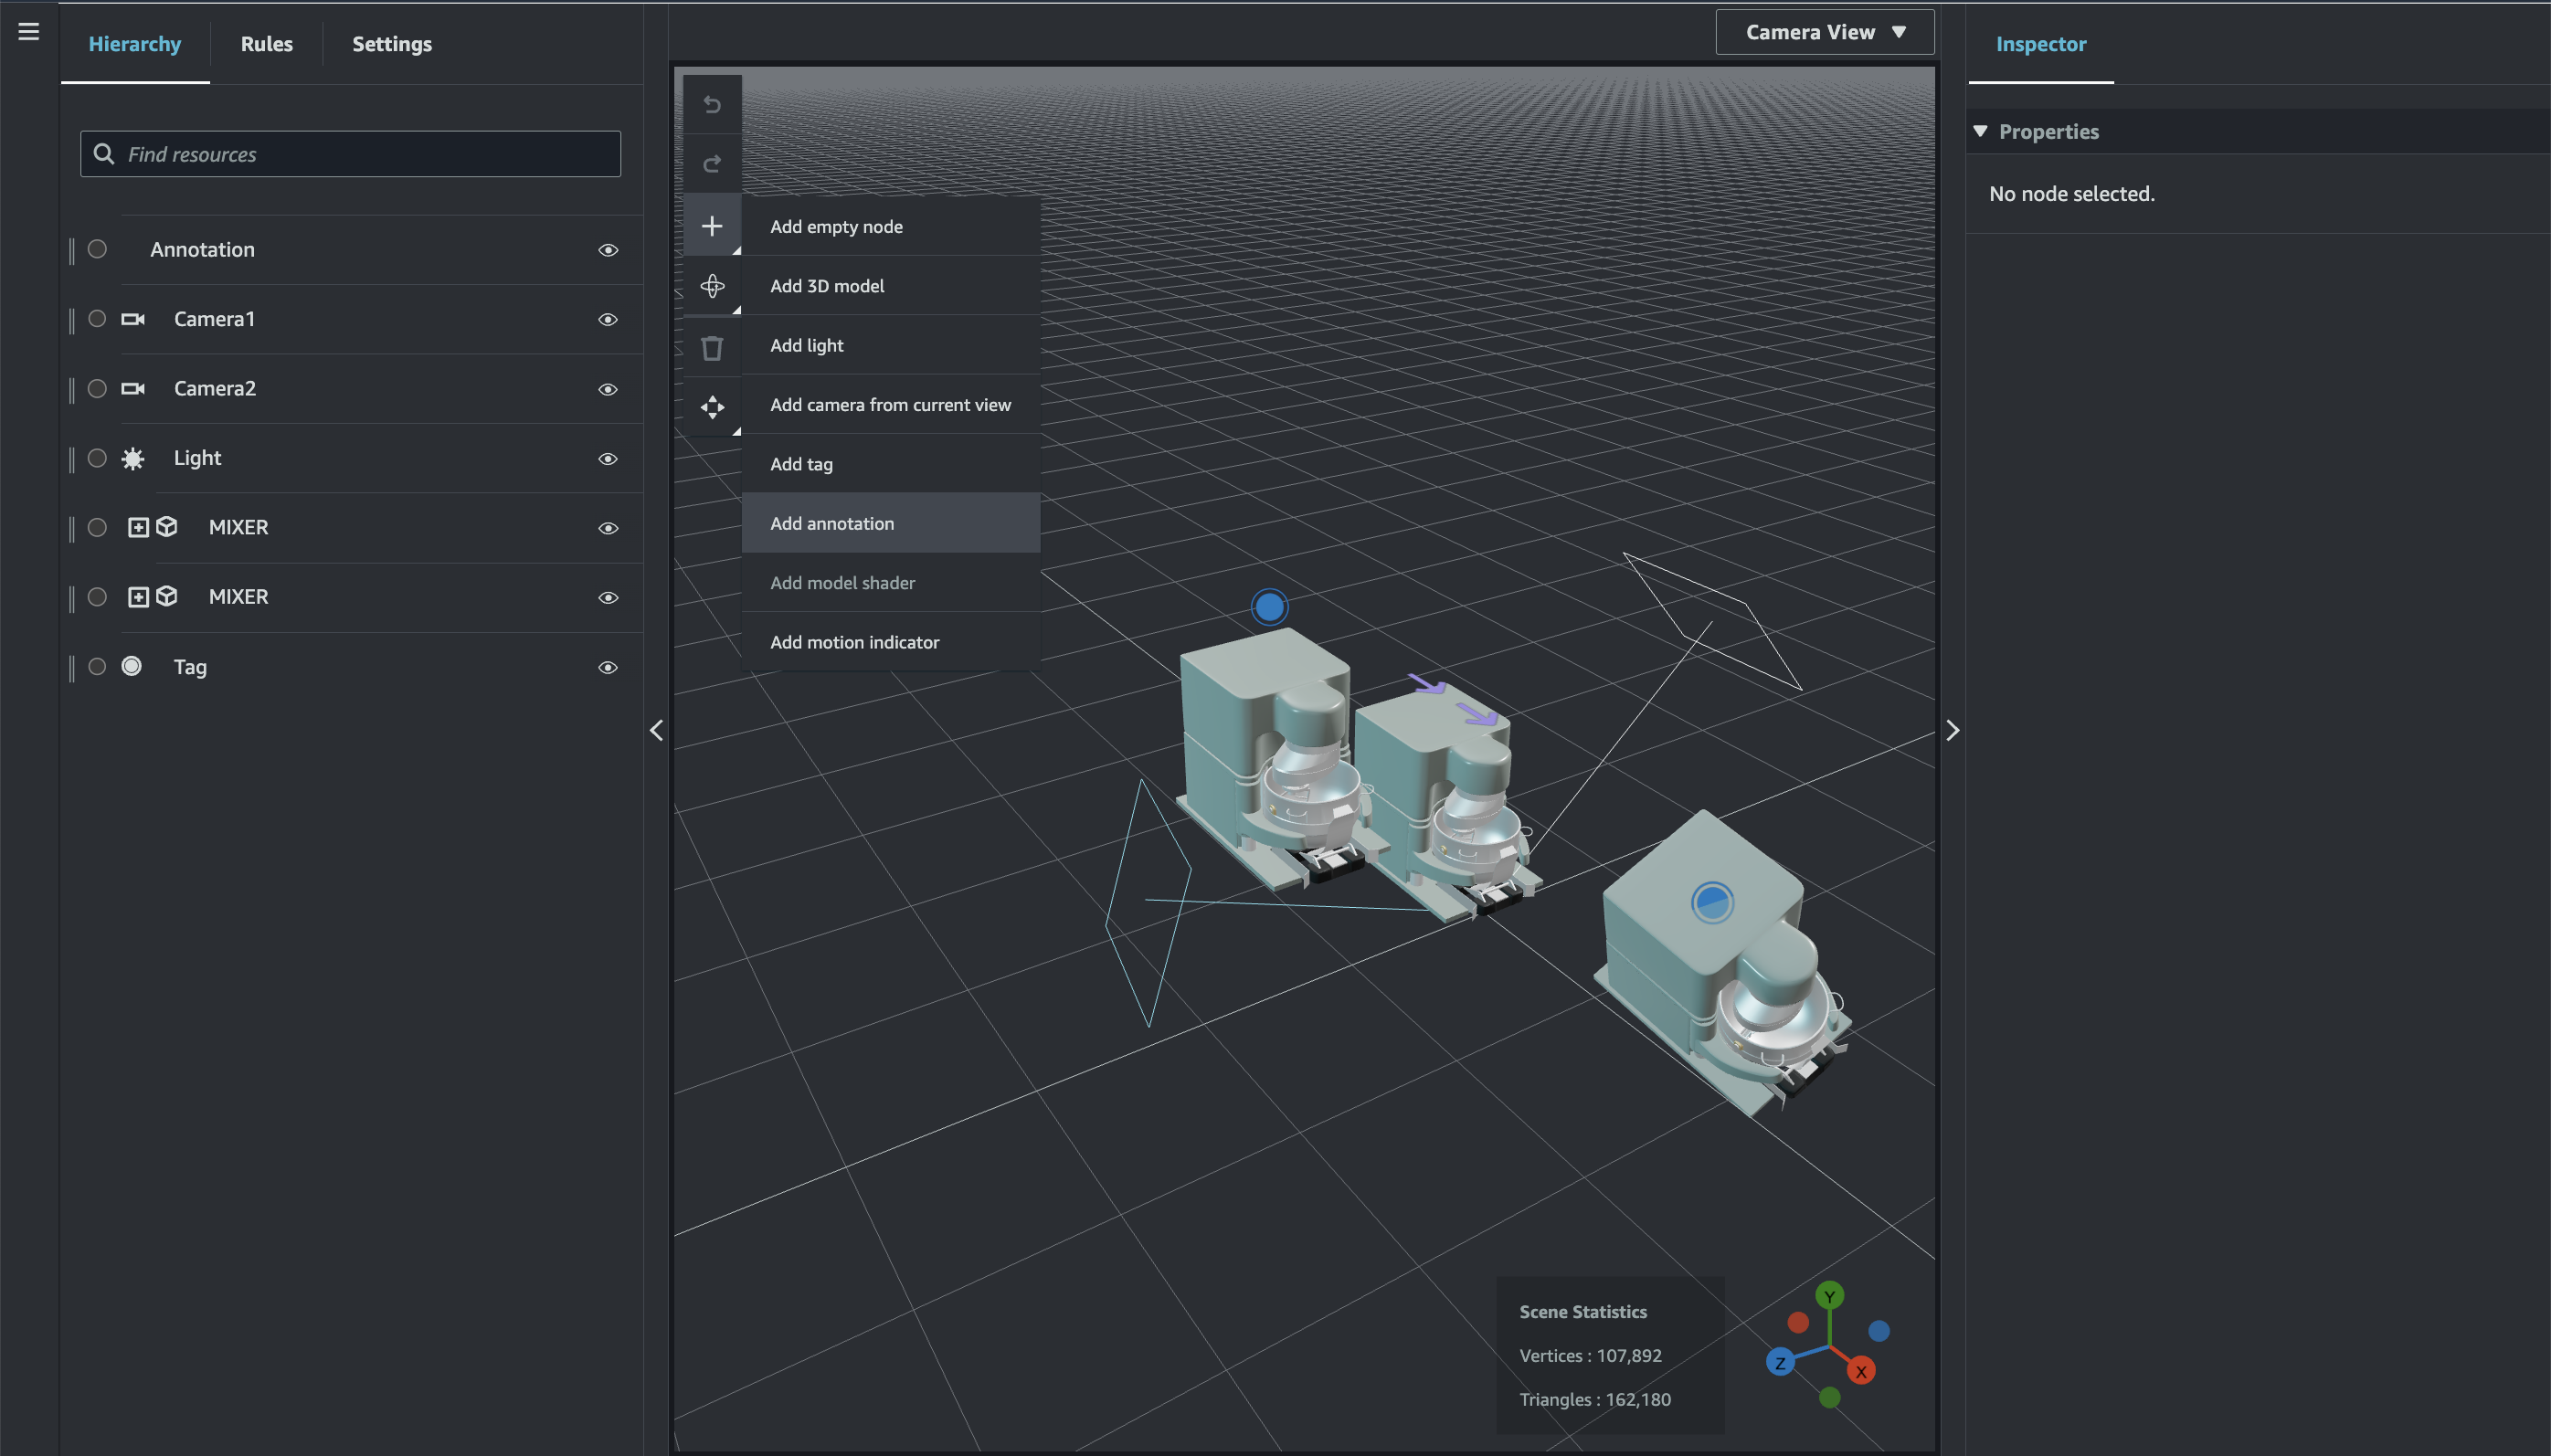
Edit entities in the scene hierarchy
AWS IoT TwinMaker scenes let you directly edit properties of entities within the hierarchy table. The following procedure shows you which actions you can perform on an entity through the hierarchy menu.
Navigate to your scene in the AWS IoT TwinMaker console
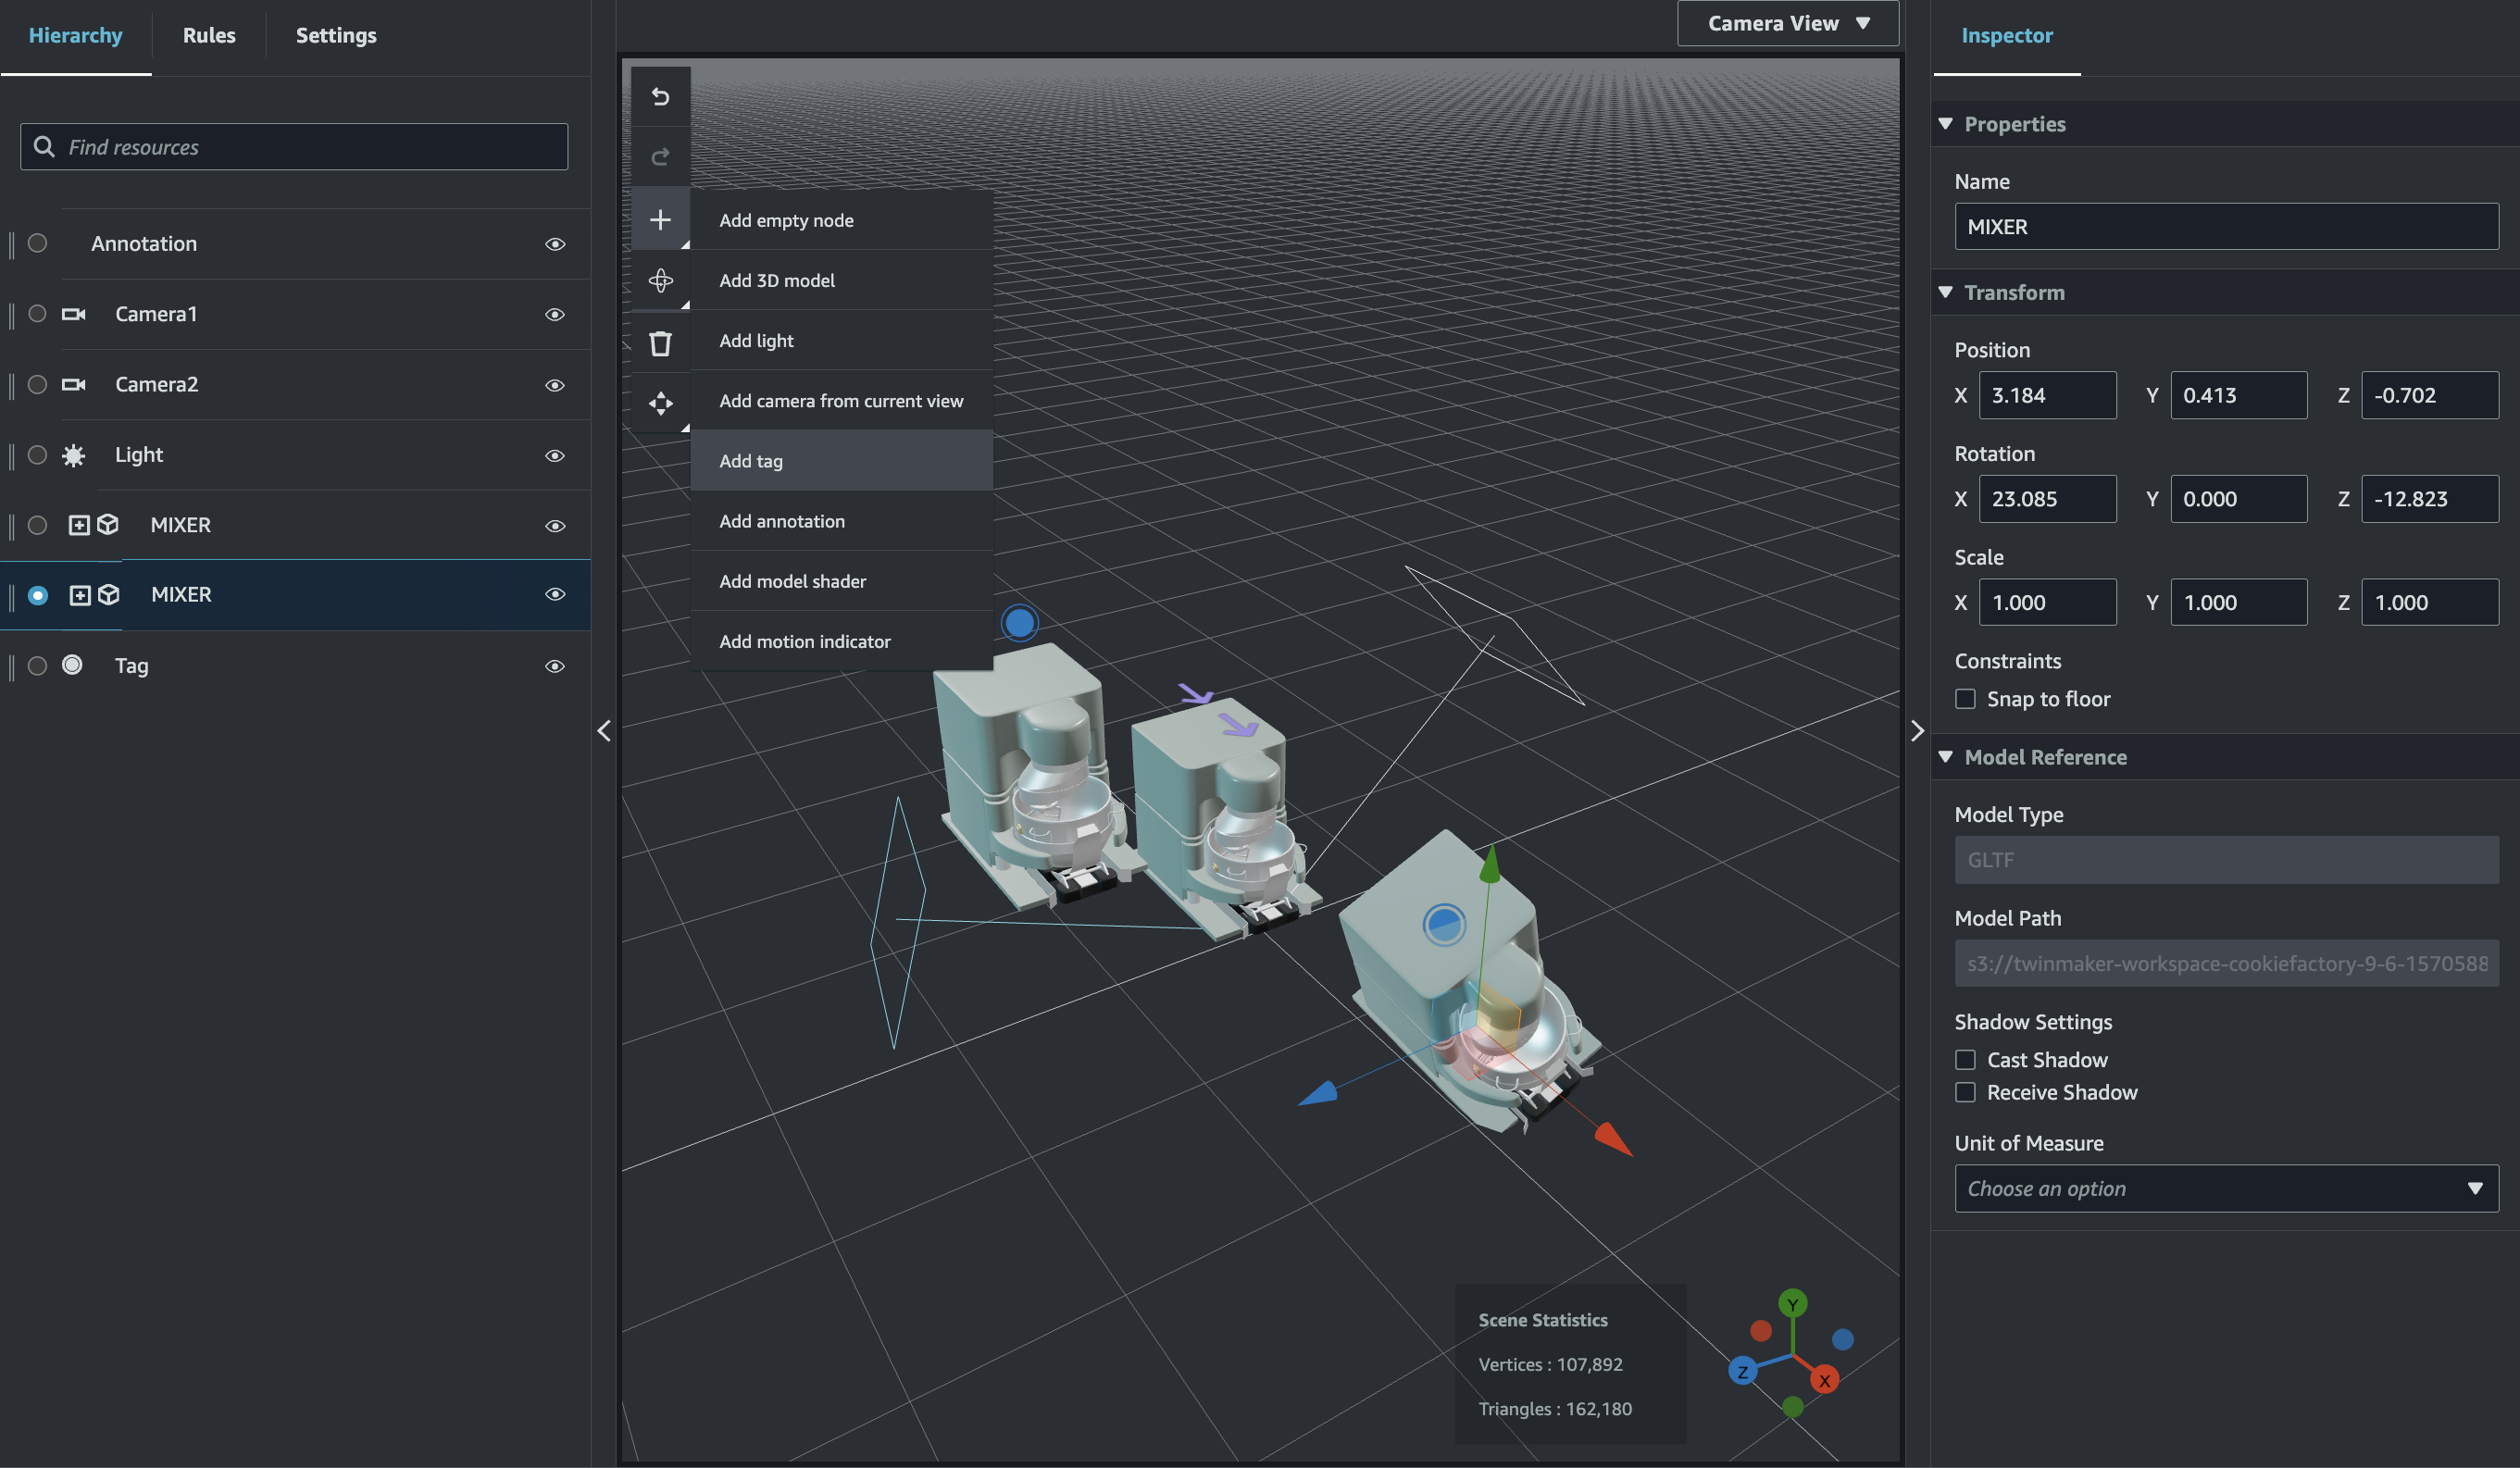
. Open the scene hierarchy, and select a sub element of an entity you wish to manipulate.
Once the element is selected, press the + button, and from the drop down select one of the options:
Add empty node
Add 3D model
Add light
Add camera from current view
Add tag
Add model shader
Add motion indicator
After selecting one of the options from the drop down, the selection will be applied to the scene as child of the selected element from step 2.
You can reorder child elements and reparent elements, by selecting a child element and dragging in the hierarchy to a new parent.
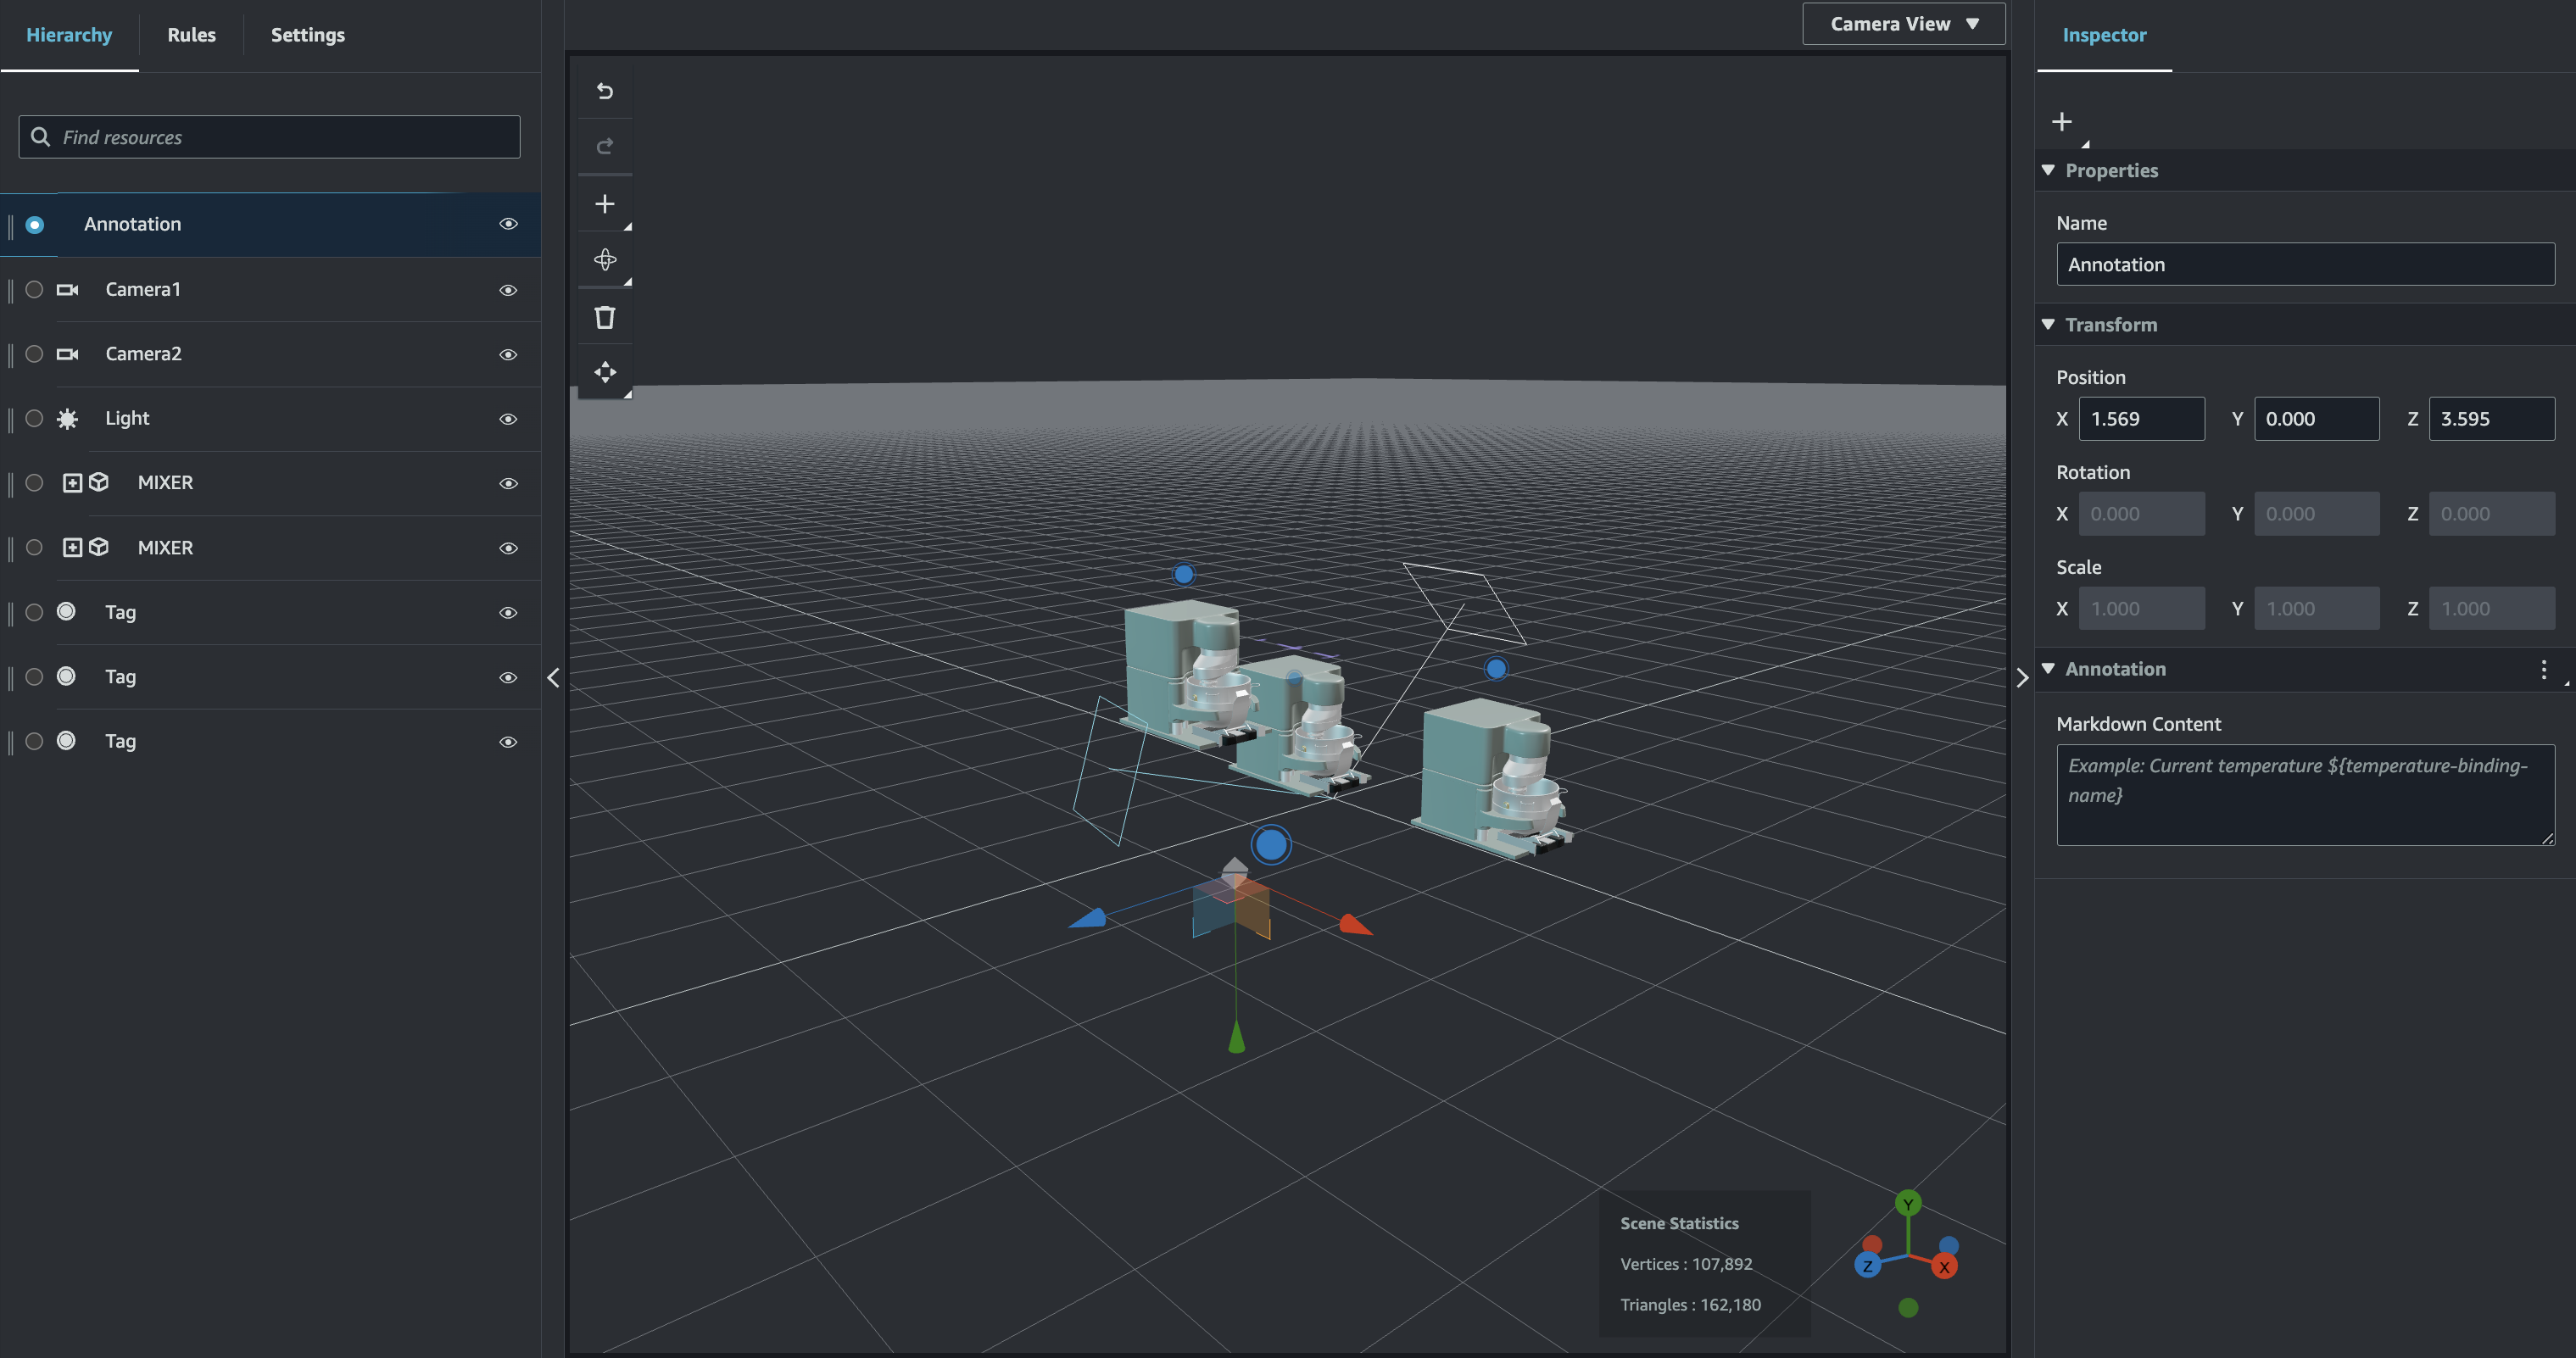
Add annotations to entities
The AWS IoT TwinMaker scene composer lets you annotate any element in your scene hierarchy. The annotation is authored in markdown.
For more information on writing in Markdown, see the official documentation on markdown syntax,
Basic Syntax
Note
AWS IoT TwinMaker annotations and overlay Markdown syntax only and not HTML.
Add an annotation to an entity
Navigate to your scene in the AWS IoT TwinMaker console
. Select an element from the scene hierarchy that you want to annotate. If no element in the hierarchy is selected, then you can add annotation to the root.
-
Press the plus + button and choose the Add annotation option.
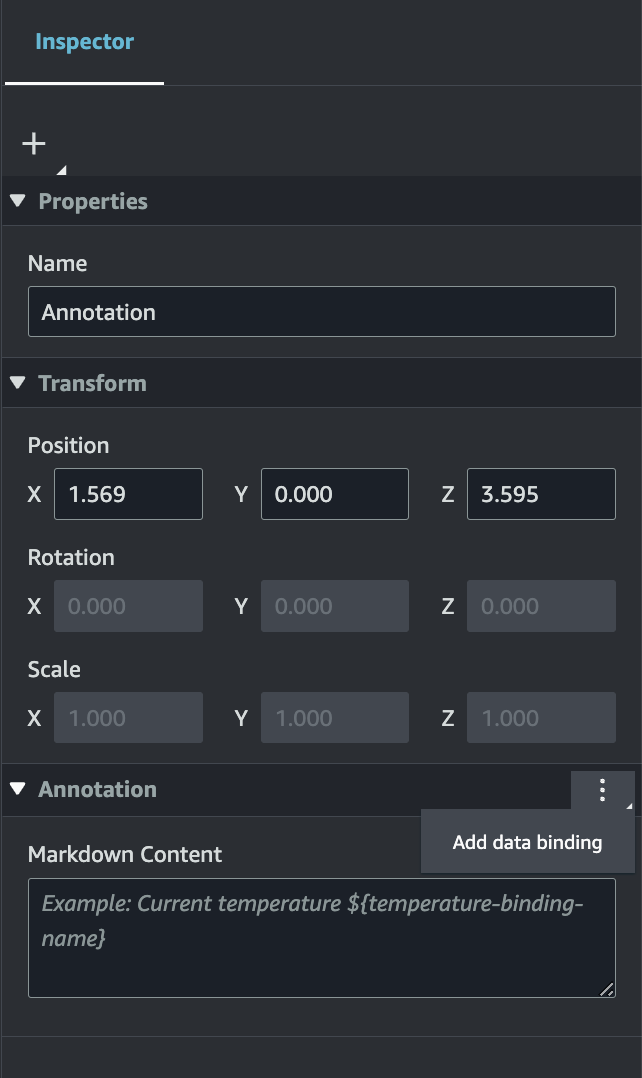
In the Inspector window on the left, scroll down to the annotation section. Using Markdown syntax, write the text you want your annotation to display.
For more information on writing in Markdown, see the official documentation on markdown syntax, Basic Syntax
. 
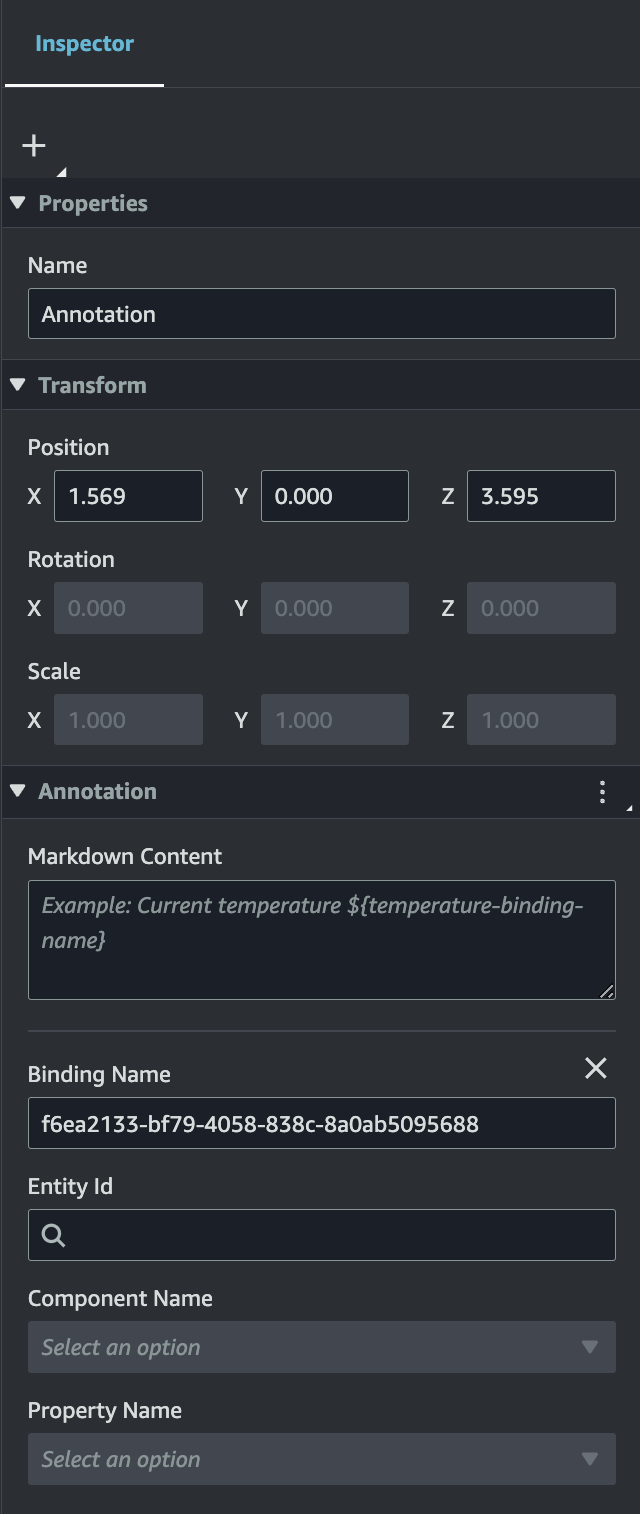
To bind your AWS IoT TwinMaker scene data to an annotation choose Add data binding, add the Entity Id, then select the Component Name and Property Name of the entity you wish to surface data from. You can update the binding name to use it as a Markdown variable, and surface the data in the annotation.
-
The Binding Name is used to represent the annotation's variable.
Enter a Binding Name to surface the latest historical value of an entities time-series in the annotation through AWS IoT TwinMaker's variable syntax:
${variable-name}As an example, this overlay displays the value of the
mixer0alarm, in the annotation with the syntax${mixer0alarm}.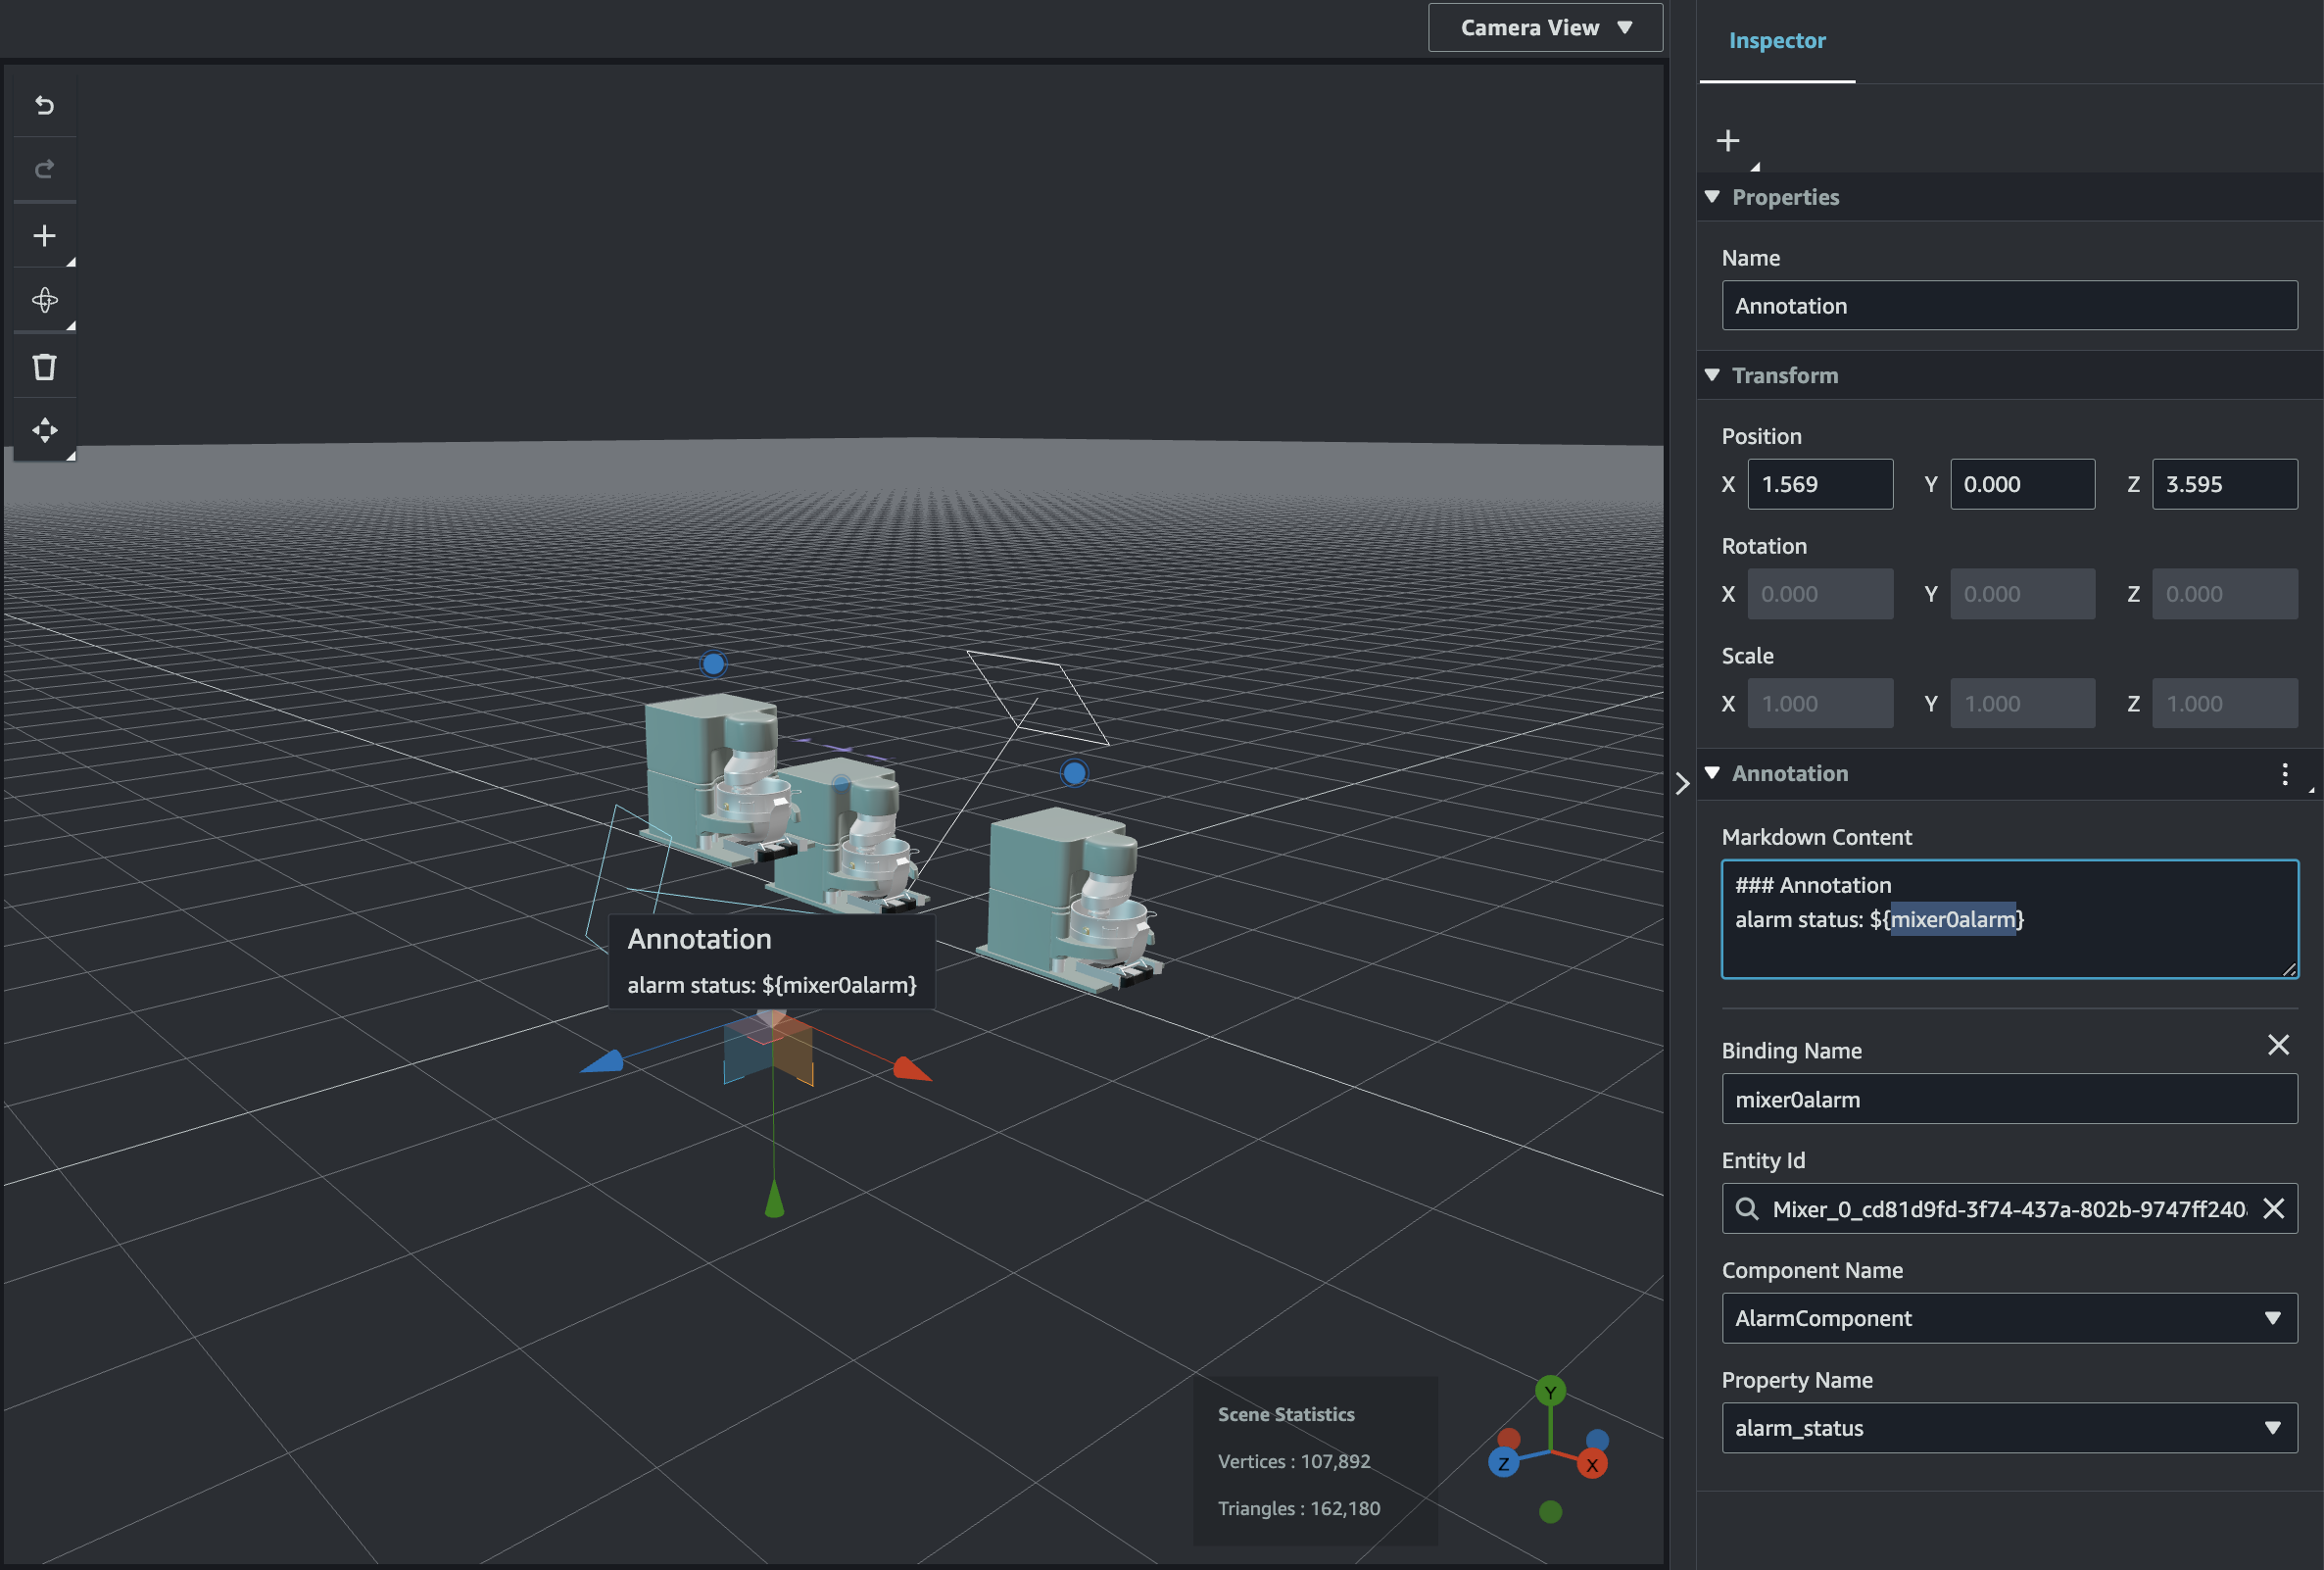
Add overlays to Tags
You can create overlays for your AWS IoT TwinMaker scenes. Scene overlays are associated with tags and can be used to surface critical data associated with your scene entities. The overlay is authored and rendered in Markdown.
For more information on writing in Markdown, see the official documentation on markdown
syntax, Basic
Syntax
Note
By default, an Overlay is visible in a scene only when the tag associated with it is selected. You can toggle this in the scene Settings so that all Overlays are visible at once.
Navigate to your scene in the AWS IoT TwinMaker console
. The AWS IoT TwinMaker overlay is associated with a tag scene, you can update an existing tag or add a new one.
Press the plus + button and choose the Add tag option.
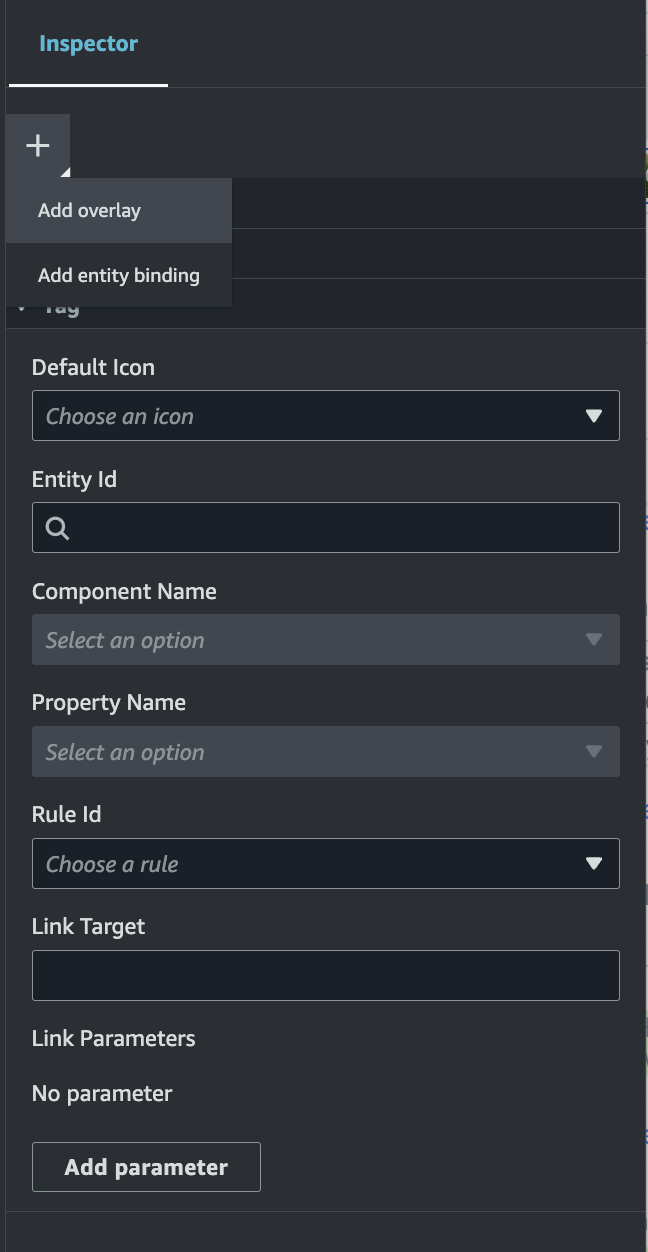
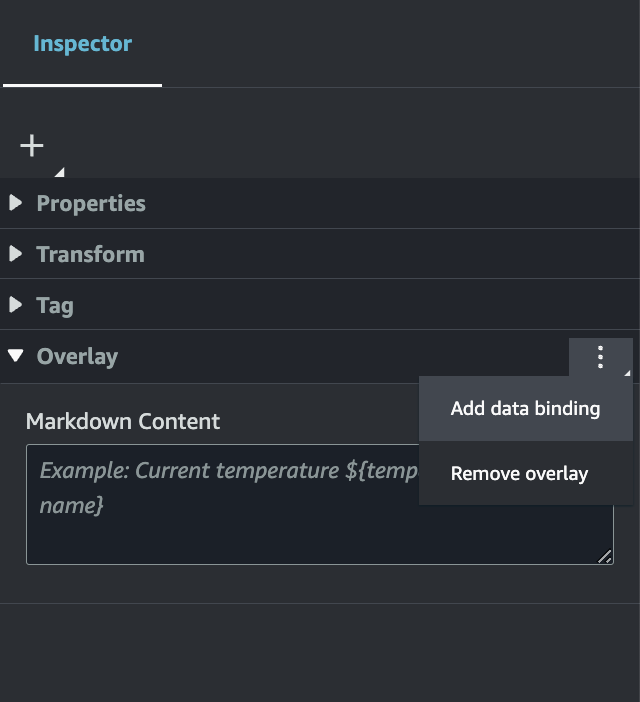
In the Inspector panel on the right, select the + (plus symbol) button then select Add overlay.
In Markdown syntax, write the text you want your overlay to display.
For more information on writing in Markdown, see the official documentation on markdown syntax, Basic Syntax
. To bind your AWS IoT TwinMaker scene data to an overlay, select Add data binding.
Add the Binding name and Entity Id, then select the Component Name and Property Name of the entity you wish to surface data from.
You can surface the latest historical value of an entities time-series data in the overlay through AWS IoT TwinMaker's variable syntax:
${.variable-name}As an example, this overlay displays the value of the
mixer0alarm, in the overlay with the syntax${mixer0alarm}.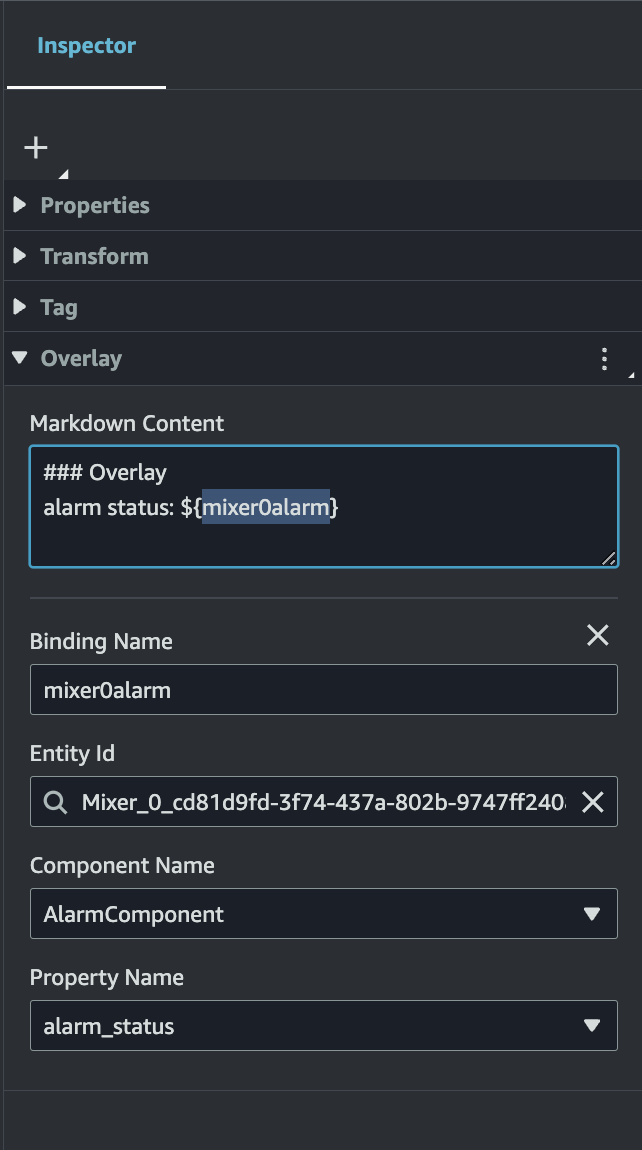
-
To enable Overlay visibility, open the Settings tab in the top left, and make sure the toggle for Overlay is switched on so that all Overlays are visible at once.
Note
By default, an Overlay is visible in a scene only when the tag associated with it is selected.

