Granting database permissions using the named resource method
The following steps explain how to grant database permissions by using the named resource method.
- Console
-
Use the Grant permissions page on the Lake Formation console. The page is divided into the following sections:
-
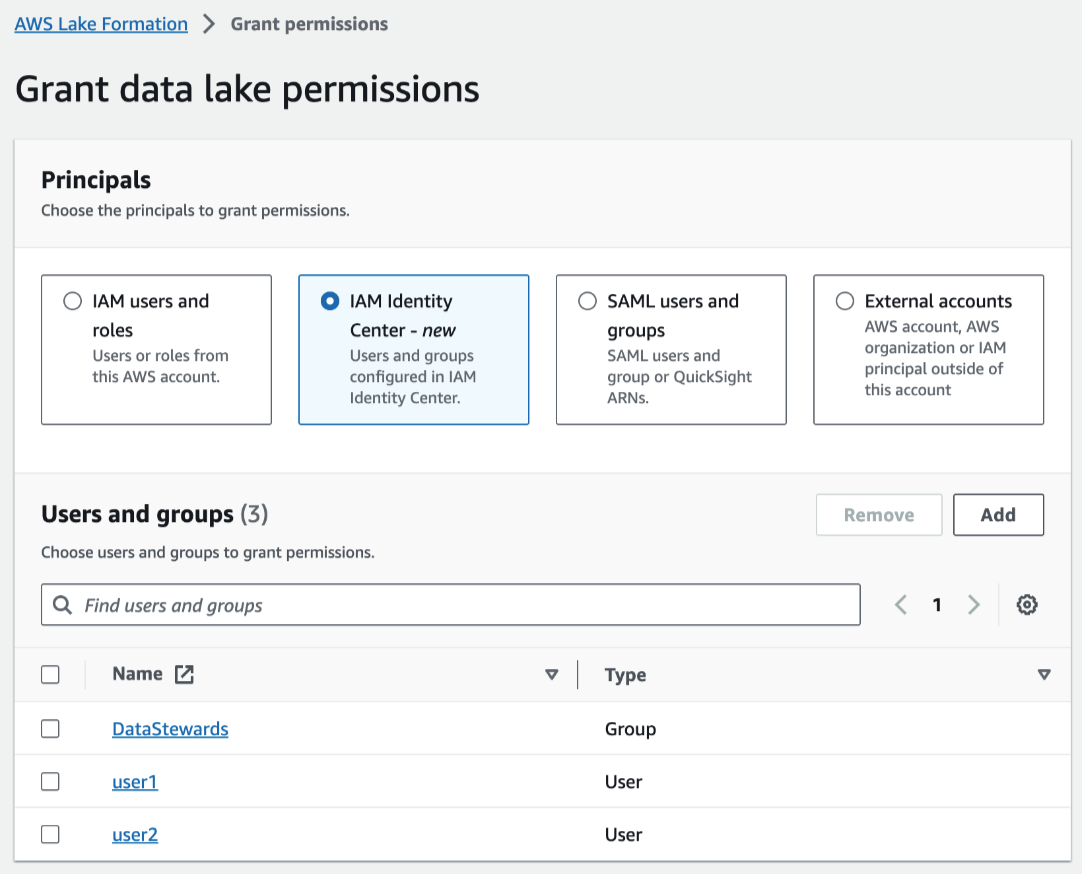
Principal type – The Principals section include the IAM users, roles, IAM Identity Center users and groups, SAML users and groups, AWS accounts, organizations, or organizational units to grant permissions. In the Principals by attributes section, you can specify the key and values for the attributes attached to the IAM roles.
-
LF-Tags or catalog resources – The databases, tables, views, or resource links to grant permissions on.
-
Permissions – The Lake Formation permissions to grant.
Note
To grant permissions on a database resource link, see Granting resource link permissions.
Open the Grant permissions page.
Open the AWS Lake Formation console at https://console.aws.amazon.com/lakeformation/
, and sign in as a data lake administrator, the database creator, or an IAM user who has Grantable permissions on the database. Do one of the following:
-
In the navigation pane, under Permissions, choose Data permissions. Then choose Grant.
-
In the navigation pane, choose Databases under Data Catalog. Then, on the Databases page, choose a database, and from the Actions menu, under Permissions, choose Grant.
Note
You can grant permissions on a database through its resource link. To do so, on the Databases page, choose a resource link, and on the Actions menu, choose Grant on target. For more information, see How resource links work in Lake Formation.
-
-
In the Principal type section, specify principals or grant permissions to principals using attributes.
- IAM users and roles
-
Choose one or more users or roles from the IAM users and roles list.
- IAM Identity Center
-
Choose one or more users or groups from the Users and groups list. Select Add to add more users or groups.
- SAML users and groups
-
For SAML and QuickSight users and groups, enter one or more Amazon Resource Names (ARNs) for users or groups federated through SAML, or ARNs for Amazon QuickSight users or groups. Press Enter after each ARN.
For information about how to construct the ARNs, see Lake Formation grant and revoke AWS CLI commands.
Note
Lake Formation integration with QuickSight is supported only for QuickSight Enterprise Edition.
- External accounts
-
For AWS account, AWS organization, or IAM Principal enter one or more valid AWS account IDs, organization IDs, organizational unit IDs, or ARN for the IAM user or role. Press Enter after each ID.
An organization ID consists of "o-" followed by 10–32 lower-case letters or digits.
An organizational unit ID starts with "ou-" followed by 4–32 lowercase letters or digits (the ID of the root that contains the OU). This string is followed by a second "-" dash and 8 to 32 additional lowercase letters or digits.
- Principals by attributes
Specify the attribute key and value(s). If you choose more than one value, you are creating an attribute expression with an OR operator. This means that if any of the attribute tag values assigned to an IAM role or user match, the role/user gains access permissions on the resource.
Choose the permission scope by specifying if you're granting permissions to principals with matching attributes in the same account or in another account.
-
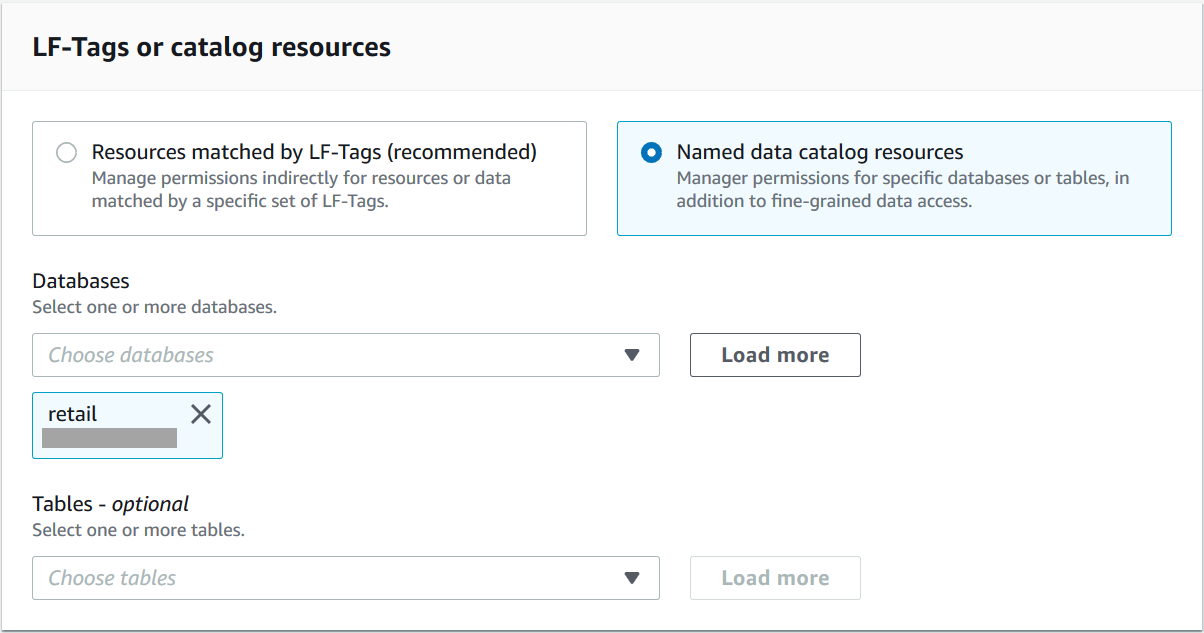
In the LF-Tags or catalog resources section, choose Named data catalog resources.
-
Choose one or more databases from the Database list. You can also choose one or more Tables and/or Data filters.
-
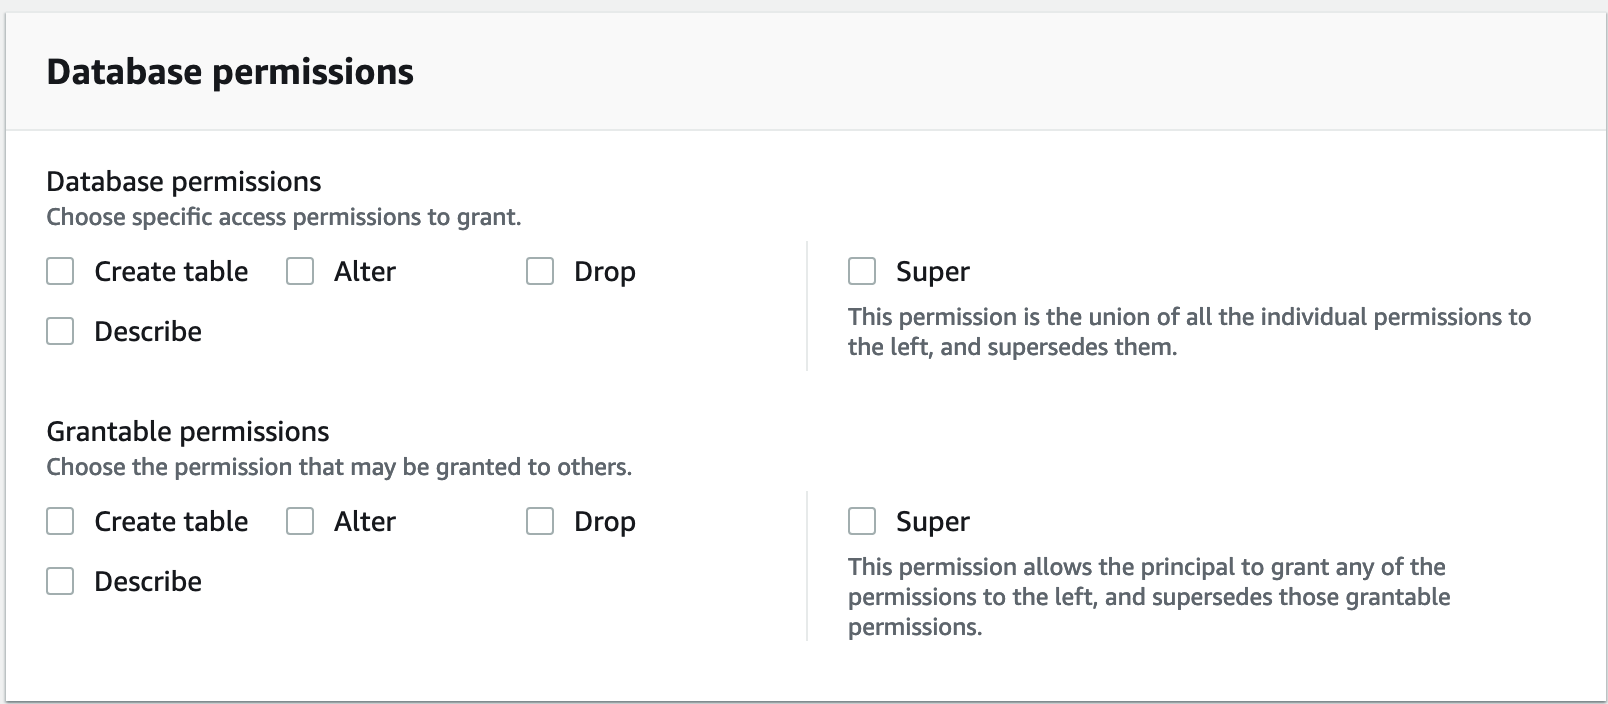
In the Permissions section, select permissions and grantable permissions. Under Database permissions, select one or more permissions to grant.
Note
After granting
Create TableorAlteron a database that has a location property that points to a registered location, be sure to also grant data location permissions on the location to the principals. For more information, see Granting data location permissions. -
(Optional) Under Grantable permissions, select the permissions that the grant recipient can grant to other principals in their AWS account. This option is not supported when you are granting permissions to an IAM principal from an external account.
-
Choose Grant.
-
- AWS CLI
-
You can grant database permissions by using the named resource method and the AWS Command Line Interface (AWS CLI).
To grant database permissions using the AWS CLI
-
Run a
grant-permissionscommand, and specify a database or the Data Catalog as the resource, depending on the permission being granted.In the following examples, replace
<account-id>with a valid AWS account ID.Example – Grant to create a database
This example grants
CREATE_DATABASEto userdatalake_user1. Because the resource on which this permission is granted is the Data Catalog, the command specifies an emptyCatalogResourcestructure as theresourceparameter.aws lakeformation grant-permissions --principal DataLakePrincipalIdentifier=arn:aws:iam::<account-id>:user/datalake_user1 --permissions "CREATE_DATABASE" --resource '{ "Catalog": {}}'Example – Grant to create tables in a designated database
The next example grants
CREATE_TABLEon the databaseretailto userdatalake_user1.aws lakeformation grant-permissions --principal DataLakePrincipalIdentifier=arn:aws:iam::<account-id>:user/datalake_user1 --permissions "CREATE_TABLE" --resource '{ "Database": {"Name":"retail"}}'Example – Grant to an external AWS account with the Grant option
The next example grants
CREATE_TABLEwith the grant option on the databaseretailto external account 1111-2222-3333.aws lakeformation grant-permissions --principal DataLakePrincipalIdentifier=111122223333 --permissions "CREATE_TABLE" --permissions-with-grant-option "CREATE_TABLE" --resource '{ "Database": {"Name":"retail"}}'Example – Grant to an organization
The next example grants
ALTERwith the grant option on the databaseissuesto the organizationo-abcdefghijkl.aws lakeformation grant-permissions --principal DataLakePrincipalIdentifier=arn:aws:organizations::111122223333:organization/o-abcdefghijkl --permissions "ALTER" --permissions-with-grant-option "ALTER" --resource '{ "Database": {"Name":"issues"}}'Example - Grant to
ALLIAMPrincipalsin the same accountThe next example grants
CREATE_TABLEpermission on the databaseretailto all principals in the same account. This option enables every principal in the account to create a table in the database and create a table resource link allowing integrated query engines to access shared databases and tables. This option is especially useful when a principal receives a cross-account grant, and does not have the permission to create resource links. In this scenario, the data lake administrator can create a placeholder database and grantCREATE_TABLEpermission to theALLIAMPrincipalgroup, enabling every IAM principal in the account to create resource links in the placeholder database.aws lakeformation grant-permissions --principal DataLakePrincipalIdentifier=111122223333:IAMPrincipals --permissions "CREATE_TABLE" --resource '{ "Database": {"Name":"temp","CatalogId":"111122223333"}}'Example - Grant to
ALLIAMPrincipalsin an external accountThe next example grants
CREATE_TABLEon the databaseretailto all principals in an external account. This option enables every principal in the account to create a table in the database.aws lakeformation grant-permissions --principal DataLakePrincipalIdentifier=111122223333:IAMPrincipals --permissions "CREATE_TABLE" --resource '{ "Database": {"Name":"retail","CatalogId":"123456789012"}}'
Note
After granting
CREATE_TABLEorALTERon a database that has a location property that points to a registered location, be sure to also grant data location permissions on the location to the principals. For more information, see Granting data location permissions. -
See also
