Granting table permissions using the named resource method
You can use the Lake Formation console or AWS CLI to grant Lake Formation permissions on Data Catalog tables. You can grant permissions on individual tables, or with a single grant operation, you can grant permissions on all tables in a database.
If you grant permissions on all tables in a database, you are implicitly granting the
DESCRIBE permission on the database. The database then appears on the
Databases page on the console, and is returned by the
GetDatabases API operation. This automatic DESCRIBE permission grant
doesn't apply when using attribute-based access control (ABAC). When granting
permissions on all tables in a database using attributes, Lake Formation doesn't
implicitly grant DESCRIBE permission to the database.
When you choose SELECT as the permission to grant, you have the option
to apply a column filter, row filter, or cell filter.
- Console
-
The following steps explain how to grant table permissions by using the named resource method and the Grant data lake permissions page on the Lake Formation console. The page is divided into these sections:
-
Principals types – The users, roles, AWS accounts, organizations, or organizational units to grant permissions to. You can also grant permissions to principals with matching attributes.
-
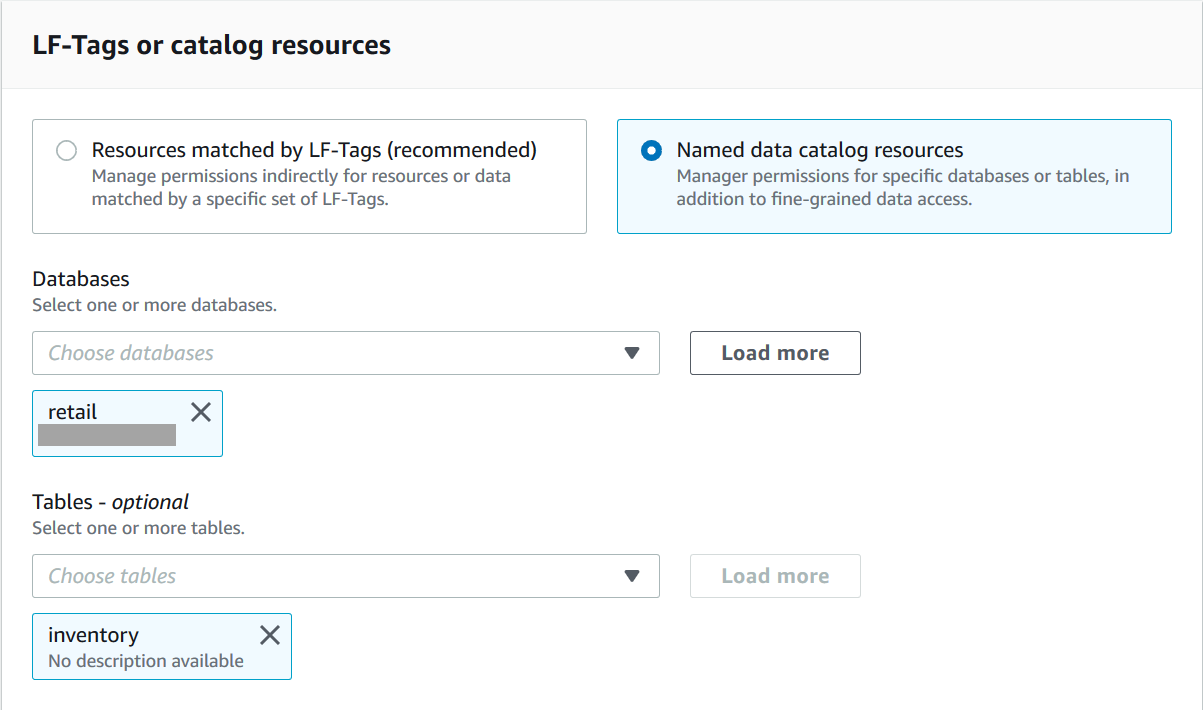
LF-Tags or catalog resources – The databases, tables, or resource links to grant permissions on.
-
Permissions – The Lake Formation permissions to grant.
Note
To grant permissions on a table resource link, see Granting resource link permissions.
Open the Grant permissions page.
Open the AWS Lake Formation console at https://console.aws.amazon.com/lakeformation/
, and sign in as a data lake administrator, the table creator, or a user who has been granted permissions on the table with the grant option. Do one of the following:
-
In the navigation pane, choose Data permissions under Permissions. Then choose Grant.
-
In the navigation pane, choose Tables. Then, on the Tables page, choose a table, and on the Actions menu, under Permissions, choose Grant.
Note
You can grant permissions on a table through its resource link. To do so, on the Tables page, choose a resource link, and on the Actions menu, choose Grant on target. For more information, see How resource links work in Lake Formation.
-
-
Next, in the Principal types section, specify principals or principals with matching attrubutes to grant permissions.
- IAM users and roles
-
Choose one or more users or roles from the IAM users and roles list.
- IAM Identity Center
-
Choose one or more users or groups from the Users and groups list.
- SAML users and groups
-
For SAML and QuickSight users and groups, enter one or more Amazon Resource Names (ARNs) for users or groups federated through SAML, or ARNs for QuickSight users or groups. Press Enter after each ARN.
For information about how to construct the ARNs, see Lake Formation grant and revoke AWS CLI commands.
Note
Lake Formation integration with QuickSight is supported for QuickSight Enterprise Edition only.
- External accounts
-
For AWS account , AWS organization, or IAM Principal enter one or more valid AWS account IDs, organization IDs, organizational unit IDs, or the ARN for the IAM user or role. Press Enter after each ID.
An organization ID consists of "o-" followed by 10–32 lower-case letters or digits.
An organizational unit ID starts with "ou-" followed by 4–32 lowercase letters or digits (the ID of the root that contains the OU). This string is followed by a second "-" character and 8 to 32 additional lowercase letters or digits.
- Principals by attributes
Specify the attribute key and value(s). If you choose more than one value, you are creating an attribute expression with an OR operator. This means that if any of the attribute tag values assigned to an IAM role or user match, the role/user gains access permissions on the resource
Choose the permission scope by specifying if you're granting permissions to principals with matching attributes in the same account or in another account.
-
In the LF-Tags or catalog resources section, choose a database. Then choose one or more tables, or All tables.
-
Specify the permissions with no data filtering.
In the Permissions section, select the table permissions to grant, and optionally select grantable permissions.
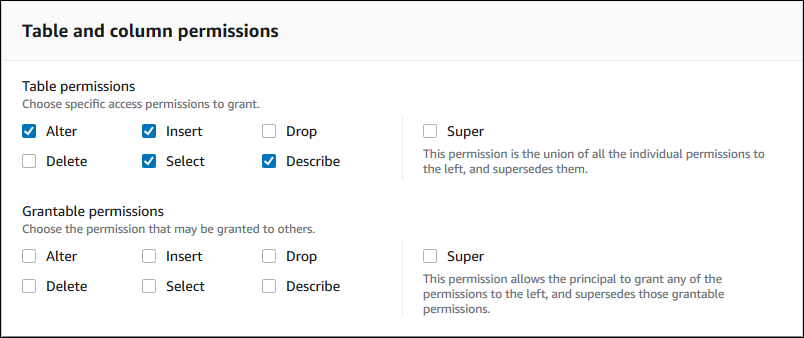
If you grant Select, the Data permissions section appears beneath the Table and column permissions section, with the All data access option selected by default. Accept the default.
-
Choose Grant.
-
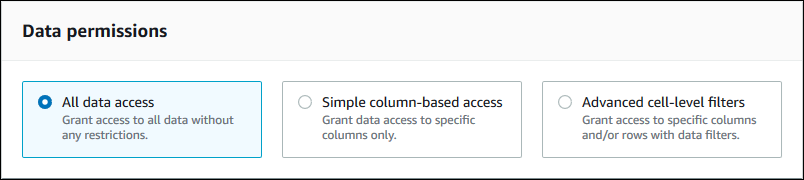
Specify the Select permission with data filtering
Select the Select permission. Don't select any other permissions.
The Data permissions section appears beneath the Table and column permissions section.
-
Do one of the following:
-
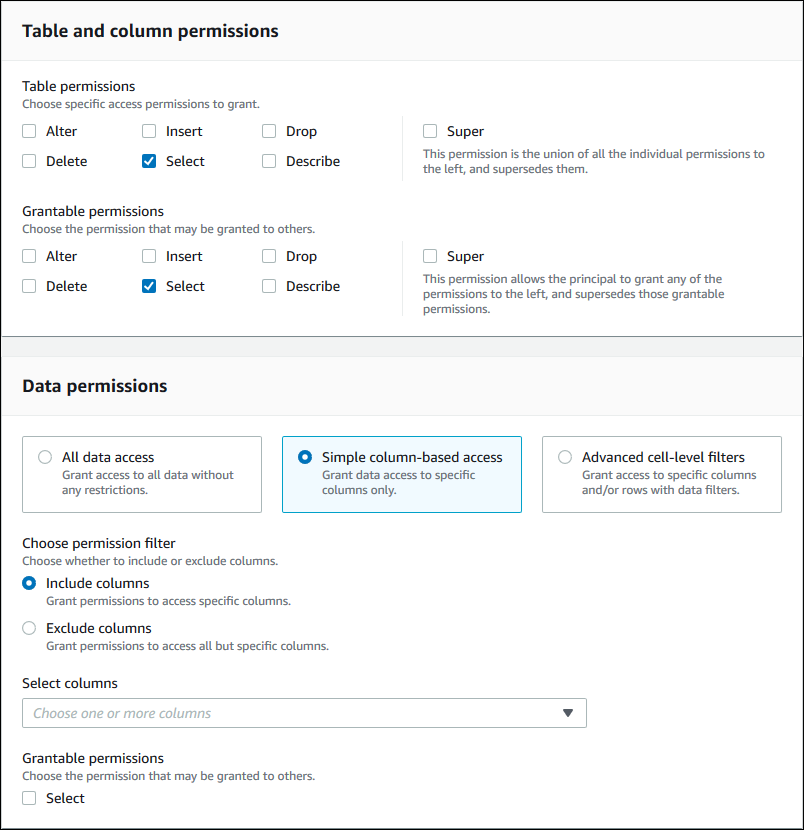
Apply simple column filtering only.
-
Choose Simple column-based access.
-
Choose whether to include or exclude columns, and then choose the columns to include or exclude.
Only include lists are supported when granting permissions to an external AWS account or organization.
-
(Optional) Under Grantable permissions, turn on the grant option for the Select permission.
If you include the grant option, the grant recipient can grant permissions only on the columns that you grant to them.
Note
You can also apply column filtering only by creating a data filter that specifies a column filter and specifies all rows as the row filter. However, this requires more steps.
-
-
Apply column, row, or cell filtering.
-
Choose Advanced cell-level filters.
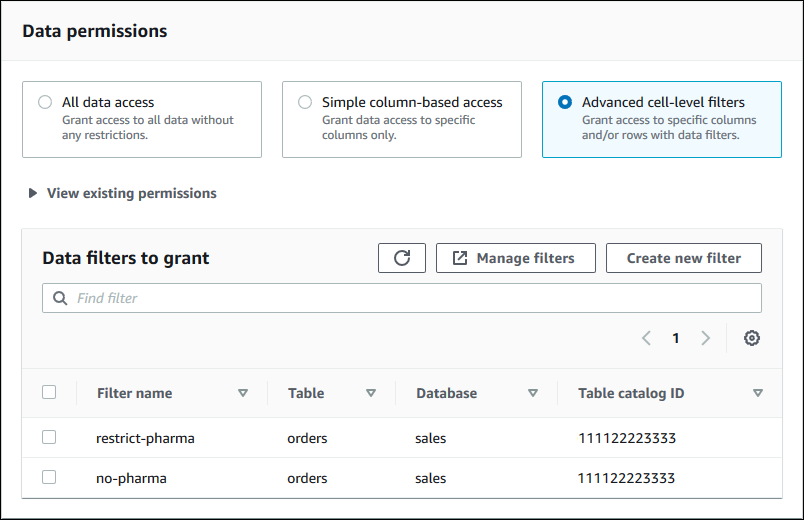
-
(Optional) Expand View existing permissions.
-
(Optional) Choose Create new filter.
-
(Optional) To view details for the listed filters, or to create new or delete existing filters, choose Manage filters.
The Data filters page opens in a new browser window.
When you are finished on the Data filters page, return to the Grant permissions page, and if necessary, refresh the page to view any new data filters that you created.
-
Select one or more data filters to apply to the grant.
Note
If there are no data filters in the list, it means that no data filters were created for the selected table.
-
-
-
Choose Grant.
-
- AWS CLI
-
You can grant table permissions by using the named resource method and the AWS Command Line Interface (AWS CLI).
To grant table permissions using the AWS CLI
-
Run a
grant-permissionscommand, and specify a table as the resource.
Example – Grant on a single table - no filtering
The following example grants
SELECTandALTERto userdatalake_user1in AWS account 1111-2222-3333 on the tableinventoryin the databaseretail.aws lakeformation grant-permissions --principal DataLakePrincipalIdentifier=arn:aws:iam::111122223333:user/datalake_user1 --permissions "SELECT" "ALTER" --resource '{ "Table": {"DatabaseName":"retail", "Name":"inventory"}}'Note
If you grant the
ALTERpermission on a table that has its underlying data in a registered location, be sure to also grant data location permissions on the location to the principals. For more information, see Granting data location permissions.Example – Grant on All Tables with the Grant option - no filtering
The next example grants
SELECTwith the grant option on all tables in databaseretail.aws lakeformation grant-permissions --principal DataLakePrincipalIdentifier=arn:aws:iam::111122223333:user/datalake_user1 --permissions "SELECT" --permissions-with-grant-option "SELECT" --resource '{ "Table": { "DatabaseName": "retail", "TableWildcard": {} } }'Example – Grant with simple column filtering
This next example grants
SELECTon a subset of columns in the tablepersons. It uses simple column filtering.aws lakeformation grant-permissions --principal DataLakePrincipalIdentifier=arn:aws:iam::111122223333:user/datalake_user1 --permissions "SELECT" --resource '{ "TableWithColumns": {"DatabaseName":"hr", "Name":"persons", "ColumnNames":["family_name", "given_name", "gender"]}}'Example – Grant with a data filter
This example grants
SELECTon theorderstable and applies therestrict-pharmadata filter.aws lakeformation grant-permissions --cli-input-json file://grant-params.jsonThe following are the contents of file
grant-params.json.{ "Principal": {"DataLakePrincipalIdentifier": "arn:aws:iam::111122223333:user/datalake_user1"}, "Resource": { "DataCellsFilter": { "TableCatalogId": "111122223333", "DatabaseName": "sales", "TableName": "orders", "Name": "restrict-pharma" } }, "Permissions": ["SELECT"], "PermissionsWithGrantOption": ["SELECT"] } -
See also
