Launch and use JupyterLab on Lightsail for Research
In this tutorial, we show you how to get started with managing and using your JupyterLab virtual computer in Amazon Lightsail for Research.
Topics
Step 1: Complete the prerequisites
Create a virtual computer using the JupyterLab application if you haven't already. For more information, see Create a Lightsail for Research virtual computer.
After your new virtual computer is up and running, continue to the launch the JupyterLab application section of this tutorial.
Step 2: (Optional) Add storage space
Your virtual computer comes with a system disk. However, as your storage needs change, you can attach additional disks to your virtual computer to increase its storage space.
You can also store your working files to an attached disk. Then you can detach the disk and attach it to a different virtual computer to quickly move your files from one computer to another.
Alternatively, you can create a snapshot of an attached disk that has your working files, and then create a duplicate disk from the snapshot. Then you can then attach the new duplicate disk to another computer to duplicate your work across different virtual computers. For more information, see Create a storage disk in the Lightsail for Research console and Add storage to a virtual computer in Lightsail for Research.
Note
When you attach a disk to your virtual computer using the console, Lightsail for Research
automatically formats and mounts the disk. This process takes a few minutes, so
you should confirm that the disk has reached a Mounted
mounting status before you start using it. By default, Lightsail for Research mounts disks to the
/home/lightsail-user/
directory. <disk-name><disk-name>
Step 3: Upload and download files
You can upload files to your JupyterLab virtual computer, and download files from it. To do so, you must complete the following steps:
-
Obtain a key pair from Amazon Lightsail. For more information, see Get a key pair for a Lightsail for Research virtual computer.
-
After you have the key pair, you can use it to establish a connection using the Secure Copy (SCP) utility. SCP lets you upload and download files using Command Prompt or Terminal. For more information, see Transfer files to Lightsail for Research virtual computers using Secure Copy.
-
(Optional) You can also use the key pair to connect to your virtual computer with SSH. For more information, see Connect to a Lightsail for Research virtual computer using Secure Shell.
Note
You can also access your virtual computer’s command line interface and transfer files by using the browser-based Amazon DCV client. Amazon DCV is available in the Lightsail for Research console. For more information, see Access a Lightsail for Research virtual computer application and Access your Lightsail for Research virtual computer's operating system.
To manage your project files in an attached storage disk, make sure to upload them
to the correct mount directory for the attached disk. When you attach a disk to your
virtual computer using the console, Lightsail for Research automatically formats and mounts the disk
to the
/home/lightsail-user/
directory. <disk-name><disk-name>
Step 4: Launch the JupyterLab application
Complete the following procedure to launch the JupyterLab application on your new virtual computer.
Important
Don't update the operating system or the JupyterLab application even if you are prompted to do so. Instead, choose the option to close or ignore those prompts. Furthermore, don't modify any of the files that are in the /home/lightsail-admin/ directory. These actions might render the virtual computer unusable.
-
Sign in to the Lightsail for Research console
. -
Choose Virtual computers in the navigation pane to view the virtual computers that are available in your account.
-
In the Virtual computers page, find your virtual computer and choose one of the following options to connect to it:
-
(Recommended) Choose Launch JupyterLab to launch the JupyterLab application in focused mode. If you haven't connected to your virtual computer recently, you might have to wait a few minutes while Lightsail for Research prepares your session.

-
Choose the dropdown menu for the computer, and then choose Access operating system to access your virtual computer's desktop.
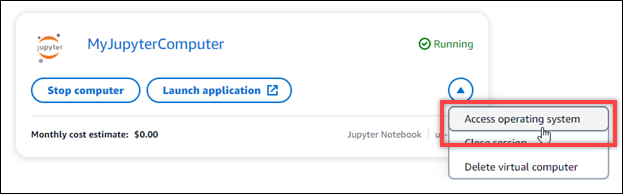
Lightsail for Research runs a few commands to initiate the remote display protocol connection. After a few moments, a new browser tab window opens with a virtual desktop connection established to your virtual computer. If you chose the Launch application option, continue to the next step of this procedure to open a file in the JupyterLab application. If you chose the Access operating system option, you can open other applications through the Ubuntu desktop.
Note
Your browser might prompt you to authorize sharing of your clipboard. Allowing this lets you copy and paste between your local computer and your virtual computer.
Ubuntu might also prompt you for an initial setup. Follow the prompts until you complete the setup and can use the operating system.
-
-
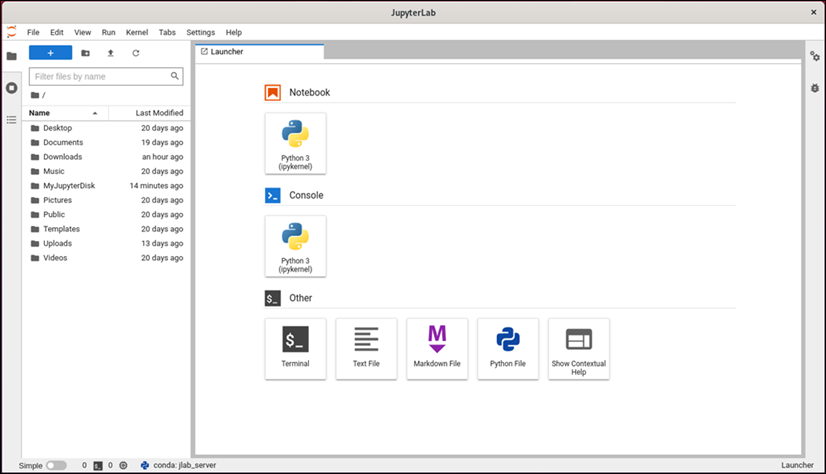
The JupyterLab application opens. In the launcher menu, you can create a new notebook, launch the console, launch the terminal, and create various files.
-
To open a file in JupyterLab, in the File Browser pane, choose the directory or folder where your project files are stored. Then choose the file to open.
If you uploaded your project files to an attached disk, look for the directory where the disk is mounted. By default, Lightsail for Research mounts disks to the
/home/lightsail-user/directory.<disk-name><disk-name>MyJupyterDiskdirectory represents the mounted disk, and theNotebookssubdirectory contains our Jupyter notebook files.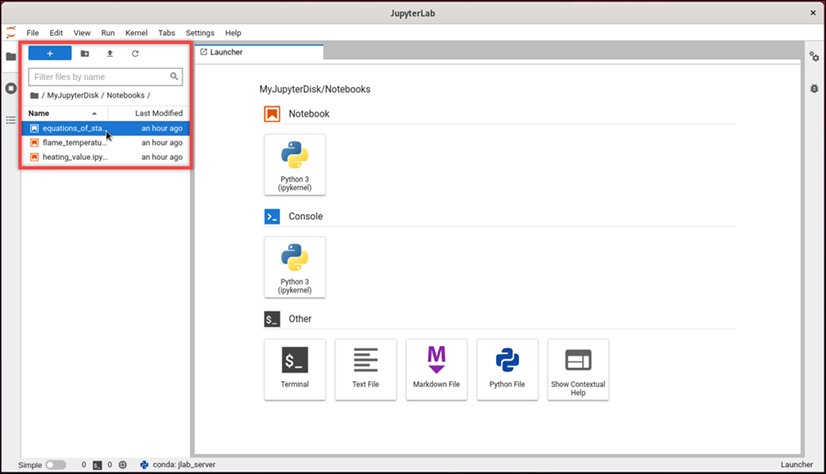
In the following example, we have opened the
equations_of_state.ipynbJupyter notebook file.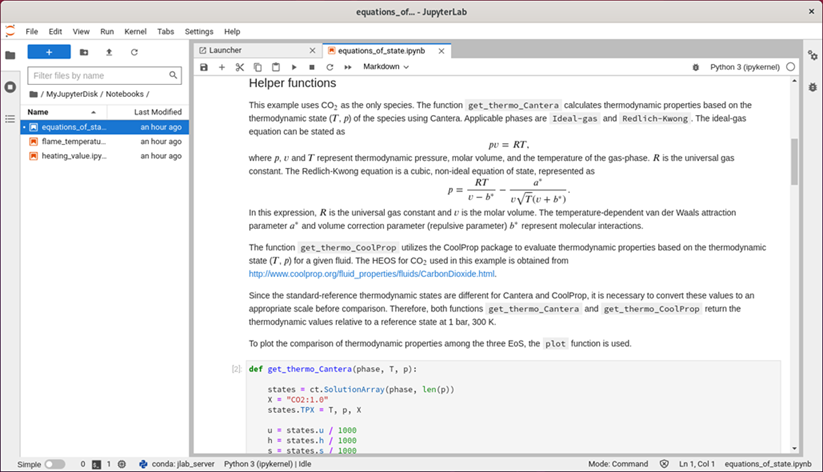
For information about how to get started, continue to the Step 5: Read the JupyterLab documentation section of this tutorial.
Step 5: Read the JupyterLab documentation
If you're not familiar with JupyterLab, we recommend that you read their official documentation. The following JupyterLab online resources are available:
Step 6: (Optional) Monitor usage and costs
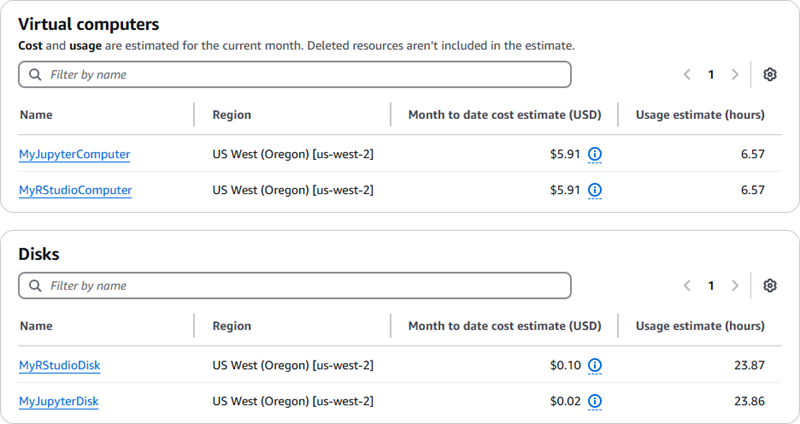
Month to date cost and usage estimates for your Lightsail for Research resources are displayed in the following areas of the Lightsail for Research console.
-
Choose Virtual computers in the navigation pane of the Lightsail for Research console. The month to date cost estimate for your virtual computers is listed under each running virtual computer.

-
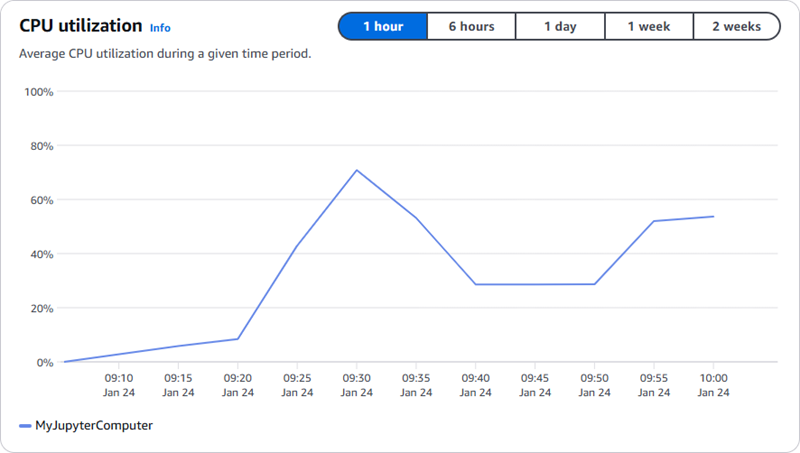
To view the CPU utilization for a virtual computer, choose the name of the virtual computer, and then choose the Dashboard tab.
-
To view the month to date cost and usage estimates for all of your Lightsail for Research resources, choose Usage in the navigation pane.
Step 7: (Optional) Create a cost control rule
Manage the usage and cost of your virtual computers by creating cost control rules. You can create a Stop virtual computer on idle rule that stops a running computer when it reaches a specified percentage of its CPU utilization during a given period. For example, a rule can automatically stop a specific computer when its CPU utilization is equal to or less than 5% during a 30-minute period. This might mean that the computer is idle, and Lightsail for Research stops the computer so that you don't incur charges for an idle resource.
Important
Before you create a rule to stop your virtual computer on idle, we recommend monitoring its CPU utilization for a few days. Take note of the CPU utilization while your virtual computer is under different loads. For example, when it's compiling code, processing an operation, and idling. This will help you determine an accurate threshold for the rule. For more information, see the Step 6: (Optional) Monitor usage and costs section of this tutorial.
If you create a rule with a CPU utilization threshold that's higher than your workload, the rule can consecutively stop your virtual computer. For example, if you start your virtual computer immediately after a rule stops it, the rule reactivates and the computer stops again.
Detailed instructions for creating, and managing cost control rules can be found in the following guides:
Step 8: (Optional) Create a snapshot
Snapshots are a point-in-time copy of your data. You can create snapshots of your virtual computers and use them as baselines to create new computers or for data backup. A snapshot contains all of the data that's needed to restore your computer (from the moment when the snapshot was taken).
Detailed instructions for creating, and managing snapshots can be found in the following guides:
Step 9: (Optional) Stop or delete your virtual computer
After you're done with the virtual computer that you created for this tutorial, you can delete it. This stops incurring charges for the virtual computer if you don't need it.
Deleting a virtual computer doesn't delete its associated snapshots or attached disks. If you created snapshots and disks, you should delete those manually to stop incurring charges for them.
To save your virtual computer for later, but to avoid incurring charges at
standard hourly prices, you can stop the virtual computer instead of deleting it.
Then you can start it again later. For more information, see View Lightsail for Research virtual computer details. For more information
about pricing, see Lightsail for Research pricing
Important
Deleting a Lightsail for Research resource is a permanent action. The deleted data cannot be recovered. If you might need the data later, create a snapshot of your virtual computer before you delete it. For more information, see Create a snapshot.
-
Sign in to the Lightsail for Research console
. -
Choose Virtual computers in the navigation pane.
-
Choose the virtual computer to delete.
-
Choose Actions, then choose Delete virtual computer.
-
Type confirm in the text block. Then, choose Delete virtual computer.
