We are no longer updating the Amazon Machine Learning service or accepting new users for it. This documentation is available for existing users, but we are no longer updating it. For more information, see What is Amazon Machine Learning.
Step 2: Create a Training Datasource
After you upload the banking.csv dataset to your Amazon Simple Storage Service (Amazon S3) location, you
use it to create a training datasource. A datasource is an Amazon Machine Learning (Amazon ML) object that contains
the location of your input data and important metadata about your input data. Amazon ML uses the
datasource for operations like ML model training and
evaluation.
To create a datasource, provide the following:
-
The Amazon S3 location of your data and permission to access the data
-
The schema, which includes the names of the attributes in the data and the type of each attribute (Numeric, Text, Categorical, or Binary)
-
The name of the attribute that contains the answer that you want Amazon ML to learn to predict, the target attribute
Note
The datasource doesn't actually store your data, it only references it. Avoid moving or changing the files stored in Amazon S3. If you do move or change them, Amazon ML can't access them to create an ML model, generate evaluations, or generate predictions.
To create the training datasource
Open the Amazon Machine Learning console at https://console.aws.amazon.com/machinelearning/
. -
Choose Get started.
Note
This tutorial assumes that this is your first time using Amazon ML. If you have used Amazon ML before, you can use the Create new... drop down list on the Amazon ML dashboard to create a new datasource.
-
On the Get started with Amazon Machine Learning page, choose Launch.

-
On the Input Data page, for Where is your data located?, make sure that S3 is selected.

-
For S3 Location, type the full location of the
banking.csvfile from Step 1: Prepare Your Data. For example:your-bucket/banking.csv. Amazon ML prepends s3:// to your bucket name for you. -
For Datasource name, type
Banking Data
        1
.
-
Choose Verify.
-
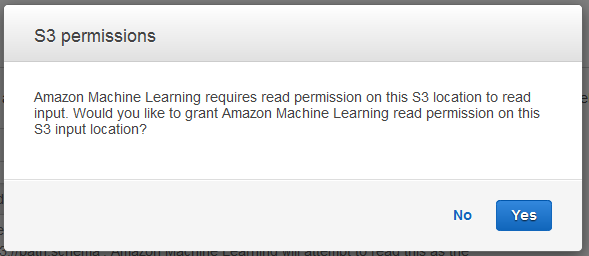
In the S3 permissions dialog box, choose Yes.
-
If Amazon ML can access and read the data file at the S3 location, you will see a page similar to the following. Review the properties, and then choose Continue.

Next, you establish a schema. A schema is the information Amazon ML needs to interpret the input data for an ML model, including attribute names and their assigned data types, and the names of special attributes. There are two ways to provide Amazon ML with a schema:
-
Provide a separate schema file when you upload your Amazon S3 data.
-
Allow Amazon ML to infer the attribute types and create a schema for you.
In this tutorial, we'll ask Amazon ML to infer the schema.
For information about creating a separate schema file, see Creating a Data Schema for Amazon ML.
To allow Amazon ML to infer the schema
-
On the Schema page, Amazon ML shows you the schema that it inferred. Review the data types that Amazon ML inferred for the attributes. It is important that attributes are assigned the correct data type to help Amazon ML ingest the data correctly and to enable the correct feature processing on the attributes.
-
Attributes that have only two possible states, such as yes or no, should be marked as Binary.
-
Attributes that are numbers or strings that are used to denote a category should be marked as Categorical.
-
Attributes that are numeric quantities for which the order is meaningful should be marked as Numeric.
-
Attributes that are strings that you would like to treat as words delimited by spaces should be marked as Text.

-
-
In this tutorial, Amazon ML has correctly identified the data types for all of the attributes, so choose Continue.
Next, select a target attribute.
Remember that the target is the attribute that the ML model must learn to predict. Attribute y indicates whether an individual has subscribed to a campaign in the past: 1 (yes) or 0 (no).
Note
Choose a target attribute only if you will use the datasource for training and evaluating ML models.
To select y as the target attribute
-
In the lower right of the table, choose the single arrow to advance to the last page of the table, where the attribute named
yappears.
-
In the Target column, select
y.
Amazon ML confirms that y is selected as your target.
-
Choose Continue.
-
On the Row ID page, for Does your data contain an identifier? , make sure that No, the default, is selected.
-
Choose Review, and then choose Continue.
Now that you have a training datasource, you're ready to create your model.
