This whitepaper is for historical reference only. Some content might be outdated and some links might not be available.
Prerequisites
Deploy the AWS environment
-
If you do not have an AWS account, follow the How do I create and activate a new AWS account?
article to create one that you will use throughout this walkthrough. -
Download the App2Container demo CloudFormation template
to your local machine for the AWS environment that you will deploy for the demo environment. -
Deploy the AWS environment with CloudFormation
(sign-in required). -
In the Create stack dialog box in Specify template, choose Upload a template file, and select the
app2container_demo_template.ymlfile that you downloaded to your local machine. Choose Next.
Create stack dialog box
-
In the Specify stack details dialog box, enter
App2Container-Demoas the stack name. You can optionally add your public IP address in the YourIPAddress field to limit the access only to your IP address. The default value (0.0.0.0/0) will allow traffic for all IP addresses. Choose Next.
Specify stack details dialog box
-
In the Configure stack options dialog box, don’t make any changes, and choose Next.
-
In the Capabilities and transforms dialog box, review, scroll to the bottom of the page, and check all check boxes. Choose Create stack.

Capabilities and transforms dialog box
-
If the deployment fails, go to the deployment stack Events tab and confirm the root cause. A common root cause is
ecsExecutionRoleorecsAutoscaleRoleIAM roles already exist in the AWS account. Delete them and re-run deployment of the environment from the CloudFormation template. -
When the template is in the
CREATE_COMPLETEstatus, you can find information about created source environment by going to AWS Management Console > CloudFormation, choosing App2Container-Demo stack, and choosing the Outputs tab.
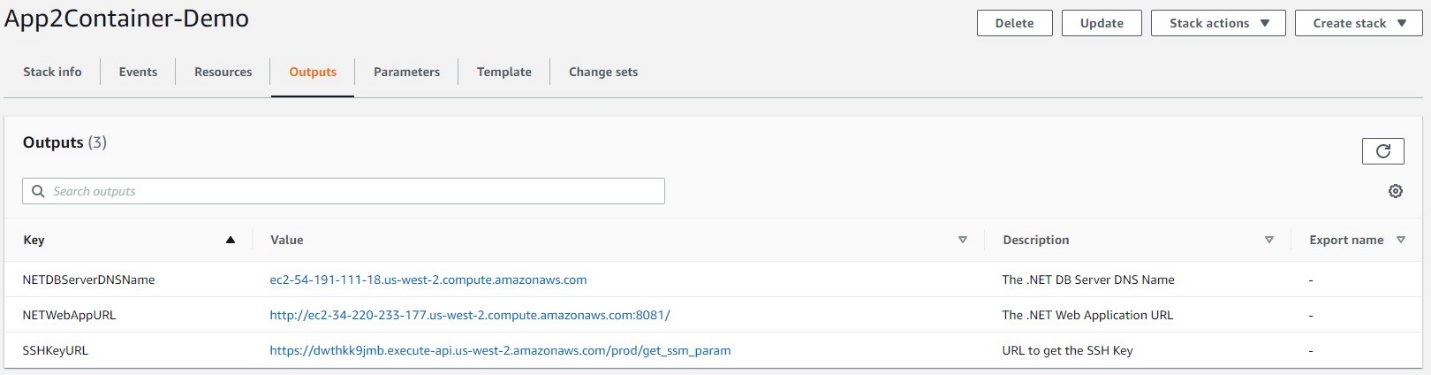
Outputs tab of the App2Container-Demo stack dialog box
