Installing the Amazon QLDB Java sample application
Important
End of support notice: Existing customers will be able to use Amazon QLDB until end of support on 07/31/2025. For more details, see
Migrate an Amazon QLDB Ledger to Amazon Aurora PostgreSQL
This section describes how to install and run the provided Amazon QLDB sample application for the step-by-step Java tutorial. The use case for this sample application is a department of motor vehicles (DMV) database that tracks the complete historical information about vehicle registrations.
The DMV sample application for Java is open source in the GitHub repository aws-samples/amazon-qldb-dmv-sample-java
Prerequisites
Before you get started, make sure that you complete the QLDB driver for Java Prerequisites. This includes the following:
-
Sign up for AWS.
-
Create a user with the appropriate QLDB permissions. To complete all of the steps in this tutorial, you need full administrative access to your ledger resource through the QLDB API.
-
If you're using an IDE other than AWS Cloud9, install Java and grant programmatic access for development.
Installation
The following steps describe how to download and set up the sample application with a local development environment. Or, you can automate setup of the sample application by using AWS Cloud9 as your IDE, and an AWS CloudFormation template to provision your development resources.
These instructions describe how to download and install the QLDB Java sample application using your own resources and development environment.
To download and run the sample application
-
Enter the following command to clone the sample application from GitHub.
This package includes the Gradle configuration and complete code from the Java tutorial.
-
Load and run the provided application.
-
If you're using Eclipse:
-
Start Eclipse, and on the Eclipse menu, choose File, Import, and then Existing Gradle Project.
-
In the project root directory, browse and select the application directory that contains the
build.gradlefile. Then, choose Finish to use the default Gradle settings for the import. -
You can try running the
ListLedgersprogram as an example. Open the context (right-click) menu for theListLedgers.javafile, and choose Run as Java Application.
-
-
If you're using IntelliJ:
-
Start IntelliJ, and on the IntelliJ menu, choose File and then Open.
-
In the project root directory, browse and select the application directory that contains the
build.gradlefile. Then, choose OK. Keep the default settings, and choose OK again. -
You can try running the
ListLedgersprogram as an example. Open the context (right-click) menu for theListLedgers.javafile, and choose Run 'ListLedgers'.
-
-
-
Proceed to Step 1: Create a new ledger to start the tutorial and create a ledger.
These instructions describe how to automate setup of the Amazon QLDB vehicle
registration sample application for Java, using AWS Cloud9
For more information about AWS Cloud9, see the AWS Cloud9 User Guide. To learn more about AWS CloudFormation, see the AWS CloudFormation User Guide.
Topics
Part 1: Provision your resources
In this first step, you use AWS CloudFormation to provision the resources required to set up your development environment with the Amazon QLDB sample application.
To open the AWS CloudFormation console and load the QLDB sample application template
-
Sign in to the AWS Management Console and open the AWS CloudFormation console at https://console.aws.amazon.com/cloudformation
. Switch to a Region that supports QLDB. For a complete list, see Amazon QLDB endpoints and quotas in the AWS General Reference. The following screenshot of the AWS Management Console shows US East (N. Virginia) as the selected AWS Region.

-
On the AWS CloudFormation console, choose Create stack, and then choose With new resources (standard).
-
On the Create stack page under Specify template, choose Amazon S3 URL.
-
Enter the following URL, and choose Next.
https://amazon-qldb-assets.s3.amazonaws.com/templates/QLDB-DMV-SampleApp.yml -
Enter a Stack name (such as
qldb-sample-app), and choose Next. -
You can add any tags as appropriate and keep the default options. Then choose Next.
-
Review your stack settings, and choose Create stack. The AWS CloudFormation script might take a few minutes to finish.
This script provisions your AWS Cloud9 environment with an associated Amazon Elastic Compute Cloud (Amazon EC2) instance that you use to run the QLDB sample application in this tutorial. It also clones the aws-samples/amazon-qldb-dmv-sample-java
repository from GitHub into your AWS Cloud9 development environment.
Part 2: Set up your IDE
In this step, you finish the setup of your cloud development environment. You download and run a provided shell script to set up your AWS Cloud9 IDE with sample application's dependencies.
To set up your AWS Cloud9 environment
-
Open the AWS Cloud9 console at https://console.aws.amazon.com/cloud9/
. -
Under Your environments, locate the card for the environment named QLDB DMV Sample Application, and choose Open IDE. Your environment might take a minute to load as the underlying EC2 instance launches.
Your AWS Cloud9 environment is preconfigured with the system dependencies that you need to run the tutorial. In the Environment navigation pane of your console, confirm that you see a folder named
QLDB DMV
                                    Sample Application
. The following screenshot of the AWS Cloud9 console shows the QLDB DMV Sample Application environment folder pane.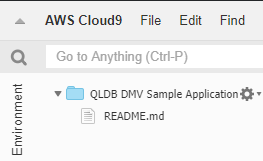
If you don't see a navigation pane, toggle the Environment tab on the left side of your console. If you don't see any folders in the pane, enable Show Environment Root using the settings icon (
 ).
). -
On the bottom pane of your console, you should see an open
bashterminal window. If you don't see this, choose New Terminal from the Window menu at the top of your console. -
Next, download and run a setup script to install OpenJDK 8 and—if applicable—check out the appropriate branch from the Git repository. In the AWS Cloud9 terminal that you created in the previous step, run the following two commands in order:
Upon completion, you should see the following message printed in the terminal:
** DMV Sample App setup completed , enjoy!! ** -
Take a moment to browse the sample application code in AWS Cloud9, particularly in the following directory path:
src/main/java/software/amazon/qldb/tutorial.
Part 3: Run the QLDB DMV sample application
In this step, you learn how to run the Amazon QLDB DMV sample application tasks using AWS Cloud9. To run the sample code, go back to your AWS Cloud9 terminal or create a new terminal window as you did in Part 2: Set Up Your IDE.
To run the sample application
-
Run the following command in your terminal to switch to the project root directory:
cd ~/environment/amazon-qldb-dmv-sample-javaEnsure that you're running the examples in the following directory path.
/home/ec2-user/environment/amazon-qldb-dmv-sample-java/ -
The following command shows the Gradle syntax to run each task.
./gradlew run -Dtutorial=TaskFor example, run the following command to list all of the ledgers in your AWS account and current Region.
./gradlew run -Dtutorial=ListLedgers -
Proceed to Step 1: Create a new ledger to start the tutorial and create a ledger.
-
(Optional) After you complete the tutorial, clean up your AWS CloudFormation resources if you no longer need them.
-
Open the AWS CloudFormation console at https://console.aws.amazon.com/cloudformation
, and delete the stack that you created in Part 1: Provision Your Resources. -
Also delete the AWS Cloud9 stack that the AWS CloudFormation template created for you.
-
