Amazon RDS Security Groups
Amazon RDS security groups enable you to manage network access to your Amazon RDS instances. With security groups, you specify sets of IP addresses using CIDR notation, and only network traffic originating from these addresses is recognized by your Amazon RDS instance.
Although they function in a similar way, Amazon RDS security groups are different from Amazon EC2 security groups. It is possible to add an EC2 security group to your RDS security group. Any EC2 instances that are members of the EC2 security group are then able to access the RDS instances that are members of the RDS security group.
For more information about Amazon RDS security groups, go to the RDS Security Groups. For more information about Amazon EC2 security groups, go to the EC2 User Guide.
Create an Amazon RDS Security Group
You can use the Toolkit for Visual Studio to create an RDS security group. If you use the AWS Toolkit to launch an RDS instance, the wizard will allow you to specify an RDS security group to use with your instance. You can use the following procedure to create that security group before you start the wizard.
To create an Amazon RDS security group
-
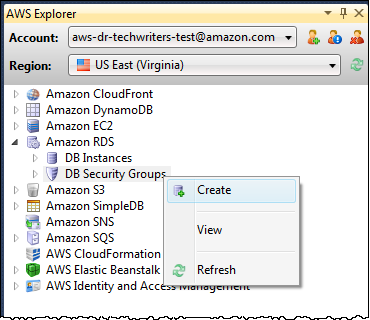
In AWS Explorer, expand the Amazon RDS node, open the context (right-click) menu for the DB Security Groups subnode and choose Create.

Alternatively, on the Security Groups tab, choose Create Security Group. If this tab isn't displayed, open the context (right-click) menu for the DB Security Groups subnode and choose View.

-
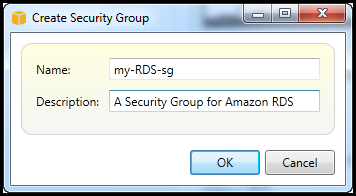
In the Create Security Group dialog box, type a name and description for the security group, and then choose OK.

Set Access Permissions for an Amazon RDS Security Group
By default, a new Amazon RDS security group provides no network access. To enable access to Amazon RDS instances that use the security group, use the following procedure to set its access permissions.
To set access for an Amazon RDS security group
-
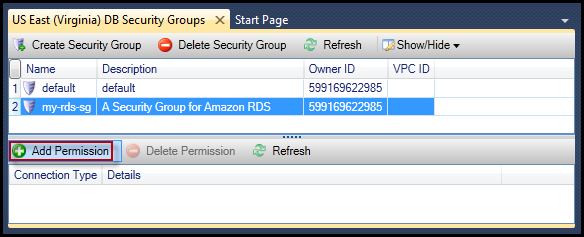
On the Security Groups tab, choose the security group from the list view. If your security group does not appear in the list, choose Refresh. If your security group still does not appear in the list, verify you are viewing the list for the correct AWS region. Security Group tabs in the AWS Toolkit are region-specific.
If no Security Group tabs appear, in AWS Explorer, open the context (right-click) menu for the DB Security Groups subnode and choose View.
-
Choose Add Permission.

Add Permissions button on the Security Groups tab
-
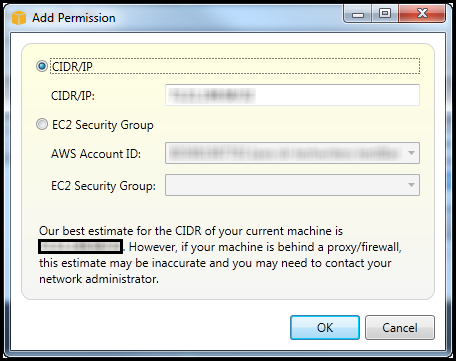
In the Add Permission dialog box, you can use CIDR notation to specify which IP addresses can access your RDS instance, or you can specify which EC2 security groups can access your RDS instance. When you choose EC2 Security Group, you can specify access for all EC2 instances associated with an AWS account have access, or you can choose a EC2 security group from the drop-down list.

The AWS Toolkit attempts to determine your IP address and auto-populate the dialog box with the appropriate CIDR specification. However, if your computer accesses the Internet through a firewall, the CIDR determined by the Toolkit may not be accurate.