本文為英文版的機器翻譯版本,如內容有任何歧義或不一致之處,概以英文版為準。
在 G4ad Linux 執行個體設定雙 4K 顯示器
啟動 G4ad 執行個體後,您可以設定雙 4K 顯示器。
安裝 AMD 驅動程式並設定雙螢幕
-
連線到 Linux 執行個體以獲取您希望用於雙 4K (2x4k) 的目標 GPU PCI 匯流排地址:
lspci -vv | grep -i amd您將會得到類似下列的輸出:
00:1e.0 Display controller: Advanced Micro Devices, Inc. [*AMD*/ATI] Device 7362 (rev c3) Subsystem: Advanced Micro Devices, Inc. [AMD/ATI] Device 0a34 -
注意上述輸出中 PCI 匯流排地址為 00:1e.0。建立名為
/etc/modprobe.d/amdgpu.conf的檔案並新增:options amdgpu virtual_display=0000:00:1e.0,2 -
若要在 Linux 安裝 AMD 驅動程式,請參閱 適用於 EC2 執行個體的 AMD 驅動程式。如果您已經安裝了 AMD GPU 驅動程式,則需要透過 DKMS 重建 amdgpu 核心模組。
-
使用下面的 xorg.conf 檔案定義雙 (2x4k) 畫面拓撲,並將檔案儲存在
/etc/X11/xorg.conf:~$ cat /etc/X11/xorg.conf Section "ServerLayout" Identifier "Layout0" Screen 0 "Screen0" Screen 1 "Screen1" InputDevice "Keyboard0" "CoreKeyboard" InputDevice "Mouse0" "CorePointer" Option "Xinerama" "1" EndSection Section "Files" ModulePath "/opt/amdgpu/lib64/xorg/modules/drivers" ModulePath "/opt/amdgpu/lib/xorg/modules" ModulePath "/opt/amdgpu-pro/lib/xorg/modules/extensions" ModulePath "/opt/amdgpu-pro/lib64/xorg/modules/extensions" ModulePath "/usr/lib64/xorg/modules" ModulePath "/usr/lib/xorg/modules" EndSection Section "InputDevice" # generated from default Identifier "Mouse0" Driver "mouse" Option "Protocol" "auto" Option "Device" "/dev/psaux" Option "Emulate3Buttons" "no" Option "ZAxisMapping" "4 5" EndSection Section "InputDevice" # generated from default Identifier "Keyboard0" Driver "kbd" EndSection Section "Monitor" Identifier "Virtual" VendorName "Unknown" ModelName "Unknown" Option "Primary" "true" EndSection Section "Monitor" Identifier "Virtual-1" VendorName "Unknown" ModelName "Unknown" Option "RightOf" "Virtual" EndSection Section "Device" Identifier "Device0" Driver "amdgpu" VendorName "AMD" BoardName "Radeon MxGPU V520" BusID "PCI:0:30:0" EndSection Section "Device" Identifier "Device1" Driver "amdgpu" VendorName "AMD" BoardName "Radeon MxGPU V520" BusID "PCI:0:30:0" EndSection Section "Extensions" Option "DPMS" "Disable" EndSection Section "Screen" Identifier "Screen0" Device "Device0" Monitor "Virtual" DefaultDepth 24 Option "AllowEmptyInitialConfiguration" "True" SubSection "Display" Virtual 3840 2160 Depth 32 EndSubSection EndSection Section "Screen" Identifier "Screen1" Device "Device1" Monitor "Virtual" DefaultDepth 24 Option "AllowEmptyInitialConfiguration" "True" SubSection "Display" Virtual 3840 2160 Depth 32 EndSubSection EndSection -
請依照「設定互動式桌面」中的指示來設定 DCV。
-
DCV 設定完成後,請重新啟動。
-
確認驅動程式可正常運作:
dmesg | grep amdgpu回應應如下所示:
Initialized amdgpu -
您應該會在
DISPLAY=:0 xrandr -q輸出中看到您已連接 2 個虛擬顯示器:~$ DISPLAY=:0 xrandr -q Screen 0: minimum 320 x 200, current 3840 x 1080, maximum 16384 x 16384 Virtual connected primary 1920x1080+0+0 (normal left inverted right x axis y axis) 0mm x 0mm 4096x3112 60.00 3656x2664 59.99 4096x2160 60.00 3840x2160 60.00 1920x1200 59.95 1920x1080 60.00 1600x1200 59.95 1680x1050 60.00 1400x1050 60.00 1280x1024 59.95 1440x900 59.99 1280x960 59.99 1280x854 59.95 1280x800 59.96 1280x720 59.97 1152x768 59.95 1024x768 60.00 59.95 800x600 60.32 59.96 56.25 848x480 60.00 59.94 720x480 59.94 640x480 59.94 59.94 Virtual-1 connected 1920x1080+1920+0 (normal left inverted right x axis y axis) 0mm x 0mm 4096x3112 60.00 3656x2664 59.99 4096x2160 60.00 3840x2160 60.00 1920x1200 59.95 1920x1080 60.00 1600x1200 59.95 1680x1050 60.00 1400x1050 60.00 1280x1024 59.95 1440x900 59.99 1280x960 59.99 1280x854 59.95 1280x800 59.96 1280x720 59.97 1152x768 59.95 1024x768 60.00 59.95 800x600 60.32 59.96 56.25 848x480 60.00 59.94 720x480 59.94 640x480 59.94 59.94 -
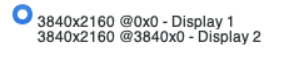
當您連接到 DCV 時,將解析度變更為 2x4k,確認 DCV 已註冊雙顯示器支援。
設定適用於 Linux 的互動式桌面
在您確認 Linux 執行個體已安裝 AMD GPU 驅動程式且 amdgpu 正在使用中之後,您就可以安裝互動式桌面管理員。為了獲得最佳的相容性和效能,我們建議您使用 MATE 桌面環境。
先決條件
開啟文字編輯器,並將以下內容儲存為名為 xorg.conf 的檔案。你的執行個體需要這個檔案。
Section "ServerLayout"
Identifier     "Layout0"
Screen          0 "Screen0"
InputDevice     "Keyboard0" "CoreKeyboard"
InputDevice     "Mouse0" "CorePointer"
EndSection
Section "Files"
ModulePath "/opt/amdgpu/lib64/xorg/modules/drivers"
ModulePath "/opt/amdgpu/lib/xorg/modules"
ModulePath "/opt/amdgpu-pro/lib/xorg/modules/extensions"
ModulePath "/opt/amdgpu-pro/lib64/xorg/modules/extensions"
ModulePath "/usr/lib64/xorg/modules"
ModulePath "/usr/lib/xorg/modules"
EndSection
Section "InputDevice"
# generated from default
Identifier     "Mouse0"
Driver         "mouse"
Option         "Protocol" "auto"
Option         "Device" "/dev/psaux"
Option         "Emulate3Buttons" "no"
Option         "ZAxisMapping" "4 5"
EndSection
Section "InputDevice"
# generated from default
Identifier     "Keyboard0"
Driver         "kbd"
EndSection
Section "Monitor"
Identifier     "Monitor0"
VendorName     "Unknown"
ModelName      "Unknown"
EndSection
Section "Device"
Identifier     "Device0"
Driver         "amdgpu"
VendorName     "AMD"
BoardName      "Radeon MxGPU V520"
BusID          "PCI:0:30:0"
EndSection
Section "Extensions"
Option         "DPMS" "Disable"
EndSection
Section "Screen"
Identifier     "Screen0"
Device         "Device0"
Monitor        "Monitor0"
DefaultDepth   24
Option         "AllowEmptyInitialConfiguration" "True"
SubSection "Display"
    Virtual    3840 2160
    Depth      32
EndSubSection
EndSection
若要在 Amazon Linux 2 上設定互動式桌面
-
安裝 EPEL 儲存庫。
[ec2-user ~]$sudo amazon-linux-extras install epel -y -
安裝 MATE 桌面。
[ec2-user ~]$sudo amazon-linux-extras install mate-desktop1.x -y[ec2-user ~]$sudo yum groupinstall "MATE Desktop" -y[ec2-user ~]$sudo systemctl disable firewalld -
將
xorg.conf檔案複製至/etc/X11/xorg.conf。 -
重新啟動執行個體。
[ec2-user ~]$sudo reboot -
(選用) 安裝 Amazon DCV 伺服器,使用 Amazon DCV 做為高效能顯示通訊協定,然後使用偏好的用戶端連線至 Amazon DCV 工作階段。
在 Ubuntu 上設定互動式桌面
-
安裝 MATE 桌面。
$sudo apt install xorg-dev ubuntu-mate-desktop -y$sudo apt purge ifupdown -y -
將
xorg.conf檔案複製至/etc/X11/xorg.conf。 -
重新啟動執行個體。
$sudo reboot -
為適當版本的 Ubuntu 安裝 AMF 編碼器。
$sudo apt install ./amdgpu-pro-20.20-*/amf-amdgpu-pro_20.20-*_amd64.deb -
(選用) 安裝 Amazon DCV 伺服器,使用 Amazon DCV 做為高效能顯示通訊協定,然後使用偏好的用戶端連線至 Amazon DCV 工作階段。
-
安裝 DCV 之後給予 DCV 使用者視訊許可:
$sudo usermod -aG video dcv
在 CentOS 上設定互動式桌面
-
安裝 EPEL 儲存庫。
$sudo yum update -y$sudo yum install epel-release -y -
安裝 MATE 桌面。
$sudo yum groupinstall "MATE Desktop" -y$sudo systemctl disable firewalld -
將
xorg.conf檔案複製至/etc/X11/xorg.conf。 -
重新啟動執行個體。
$sudo reboot -
(選用) 安裝 Amazon DCV 伺服器,使用 Amazon DCV 做為高效能顯示通訊協定,然後使用偏好的用戶端連線至 Amazon DCV 工作階段。
