本文為英文版的機器翻譯版本,如內容有任何歧義或不一致之處,概以英文版為準。
設定 Amazon Connect Cases 的整合
若要更新 Amazon Connect Customer Profiles 中的 Amazon Connect 案例資料並使用計算屬性等功能,您可以使用 Amazon AppIntegrations 進行整合。首先設定 Cases 事件串流,將系統欄位傳送至 EventBridge 匯流排,然後使用 Amazon AppIntegrations 將這些事件轉送至客戶設定檔。
將資料從 Amazon Connect Cases 串流至 Event Bridge
-
在 https://console.aws.amazon.com/connect/
開啟 Amazon Connect 主控台。 -
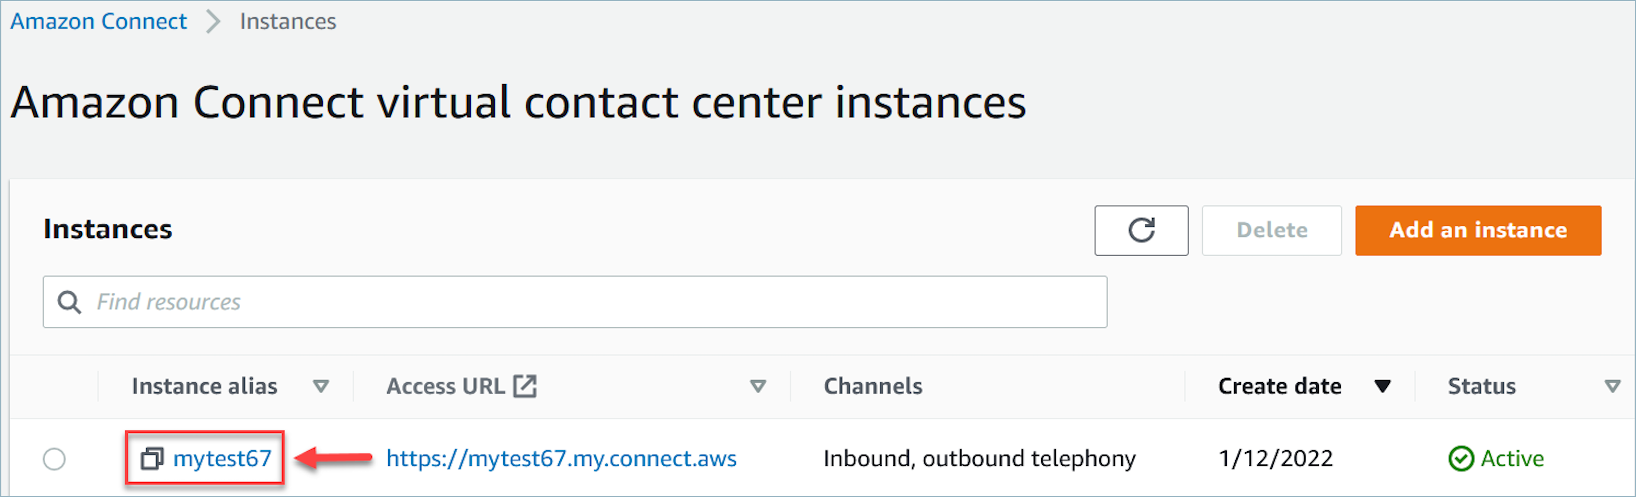
在執行個體頁面上,選擇執行個體別名。執行個體別名也是您的執行個體名稱,它會出現在您的 Amazon Connect URL 中。下圖顯示 Amazon Connect 虛擬聯絡中心執行個體頁面,其中包含執行個體別名周圍的方塊。
-
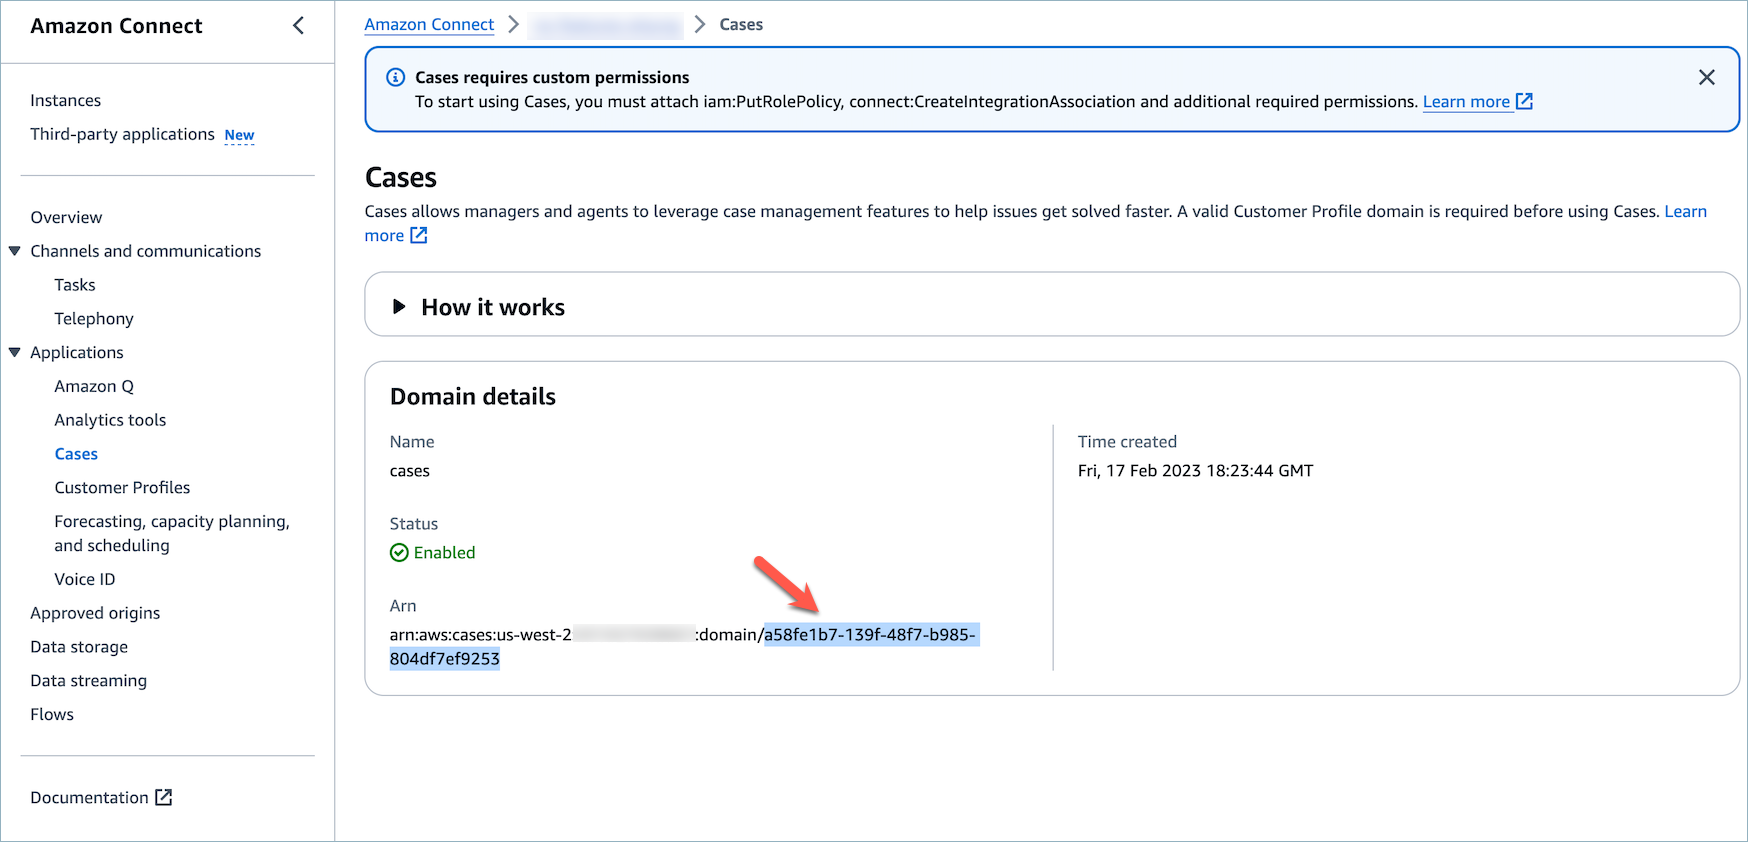
在導覽窗格中,從網域詳細資訊區段中選擇 Cases 並記下您的 Cases 網域 ID。
-
使用 AWS CLI建立案例事件組態,將 Amazon Connect Cases Events 傳送至 AWS 帳戶您預設的 Event Bridge 匯流排。
// set up Case Event Configuration including all system fields
aws connectcases put-case-event-configuration --domain-id <YOUR_CASES_DOMAIN_ID> --region <YOUR_AWS_REGION> --event-bridge "{
    \"enabled\": true,
    \"includedData\": {
       \"caseData\": {
          \"fields\": [
          {
          \"id\": \"status\"
          },
          {
          \"id\": \"title\"
          },
          {
          \"id\": \"summary\"
          },
          {
          \"id\": \"reference_number\"
          },
          {
          \"id\": \"created_datetime\"
          },
          {
          \"id\": \"last_updated_datetime\"
          },
          {
          \"id\": \"last_closed_datetime\"
          },
          {
          \"id\": \"customer_id\"
          }
        ]
      }
    }
  }"
-
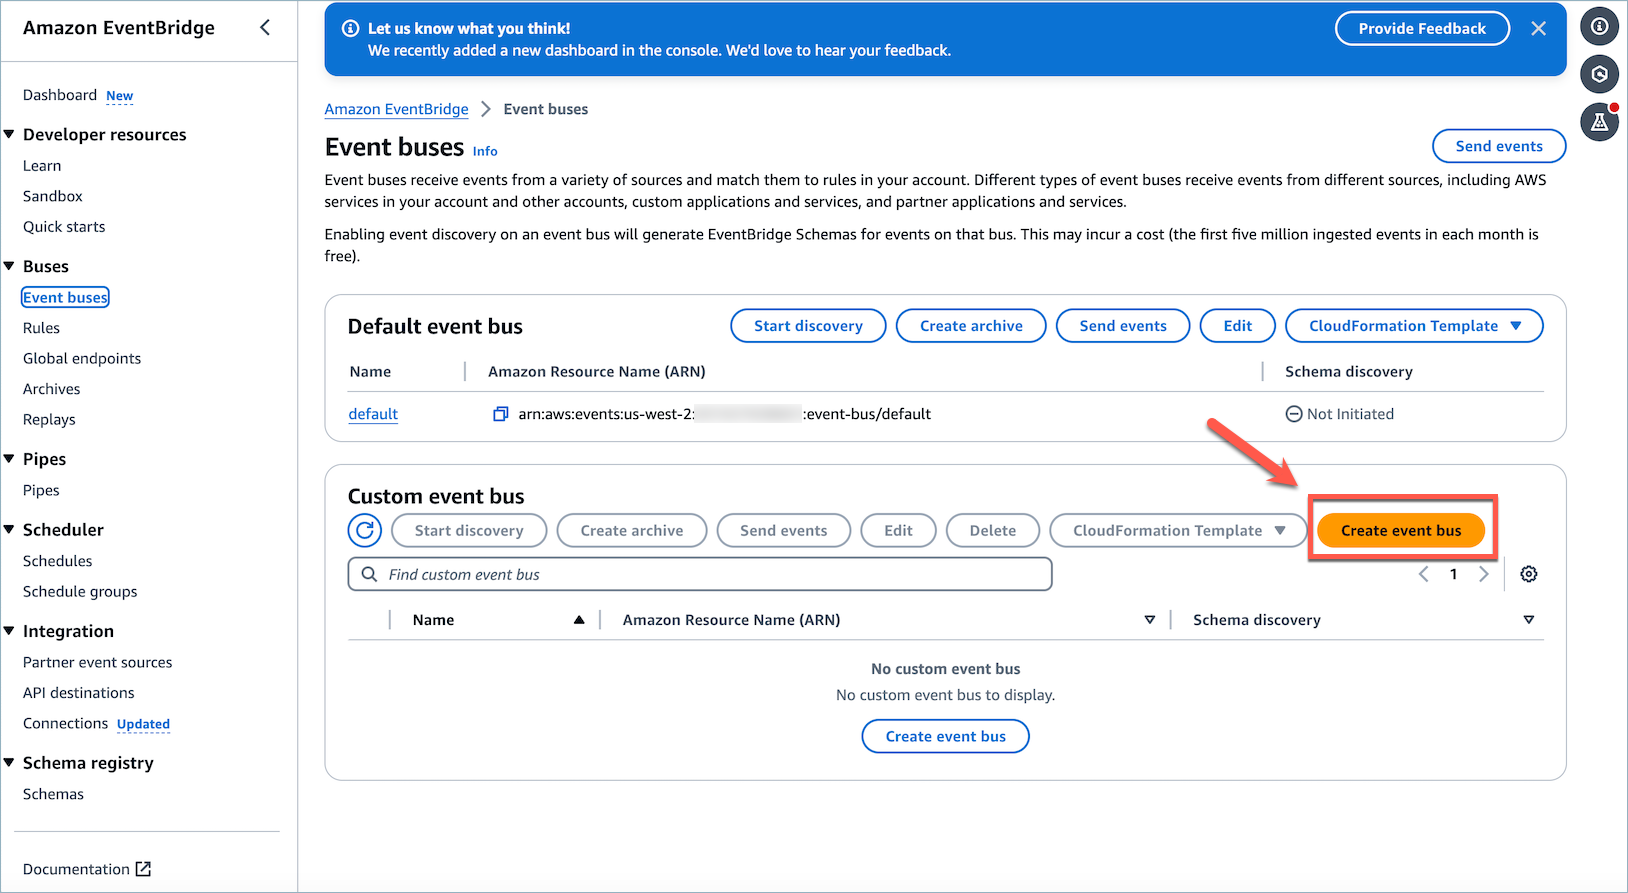
開啟您 AWS 區域的 Event Bridge 主控台。例如,https://us-west-2.console.aws.amazon.com/events/home?region=us-west-2#/eventbuses
-
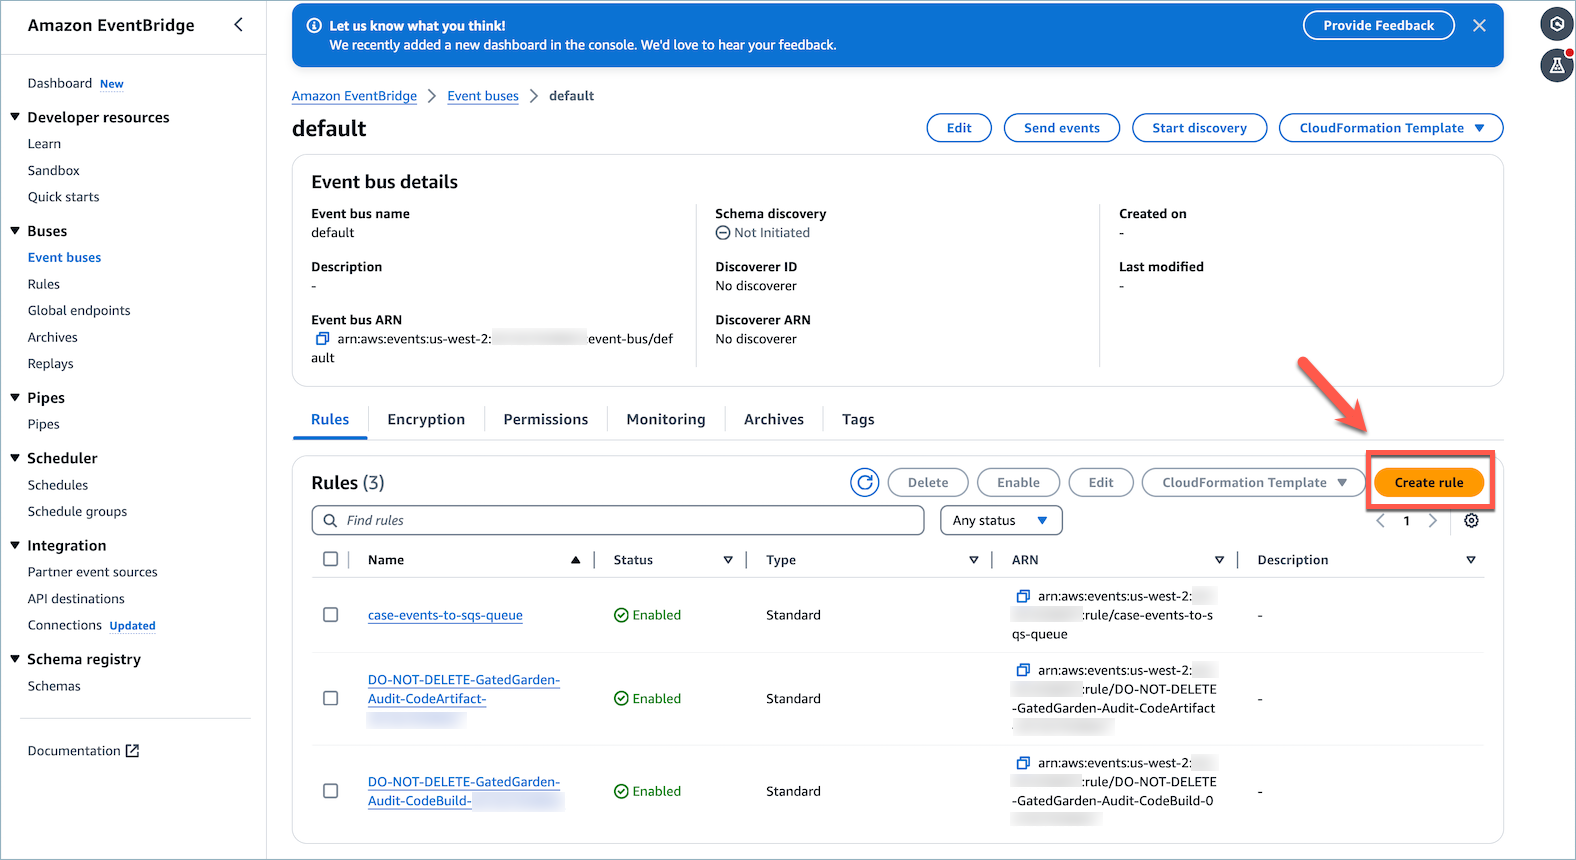
選擇 Create event bus (建立事件匯流排)。
-
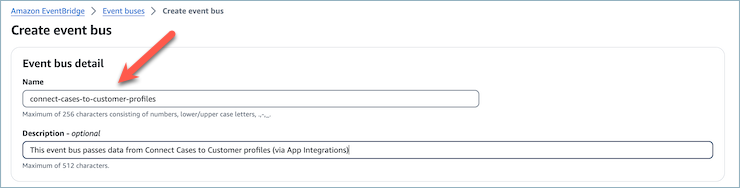
建立名稱為 的事件匯流排
connect-cases-to-customer-profiles。
-
返回您的預設事件匯流排,並建立名稱為 的規則
connect-cases-to-customer-profiles-rule。
-
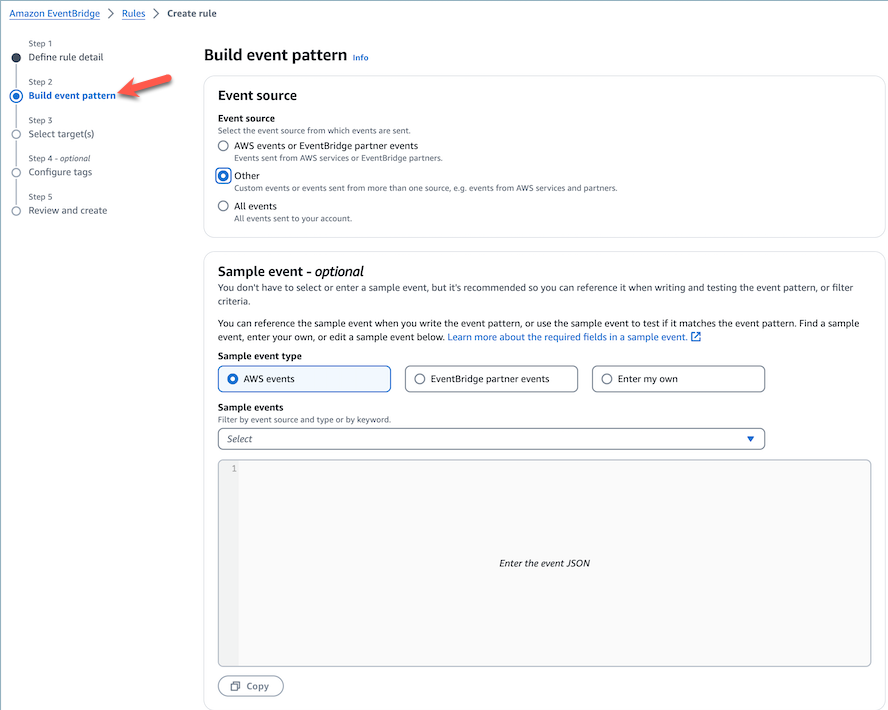
事件模式程式碼片段:
{
  "source": ["aws.cases"],
  "detail": {
    "eventType": ["CASE.UPDATED", "CASE.CREATED", "CASE.DELETED"]
  }
}

-
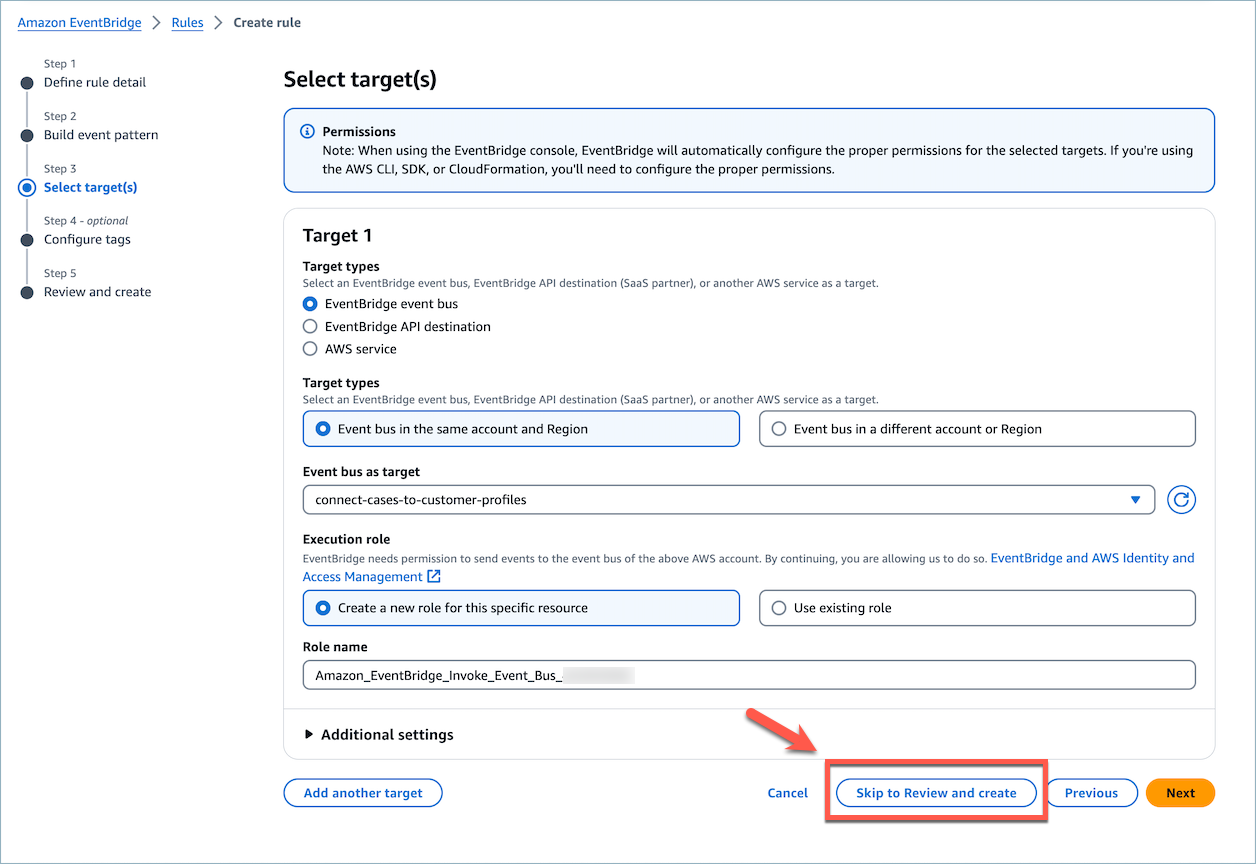
選擇略過以檢閱和建立,然後選擇建立規則。
使用 AppIntegrations 將事件橋接器案例資料擷取至客戶設定檔
-
使用 AWS CLI建立與 AppIntegrations 的事件整合,並記錄 ARN 輸出。 這表示 Amazon Connect 執行個體可以使用的來源資料。
aws appintegrations create-event-integration --region<YOUR_REGION>--name Connect-Cases-Event-Integration --event-bridge-bus connect-cases-to-customer-profiles --event-filter "{\"Source\": \"aws.cases\" }" --description "Event Integration for Cases Event Bus"
-
使用 AWS CLI,使用 put-integration API 建立與客戶設定檔的整合。這將開始資料流到客戶設定檔,將預留位置值取代為您的事件整合 ARN 和客戶設定檔網域名稱。
aws customer-profiles put-integration --region<YOUR_REGION>--domain-name<YOUR_CP_DOMAIN_NAME>--uri<YOUR_EVENT_INTEGRATION_ARN>--object-type-name Connect-case
驗證您的案例整合
-
在 Amazon Connect Cases 中建立案例。
-
事件交付應該幾乎是即時的,但需要一分鐘的時間才能交付並與客戶設定檔建立關聯。
-
使用 AWS CLI,在設定檔下尋找 Connect-case 物件,以正確的值取代預留位置。
aws customer-profiles list-profile-objects --domain-name<YOUR_CP_DOMAIN_NAME>--region<YOUR_REGION>--object-type-name Connect-case --profile-id<YOUR_PROFILE_ID>
-
如果您在上述 API 呼叫的回應中找不到項目,則您的整合發生問題。若要疑難排解:
-
前往 Amazon EventBridge 主控台。
-
請檢查 EventSource 是否處於作用中狀態,以及相符的 EventBus 是否存在且正在執行。
-
檢查您的案例事件組態是否已正確設定。
-
如果這些項目有效,請聯絡 支援 以取得調查問題的協助。
-
