Instance store temporary block storage for EC2 instances
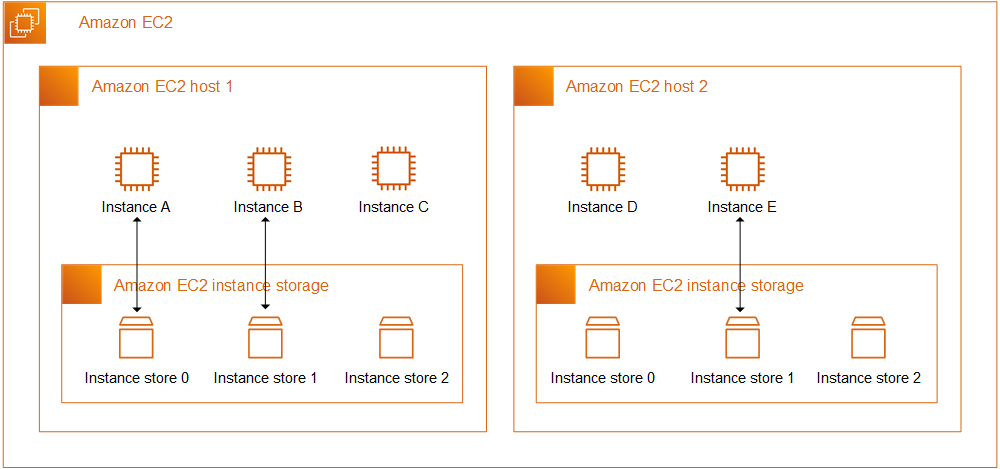
An instance store provides temporary block-level storage for your EC2 instance. This storage is provided by disks that are physically attached to the host computer. Instance store is ideal for temporary storage of information that changes frequently, such as buffers, caches, scratch data, and other temporary content. It can also be used to store temporary data that you replicate across a fleet of instances, such as a load-balanced pool of web servers.
An instance store consists of one or more instance store volumes exposed as block devices. The size of an instance store as well as the number of devices available varies by instance type and instance size. For example, not every instance type provides instance store volumes. For more information, see Instance store volume limits for EC2 instances.
The virtual devices for instance store volumes are given virtual device names in order
from ephemeral0 to ephemeral23. For example, with
an instance type that supports one instance store volume, the virtual device name of the one
volume is ephemeral0. With an instance type that supports four instance
store volumes, the virtual device names of the four volumes are as follows: ephemeral0,
ephemeral1, ephemeral2 and ephemeral3.
Instance store pricing
There is no additional charge to use the instance store volumes provided for your instance. Instance store volumes are included as part of the usage cost of the instance.
Contents
