Example: Launching an Elastic Beanstalk in a VPC with Amazon RDS
This section walks you through the tasks to deploy an Elastic Beanstalk application with Amazon RDS in a VPC using a NAT gateway.
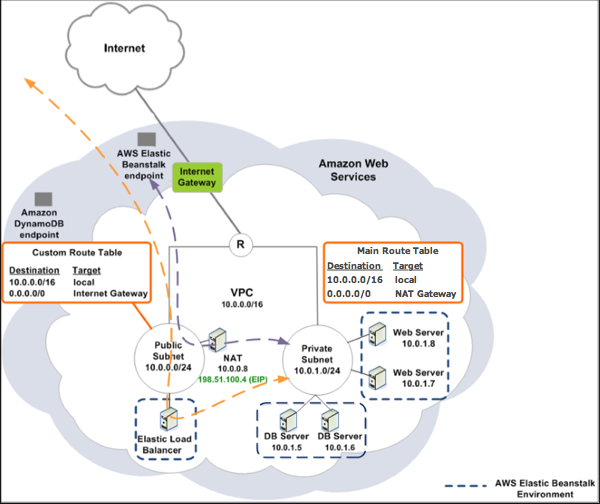
Your infrastructure will look similar to the following diagram.
Note
If you haven't used a DB instance with your application before, try adding one to a test environment, and connecting to an external DB instance before adding a VPC configuration to the mix.
Create a VPC with a public and private subnet
You can use the Amazon VPC
console
To create a VPC
-
Sign in to the Amazon VPC console
. -
In the navigation pane, choose VPC Dashboard. Then choose Create VPC.
-
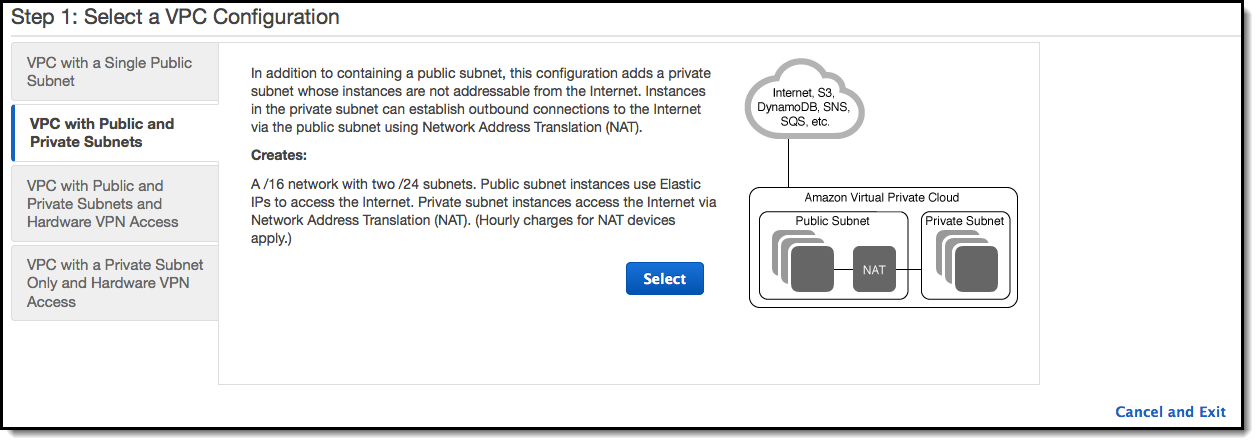
Choose VPC with Public and Private Subnets, and then choose Select.
-
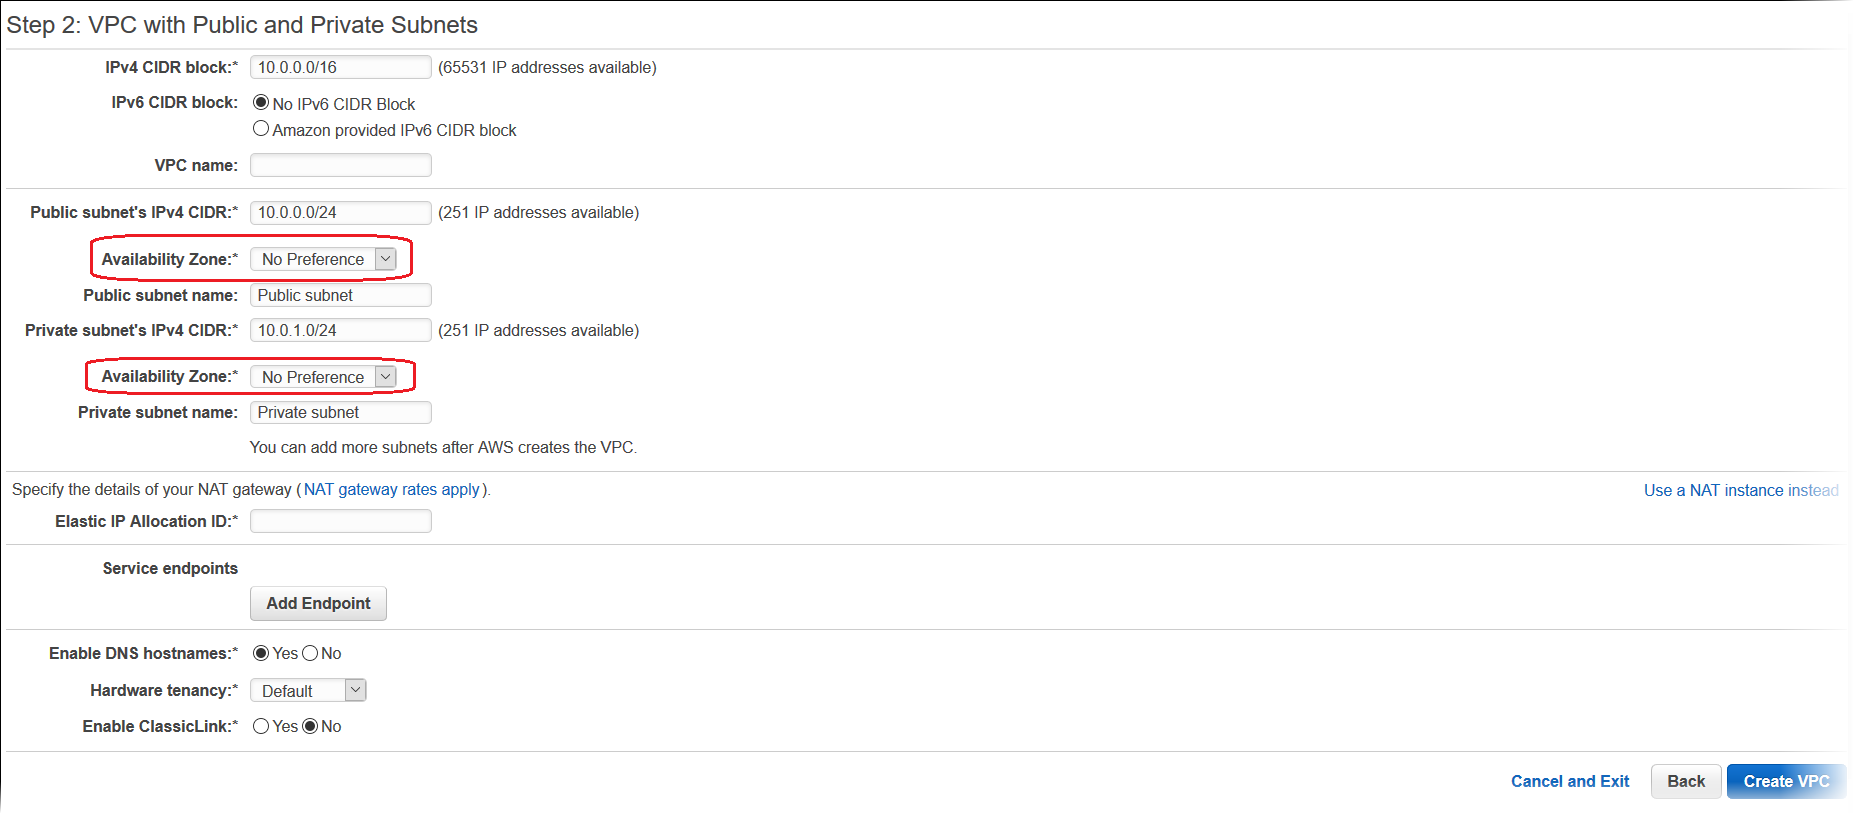
Your Elastic Load Balancing load balancer and your Amazon EC2 instances must be in the same Availability Zone so they can communicate with each other. Choose the same Availability Zone from each Availability Zone list.
-
Choose an Elastic IP address for your NAT gateway.
-
Choose Create VPC.
The wizard begins to create your VPC, subnets, and internet gateway. It also updates the main route table and creates a custom route table. Finally, the wizard creates a NAT gateway in the public subnet.
Note
You can choose to launch a NAT instance in the public subnet instead of a NAT gateway. For more information, see Scenario 2: VPC with Public and Private Subnets (NAT) in the Amazon VPC User Guide.
-
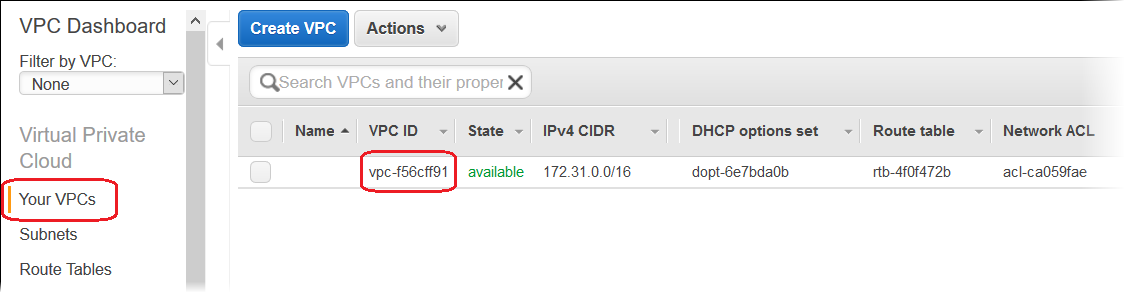
After the VPC is successfully created, you get a VPC ID. You need this value for the next step. To view your VPC ID, choose Your VPCs in the left pane of the Amazon VPC console
. 
Create a DB subnet group
A DB subnet group for a VPC is a collection of subnets (typically private) that you can designate for your backend RDS DB instances. Each DB subnet group should have at least one subnet for every Availability Zone in a given AWS Region. To learn more, see Creating a Subnet in Your VPC.
Create a DB subnet group
-
Open the Amazon RDS console
. -
In the navigation pane, choose Subnet groups.
-
Choose Create DB Subnet Group.
-
Choose Name, and then type the name of your DB subnet group.
-
Choose Description, and then describe your DB subnet group.
-
For VPC, choose the ID of the VPC that you created.
-
In Add subnets, choose Add all the subnets related to this VPC.
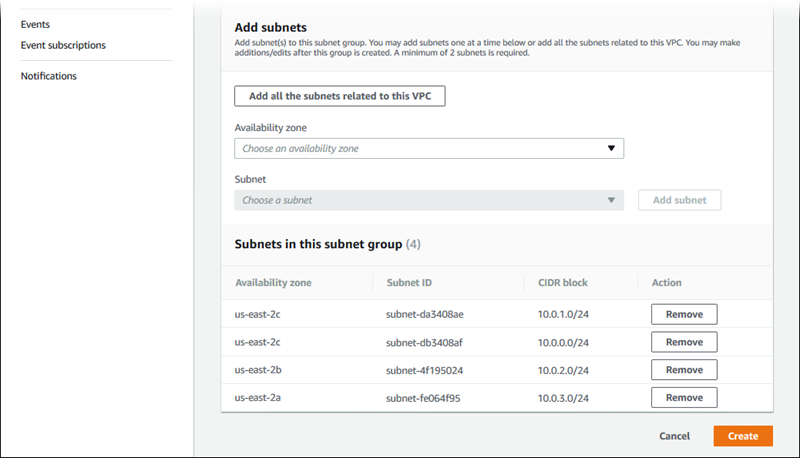
-
When you are finished, choose Create.
Your new DB subnet group appears in the Subnet groups list of the Amazon RDS console. You can choose it to see details, such as all of the subnets associated with this group, in the details pane at the bottom of the page.
Deploy to Elastic Beanstalk
After you set up your VPC, you can create your environment inside it and deploy your
application to Elastic Beanstalk. You can do this using the Elastic Beanstalk console, or you can use the AWS
toolkits, AWS CLI, EB CLI, or Elastic Beanstalk API. If you use the Elastic Beanstalk console, you just need to upload
your .war or .zip file and select the VPC settings
inside the wizard. Elastic Beanstalk then creates your environment inside your VPC and deploys your
application. Alternatively, you can use the AWS toolkits, AWS CLI, EB CLI, or Elastic Beanstalk API to
deploy your application. To do this, you need to define your VPC option settings in a
configuration file and deploy this file with your source bundle. This topic provides
instructions for both methods.
Deploying with the Elastic Beanstalk console
The Elastic Beanstalk console walks you through creating your new environment inside your VPC. You
need to provide a .war file (for Java applications) or a
.zip file (for all other applications). On the VPC
Configuration page of the Elastic Beanstalk environment wizard, you must make the
following selections:
- VPC
-
Select your VPC.
- VPC security group
-
Select the instance security group you created above.
- ELB visibility
-
Select
Externalif your load balancer should be publicly available, or selectInternalif the load balancer should be available only within your VPC.
Select the subnets for your load balancer and EC2 instances. Be sure you select the
public subnet for the load balancer, and the private subnet for your Amazon EC2 instances. By
default, the VPC creation wizard creates the public subnet in 10.0.0.0/24
and the private subnet in 10.0.1.0/24.
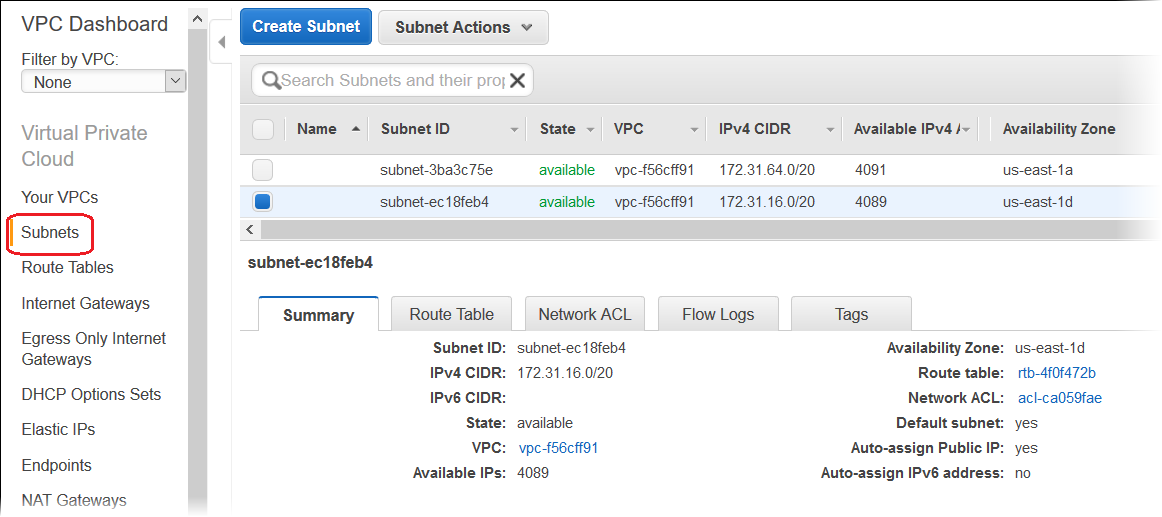
You can view your subnet IDs by choosing Subnets in the Amazon VPC console
Deploying with the AWS toolkits, EB CLI, AWS CLI, or API
When deploying your application to Elastic Beanstalk using the AWS toolkits, EB CLI, AWS CLI, or API, you can specify your VPC option settings in a file and deploy it with your source bundle. See Advanced environment customization with configuration files (.ebextensions) for more information.
When you update the option settings, you need to specify at least the following:
-
VPCId–Contains the ID of the VPC.
-
Subnets–Contains the ID of the Auto Scaling group subnet. In this example, this is the ID of the private subnet.
-
ELBSubnets–Contains the ID of the subnet for the load balancer. In this example, this is the ID of the public subnet.
-
SecurityGroups–Contains the ID of the security groups.
-
DBSubnets–Contains the ID of the DB subnets.
Note
When using DB subnets, you need to create additional subnets in your VPC to cover all the Availability Zones in the AWS Region.
Optionally, you can also specify the following information:
-
ELBScheme – Specify
internalto create an internal load balancer inside your VPC so that your Elastic Beanstalk application can't be accessed from outside your VPC.
The following is an example of the option settings you could use when deploying your Elastic Beanstalk application inside a VPC. For more information about VPC option settings (including examples for how to specify them, default values, and valid values), see the aws:ec2:vpc namespace table in Configuration options.
option_settings:
  - namespace: aws:autoscaling:launchconfiguration
    option_name: EC2KeyName
    value: ec2keypair

  - namespace: aws:ec2:vpc
    option_name: VPCId
    value: vpc-170647c

  - namespace: aws:ec2:vpc
    option_name: Subnets
    value: subnet-4f195024

  - namespace: aws:ec2:vpc
    option_name: ELBSubnets
    value: subnet-fe064f95

  - namespace: aws:ec2:vpc
    option_name: DBSubnets
    value: subnet-fg148g78

  - namespace: aws:autoscaling:launchconfiguration
    option_name: InstanceType
    value: m1.small

  - namespace: aws:autoscaling:launchconfiguration
    option_name: SecurityGroups
    value: sg-7f1ef110
Note
When using DB subnets, be sure you have subnets in your VPC to cover all the Availability Zones in the AWS Region.
