Amazon Monitron is no longer open to new customers. Existing customers can
continue to use the service as normal. For capabilities similar to Amazon
Monitron, see our blog post
Step 1: Add a Gateway
In Amazon Monitron, sensors collect data from machines and pass it to gateways, which transmit the data to the AWS Cloud and thus to Amazon Monitron for analysis. These gateways are usually mounted on the wall of a factory within 20 to 30 meters from the sensor and connect to the AWS Cloud using the local Wi-Fi network.
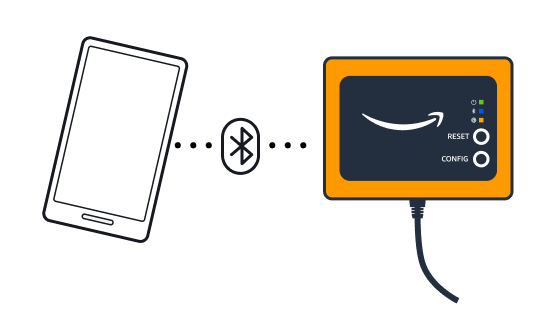
Before adding a gateway, make sure that Bluetooth is turned on for your smartphone. You can only add gateways using the mobile app.
To add a Wi-Fi gateway
-
Choose the menu icon (☰), and then choose Getting Started.

-
Choose Add gateway.

-
In your factory, position your gateway in the location that works best for communicating with your sensors.
The best place to mount your gateway is higher than the sensors and no more than 20 to 30 meters away. For more information about locating gateways, see Where to Install Your Gateway in the Amazon Monitron User Guide.
-
Plug the gateway in and make sure that the LED lights on the top alternatively blink yellow and blue.

-
Push the button on the side of the gateway to put it into commissioning mode. The lights will start blinking rapidly.
-
In the mobile app, choose Next.
-
Choose Add gateway.
Amazon Monitron searches for the gateway, which can take a few moments. When it finds it, the gateway appears in the gateway list.
If it can't find the gateway, see Setting Up Gateways in the Amazon Monitron User Guide for possible solutions.
-
When you see the new gateway in the list, choose it.
It can take a few moments for Amazon Monitron to connect to the new gateway.

-
After it connects to the gateway, Amazon Monitron scans for Wi-Fi networks. Choose the Wi-Fi network that you want to use.
Note
When the gateway is successfully connected, Amazon Monitron displays the gateway device ID and MAC ID in the mobile app.
-
Enter your Wi-Fi password, and then choose Connect.
It can take a few minutes for the gateway to be commissioned.
To add an Ethernet gateway
-
If Bluetooth isn't already turned on for your smartphone, turn it on.
-
Position your gateway in the location that works best for communicating with your sensors.
The best place to mount your gateway is higher than the sensors and no more than 20 to 30 meters away.For additional help with locating your gateway, see Placing and installing an Ethernet gateway.
-
Plug in the gateway and make sure the network light (yellow) and the Bluetooth light (blue) on the front of your gateway are blinking alternatively.
-
Push the Config button on the gateway to put it into commissioning mode. the Bluetooth and network LED lights will start flashing rapidly.

-
Open the mobile app on your smartphone.
-
On the Getting started page or the Gateways page, choose Add gateway.
Amazon Monitron scans for the gateway. This can take a few moments. when Amazon Monitron finds the gateway, it displays it in the gateway list.
-
Choose the gateway.
It can take a few moments for Amazon Monitron to connect to the new gateway.
If the mobile app continues to try to connect to the gateway without success, see Troubleshooting Ethernet gateway detection.
Note
When the gateway is successfully connected, Amazon Monitron displays the gateway device ID and MAC ID in the mobile app.
-
After it connects to the gateway, Amazon Monitron will provide two options for you to configure the network connection for your gateway.

-
Choose your network configuation.
It can take a few minutes for the gateway to be commissioned and to connect to the network.
If you have further difficulties making the gateway work, it might be helpful to reset it. For more information, see .
-
If you choose automatic (DHCP), Amazon Monitron will automatically configure the network to connect the gateway.
-
If you choose manual, enter your IP address, subnet mask, router, preferred DNS server, and alternate DNS server (optional) information. then choose connect.
-

