Using other AWS services to view Trusted Advisor reports
Follow this tutorial to upload and view your data by using other AWS services. In this topic, you create an Amazon Simple Storage Service (Amazon S3) bucket to store your report and an AWS CloudFormation template to create resources in your account. Then, you can use Amazon Athena to analyze or run queries for your report or QuickSight to visualize that data in a dashboard.
For information and examples for visualizing your report data, see the View
AWS Trusted Advisor recommendations at scale with AWS Organizations
Prerequisites
Before you start this tutorial, you must meet the following requirements:
-
Sign in as an AWS Identity and Access Management (IAM) user with administrator permissions.
-
Use the US East (N. Virginia) AWS Region to quickly set up your AWS services and resources.
-
Create an QuickSight account. For more information, see Getting Started with Data Analysis in QuickSight in the Amazon QuickSight User Guide.
Upload the report to Amazon S3
After you download your resources.json report, upload the file to
Amazon S3. You must use a bucket in the US East (N. Virginia) Region.
To upload the report to an Amazon S3 bucket
-
Sign in to the AWS Management Console at https://console.aws.amazon.com/
. -
Use the Region selector and choose the US East (N. Virginia) Region.
Open the Amazon S3 console at https://console.aws.amazon.com/s3/
. -
From the list of buckets, choose an S3 bucket, and then copy the name. You use the name in the next procedure.
-
On the
bucket-namepage, choose Create folder, enter the namefolder1, and then choose Save. -
Choose the folder1.
-
In folder1, choose Upload and choose the
resources.jsonfile. -
Choose Next, keep the default options, and then choose Upload.
Note
If you upload a new report to this bucket, rename the
.jsonfiles each time you upload them so that you don't override the existing reports. For example, you can add the timestamp to each file, such asresources-timestamp.json,resources-timestamp2.json, and so on.
Create your resources using AWS CloudFormation
After you upload your report to Amazon S3, upload the following YAML template to AWS CloudFormation. This template tells AWS CloudFormation what resources to create for your account so that other services can use the report data in the S3 bucket. The template creates resources for IAM, AWS Lambda, and AWS Glue.
To create your resources with AWS CloudFormation
-
Download the trusted-advisor-reports-template.zip file.
-
Unzip the file.
-
Open the template file in a text editor.
-
For the
BucketNameandFolderNameparameters, replace the values foryour-bucket-name-herefolder1 -
Save the file.
Open the AWS CloudFormation console at https://console.aws.amazon.com/cloudformation
. -
If you haven't already, in the Region selector, choose the US East (N. Virginia) Region.
-
In the navigation pane, choose Stacks.
-
Choose Create stack and choose With new resources (standard).
-
On the Create stack page, under Specify template, choose Upload a template file, and then choose Choose file.
-
Choose the YAML file and choose Next.
-
On the Specify stack details page, enter a stack name such as
Organizational-view-Trusted-Advisor-reports, and choose Next. -
On the Configure stack options page, keep the default options, and then choose Next.
-
On the Review
Organizational-view-Trusted-Advisor-reportspage, review your options. At the bottom of the page, select the check box for I acknowledge that AWS CloudFormation might create IAM resources. -
Choose Create stack.
The stack takes about 5 minutes to create.
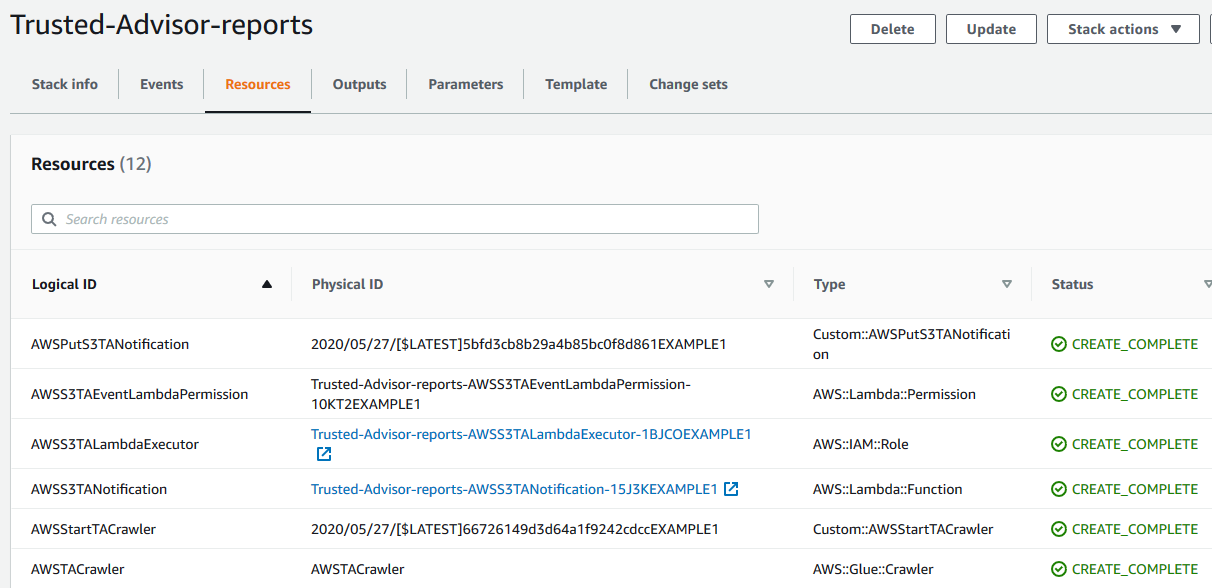
-
After the stack creates successfully, the Resources tab appears like the following example.
Query the data in Amazon Athena
After you have your resources, you can view the data in Athena. Use Athena to create queries and analyze the results of the report, such as looking up specific check results for accounts in the organization.
Notes
-
Use the US East (N. Virginia) Region.
-
If you're new to Athena, you must specify a query result location before you can run a query for your report. We recommend that you specify a different S3 bucket for this location. For more information, see Specifying a query result location in the Amazon Athena User Guide.
To query the data in Athena
Open the Athena console at https://console.aws.amazon.com/athena/
. -
If you haven't already, in the Region selector, choose the US East (N. Virginia) Region.
-
Choose Saved Queries and in search field, enter
Show sample. -
Choose the query that appears, such as Show sample entries of TA report.
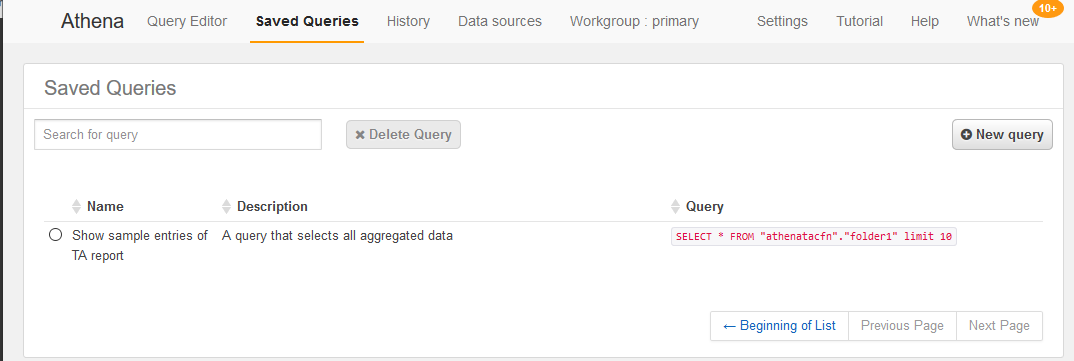
The query should look like the following.
SELECT * FROM "athenatacfn"."folder1" limit 10 -
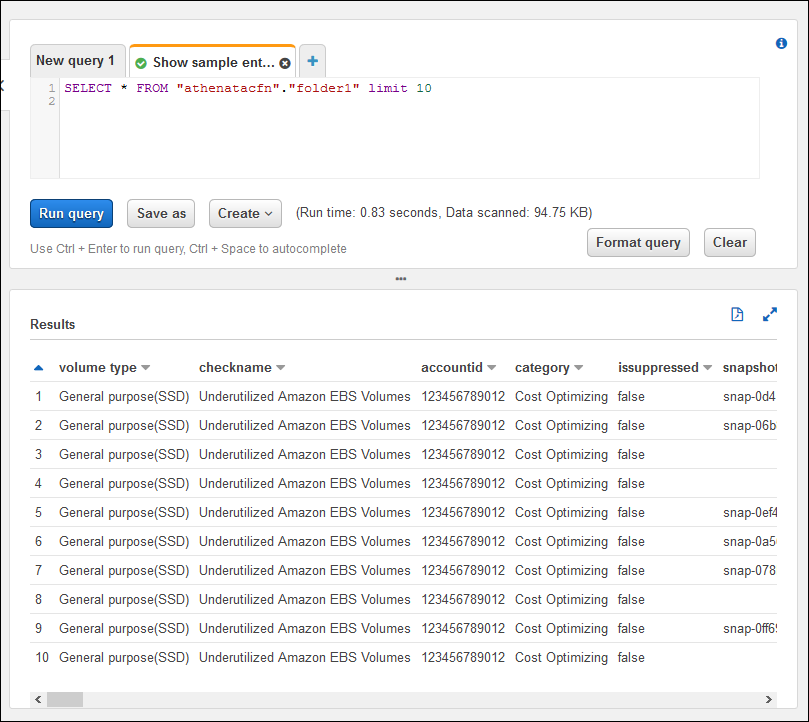
Choose Run query. Your query results appear.
Example : Athena query
The following example shows 10 sample entries from the report.
For more information, see Running SQL Queries Using Amazon Athena in the Amazon Athena User Guide.
Create a dashboard in QuickSight
You can also set up QuickSight so that you can view your data in a dashboard and visualize your report information.
Note
You must use the US East (N. Virginia) Region.
To create a dashboard in QuickSight
-
Navigate to the QuickSight console and sign in to your account
. -
Choose New analysis, New dataset, and then choose Athena.
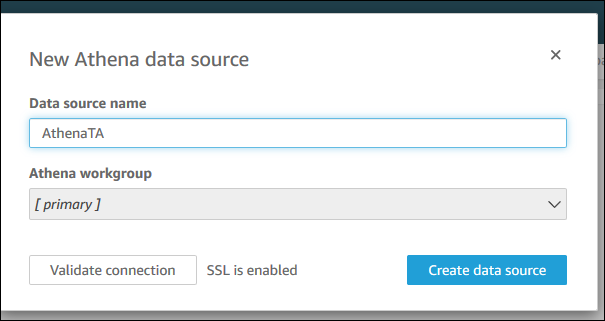
-
In the New Athena data source dialog box, enter a data source name such as AthenaTA, and then choose Create data source.
-
In the Choose your table dialog box, choose the athenatacfn table, choose folder1, and then choose Select.

-
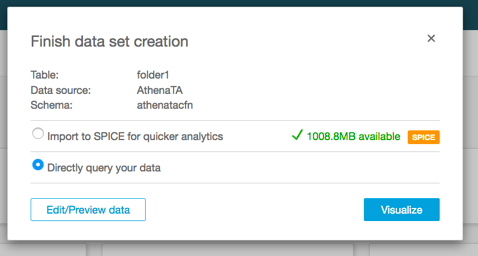
In the Finish data set creation dialog box, choose Directly query your data, and then choose Visualize.
You can now create a dashboard in QuickSight. For more information, see Working with Dashboards in the Amazon QuickSight User Guide.
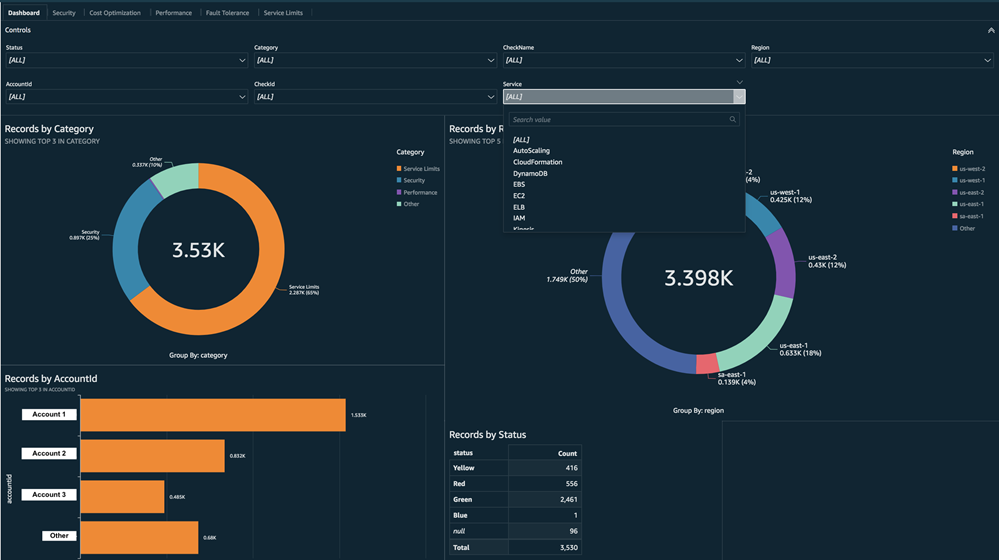
Example : QuickSight dashboard
The following example dashboard shows information about the Trusted Advisor checks, such as the following:
-
Affected account IDs
-
Summary by AWS Regions
-
Check categories
-
Check statuses
-
Number of entries in the report for each account
Note
If you have permission errors while creating your dashboard, make sure that QuickSight can use Athena. For more information, see I Can't Connect to Amazon Athena in the Amazon QuickSight User Guide.
For more information and examples for visualizing your report data, see the View
AWS Trusted Advisor recommendations at scale with AWS Organizations
Troubleshooting
If you have issues with this tutorial, see the following troubleshooting tips.
I'm not seeing the latest data in my report
When you create a report, the organizational view feature doesn't automatically refresh the Trusted Advisor checks in your organization. To get the latest check results, refresh the checks for the management account and each member account in the organization. For more information, see Refresh Trusted Advisor checks.
I have duplicate columns in the report
The Athena console might show the following error in your table if your report has duplicate columns.
HIVE_INVALID_METADATA: Hive metadata for table
                        folder1 is invalid: Table descriptor contains
                    duplicate columns
For example, if you added a column in your report that already exists, this can cause issues when you try to view the report data in the Athena console. You can follow these steps to fix this issue.
Find duplicate columns
You can use the AWS Glue console to view the schema and quickly identify if you have duplicate columns in your report.
To find duplicate columns
Open the AWS Glue console at https://console.aws.amazon.com/glue/
. -
If you haven't already, in the Region selector, choose the US East (N. Virginia) Region.
-
In the navigation pane, choose Tables.
-
Choose your folder name, such as
folder1, and then under Schema, view the values for Column name.If you have a duplicate column, you must upload a new report to your Amazon S3 bucket. See the following Upload a new report section.
Upload a new report
After you identify the duplicate column, we recommend that you replace the existing report with a new one. This ensures that the resources created from this tutorial use the latest report data from your organization.
To upload a new report
-
If you haven't already, refresh your Trusted Advisor checks for the accounts in your organization. See Refresh Trusted Advisor checks.
-
Create and download another JSON report in the Trusted Advisor console. See Create organizational view reports. You must use a JSON file for this tutorial.
Sign in to the AWS Management Console and open the Amazon S3 console at https://console.aws.amazon.com/s3/
. -
Choose your Amazon S3 bucket and choose the
folder1 -
Select the previous
resources.json -
In the Delete objects page, under Permanently delete objects?, enter
permanently delete, and then choose Delete objects. -
In your S3 bucket, choose Upload and then specify the new report. This action automatically updates your Athena table and AWS Glue crawler resources with the latest report data. It can take a few minutes to refresh your resources.
-
Enter a new query in the Athena console. See Query the data in Amazon Athena.
Note
If you still have issues with this tutorial, you can create a technical support
case in the AWS Support
Center
