Create an outbound campaign in Amazon Connect
-
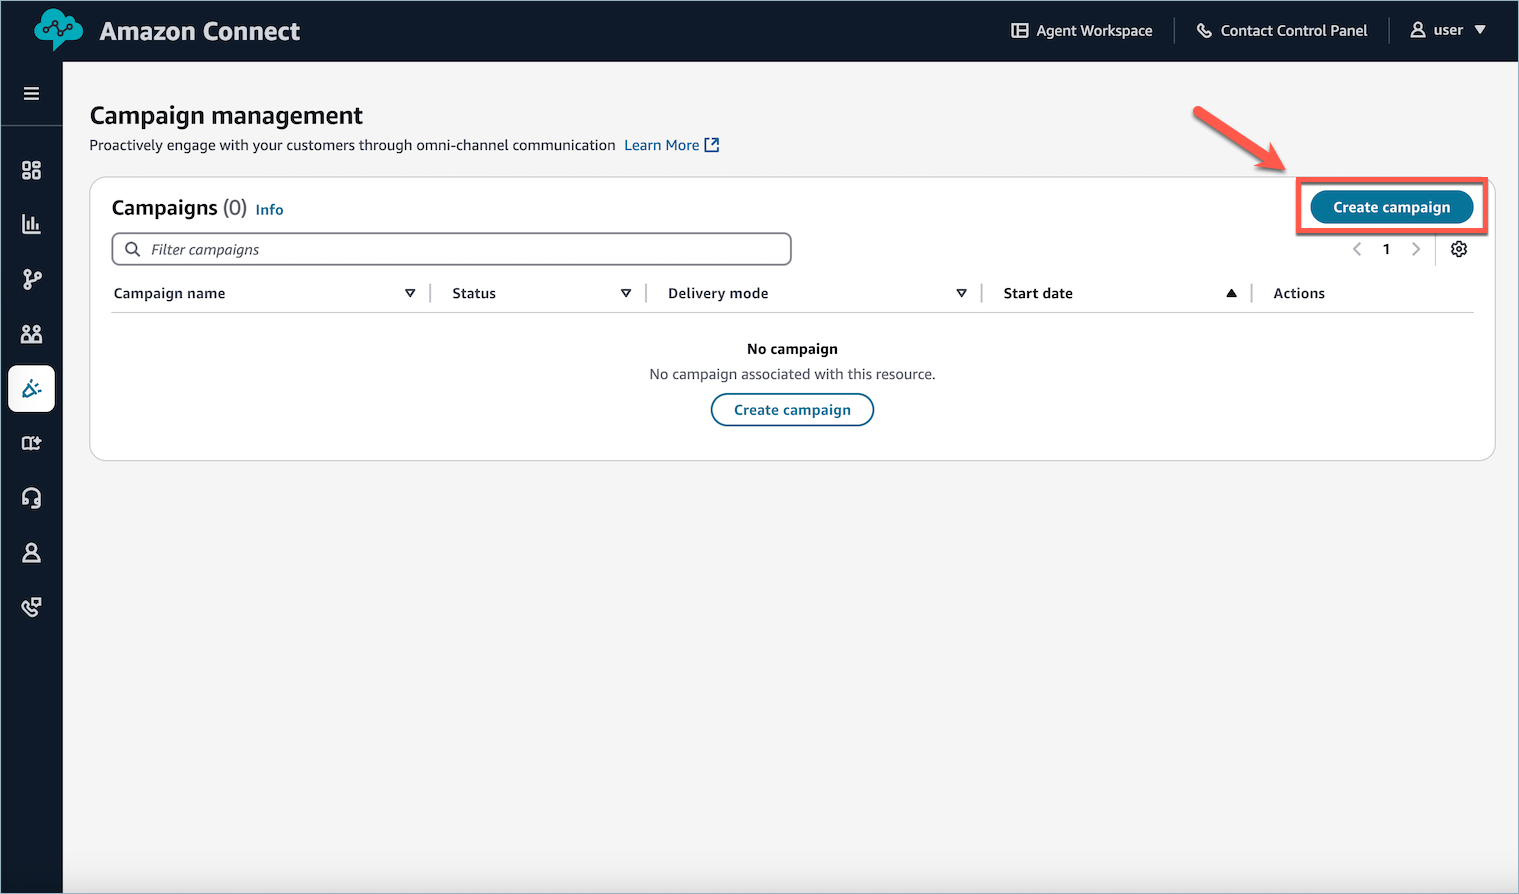
Open the Amazon Connect Outbound campaigns page from the Amazon Connect admin website.

-
From the Campaign management page, choose Create Campaign.
-
Enter a campaign Name.
Note
You can also use your own recipient list or campaign management tool by choosing Host external campaign. For more information on setting up a campaign with your own resources, see the High Volume Outbound Communication with Amazon Connect Outbound Campaigns
blog post. 

-
Select a Customer Segment to use for this campaign. Recipients for the campaign will be determined at the campaign's scheduled start time using the chosen segment.
-
Choose the Channel for the main communication of the campaign. The supported channels include Agent assisted voice, Automated voice, Email, and SMS.

Note
Recipients with incorrect or invalid endpoints are dropped from the communication. For example, for an Email campaign, a recipient with email address "jane.doe@abc!com" is not valid and will not be processed.
Outbound campaigns channel configurations


Outbound campaigns attempts
Communications per recipient
You can control how often each recipient is contacted by setting communication limits for the campaign. Simply specify the maximum number of messages a recipient can receive within a defined time frame (e.g., per day, week, or month). If a recipient has already received the maximum number of communications within any of the time frames you set, Amazon Connect Outbound Campaigns will automatically skip that recipient and they won’t receive additional messages from the campaign.
Example:
If you set a limit of 4 communications per 2 days and 6 communications per 2 weeks (14 days), any recipient who has already received 4 messages in the last 2 days or 6 messages in the last 14 days will not be contacted again by this campaign.
Amazon Connect Outbound Campaigns considers any time a recipient has been contacted, regardless of the recipients interaction with the message, as a communication. For example, a phone call ending in a voicemail is still considered a communication. Amazon Connect Outbound Campaigns will adjust the count of communications if it can determine that the message never reached the end user, and will always err on the side of over-counting.
In addition to setting communication limits for individual campaigns, you can also define Total Communication Limits at the instance level. These limits control how many messages a recipient can receive across all campaigns running within your Amazon Connect instance over a specific time frame. If a recipient reaches the specified limit—for example, 10 communications per week—they will be excluded from further messaging across all campaigns until the time window resets. This helps ensure that overall message volume stays within acceptable boundaries.
For critical campaigns, you have the option to opt out of total communication limits by enabling the Ignore total limits setting. This allows these campaigns to bypass the instance-wide limits, ensuring important messages are delivered without being blocked by other ongoing campaigns.
Note
-
The total count of messages across campaigns will not necessarily be incremented immediately, but will eventually be accurate. For example, if two campaigns target the same user at the same moment in time, the first campaign's communication may not be reflected in the total communication count by the time the second campaign checks.
-
All communications across all campaigns in the active state are considered when determining if a recipient has breached their total limits.
-
Amazon Connect Outbound Campaigns measures a day as a rolling 24 hour window from the current moment.
-
Any communications sent from a campaign that ignores total limits will not count toward the instance's total communication limits. These campaigns are treated as outside the scope of instance-level limits.
Total Communication Limits

Campaign Communication Limits frames

Outbound campaigns reattempt rules
Outcomes for communication result in disposition codes. You can select a subset of those disposition codes for which you would like to re-attempt a communication. The Dispositions dropdown is pre-populated with possible codes to use.
-
Retry: Select the channel on which to retry. After the channel is selected, the possible additional configuration appears.
-
Start: Select an optional wait time before re-attempting.
Following is a list of disposition codes that are available in the Disposition dropdown menu for you to configure a retry rule.
-
Voice channel (Agent and Automated Voice)
Disposition code in the UI Campaign event ID (the AMD status) Description Busy SIT_TONE_BUSYThe number dialed was busy.
The retry behavior for busy numbers can vary. For some campaigns you may want to retry busy numbers, others you might not. It will depend on your specific campaign configuration.
Invalid number SIT_TONE_INVALID_NUMBERThe number dialed was not a valid number. Unanswered AMD_UNANSWEREDThe number dialed kept ringing, but the call was not picked up.
Typically this status triggers a retry to reach the customer again later.
Voicemail VOICEMAIL_BEEPThe number dialed was answered by voicemail with a beep.
Typically this status triggers a retry to reach the customer again later.
-
Email channel
Disposition code in the UI Campaign event ID Description Bounced BounceAn issue related to the recipient's email or server permanently rejected the email, preventing Amazon Connect from delivering the message. -
SMS channel
Disposition code in the UI Campaign event ID Description Blocked TEXT_BLOCKEDThe recipient's device or carrier is blocking SMS messages. Invalid number TEXT_INVALIDThe destination phone number is not valid. Unreachable TEXT_UNREACHABLEUnreachable events occur when the recipient's device is currently unavailable. For example, the device might be powered off, or might be disconnected from the network.
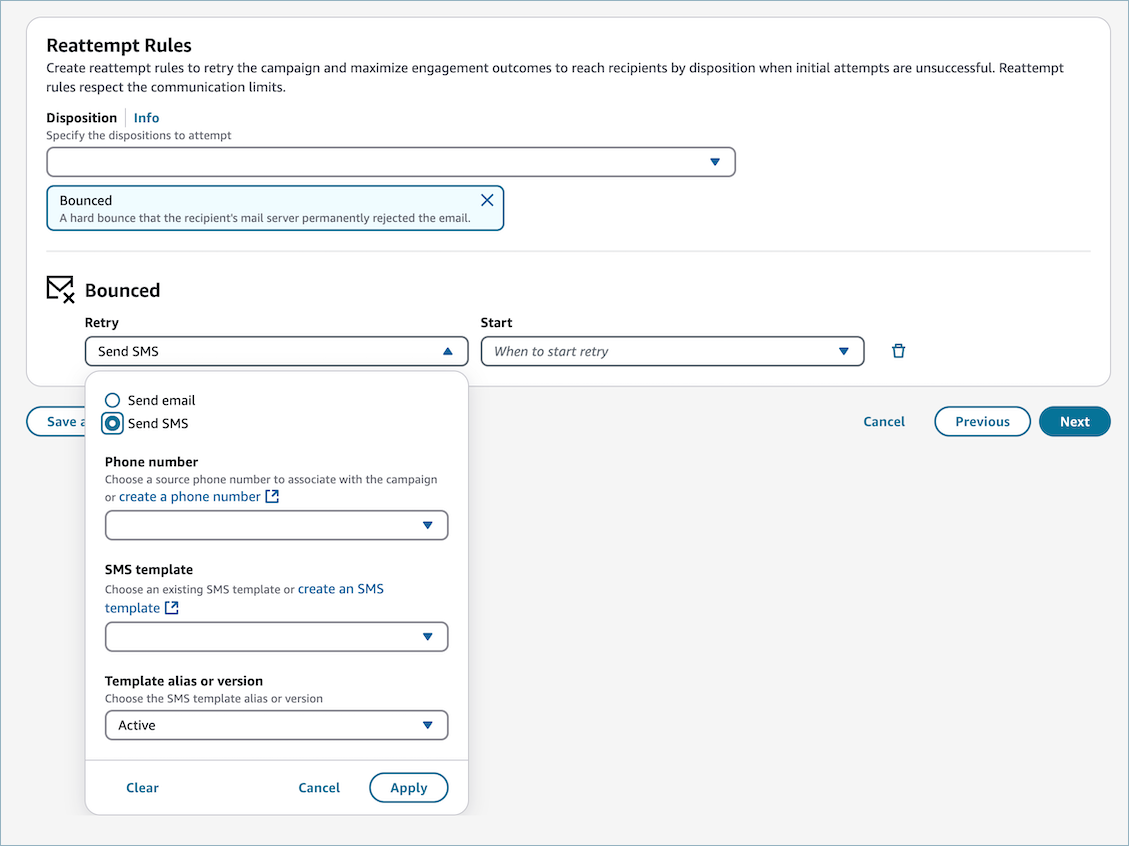
The following image shows an example of setting the Retry rule for Bounced email.

The following image shows if you choose Send email in response to a Bounced email, you are prompted to provide the Outgoing email address, Friendly sender name, Email template, and version.

The following image shows if you choose Send SMS in response to a Bounced email, you are prompted to provide the Phone number, SMS template, and Template alias or version.
Campaign set up and Cycling through recipient contact types for communication
The purpose of this guide is to showcase how you can configure the campaign to cycle through multiple contact types for each recipient.
Note
Configure engagement preferences and upload data into Customer Profiles. For details about customer profile ingestion prior to creating a campaign, see Ingesting account-based profiles.
-
The Max dial re-attempts per number defines the count of reattempts for each contact type across all dispositions.
-
Next action - optional enables switching to the next available contact type for the profile/account as provided using engagement preferences in Customer Profiles
Note
You can set the number of retry attempts and next actions, but communications will not exceed the maximum limits set for each recipient.

Example scenarios
Priority dialing order (in Customer Profile):
-
Primary (Mobile)
-
Secondary (Home)
-
Tertiary (Work)
Scenario A - Call Attempts: All numbers fail with "Busy"- Retry action: Call again. Max dial attempts per number: 0. Toggled to retry all available numbers for the recipient.

| Attempt | Phone Number | Disposition | Action Taken | Total Attempts |
|---|---|---|---|---|
| 1 | Mobile | Busy | Move on to next number (home) | 1 |
| 2 | Home | Busy | Move on to next number (work) | 2 |
| 3 | Work | Busy | End - max dial attempts reached | 3 |
Scenario B - Call Attempts: All numbers fail with "Busy"- Retry action: Call again. Max dial attempts per number: 2. Toggled to retry all available numbers for the recipient.

| Attempt | Phone Number | Disposition | Action Taken | Total Attempts |
|---|---|---|---|---|
| 1 | Mobile | Busy | Wait 15 mins, call again | 1 |
| 2 | Mobile | Busy | Wait 15 mins, call again | 2 |
| 3 | Mobile | Busy | Move on to next number (Home) | 3 |
| 1 | Home | Busy | Wait 15 mins, call again | 4 |
| 2 | Home | Busy | Wait 15 mins, call again | 5 |
| 3 | Home | Busy | Move on to next number (Work) | 6 |
| 1 | Work | Busy | Wait 15 mins, call again | 7 |
| 2 | Work | Busy | Wait 15 mins, call again | 8 |
| 3 | Work | Busy | End - max dial attempts reached | 9 |
Scenario C - Call Attempts: All numbers fail with "Busy"- Retry action: Call again. Max dial attempts per number: 2. Toggled NOT to retry all available numbers for the recipient.

| Attempt | Phone Number | Disposition | Action Taken | Total Attempts |
|---|---|---|---|---|
| 1 | Mobile | Busy | Wait 15 mins, call again | 1 |
| 2 | Mobile | Busy | Wait 15 mins, call again | 2 |
| 3 | Mobile | Busy | End - max dial attempts reached | 3 |
Scenario D - Call Attempts: Mixed disposition between "Unanswered", "Busy"- Retry action: Call again. Max dial attempts per number: 2. Toggled to retry all available numbers for the recipient.

| Attempt | Phone Number | Disposition | Action Taken | Total Attempts |
|---|---|---|---|---|
| 1 | Mobile | Unanswered | Wait 30 mins, call again | 1 |
| 2 | Mobile | Busy | Wait 15 mins, call again | 2 |
| 3 | Mobile | Busy | Move on to next number (Home) | 3 |
| 1 | Home | Busy | Wait 15 mins, call again | 4 |
| 2 | Home | Unanswered | Wait 30 mins, call again | 5 |
| 3 | Home | Unanswered | Move on to next number (Work) | 6 |
| 1 | Work | Busy | Wait 15 mins, call again | 7 |
| 2 | Work | Busy | Wait 15 mins, call again | 8 |
| 3 | Work | Busy | End - max dial attempts reached | 9 |
Communication Time
You can specify valid times to attempt to contact your users. The Active communication time specifies those valid times, based on the day of the week. Exceptions to communication time, an optional setting, specifies specific days of the year during which you want no communications sent, even if that day happens to fall in an active communication time.
Time zone
In order for the Campaign to determine appropriate time to attempt communication with a particular recipient, you need to provide a Time Zone. You may either select a Standard time zone, which will be used for all recipients, or you may specify the Recipient's local time zone. Recipients with no time zone specified are excluded from message deliveries.
-
Standard time zone:
The time zone selected will be used for all recipients. Select this option if you know the time zone of all recipients in your segment or if you want all communications sent at the same moment in time.
-
Recipient's local time zone:
Amazon Connect Outbound Campaigns use the provided Address and/or the area code from the Phone Number to infer the recipients time zone. If the time zone cannot be determined (for example, if either the Address and/or Phone Number is missing or is invalid), the recipient will be dropped from the Campaign. Select this option if it's important to send communications to recipients only during their specific local times.

Active communication time
The Active communication time represents the times during which Amazon Connect Outbound campaigns may send communications for this campaign. To add active communication times:
-
Select the channel. Alternatively, select Apply to all channels to apply the active communication times to each channel.
-
Select the day of the week to configure. You can add multiple active communication times for each day, if desired.
-
Select the time frame during which Amazon Connect Outbound campaigns can send communications on the given day.
Note
-
Amazon Connect Outbound campaigns will evaluate the From and To times relative to either the Standard time zone or the Recipient's local time zone, whichever is specified.
-
If no Active communication timeActive communication time is provided, communications to intended recipients will be attempted as soon as the campaign is published.

Exceptions to communication time - (optional)
Exceptions to communication time is an optional set of specific calendar days for which you do not want communications sent. If exceptions are included in the Campaign, then active communication times must also be specified. To add exceptions to communication time:
-
Select the channel.
-
Add a Name for the exception. This name is only for informational purposes and does not affect the running of the campaign.
-
Select the Date range for the exception.
Important
The end date is exclusive. For example, if you select July 12 - 13, it blocks all communications only from 00:00 July 12 to 23:59 July 12. July 13 would have no exception.

Review and publish
Take a moment to review your campaign prior to publishing.
Important
These settings cannot be changed once your campaign has been published.
Once you have reviewed you campaign, choose Publish to Schedule your campaign.

Schedule campaign
Specify when you want your campaign to begin:
-
Start now: Start the campaign right away.
-
Start later: Select the specific day and time for the campaign to begin.
-
Expiry Date and Time: The date and time at which Amazon Connect Outbound campaigns should end the campaign. An expired campaign appears with a Completed status a few moments after expiry time.
The start and end times of a campaign that starts now or a campaign that starts later are based on your local time zone.

Repeats
If you want your campaign to repeat running, select the Repeats radio button and choose a Frequency. Amazon Connect Outbound campaigns will then refresh profiles in the segment specified for this campaign at the same frequency you select. For example, if you schedule your campaign to start at 7:03AM EST and use a Daily Frequency, then profiles will be refreshed in the segment daily at 7:03AM EST.
Note
A recipient may be active only in a campaign once at any given time. So if they are still waiting to exit the campaign when the next Segment Snapshot is created, and are a member of that Snapshot, they are allowed to enter the campaign as a part of the second Snapshot.
Important
If a recipient is a part of a segment Snapshot and is not currently in the campaign, they will be allowed to enter, regardless of whether or not they have previously gone through the campaign.
Publish
Choose Publish to schedule your campaign.

Campaign states

After a campaign is running, you can stop it. You can also delete a campaign at any time.
Following is a description of each campaign state:
-
Draft: The campaign is being developed and hasn't been published yet.
-
Active: The campaign has been developed and published. Depending on the campaign's schedule, the campaign may currently be running or scheduled to start running at a later time.
-
Stopped: The campaign is stopped. You can't resume a campaign that is stopped.
-
Error: An error state caused the campaign to fail.
-
Completed: The campaign has finished running. All participants have entered the campaign and no participants are waiting to complete the campaign.

