Route domain traffic to a Lightsail container service using Route 53
You can route traffic for a registered domain, such as example.com, to the
applications running on a Amazon Lightsail container service. You do this by adding an alias
record to the hosted zone of your domain that points to the default domain of your Lightsail
container service.
In this tutorial, we show you how to add an alias record for your Lightsail container service to a hosted zone in Route 53. You can do this only by using the AWS Command Line Interface (AWS CLI). It cannot be done using the Route 53 console.
Note
If you're using Lightsail to host the DNS of your domain, then you should add the alias record to the DNS zone of your domain in Lightsail. For more information, see Routing traffic for a domain in Amazon Lightsail to a Lightsail container service.
Contents
Step 1: Complete the prerequisites
Complete the following prerequisites if you haven't already:
-
Register a domain name in Route 53, or make Route 53 the DNS service for your registered (existing) domain name. For more information, see Registering domain names using Amazon Route 53 or Making Amazon Route 53 the DNS service for an existing domain in the Amazon Route 53 Developer Guide.
-
Deploy your applications to your Lightsail container service. For more information, see Create and manage container service deployments.
-
Enable your registered domain name on your Lightsail container service. For more information, see Enable and manage custom domains.
-
Configure the AWS CLI with your account. For more information, see Configure the AWS CLI to work with Lightsail.
Step 2: Get the hosted zone IDs for Lightsail container services
You must specify a hosted zone ID for your Lightsail container service when you add an
alias record to a hosted zone in Route 53. For example, if your Lightsail container service is
in the US West (Oregon) (us-west-2) AWS Region, then you must specify hosted zone ID
Z0959753D43BBB908BAV when adding an alias record for your Lightsail container
service to a hosted zone in Route 53.
Following are the hosted zone IDs for each AWS Region in which you can create a Lightsail container service.
EU (London) (eu-west-2): Z0624918ZXDYQZLOXA66
US East (N. Virginia) (us-east-1): Z06246771KYU0IRHI74W4
Asia Pacific (Singapore) (ap-southeast-1): Z0625921354DRJH4EY9V0
EU (Ireland) (eu-west-1): Z0624732FELAMMKW3Y21
Asia Pacific (Tokyo) (ap-northeast-1): Z0626125UAU4JWQ9JSKN
Asia Pacific (Seoul) (ap-northeast-2): Z06260262XZM84B2WPLHH
Asia Pacific (Jakarta) (ap-southeast-3): Z03072883T5HFTY4T7CDL
Asia Pacific (Mumbai) (ap-south-1): Z10460781IQMISS0I0VVY
Asia Pacific (Sydney) (ap-southeast-2): Z09597943PQQZATPFE96E
Canada (Central) (ca-central-1): Z10450993RIRIJJUUMA5W
Europe (Frankfurt) (eu-central-1): Z06137433FV04OY4EC6L0
Europe (Stockholm) (eu-north-1): Z016970523TDG2TZMUXKK
Europe (Paris) (eu-west-3): Z09594631DSW2QUR7CFGO
US East (Ohio) (us-east-2): Z10362273VJ548563IY84
US West (Oregon) (us-west-2): Z0959753D43BBB908BAV
Step 3: Create a record set JSON file
When you add a DNS record to the hosted zone of your domain in Route 53 using the AWS CLI, you must specify a set of configuration parameters for the record. The easiest way to do this is by creating a JSON (.json) file that contains all of the parameters, and then referencing the JSON file in your AWS CLI request.
Complete the following procedure to create a JSON file with the record set parameters for the alias record:
-
Open a text editor, such as Notepad on Windows or Nano on Linux.
-
Copy and paste the following text into the text editor:
{ "Comment": "Comment", "Changes": [ { "Action": "CREATE", "ResourceRecordSet": { "Name": "Domain.", "Type": "A", "AliasTarget": { "HostedZoneId": "LightsailContainerServiceHostedZoneID", "DNSName": "LightsailContainerServiceAddress.", "EvaluateTargetHealth": true } } } ] }In your file, replace the following example text with your own:
-
Commentwith a personal note or comment about the record set. -
Domainwith the registered domain name that you want to use with your Lightsail container service (for example,example.comorwww.example.com). To use the root of your domain with your Lightsail container service, you must specify an@symbol in the subdomain space of your domain (for example,@.example.com). -
LightsailContainerServiceHostedZoneIDwith the hosted zone ID for the AWS Region in which you created your Lightsail container service. For more information, see Step 2: Get the hosted zone IDs for Lightsail container services earlier in this guide. -
LightsailContainerServiceAddresswith the public domain name of your Lightsail container service. You can get this by signing in to the Lightsail console, browsing to your container service, and copying the Public domain listed in the header section of the container service management page (for example,container-service-1.q8cexampleljs.us-west-2.cs.amazonlightsail.com).
Example:
{ "Comment": "Alias record for Lightsail container service", "Changes": [ { "Action": "CREATE", "ResourceRecordSet": { "Name": "@.example.com.", "Type": "A", "AliasTarget": { "HostedZoneId": "Z0959753D43BBB908BAV", "DNSName": "container-service-1.q8cexampleljs.us-west-2.cs.amazonlightsail.com.", "EvaluateTargetHealth": true } } } ] } -
-
Save the file to your local directory as
change-resource-record-sets.json.
Step 4: Add a record to the hosted zone of your domain in Route 53
Complete the following procedure to add a record to the hosted zone of your domain in
Route 53 using the AWS CLI. You do this by using the
change-resource-record-sets command. For more information, see change-resource-record-sets in the AWS CLI Command
Reference.
Note
You must install the AWS CLI and configure it for Lightsail and Route 53 before continuing with this procedure. For more information, see Configure the AWS CLI to work with Lightsail.
-
Open a Command Prompt or Terminal window.
-
Enter the following command to add a record to the hosted zone of your domain in Route 53.
aws route53 change-resource-record-sets --hosted-zone-idHostedZoneID--change-batchPathToJsonFileIn the command, replace the following example text with your own:
-
HostedZoneIDwith the ID of the hosted zone for your registered domain in Route 53. Use the list-hosted-zones command to get a list of IDs for the hosted zones in your Route 53 account. -
PathToJsonFilewith the local directory folder path on your computer of the .json file that contains the record parameters. For more information, see the Step 3: Create a record set JSON file section earlier in this guide.
Examples:
On a Linux or Unix computer:
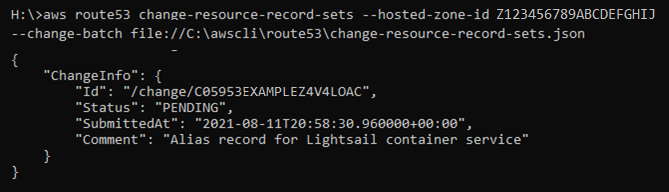
aws route53 change-resource-record-sets --hosted-zone-idZ123456789ABCDEFGHIJ--change-batchhome/user/awscli/route53/change-resource-record-sets.jsonOn a Windows computer:
aws route53 change-resource-record-sets --hosted-zone-idZ123456789ABCDEFGHIJ--change-batchfile://C:\awscli\route53\change-resource-record-sets.jsonYou should see a result similar to the following example:
Allow time for the change to propagate through the internet's DNS, which might take several hours. After that is completed, internet traffic for your registered domain in Route 53 should begin routing to your Lightsail container service.
-
