End of support notice: On October 7th, 2026, AWS will discontinue support for AWS IoT Greengrass Version 1. After October 7th, 2026, you will no longer be able to access the AWS IoT Greengrass V1 resources. For more information, please visit Migrate from AWS IoT Greengrass Version 1.
Getting started with Greengrass connectors (console)
This feature is available for AWS IoT Greengrass Core v1.7 and later.
This tutorial shows how to use the AWS Management Console to work with connectors.
Use connectors to accelerate your development life cycle. Connectors are prebuilt, reusable modules that can make it easier to interact with services, protocols, and resources. They can help you deploy business logic to Greengrass devices more quickly. For more information, see Integrate with services and protocols using Greengrass connectors.
In this tutorial, you configure and deploy the Twilio Notifications connector. The connector receives Twilio message information as input data, and then triggers a Twilio text message. The data flow is shown in following diagram.

After you configure the connector, you create a Lambda function and a subscription.
The function evaluates simulated data from a temperature sensor. It conditionally publishes the Twilio message information to an MQTT topic. This is the topic that the connector subscribes to.
The subscription allows the function to publish to the topic and the connector to receive data from the topic.
The Twilio Notifications connector requires a Twilio auth token to interact with the Twilio API. The token is a text type secret created in AWS Secrets Manager and referenced from a group resource. This enables AWS IoT Greengrass to create a local copy of the secret on the Greengrass core, where it is encrypted and made available to the connector. For more information, see Deploy secrets to the AWS IoT Greengrass core.
The tutorial contains the following high-level steps:
The tutorial should take about 20 minutes to complete.
Prerequisites
To complete this tutorial, you need:
-
A Greengrass group and a Greengrass core (v1.9.3 or later). To learn how to create a Greengrass group and core, see Getting started with AWS IoT Greengrass. The Getting Started tutorial also includes steps for installing the AWS IoT Greengrass Core software.
-
Python 3.7 installed on the AWS IoT Greengrass core device.
-
AWS IoT Greengrass must be configured to support local secrets, as described in Secrets Requirements.
Note
This requirement includes allowing access to your Secrets Manager secrets. If you're using the default Greengrass service role, Greengrass has permission to get the values of secrets with names that start with greengrass-.
-
A Twilio account SID, auth token, and Twilio-enabled phone number. After you create a Twilio project, these values are available on the project dashboard.
Note
You can use a Twilio trial account. If you're using a trial account, you must add non-Twilio recipient phone numbers to a list of verified phone numbers. For more information, see How to Work with your Free Twilio Trial Account
.
Step 1: Create a Secrets Manager secret
In this step, you use the AWS Secrets Manager console to create a text type secret for your Twilio auth token.
-
Sign in to the AWS Secrets Manager console
. Note
For more information about this process, see Step 1: Create and store your secret in AWS Secrets Manager in the AWS Secrets Manager User Guide.
-
Choose Store a new secret.
-
Under Choose secret type, choose Other type of secret.
-
Under Specify the key/value pairs to be stored for this secret, on the Plaintext tab, enter your Twilio auth token. Remove all of the JSON formatting and enter only the token value.
-
Keep aws/secretsmanager selected for the encryption key, and then choose Next.
Note
You aren't charged by AWS KMS if you use the default AWS managed key that Secrets Manager creates in your account.
-
For Secret name, enter
greengrass-TwilioAuthToken, and then choose Next.Note
By default, the Greengrass service role allows AWS IoT Greengrass to get the value of secrets with names that start with greengrass-. For more information, see secrets requirements.
-
This tutorial doesn't require rotation, so choose disable automatic rotation, and then choose Next.
-
On the Review page, review your settings, and then choose Store.
Next, you create a secret resource in your Greengrass group that references the secret.
Step 2: Add a secret resource to a Greengrass group
In this step, you add a secret resource to the Greengrass group. This resource is a reference to the secret that you created in the previous step.
In the AWS IoT console navigation pane, under Manage, expand Greengrass devices, and then choose Groups (V1).
-
Choose the group that you want to add the secret resource to.
-
On the group configuration page, choose the Resources tab, and then scroll down to the Secrets section. The Secrets section displays the secret resources that belong to the group. You can add, edit, and remove secret resources from this section.
Note
Alternatively, the console allows you to create a secret and secret resource when you configure a connector or Lambda function. You can do this from the connector's Configure parameters page or the Lambda function's Resources page.
-
Choose Add under the Secrets section.
-
On the Add a secret resource page, enter
MyTwilioAuthTokenfor the Resource name. -
For the Secret, choose greengrass-TwilioAuthToken.
-
In the Select labels (Optional) section, the AWSCURRENT staging label represents the latest version of the secret. This label is always included in a secret resource.
Note
This tutorial requires the AWSCURRENT label only. You can optionally include labels that are required by your Lambda function or connector.
-
Choose Add resource.
Step 3: Add a connector to the Greengrass group
In this step, you configure parameters for the Twilio Notifications connector and add it to the group.
-
On the group configuration page, choose Connectors, and then choose Add a connector.
-
On the Add connector page, choose Twilio Notifications.
-
Choose the version.
-
In the Configuration section:
-
For Twilio auth token resource, enter the resource that you created in the previous step.
Note
When you enter the resource, the ARN of Twilio auth token secret property is populated for you.
-
For Default from phone number, enter your Twilio-enabled phone number.
-
For Twilio account SID, enter your Twilio account SID.
-
-
Choose Add resource.
Step 4: Create a Lambda function deployment package
To create a Lambda function, you must first create a Lambda function deployment package that contains the function code and dependencies. Greengrass Lambda functions require the AWS IoT Greengrass Core SDK for tasks such as communicating with MQTT messages in the core environment and accessing local secrets. This tutorial creates a Python function, so you use the Python version of the SDK in the deployment package.
-
From the AWS IoT Greengrass Core SDK downloads page, download the AWS IoT Greengrass Core SDK for Python to your computer.
-
Unzip the downloaded package to get the SDK. The SDK is the
greengrasssdkfolder. -
Save the following Python code function in a local file named
temp_monitor.py.import greengrasssdk import json import random client = greengrasssdk.client('iot-data') # publish to the Twilio Notifications connector through the twilio/txt topic def function_handler(event, context): temp = event['temperature'] # check the temperature # if greater than 30C, send a notification if temp > 30: data = build_request(event) client.publish(topic='twilio/txt', payload=json.dumps(data)) print('published:' + str(data)) print('temperature:' + str(temp)) return # build the Twilio request from the input data def build_request(event): to_name = event['to_name'] to_number = event['to_number'] temp_report = 'temperature:' + str(event['temperature']) return { "request": { "recipient": { "name": to_name, "phone_number": to_number, "message": temp_report } }, "id": "request_" + str(random.randint(1,101)) } -
Zip the following items into a file named
temp_monitor_python.zip. When creating the ZIP file, include only the code and dependencies, not the containing folder.-
temp_monitor.py. App logic.
-
greengrasssdk. Required library for Python Greengrass Lambda functions that publish MQTT messages.
This is your Lambda function deployment package.
-
Now, create a Lambda function that uses the deployment package.
Step 5: Create a Lambda function in the AWS Lambda console
In this step, you use the AWS Lambda console to create a Lambda function and configure it to use your deployment package. Then, you publish a function version and create an alias.
-
First, create the Lambda function.
-
In the AWS Management Console, choose Services, and open the AWS Lambda console.
-
Choose Create function and then choose Author from scratch.
-
In the Basic information section, use the following values:
-
For Function name, enter
TempMonitor. -
For Runtime, choose Python 3.7.
-
For Permissions, keep the default setting. This creates an execution role that grants basic Lambda permissions. This role isn't used by AWS IoT Greengrass.
-
-
At the bottom of the page, choose Create function.
-
-
Next, register the handler and upload your Lambda function deployment package.
-
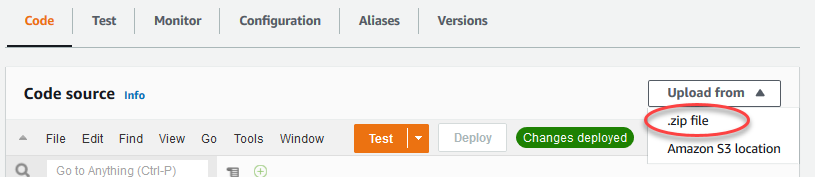
On the Code tab, under Code source, choose Upload from. From the dropdown, choose .zip file.
-
Choose Upload, and then choose your
temp_monitor_python.zipdeployment package. Then, choose Save. -
On the Code tab for the function, under Runtime settings, choose Edit, and then enter the following values.
-
For Runtime, choose Python 3.7.
-
For Handler, enter
temp_monitor.function_handler
-
-
Choose Save.
Note
The Test button on the AWS Lambda console doesn't work with this function. The AWS IoT Greengrass Core SDK doesn't contain modules that are required to run your Greengrass Lambda functions independently in the AWS Lambda console. These modules (for example,
greengrass_common) are supplied to the functions after they are deployed to your Greengrass core.
-
-
Now, publish the first version of your Lambda function and create an alias for the version.
Note
Greengrass groups can reference a Lambda function by alias (recommended) or by version. Using an alias makes it easier to manage code updates because you don't have to change your subscription table or group definition when the function code is updated. Instead, you just point the alias to the new function version.
-
On the TempMonitor: 1 configuration page, from the Actions menu, choose Create alias.
-
On the Create a new alias page, use the following values:
-
For Name, enter
GG_TempMonitor. -
For Version, choose 1.
Note
AWS IoT Greengrass doesn't support Lambda aliases for $LATEST versions.
-
-
Choose Create.
-
Now you're ready to add the Lambda function to your Greengrass group.
Step 6: Add a Lambda function to the Greengrass group
In this step, you add the Lambda function to the group and then configure its lifecycle and environment variables. For more information, see Controlling execution of Greengrass Lambda functions by using group-specific configuration.
-
On the group configuration page, choose the Lambda functions tab.
-
Under My Lambda functions, choose Add.
-
On the Add Lambda function page, choose TempMonitor for your Lambda function.
-
For Lambda function version, choose Alias: GG_TempMonitor.
-
Choose Add Lambda function.
Step 7: Add subscriptions to the Greengrass group
In this step, you add a subscription that enables the Lambda function to send input data to the connector. The connector defines the MQTT topics that it subscribes to, so this subscription uses one of the topics. This is the same topic that the example function publishes to.
For this tutorial, you also create subscriptions that allow the function to receive simulated temperature readings from AWS IoT and allow AWS IoT to receive status information from the connector.
-
On the Create a subscription page, configure the source and target, as follows:
-
For Source type, choose Lambda function, and then choose TempMonitor.
-
For Target type, choose Connector, and then choose Twilio Notifications.
-
-
For the Topic filter, choose
twilio/txt. -
Choose Create subscription.
-
Repeat steps 1 - 4 to create a subscription that allows AWS IoT to publish messages to the function.
-
For Source type, choose Service, and then choose IoT Cloud.
-
For Select a target, choose Lambda function, and then choose TempMonitor.
-
For Topic filter, enter
temperature/input.
-
-
Repeat steps 1 - 4 to create a subscription that allows the connector to publish messages to AWS IoT.
-
For Source type, choose Connector, and then choose Twilio Notifications.
-
For Target type, choose Service, and then choose IoT Cloud.
-
For Topic filter,
twilio/message/statusis entered for you. This is the predefined topic that the connector publishes to.
-
Step 8: Deploy the Greengrass group
Deploy the group to the core device.
Note
A Greengrass group can contain only one version of the connector at a time. For information about upgrading a connector version, see Upgrading connector versions.
Test the solution
-
On the AWS IoT console home page, choose Test.
-
For Subscribe to topic, use the following values, and then choose Subscribe. The Twilio Notifications connector publishes status information to this topic.
Property
Value
Subscription topic
twilio/message/status
MQTT payload display
Display payloads as strings
-
For Publish to topic, use the following values, and then choose Publish to invoke the function.
Property
Value
Topic
temperature/input
Message
Replace
recipient-namewith a name andrecipient-phone-numberwith the phone number of the text message recipient. Example:+12345000000{ "to_name": "recipient-name", "to_number": "recipient-phone-number", "temperature": 31 }If you're using a trial account, you must add non-Twilio recipient phone numbers to a list of verified phone numbers. For more information, see Verify your Personal Phone Number
. If successful, the recipient receives the text message and the console displays the
successstatus from the output data.Now, change the
temperaturein the input message to29and publish. Because this is less than 30, the TempMonitor function doesn't trigger a Twilio message.
See also
