Visualize and share wind farm data in SiteWise Monitor
This tutorial explains how to use AWS IoT SiteWise Monitor to visualize and share industrial data through managed web applications, known as portals. Each portal encompasses projects, providing you with the flexibility to choose which data is accessible within each project. Then, specify people in your organization that can access each portal. Your users sign in to portals using AWS IAM Identity Center accounts, so you can use your existing identity store or a store managed by AWS.
You, and your users with sufficient permissions, can create dashboards in each project to visualize your industrial data in meaningful ways. Then, your users can view these dashboards to quickly gain insights into your data and monitor your operation. You can configure administrative or read-only permissions to each project for every user in your company. For more information, see Monitor data with AWS IoT SiteWise Monitor.
Throughout the tutorial, you enhance the AWS IoT SiteWise demo, providing a sample dataset for a wind farm. You configure a portal in SiteWise Monitor, create a project, and dashboards to visualize the wind farm data. The tutorial also covers the creation of additional users, along with the assignment of permissions to own or view the project and its associated dashboards.
Note
When you use SiteWise Monitor, you're charged per user that signs in to a portal (per month). In
this tutorial, you create three users, but you only need to sign in with one user. After you
complete this tutorial, you incur charges for one user. For more information, see
AWS IoT SiteWise Pricing
Topics
Prerequisites
To complete this tutorial, you need the following:
-
An AWS account. If you don't have one, see Set up an AWS account.
-
A development computer running Windows, macOS, Linux, or Unix to access the AWS Management Console. For more information, see What is the AWS Management Console?.
-
An AWS Identity and Access Management (IAM) user with administrator permissions.
-
A running AWS IoT SiteWise wind farm demo. When you set up the demo, it defines models and assets in AWS IoT SiteWise and streams data to them to represent a wind farm. For more information, see Use the AWS IoT SiteWise demo.
-
If you enabled IAM Identity Center in your account, sign in to your AWS Organizations management account. For more information, see AWS Organizations terminology and concepts. If you haven't enabled IAM Identity Center, you will enable it in this tutorial and set your account as the management account.
If you can't sign in to your AWS Organizations management account, you can partially complete the tutorial as long as you have an IAM Identity Center user in your organization. In this case, you can create the portal and dashboards, but you can't create new IAM Identity Center users to assign to projects.
Step 1: Create a portal in SiteWise Monitor
In this procedure, you create a portal in AWS IoT SiteWise Monitor. Each portal is a managed web application that you and your users can sign in to with AWS IAM Identity Center accounts. With IAM Identity Center, you can use your company's existing identity store or create one managed by AWS. Your company's employees can sign in without creating separate AWS accounts.
To create a portal
-
Sign in to the AWS IoT SiteWise console
. -
Review the AWS IoT SiteWise endpoints and quotas where AWS IoT SiteWise is supported and switch Regions, if needed. You must run the AWS IoT SiteWise demo in the same Region.
-
In the left navigation pane, choose Portals.
-
Choose Create portal.
-
If you already enabled IAM Identity Center, skip to step 6. Otherwise, complete the following steps to enable IAM Identity Center:
-
On the Enable AWS IAM Identity Center (SSO) page, enter your Email address, First name, and Last name to create an IAM Identity Center user for yourself to be the portal administrator. Use an email address you can access so that you can receive an email to set a password for your new IAM Identity Center user.
In a portal, the portal administrator creates projects and assigns users to projects. You can create more users later.

-
Choose Create user.
-
-
On the Portal configuration page, complete the following steps:
-
Enter a name for your portal, such as
WindFarmPortal. -
(Optional) Enter a description for your portal. If you have multiple portals, use meaningful descriptions to keep track of what each portal contains.
-
(Optional) Upload an image to display in the portal.
-
Enter an email address that portal users can contact when they have an issue with the portal and need help from your company's AWS administrator to resolve it.
-
Choose Create portal.
-
-
On the Invite administrators page, you can assign IAM Identity Center users to the portal as administrators. Portal administrators manage permissions and projects within a portal. On this page, do the following:
-
Select a user to be the portal administrator. If you enabled IAM Identity Center earlier in this tutorial, select the user that you created.

-
(Optional) Choose Send invite to selected users. Your email client opens, and an invitation appears in the message body. You can customize the email before you send it to your portal administrators. You can also send the email to your portal administrators later. If you're trying SiteWise Monitor for the first time and will be the portal administrator, you don't need to email yourself.
-
Choose Next.
-
-
On the Assign users page, you can assign IAM Identity Center users to the portal. Portal administrators can later assign these users as project owners or viewers. Project owners can create dashboards in projects. Project viewers have read-only access to the projects that they're assigned. On this page, you can create IAM Identity Center users to add to the portal.
Note
If you aren't signed in to your AWS Organizations management account, you can't create IAM Identity Center users. Choose Assign users to create the portal without portal users, and then skip this step.
On this page, do the following:
-
Complete the following steps twice to create two IAM Identity Center users:
-
Choose Create user to open a dialog box where you enter details for the new user.
-
Enter an Email address, First name, and Last name for the new user. IAM Identity Center sends the user an email for them to set their password. If you want to sign in to the portal as these users, choose an email address that you can access. Each email address must be unique. Your users sign in to the portal using their email address as their usernames.

-
Choose Create user.
-
-
Select the two IAM Identity Center users that you created in the previous step.

-
Choose Assign users to add these users to the portal.
The portals page opens with your new portal listed.
-
Step 2: Sign in to a portal
In this procedure, you sign in to your new portal using the AWS IAM Identity Center user that you added to the portal.
To sign in to a portal
-
On the Portals page, choose your new portal's Link to open your portal in a new tab.

-
If you created your first IAM Identity Center user earlier in the tutorial, use the following steps to create a password for your user:
-
Check your email for the subject line Invitation to join AWS IAM Identity Center.
-
Open that invitation email and choose Accept invitation.
-
In the new window, set a password for your IAM Identity Center user.
If you want to sign in later to the portal as the second and third IAM Identity Center users that you created earlier, you can also complete these steps to set passwords for those users.
Note
If you didn't receive an email, you can generate a password for your user in the IAM Identity Center console. For more information, see Reset the IAM Identiy Center user password for an end user in the AWS IAM Identity Center User Guide.
-
-
Enter your IAM Identity Center Username and Password. If you created your IAM Identity Center user earlier in this tutorial, your Username is the email address of the portal administrator user that you created.
All portal users, including the portal administrator, must sign in with their IAM Identity Center user credentials. These credentials are typically not the same credentials that you use to sign in to the AWS Management Console.

-
Choose Sign in.
Your portal opens.
Step 3: Create a wind farm project
In this procedure, you create a project in your portal. Projects are resources that define a set of permissions, assets, and dashboards, which you can configure to visualize asset data in that project. With projects, you define who has access to which subsets of your operation and how those subsets' data is visualized. You can assign portal users as owners or viewers of each project. Project owners can create dashboards to visualize data and share the project with other users. Project viewers can view dashboards but not edit them. For more information about roles in SiteWise Monitor, see SiteWise Monitor roles.
To create a wind farm project
-
In the left navigation pane in your portal, choose the Assets tab. On the Assets page, you can explore all assets available in the portal and add assets to projects.
-
In the asset browser, choose Demo Wind Farm Asset. When you choose an asset, you can explore that asset's live and historical data. You can also press Shift to select multiple assets and compare their data side-by-side.
-
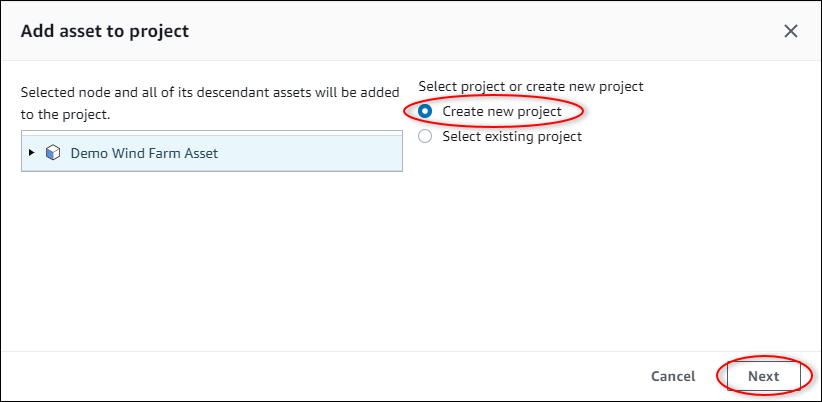
Choose Add asset to project in the upper left. Projects contain dashboards that your portal users can view to explore your data. Each project has access to a subset of your assets in AWS IoT SiteWise. When you add an asset to a project, all users with access to that project can also access data for that asset and its children.

-
In the Add asset to project dialog box, choose Create new project, and then choose Next.
-
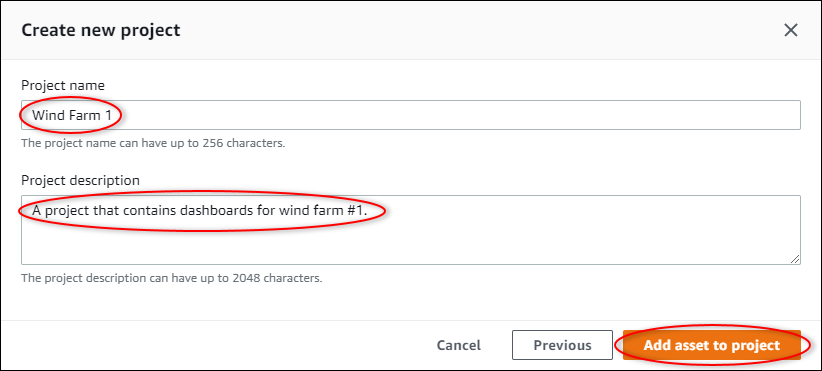
In the Create new project dialog box, enter a Project name and Project description for your project, and then choose Add asset to project.
Your new project's page opens.
-
On the project's page, you can add portal users as owners or viewers of this project.
Note
If you aren't signed in to your AWS Organizations management account, you might not have portal users to assign to this project, so you can skip this step.
On this page, do the following:
-
Under Project owners, choose Add owners or Edit users.

-
Choose the user to add as a project owner (for example, Mary Major), and then choose the >> icon.

-
Choose Save.
Your IAM Identity Center user Mary Major can sign in to this portal to edit the dashboards in this project and share this project with other users in this portal.
-
Under Project viewers, choose Add viewers or Edit users.
-
Choose the user to add as a project viewer (for example, Mateo Jackson), and then choose the >> icon.
-
Choose Save.
Your IAM Identity Center user Mateo Jackson can sign in to this portal to view, but not edit, the dashboards in the wind farm project.
-
Step 4: Create a dashboard to visualize wind farm data
In this procedure, you create dashboards to visualize the demo wind farm data. Dashboards contain customizable visualizations of your project's asset data. Each visualization can have a different type, such as a line chart, bar chart, or key performance indicator (KPI) display. You can choose the visualization type that works best for your data. Project owners can edit dashboards, whereas project viewers can only view dashboards to gain insights.
To create a dashboard with visualizations
-
On your new project's page, choose Create dashboard to create a dashboard and open its edit page.
In a dashboard's edit page, you can drag asset properties from the asset hierarchy to the dashboard to create visualizations. Then, you can edit each visualization's title, legend titles, type, size, and location in the dashboard.
-
Enter a name your dashboard.

-
Drag Total Average Power from the Demo Wind Farm Asset to the dashboard to create a visualization.

-
Choose Demo Turbine Asset 1 to show properties for that asset, and then drag Wind Speed to the dashboard to create a visualization for wind speed.

-
Add Wind Speed to the new wind speed visualization for each Demo Turbine Asset 2, 3, and 4 (in that order).
Your Wind Speed visualization should look similar to the following screenshot.

-
Repeat steps 4 and 5 for the wind turbines' Torque (KiloNewton Meter) properties to create a visualization for wind turbine torque.
-
Choose the visualization type icon for the Torque (KiloNewton Meter) visualization, and then choose the bar chart icon.

-
Repeat steps 4 and 5 for the wind turbines' Wind Direction properties to create a visualization for wind direction.
-
Choose the visualization type icon for the Wind Direction visualization, and then choose the KPI chart icon (30%).

-
(Optional) Make other changes to each visualization's title, legend titles, type, size, and location as needed.
-
Choose Save dashboard in the upper right to save your dashboard.
Your dashboard should look similar to the following screenshot.

-
(Optional) Create an additional dashboard for each wind turbine asset.
As a best practice, we recommend that you create a dashboard for each asset so that your project viewers can investigate any issues with each individual asset. You can only add up to 5 assets to each visualization, so you must create multiple dashboards for your hierarchical assets in many scenarios.
A dashboard for a demo wind turbine might look similar to the following screenshot.

-
(Optional) Change the timeline or select data points on a visualization to explore the data in your dashboard. For more information, see Viewing dashboards in the AWS IoT SiteWise Monitor Application Guide.
Step 5: Explore the portal
In this procedure, you can explore the portal as a user with fewer permissions than an AWS IoT SiteWise portal administrator.
To explore the portal and finish the tutorial
-
(Optional) If you added other users to the project as owners or viewers, you can sign in to the portal as these users. This lets you explore the portal as a user with fewer permissions than a portal administrator.
Important
You're charged for each user that signs in to a portal. For more information, see AWS IoT SiteWise Pricing
. To explore the portal as other users, do the following:
-
Choose Log out in the bottom left of the portal to exit the web application.
-
Choose Sign out in the upper right of the IAM Identity Center application portal to sign out of your IAM Identity Center user.
-
Sign in to the portal as the IAM Identity Center user that you assigned as a project owner or project viewer. For more information, see Step 2: Sign in to a portal.
-
You've completed the tutorial. When you finish exploring your demo wind farm in SiteWise Monitor, follow the next procedure to clean up your resources.
Step 6: Clean up resources after the tutorial
After you complete the tutorial, you can clean up your resources. You aren't charged for AWS IoT SiteWise if users don't sign in to your portal, but you can delete your portal and AWS IAM Identity Center directory users. Your demo wind farm assets are deleted at the end of the duration that you chose when you created the demo, or you can delete the demo manually. For more information, see Delete the AWS IoT SiteWise demo.
Use the following procedures to delete your portal and IAM Identity Center users.
To delete a portal
-
Navigate to the AWS IoT SiteWise console
. -
In the left navigation pane, choose Portals.
-
Choose your portal, WindFarmPortal, and then choose Delete.
When you delete a portal or project, the assets associated to deleted projects aren't affected.

-
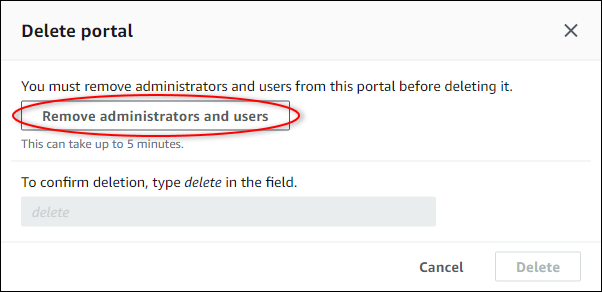
In the Delete portal dialog box, choose Remove administrators and users.
-
Enter
deleteto confirm deletion, and then choose Delete.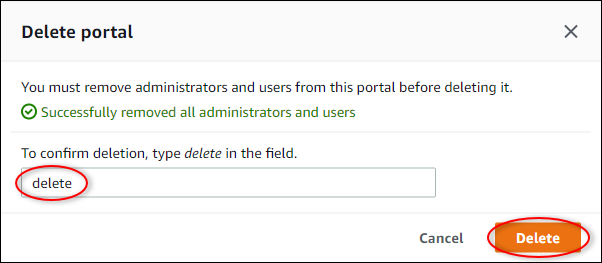
To delete IAM Identity Center users
-
Navigate to the IAM Identity Center console
. -
In the left navigation pane, choose Users.
-
Select the check box for each user to delete, and then choose Delete users.

-
In the Delete users dialog box, enter
DELETE, and then choose Delete users.
