Open a tunnel using manual setup and connect to remote device
When you open a tunnel, you can choose the quick setup or the manual setup method for opening a tunnel into the remote device. This tutorial shows how to open a tunnel using the manual setup method and configure and start the local proxy to connect to the remote device.
When you use the manual setup method, you must manually specify the tunnel configurations when creating the tunnel. After creating the tunnel, you can SSH within the browser or open a terminal outside the AWS IoT console. This tutorial shows how to use the terminal outside the console to access the remote device. You'll also learn how to configure the local proxy and then connect to the local proxy to interact with the remote device. To connect to the local proxy, you must download the source access token when creating the tunnel.
With this setup method, you can use services other than SSH, such as FTP to connect to the remote device. For more information about the different setup methods, see Tunnel setup methods.
Prerequisites for manual setup method
-
The firewalls that the remote device is behind must allow outbound traffic on port 443. The tunnel that you create will use this port to connect to the remote device.
-
You have an IoT device agent (see IoT agent snippet) running on the remote device that connects to the AWS IoT device gateway and is configured with an MQTT topic subscription. For more information, see connect a device to the AWS IoT device gateway.
-
You must have an SSH daemon running on the remote device.
-
You have downloaded the local proxy source code from GitHub
and built it for the platform of your choice. We'll refer to the built local proxy executable file as localproxyin this tutorial.
Open a tunnel
You can open a secure tunnel using the AWS Management Console, the AWS IoT API Reference, or the AWS CLI. You can optionally configure a destination name but it's not required for this tutorial. If you configure the destination, secure tunneling will automatically deliver the access token to the remote device using MQTT. For more information, see Tunnel creation methods in AWS IoT console.
To open a tunnel in the console
Go to the Tunnels hub of the AWS IoT console
and choose Create tunnel. 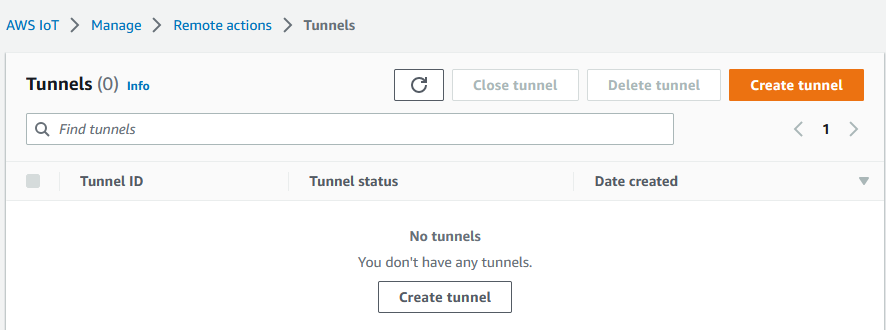
-
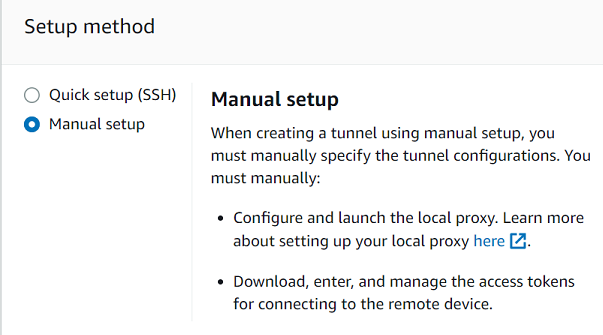
For this tutorial, choose Manual setup as the tunnel creation method and then choose Next. For information about using the quick setup method to create a tunnel, see Open a tunnel and use browser-based SSH to access remote device.
Note
If you create a secure tunnel from the details page of a thing, you can choose whether to create a new tunnel or use an existing one. For more information, see Open a tunnel for remote device and use browser-based SSH.
-
(Optional) Enter the configuration settings for your tunnel. You can also skip this step and proceed to the next step to create a tunnel.
Enter a tunnel description, a tunnel timeout duration, and resource tags as key-value pairs to help you identify your resource. For this tutorial, you can skip the destination configuration.
Note
You won't be charged based on the duration for which you keep a tunnel open. You only incur charges when creating a new tunnel. For pricing information, see Secure Tunneling in AWS IoT Device Management pricing
. -
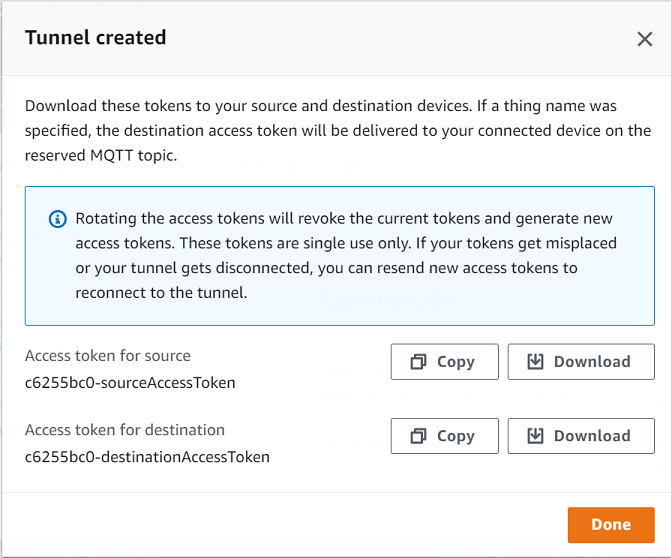
Download the client access tokens and then choose Done. The tokens will not be available to download after you choose Done.
These tokens can only be used once to connect to the tunnel. If you misplace the tokens or the tunnel gets disconnected, you can generate and send new tokens to your remote device for reconnecting to the tunnel.
To open a tunnel using the API
To open a new tunnel, you can use the OpenTunnel API operation. You can also specify additional configurations using the API, such as the tunnel duration and the destination configuration.
aws iotsecuretunneling open-tunnel \ --regionus-east-1\ --endpoint https://api.us-east-1.tunneling.iot.amazonaws.com
Running this command creates a new tunnel and provides you the source and destination access tokens.
{
    "tunnelId": "01234567-89ab-0123-4c56-789a01234bcd",
    "tunnelArn": "arn:aws:iot:us-east-1:123456789012:tunnel/01234567-89ab-0123-4c56-789a01234bcd",
    "sourceAccessToken": "<SOURCE_ACCESS_TOKEN>",
    "destinationAccessToken": "<DESTINATION_ACCESS_TOKEN>"
}
Resend tunnel access tokens
The tokens that you obtained when creating a tunnel can only be used once to connect to the tunnel. If you misplace the access token or the tunnel gets disconnected, you can resend new access tokens to the remote device using MQTT at no additional charge. AWS IoT secure tunneling will revoke the current tokens and return new access tokens for reconnecting to the tunnel.
To rotate the tokens from the console
Go to the Tunnels hub of the AWS IoT console
and choose the tunnel that you created. -
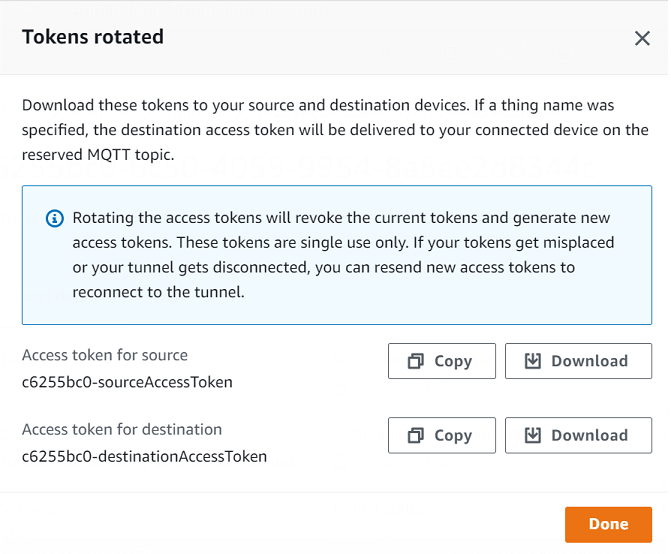
In the tunnel details page, choose Generate new access tokens and then choose Next.
-
Download the new access tokens for your tunnel and choose Done. These tokens can be used only once. If you misplace these tokens or the tunnel gets disconnected, you can resend new access tokens.
To rotate access tokens using the API
To rotate the tunnel access tokens, you can use the RotateTunnelAccessToken API operation to revoke the current
tokens and return new access tokens for reconnecting to the tunnel. For
example, the following command rotates the access tokens for the destination
device, RemoteThing1
aws iotsecuretunneling rotate-tunnel-access-token \ --tunnel-id<tunnel-id>\ --client-modeDESTINATION\ --destination-config thingName=<RemoteThing1>,services=SSH \ --region<region>
Running this command generates the new access token as shown in the following example. The token is then delivered to the device using MQTT to connect to the tunnel, if the device agent is set up correctly.
{
    "destinationAccessToken": "destination-access-token",
    "tunnelArn": "arn:aws:iot:region:account-id:tunnel/tunnel-id"
}
For examples that show how and when to rotate the access tokens, see Resolving AWS IoT secure tunneling connectivity issues by rotating client access tokens.
Configure and start the local proxy
To connect to the remote device, open a terminal on your laptop and configure and
start the local proxy. The local proxy transmits data sent by the application
running on the source device by using secure tunneling over a WebSocket secure
connection. You can download the local proxy source from GitHub
After you configure the local proxy, copy the source client access token, and use it to start the local proxy in source mode. Following shows an example command to start the local proxy. In the following command, the local proxy is configured to listen for new connections on port 5555. In this command:
-
-rspecifies the AWS Region, which must be the same Region where your tunnel was created. -
-sspecifies the port to which the proxy should connect.
-
-tspecifies the client token text.
./localproxy -r us-east-1 -s 5555 -tsource-client-access-token
Running this command will start the local proxy in source mode. If you receive the following error
after running the command, set up the CA path. For information, see Secure tunneling local
proxy on GitHub
Could not perform SSL handshake with proxy server: certificate verify failed
The following shows a sample output of running the local proxy in source mode.
...
...

Starting proxy in source mode
Attempting to establish web socket connection with endpoint wss://data.tunneling.iot.us-east-1.amazonaws.com:443
Resolved proxy  server IP: 10.10.0.11
Connected successfully with proxy server
Performing SSL handshake with proxy server
Successfully completed SSL handshake with proxy server
HTTP/1.1 101 Switching Protocols

...

Connection: upgrade
channel-id: 01234567890abc23-00001234-0005678a-b1234c5de677a001-2bc3d456
upgrade: websocket

...

Web socket session ID: 01234567890abc23-00001234-0005678a-b1234c5de677a001-2bc3d456
Web socket subprotocol selected: aws.iot.securetunneling-2.0
Successfully established websocket connection with proxy server: wss://data.tunneling.iot.us-east-1.amazonaws.com:443
Setting up web socket pings for every 5000 milliseconds
Scheduled next read:

...

Starting web socket read loop continue reading...
Resolved bind IP: 127.0.0.1
Listening for new connection on port 5555
Start an SSH session
Open another terminal and use the following command to start a new SSH session by connecting to the local proxy on port 5555.
sshusername@localhost -p 5555
You might be prompted for a password for the SSH session. When you are done with the
SSH session, type exit to close the session.
Cleaning up
-
Close tunnel
We recommend that you close the tunnel after you've finished using it. A tunnel can also become closed if it stayed open for longer than the specified tunnel duration. A tunnel cannot be reopened once closed. You can still duplicate a tunnel by opening the closed tunnel and then choosing Duplicate tunnel. Specify the tunnel duration that you want to use and then create the new tunnel.
-
To close an individual tunnel or multiple tunnels from the AWS IoT console, go to the Tunnels hub
, choose the tunnels that you want to close, and then choose Close tunnel. -
To close an individual tunnel or multiple tunnels using the AWS IoT API Reference API, use the CloseTunnel API operation.
aws iotsecuretunneling close-tunnel \
    --tunnel-id "01234567-89ab-0123-4c56-789a01234bcd"
-
-
Delete tunnel
You can delete a tunnel permanently from your AWS account.
Warning
Deletion actions are permanent and can't be undone.
-
To delete an individual tunnel or multiple tunnels from the AWS IoT console, go to the Tunnels hub
, choose the tunnels that you want to delete, and then choose Delete tunnel. -
To delete an individual tunnel or multiple tunnels using the AWS IoT API Reference API, use the CloseTunnel API operation. When using the API, set the
deleteflag totrue.aws iotsecuretunneling close-tunnel \ --tunnel-id "01234567-89ab-0123-4c56-789a01234bcd" --delete true
-
