Creating a custom vocabulary using a table
Using a table format is the preferred way to create your custom vocabulary. Vocabulary tables must consist of four columns (Phrase, SoundsLike, IPA, and DisplayAs), which can be included in any order:
| Phrase | SoundsLike | IPA | DisplayAs |
|---|---|---|---|
|
Required. Every row in your table must contain an entry in this column. Do not use spaces in this column. If your entry contains multiple words, separate each word with a hyphen (-). For example,
For acronyms, any pronounced letters must be separated by a period. The trailing period also needs to be pronounced. If your acronym is plural, you
must use a hyphen between the acronym and the 's'. For example, 'CLI' is If your phrase consists of both a word and an acronym, these two components must be
separated by a hyphen. For example, 'DynamoDB' is Do not include digits in this column; numbers must be spelled out. For example, 'VX02Q' is
|
|
|
Optional. Rows in this column can be left empty. You can use spaces in this column. Defines the how you want your entry to look in your transcription output. For example,
If a row in this column is empty, Amazon Transcribe uses the contents of the You can include digits ( |
Things to note when creating your table:
-
Your table must contain all four column headers (Phrase, SoundsLike, IPA, and DisplayAs). The
Phrasecolumn must contain an entry on each row. The ability to provide pronunciation inputs throughIPAandSoundsLikeis no longer supported and you may leave the column empty. Any values in these columns will be ignored. -
Each column must be TAB or comma (,) delineated; this applies to every row in your custom vocabulary file. If a row contains empty columns, you must still include a delineator (TAB or comma) for each column.
-
Spaces are only allowed within the
IPAandDisplayAscolumns. Do not use spaces to separate columns. -
IPAandSoundsLikeare no longer supported for Custom Vocabulary. Please leave the column empty. Any values in these column will be ignored. We will remove the support for this column in the future. -
The
DisplayAscolumn supports symbols and special characters (for example, C++). All other columns support the characters that are listed on your language's character set page. -
If you want to include numbers in the
Phrasecolumn, you must spell them out. Digits (0-9) are only supported in theDisplayAscolumn. -
You must save your table as a plaintext (*.txt) file in
LFformat. If you use any other format, such asCRLF, your custom vocabulary can't be processed. -
You must upload your custom vocabulary file into an Amazon S3 bucket and process it using
CreateVocabularybefore you can include it in a transcription request. Refer to Creating custom vocabulary tables for instructions.
Note
Enter acronyms, or other words whose letters should be pronounced individually, as single
letters separated by periods (A.B.C.). To enter the plural form
of an acronym, such as 'ABCs', separate the 's' from the acronym with a hyphen
(A.B.C.-s). You can use upper or lower case letters to define an
acronym. Acronyms are not supported in all languages; refer to
Supported languages and language-specific features.
Here is a sample custom vocabulary table (where [TAB]
represents a tab character):
Phrase[TAB]SoundsLike[TAB]IPA[TAB]DisplayAs
Los-Angeles[TAB][TAB][TAB]Los Angeles
Eva-Maria[TAB][TAB][TAB]
A.B.C.-s[TAB][TAB][TAB]ABCs
Amazon-dot-com[TAB][TAB][TAB]Amazon.com
C.L.I.[TAB][TAB][TAB]CLI
Andorra-la-Vella[TAB][TAB][TAB]Andorra la Vella
Dynamo-D.B.[TAB][TAB][TAB]DynamoDB
V.X.-zero-two[TAB][TAB][TAB]VX02
V.X.-zero-two-Q.[TAB][TAB][TAB]VX02Q
For visual clarity, here is the same table with aligned columns. Do not add spaces between columns in your custom vocabulary table; your table should look misaligned like the preceding example.
Phrase          [TAB]SoundsLike          [TAB]IPA                [TAB]DisplayAs
Los-Angeles     [TAB]                    [TAB]                   [TAB]Los Angeles
Eva-Maria       [TAB]                    [TAB]                   [TAB]
A.B.C.-s        [TAB]                    [TAB]                   [TAB]ABCs
amazon-dot-com  [TAB]                    [TAB]                   [TAB]amazon.com
C.L.I.          [TAB]                    [TAB]                   [TAB]CLI
Andorra-la-Vella[TAB]                    [TAB]                   [TAB]Andorra la Vella
Dynamo-D.B.     [TAB]                    [TAB]                   [TAB]DynamoDB
V.X.-zero-two   [TAB]                    [TAB]                   [TAB]VX02
V.X.-zero-two-Q.[TAB]                    [TAB]                   [TAB]VX02Q
Creating custom vocabulary tables
To process a custom vocabulary table for use with Amazon Transcribe, see the following examples:
-
Sign in to the AWS Management Console
. -
In the navigation pane, choose Custom vocabulary. This opens the Custom vocabulary page where you can view existing vocabularies or create a new one.
-
Select Create vocabulary.
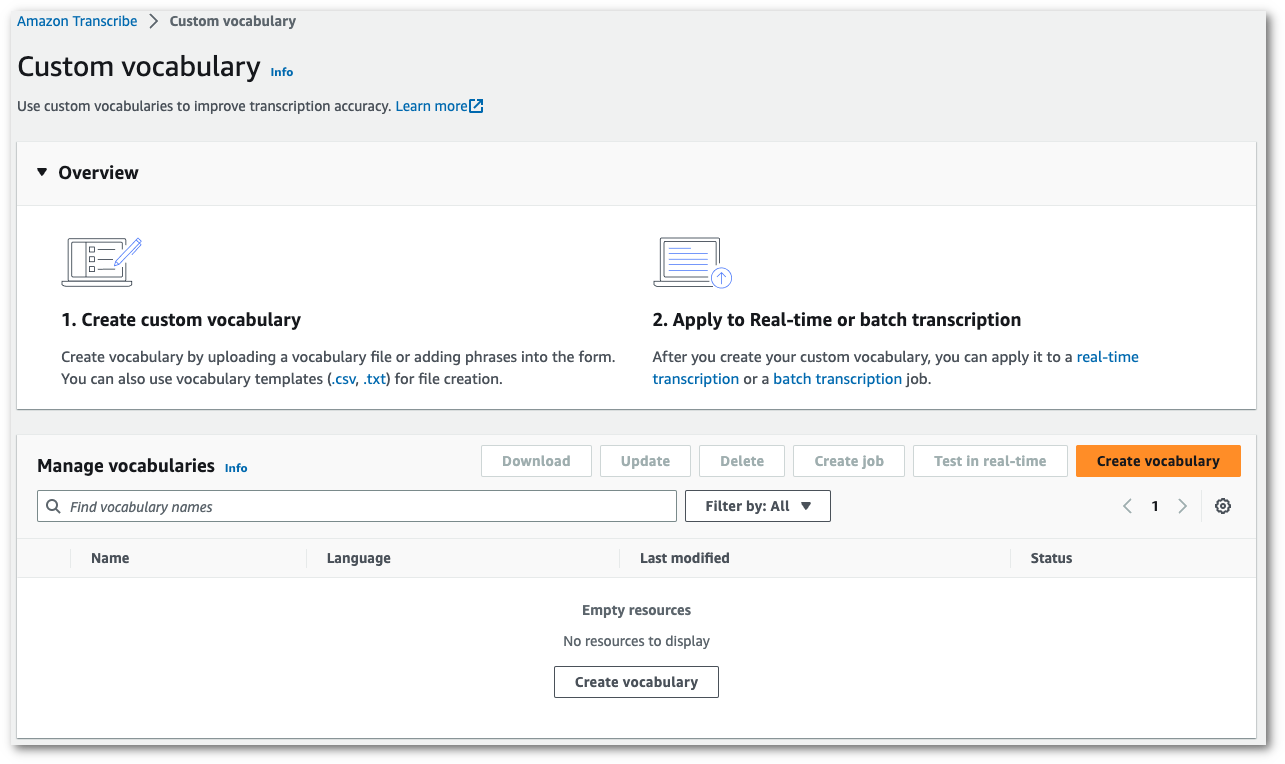
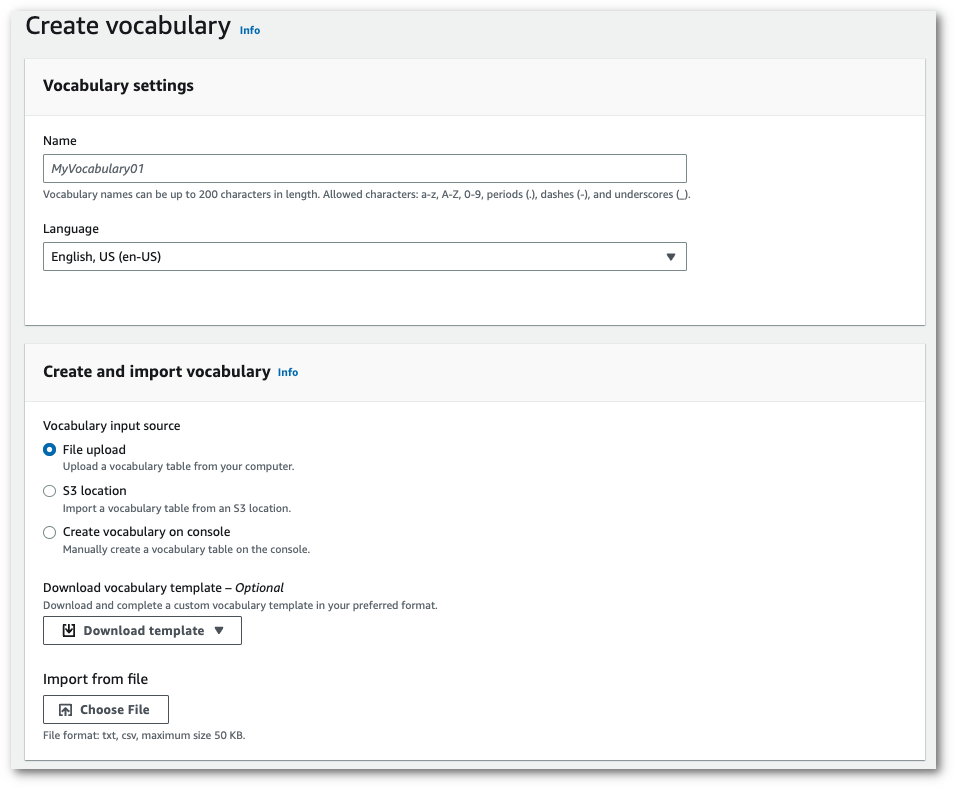
This takes you to the Create vocabulary page. Enter a name for your new custom vocabulary.
Here, you have three options:
-
Upload a txt or csv file from your computer.
You can either create your custom vocabulary from scratch or download a template to help you get started. Your vocabulary is then auto-populated in the View and edit vocabulary pane.
-
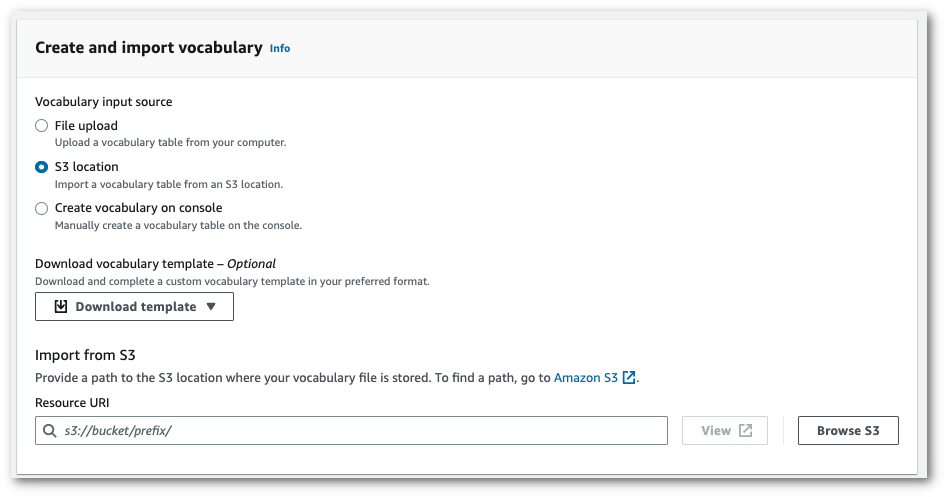
Import a txt or csv file from an Amazon S3 location.
You can either create your custom vocabulary from scratch or download a template to help you get started. Upload your finished vocabulary file to an Amazon S3 bucket and specify its URI in your request. Your vocabulary is then auto-populated in the View and edit vocabulary pane.
-
Manually create your vocabulary in the console.
Scroll to the View and edit vocabulary pane and select Add 10 rows. You can now manually enter terms.

-
-
You can edit your vocabulary the View and edit vocabulary pane. To make changes, click on the entry you want to modify.
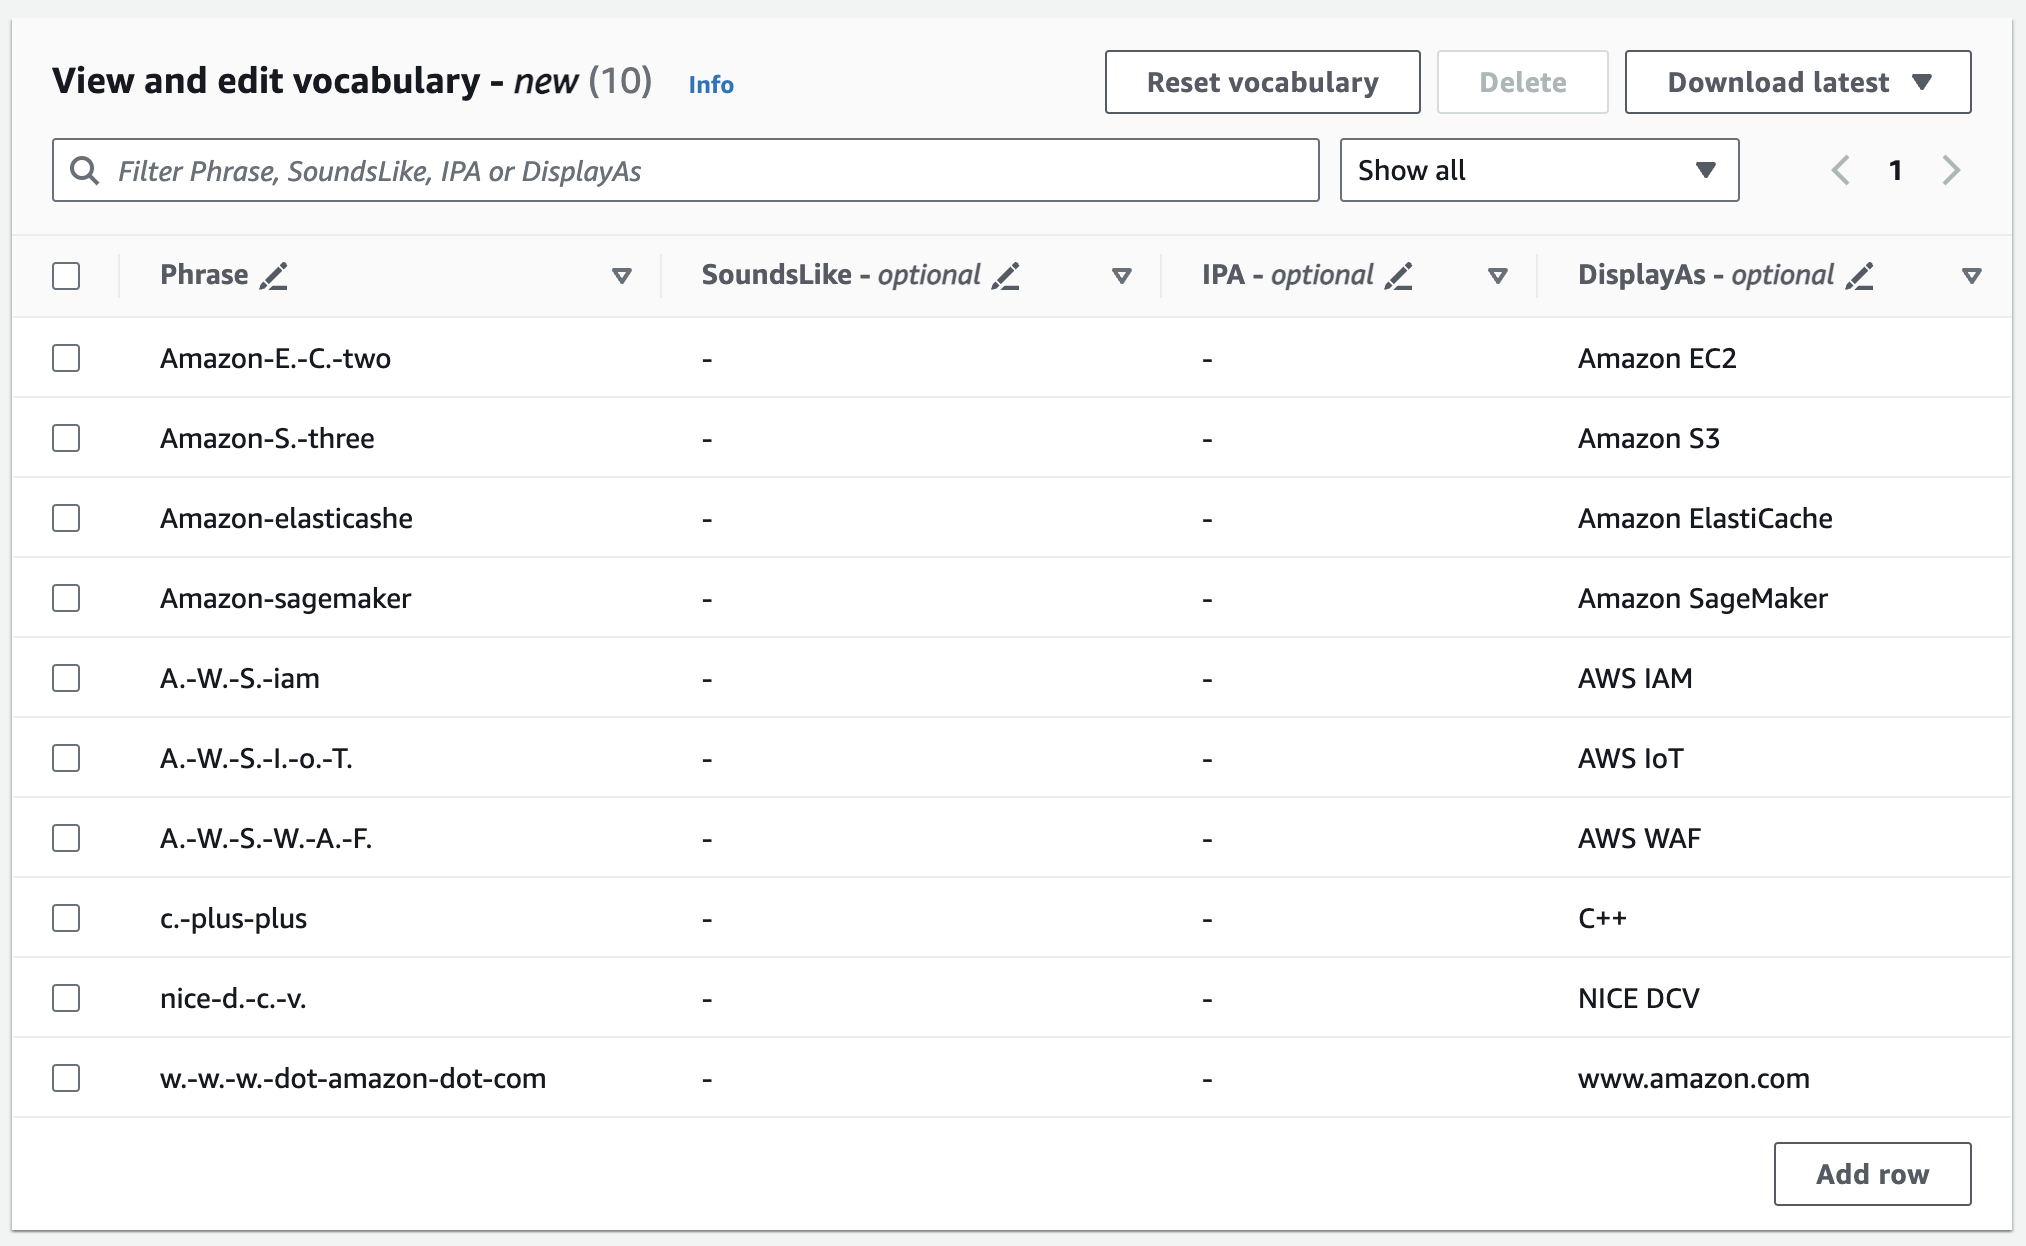
If you make an error, you get a detailed error message so you can correct any issues prior to processing your vocabulary. Note that if you don't correct all errors before selecting Create vocabulary, your vocabulary request fails.

Select the check mark (✓) to save your changes or the 'X' to discard your changes.
-
Optionally, add tags to your custom vocabulary. Once you have all fields completed and are happy with your vocabulary, select Create vocabulary at the bottom of the page. This takes you back to the Custom vocabulary page where you can view the status of your custom vocabulary. When the status changes from 'Pending' to 'Ready' your custom vocabulary can be used with a transcription.

-
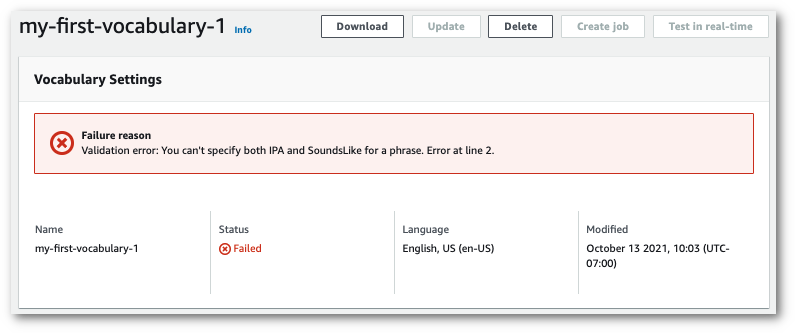
If the status changes to 'Failed', select the name of your custom vocabulary to go to its information page.
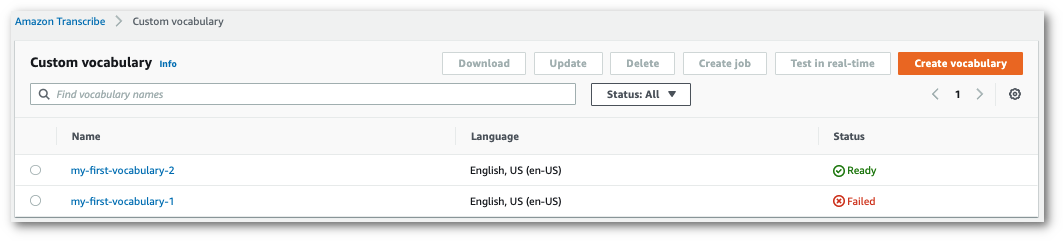
There is a Failure reason banner at the top of this page that provides information on why your custom vocabulary failed. Correct the error in your text file and try again.
This example uses the create-vocabulary command with a table-formatted vocabulary file. For more information, see CreateVocabulary.
To use an existing custom vocabulary in a transcription job, set the
VocabularyName in the Settings field when you call the
StartTranscriptionJob operation
or, from the AWS Management Console, choose the custom vocabulary from the dropdown list.
aws transcribe create-vocabulary \ --vocabulary-namemy-first-vocabulary\ --vocabulary-file-uri s3://amzn-s3-demo-bucket/my-vocabularies/my-vocabulary-file.txt \ --language-codeen-US
Here's another example using the create-vocabulary command, and a request body that creates your custom vocabulary.
aws transcribe create-vocabulary \
--cli-input-json file://filepath/my-first-vocab-table.json
The file my-first-vocab-table.json contains the following request body.
{
  "VocabularyName": "my-first-vocabulary",
  "VocabularyFileUri": "s3://amzn-s3-demo-bucket/my-vocabularies/my-vocabulary-table.txt",
  "LanguageCode": "en-US"
}
Once VocabularyState changes from PENDING to
READY, your custom vocabulary is ready to use with a transcription. To view the
current status of your custom vocabulary, run:
aws transcribe get-vocabulary \ --vocabulary-namemy-first-vocabulary
This example uses the AWS SDK for Python (Boto3) to create a custom vocabulary from a table
using the
create_vocabularyCreateVocabulary.
To use an existing custom vocabulary in a transcription job, set the
VocabularyName in the Settings field when you call the
StartTranscriptionJob operation
or, from the AWS Management Console, choose the custom vocabulary from the dropdown list.
For additional examples using the AWS SDKs, including feature-specific, scenario, and cross-service examples, refer to the Code examples for Amazon Transcribe using AWS SDKs chapter.
from __future__ import print_function
import time
import boto3
transcribe = boto3.client('transcribe', 'us-west-2')
vocab_name = "my-first-vocabulary"
response = transcribe.create_vocabulary(
    LanguageCode = 'en-US',
    VocabularyName = vocab_name,
    VocabularyFileUri = 's3://amzn-s3-demo-bucket/my-vocabularies/my-vocabulary-table.txt'
)

while True:
    status = transcribe.get_vocabulary(VocabularyName = vocab_name)
    if status['VocabularyState'] in ['READY', 'FAILED']:
        break
    print("Not ready yet...")
    time.sleep(5)
print(status)
Note
If you create a new Amazon S3 bucket for your custom vocabulary files, make sure the
IAM role making the CreateVocabulary
request has permissions to access this bucket. If the role doesn't have the correct permissions, your request
fails. You can optionally specify an IAM role within your request by including the
DataAccessRoleArn parameter. For more information on IAM roles and policies
in Amazon Transcribe, see Amazon Transcribe identity-based policy
examples.
