Mounting on Amazon EC2 with a DNS name
Note
Prior to mounting your file system, you need to add a rule to the mount target security group that allows inbound NFS access from the EC2 security group. For more information, see Using VPC security groups for Amazon EC2 instances and mount targets.
-
File system DNS name – Using the file system's DNS name is your simplest mounting option. The file system DNS name automatically resolves to the mount target’s IP address in the Availability Zone of the connecting Amazon EC2 instance. You can get the DNS name from the console, or if you have the file system ID, you can construct it using the following convention.
file-system-id.efs.aws-region.amazonaws.comNote
DNS resolution for file system DNS names requires that the Amazon EFS file system has a mount target in the same Availability Zone as the client instance.
Using the file system DNS name, you can mount a file system on your Amazon EC2 Linux instance with the following command.
sudo mount -t nfs -o nfsvers=4.1,rsize=1048576,wsize=1048576,hard,timeo=600,retrans=2,noresvportfile-system-id.efs.aws-region.amazonaws.com:/ /efs-mount-pointUsing the file system DNS name, you can mount a file system on your Amazon EC2 Mac instance running a supported macOS version (Big Sur, Monterey, Ventura) with the following command.
sudo mount -t nfs -o nfsvers=4.0,rsize=65536,wsize=65536,hard,timeo=600,retrans=2,noresvport,mountport=2049file-system-id.efs.aws-region.amazonaws.com:/ /efsImportant
You must use
mountport=2049in order to successfully connect to the EFS file system when mounting on EC2 Mac instances running support macOS versions.
-
Mount target DNS name – In December 2016, we introduced file system DNS names. We continue to provide a DNS name for each Availability Zone mount target for backward compatibility. The generic form of a mount target DNS name is as follows.
availability-zone.file-system-id.efs.aws-region.amazonaws.comNote
Mount target DNS name resolution across Availability Zones is supported.
In some cases, you might delete a mount target and then create a new one in the same Availability Zone. In such a case, the DNS name for that new mount target in that Availability Zone is the same as the DNS name for the old mount target.
You can view and copy the exact commands to mount your file system in the Attach dialog box.
To view the mount commands for your file system
In the Amazon EFS console, choose the file system that you want to mount to display its details page.
To display the mount commands to use for this file system, choose Attach in the upper right.
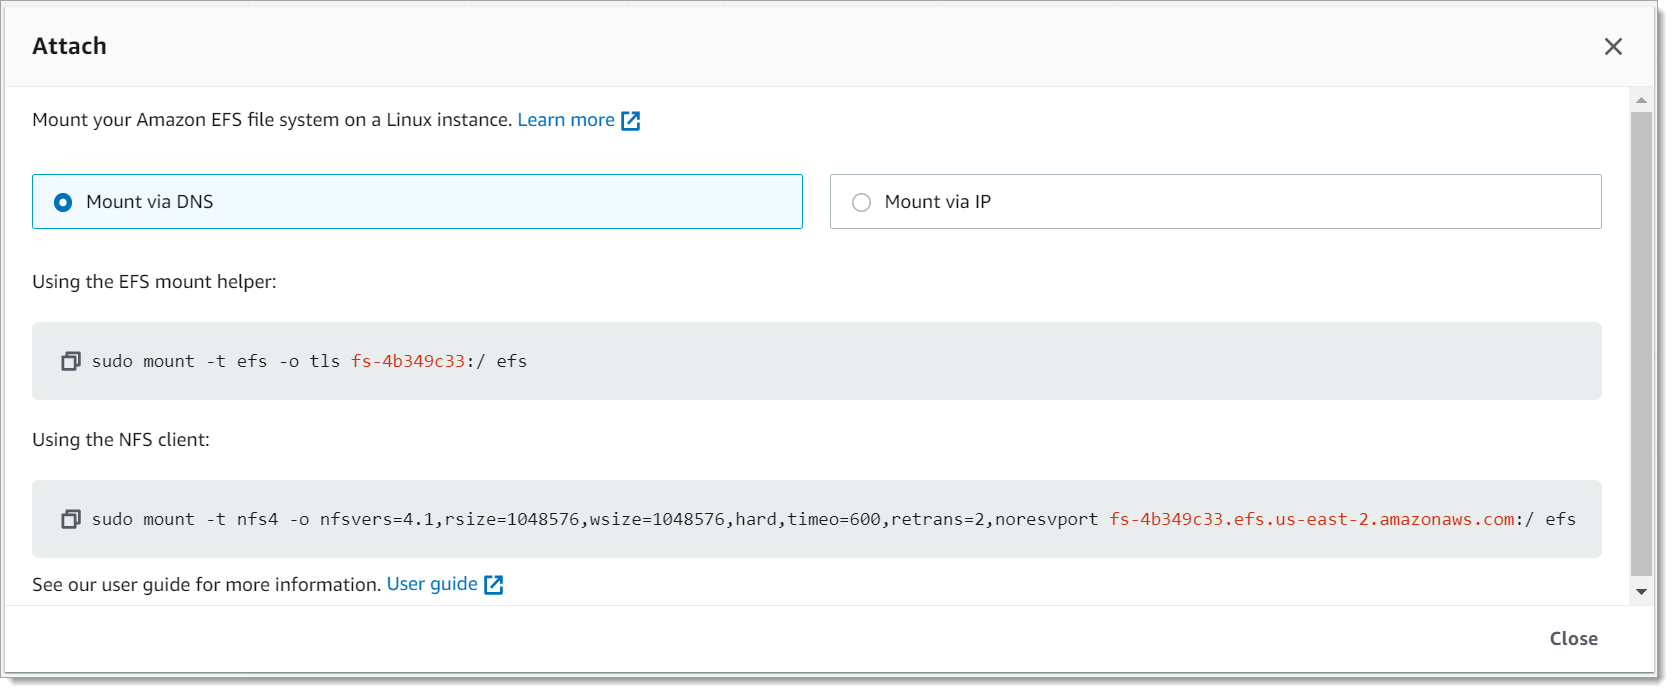
The Attach screen displays the exact commands to use for mounting the file system.
The default Mount via DNS view displays the command to mount the file system using the file system's DNS name when mounting with the EFS mount helper or an NFS client.
For a list of AWS Regions that support Amazon EFS, see Amazon Elastic File System in the AWS General Reference.
To be able to use a DNS name in the mount command, the following must be
true:
-
The connecting EC2 instance must be inside a VPC and must be configured to use the DNS server provided by Amazon. For information about Amazon DNS server, see DHCP Options Sets in the Amazon VPC User Guide.
-
The VPC of the connecting EC2 instance must have both DNS Resolution and DNS Hostnames enabled. For more information, see Viewing DNS Hostnames for Your EC2 Instance in the Amazon VPC User Guide.
-
The connecting EC2 instance must be inside the same VPC as the EFS file system. For more information on accessing and mounting a file system from another location or from a different VPC, see Walkthrough: Create and mount a file system on-premises with AWS Direct Connect and VPN and Walkthrough: Mount a File System from a Different VPC .
Note
We recommend that you wait 90 seconds after creating a mount target before you mount your file system. This wait lets the DNS records propagate fully in the AWS Region where the file system is.
