Set up a stage for a REST API in API Gateway
A stage is a named reference to a deployment, which is a snapshot of the API. You use a Stage to manage and optimize a particular deployment. For example, you can configure stage settings to enable caching, customize request throttling, configure logging, define stage variables, or attach a canary release for testing. The following section shows how to create and configure your stage.
Create a new stage
After the initial deployment, you can add more stages and associate them with existing deployments. You can use the API Gateway console to create a new stage, or you can choose an existing stage while deploying an API. In general, you can add a new stage to an API deployment before redeploying the API. To create a new stage using the API Gateway console, follow these steps:
Sign in to the API Gateway console at https://console.aws.amazon.com/apigateway
. Choose a REST API.
-
In the main navigation pane, choose Stages under an API.
-
From the Stages navigation pane, choose Create stage.
-
For Stage name, enter a name, for example,
prod.Note
Stage names can only contain alphanumeric characters, hyphens, and underscores. Maximum length is 128 characters.
-
(Optional). For Description, enter a stage description.
-
For Deployment, select the date and time of the existing API deployment you want to associate with this stage.
-
Under Additional settings, you can specify additional settings for your stage.
-
Choose Create stage.
Modify stage settings
After a successful deployment of an API, the stage is populated with default settings. You can use the console or the API Gateway REST API to change the stage settings, including API caching and logging. If you've modified the default endpoint of your REST API, when you update a stage, the modification is propagated to all stages of your API. The following steps show you how to do so using the Stage editor of the API Gateway console.
Sign in to the API Gateway console at https://console.aws.amazon.com/apigateway
. Choose a REST API.
-
In the main navigation pane, choose Stages under an API.
-
In the Stages pane, choose the name of the stage.
-
In the Stage details section, choose Edit.
(Optional) For Stage description, edit the description.
For Additional settings, you modify the following settings:
- Cache settings
-
To enable API caching for the stage, turn on Provision API cache. Then configure the Default method-level caching, Cache capacity, Encrypt cache data, Cache time-to-live (TTL), as well as any requirements for per-key cache invalidation.
Caching is not active until you turn on the default method-level caching or turn on the method-level cache for a specific method.
For more information about cache settings, see Cache settings for REST APIs in API Gateway.
Note
If you enable API caching for an API stage, your AWS account might be charged for API caching. Caching isn't eligible for the AWS Free Tier.
- Throttling settings
-
To set stage-level throttling targets for all of the methods associated with this API, turn on Throttling.
For Rate, enter a target rate. This is the rate, in requests per second, that tokens are added to the token bucket. The stage-level rate must not be more than the account-level rate as specified in Quotas for configuring and running a REST API in API Gateway.
For Burst, enter a target burst rate. The burst rate, is the capacity of the token bucket. This allows more requests through for a period of time than the target rate. This stage-level burst rate must not be more than the account-level burst rate as specified in Quotas for configuring and running a REST API in API Gateway.
Note
Throttling rates are not hard limits, and are applied on a best-effort basis. In some cases, clients can exceed the targets that you set. Don’t rely on throttling to control costs or block access to an API. Consider using AWS Budgets to monitor costs and AWS WAF to manage API requests.
- Firewall and certificate settings
To associate an AWS WAF web ACL with the stage, select a web ACL from the Web ACL dropdown list. If desired, choose Block API Request if WebACL cannot be evaluated (Fail- Close).
To select a client certificate for your stage, select a certificate from the Client certificate dropdown menu.
Choose Continue.
Review your changes and choose Save changes.
-
To enable Amazon CloudWatch Logs for all of the methods associated with this stage of this API Gateway API, in the Logs and tracing section, choose Edit.
Note
To enable CloudWatch Logs, you must also specify the ARN of an IAM role that enables API Gateway to write information to CloudWatch Logs on behalf of your user. To do so, choose Settings from the APIs main navigation pane. Then, for CloudWatch log role, enter the ARN of an IAM role.
For common application scenarios, the IAM role could attach the managed policy of AmazonAPIGatewayPushToCloudWatchLogs.
The IAM role must also contain the following trust relationship statement:
For more information about CloudWatch, see the Amazon CloudWatch User Guide.
-
Select a logging level from the CloudWatch Logs dropdown menu. The logging levels are the following:
-
Off – Logging is not turned on for this stage.
-
Errors only – Logging is enabled for errors only.
-
Errors and info logs – Logging is enabled for all events.
-
Select Data tracing to have API Gateway report to CloudWatch the data trace logging for your stage. This can be useful to troubleshoot APIs, but can result in logging sensitive data.
Note
We recommend that you don't use Data tracing for production APIs.
-
Select Detailed metrics to have API Gateway report to CloudWatch the API metrics of
API calls,Latency,Integration latency,400 errors, and500 errors. For more information about CloudWatch, see the Basic monitoring and detailed monitoring in the Amazon CloudWatch User Guide.Important
Your account is charged for accessing method-level CloudWatch metrics, but not the API-level or stage-level metrics.
To enable access logging to a destination, turn on Custom access logging.
-
For Access log destination ARN, enter the ARN of a log group or a Firehose stream.
The ARN format for Firehose is
arn:aws:firehose:. The name of your Firehose stream must be{region}:{account-id}:deliverystream/amazon-apigateway-{your-stream-name}amazon-apigateway-.{your-stream-name} -
In Log format, enter a log format. To learn more about example log formats, see CloudWatch log formats for API Gateway.
-
To enable AWS X-Ray tracing for the API stage, select X-Ray tracing. For more information, see Trace user requests to REST APIs using X-Ray in API Gateway.
-
Choose Save changes. Redeploy your API for the new settings to take effect.
Override stage-level settings
After you customize the stage-level settings, you can override them for each API method. Some of these options might result in additional charges to your AWS account.
To configure method overrides, expand the stage under the secondary navigation pane, and then choose a method.
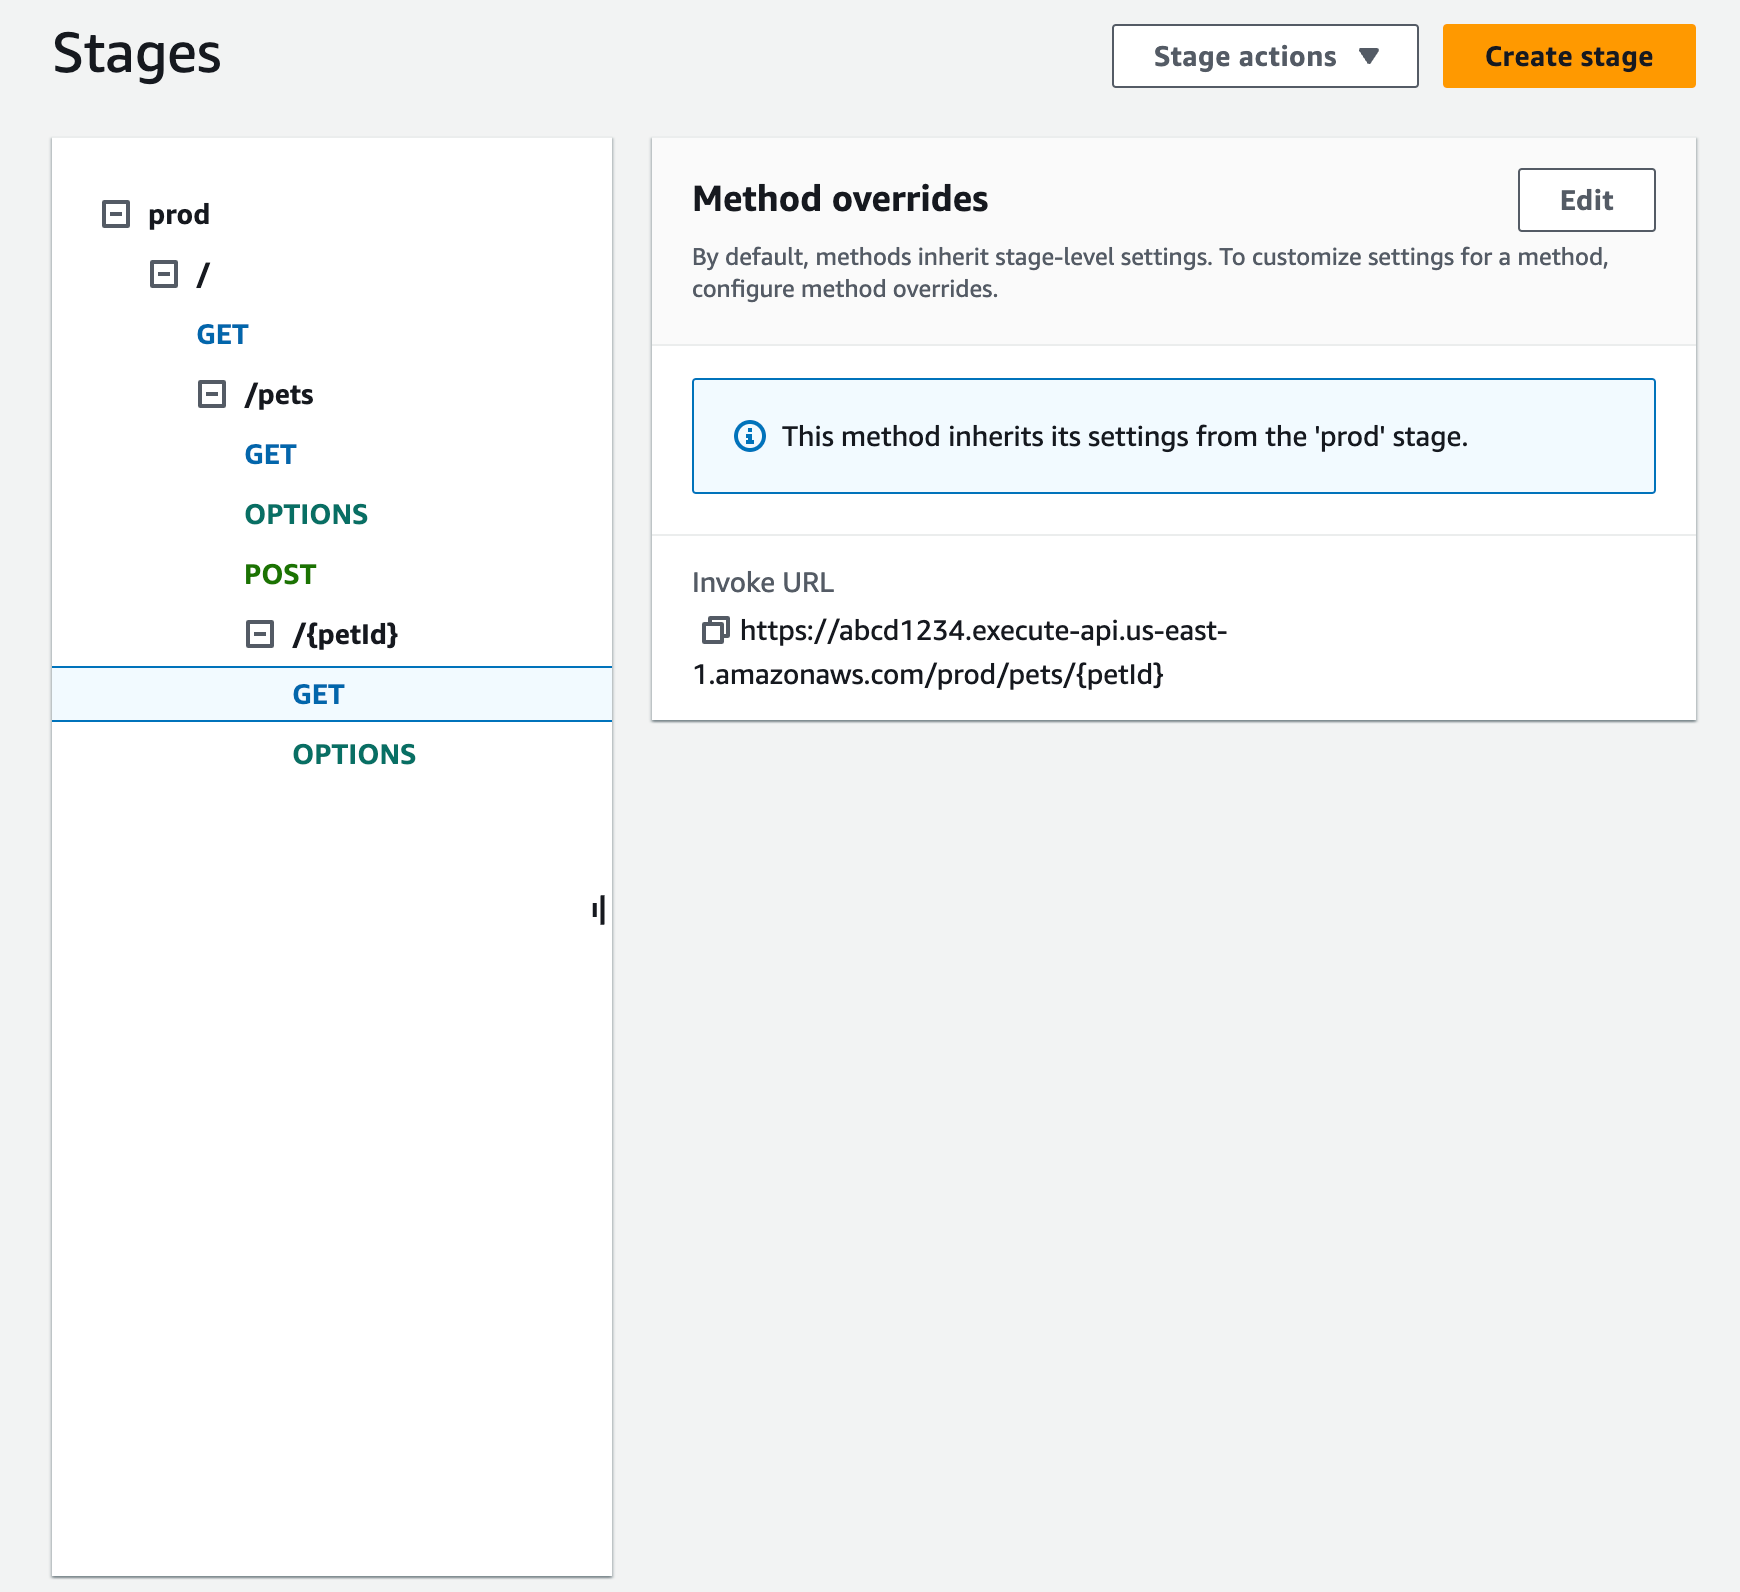
For Method overrides, choose Edit.
To turn on method-level CloudWatch settings, for CloudWatch Logs, select a logging level.
To turn on data trace logging for your method, select Data tracing.
Note
We recommend that you don't use Data tracing for production APIs.
To turn on method-level detailed metrics, select Detailed metrics. Your account is charged for accessing method-level CloudWatch metrics, but not the API-level or stage-level metrics.
To turn on method-level throttling, select Throttling. Enter the appropriate method-level options. To learn more about throttling, see Throttle requests to your REST APIs for better throughput in API Gateway.
To configure the method-level cache, select Enable method cache. If you change the default method-level caching setting in the Stage details, it doesn't affect this setting.
Choose Save.
