AWS Cloud9 is no longer available to new customers. Existing customers of
AWS Cloud9 can continue to use the service as normal.
Learn more
Working with AWS Toolkit
You can navigate and interact with AWS services using the AWS Toolkit through the AWS Explorer window.
Why use the AWS Toolkit?
The AWS Toolkit is an extension for the AWS Cloud9 integrated development environment (IDE). You can access and work with a wide range of AWS services through this extension. The AWS Toolkit replaces the functionality that's provided by the Lambda plugin for AWS Cloud9. For more information, see Disabling AWS Toolkit.
Important
AWS Toolkit support is an integrated feature of AWS Cloud9. Currently, you can't customize the AWS Cloud9 IDE with third-party extensions.
Warning
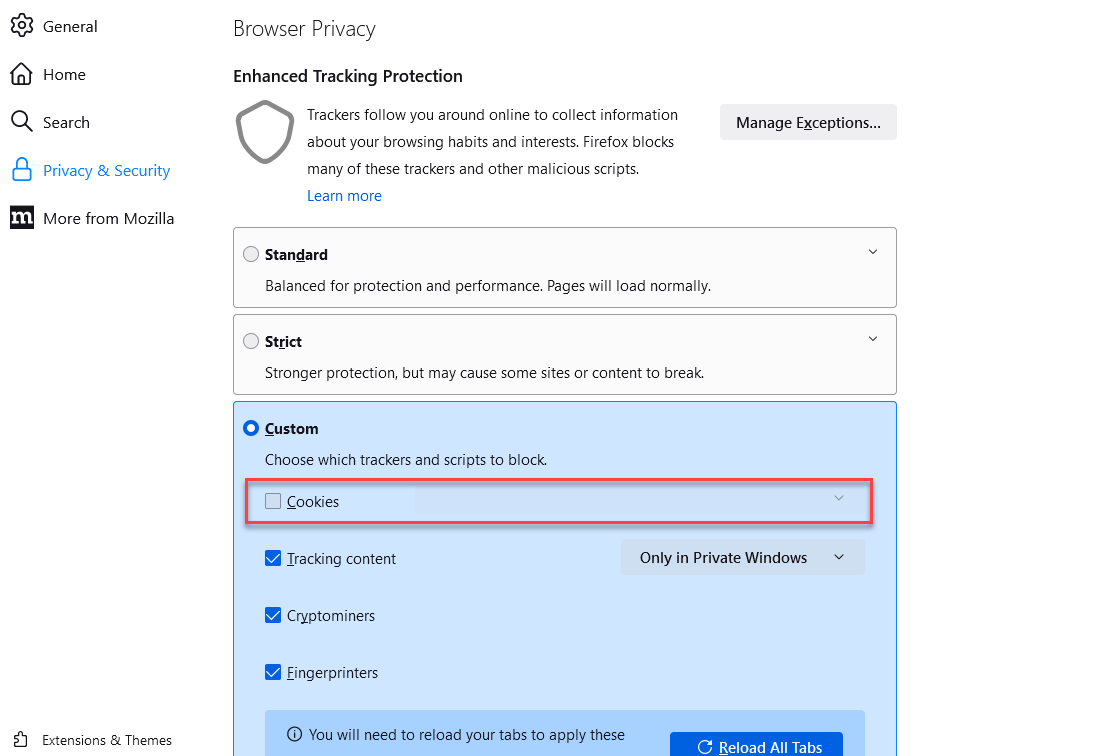
If you are using Mozilla Firefox as your preferred browser with AWS Cloud9 IDE, there is a 3rd party cookie setting which prevents AWS Cloud9 webview and AWS Toolkits from working correctly in the browser. As a workaround to this issue, you must ensure that you have not blocked Cookies in the Privacy & Security section of your browser settings, as displayed in the image below.
At present, the following AWS services and resources can be accessed through the AWS Toolkit extension:
Enabling AWS Toolkit
If the AWS Toolkit isn't available in your environment, you can enable it in the Preferences tab.
To enable the AWS Toolkit
-
Choose AWS Cloud9, Preferences on the menu bar.
-
On the Preferences tab, in the side navigation pane, choose AWS Settings.
-
In the AWS Resources pane, enable AWS Toolkit so that it displays a check mark on a green background.
When you enable the AWS Toolkit, the integrated development environment (IDE) refreshes to show the updated Enable AWS Toolkit setting. The AWS Toolkit option at the side of the IDE below the Environment option also appears.
Important
If your AWS Cloud9 environment's EC2 instance doesn't have access to the internet (that is, no outbound traffic allowed), a message might display after you enable AWS Toolkit and relaunch the IDE. This message states that the dependencies that are required by AWS Toolkit couldn't be downloaded. If this is the case, you also can't use the AWS Toolkit.
To fix this issue, create a VPC endpoint for Amazon S3. This grants access to an Amazon S3 bucket in your AWS Region that contains the dependencies that are required to keep your IDE up to date.
For more information, see Configuring VPC endpoints for Amazon S3 to download dependencies.
Managing access credentials for AWS Toolkit
AWS Toolkit interacts with a wide range of AWS services. To manage access control, make sure that the IAM entity for your AWS Toolkit service has the necessary permissions for this range of services. As a quick start, use AWS managed temporary credentials to obtain the necessary permission. These managed credentials work by granting your EC2 environment access to AWS services on behalf of an AWS entity, such as an IAM user.
However, if you've launched your development environment's EC2 instance into a private subnet, AWS managed temporary credentials aren't available to you. So, as an alternative, you can allow AWS Toolkit to access your AWS services by manually creating your own set of credentials. This set is called a profile. Profiles feature long-term credentials called access keys. You can get these access keys from the IAM console.
Create a profile to provide access credential for AWS Toolkit
-
To get your access keys (consisting of an access key ID and secret access key), go to the IAM console at https://console.aws.amazon.com/iam
. -
Choose Users from the navigation bar and then choose your AWS user name (not the check box).
-
Choose the Security credentials tab, and then choose Create access key.
Note
If you already have an access key but you can't access your secret key, make the old key inactive and create a new one.
-
In the dialog box that shows your access key ID and secret access key, choose Download .csv file to store this information in a secure location.
-
After you downloaded your access keys, launch an AWS Cloud9 environment and start a terminal session by choosing Window, New Terminal.
-
In the terminal window, run the following command.
aws configure --profile toolkituserIn this case,
toolkituseris the profile name being used, but you can choose your own. -
At the command line, enter the
AWS Access Key IDandAWS Secret Access Keythat you previously downloaded from the IAM console.-
For
Default region name, specify an AWS Region (for example,us-east-1). -
For
Default output format, specify a file format (for example,json).
Note
For information about the options for configuring a profile, see Configuration basics in the AWS Command Line Interface User Guide.
-
-
After you created your profile, launch the AWS Toolkit, go to the AWS Toolkit menu, and choose Connect to AWS.
-
For the Select an AWS credential profile field, choose the profile that you just created in the terminal (for example,
profile:toolkituser).
If the selected profile contains valid access credentials, the AWS Explorer pane refreshes to display the AWS services that you can now access.
Using IAM roles to grant permissions to applications on EC2 instances
You can also use an IAM role to manage temporary credentials for applications that run on an EC2 instance. The role supplies temporary permissions that applications can use when they make calls to other AWS resources. When you launch an EC2 instance, you specify an IAM role to associate with the instance. Applications that run on the instance can then use the role-supplied temporary credentials when making API requests against AWS services.
After you created the role, assign this role and its associated permission to the instance by creating an instance profile. The instance profile is attached to the instance and can provide the role's temporary credentials to an application that runs on the instance.
For more information, see Using an IAM role to grant permissions to applications running on Amazon EC2 instances in the IAM User Guide.
Identifying AWS Toolkit components
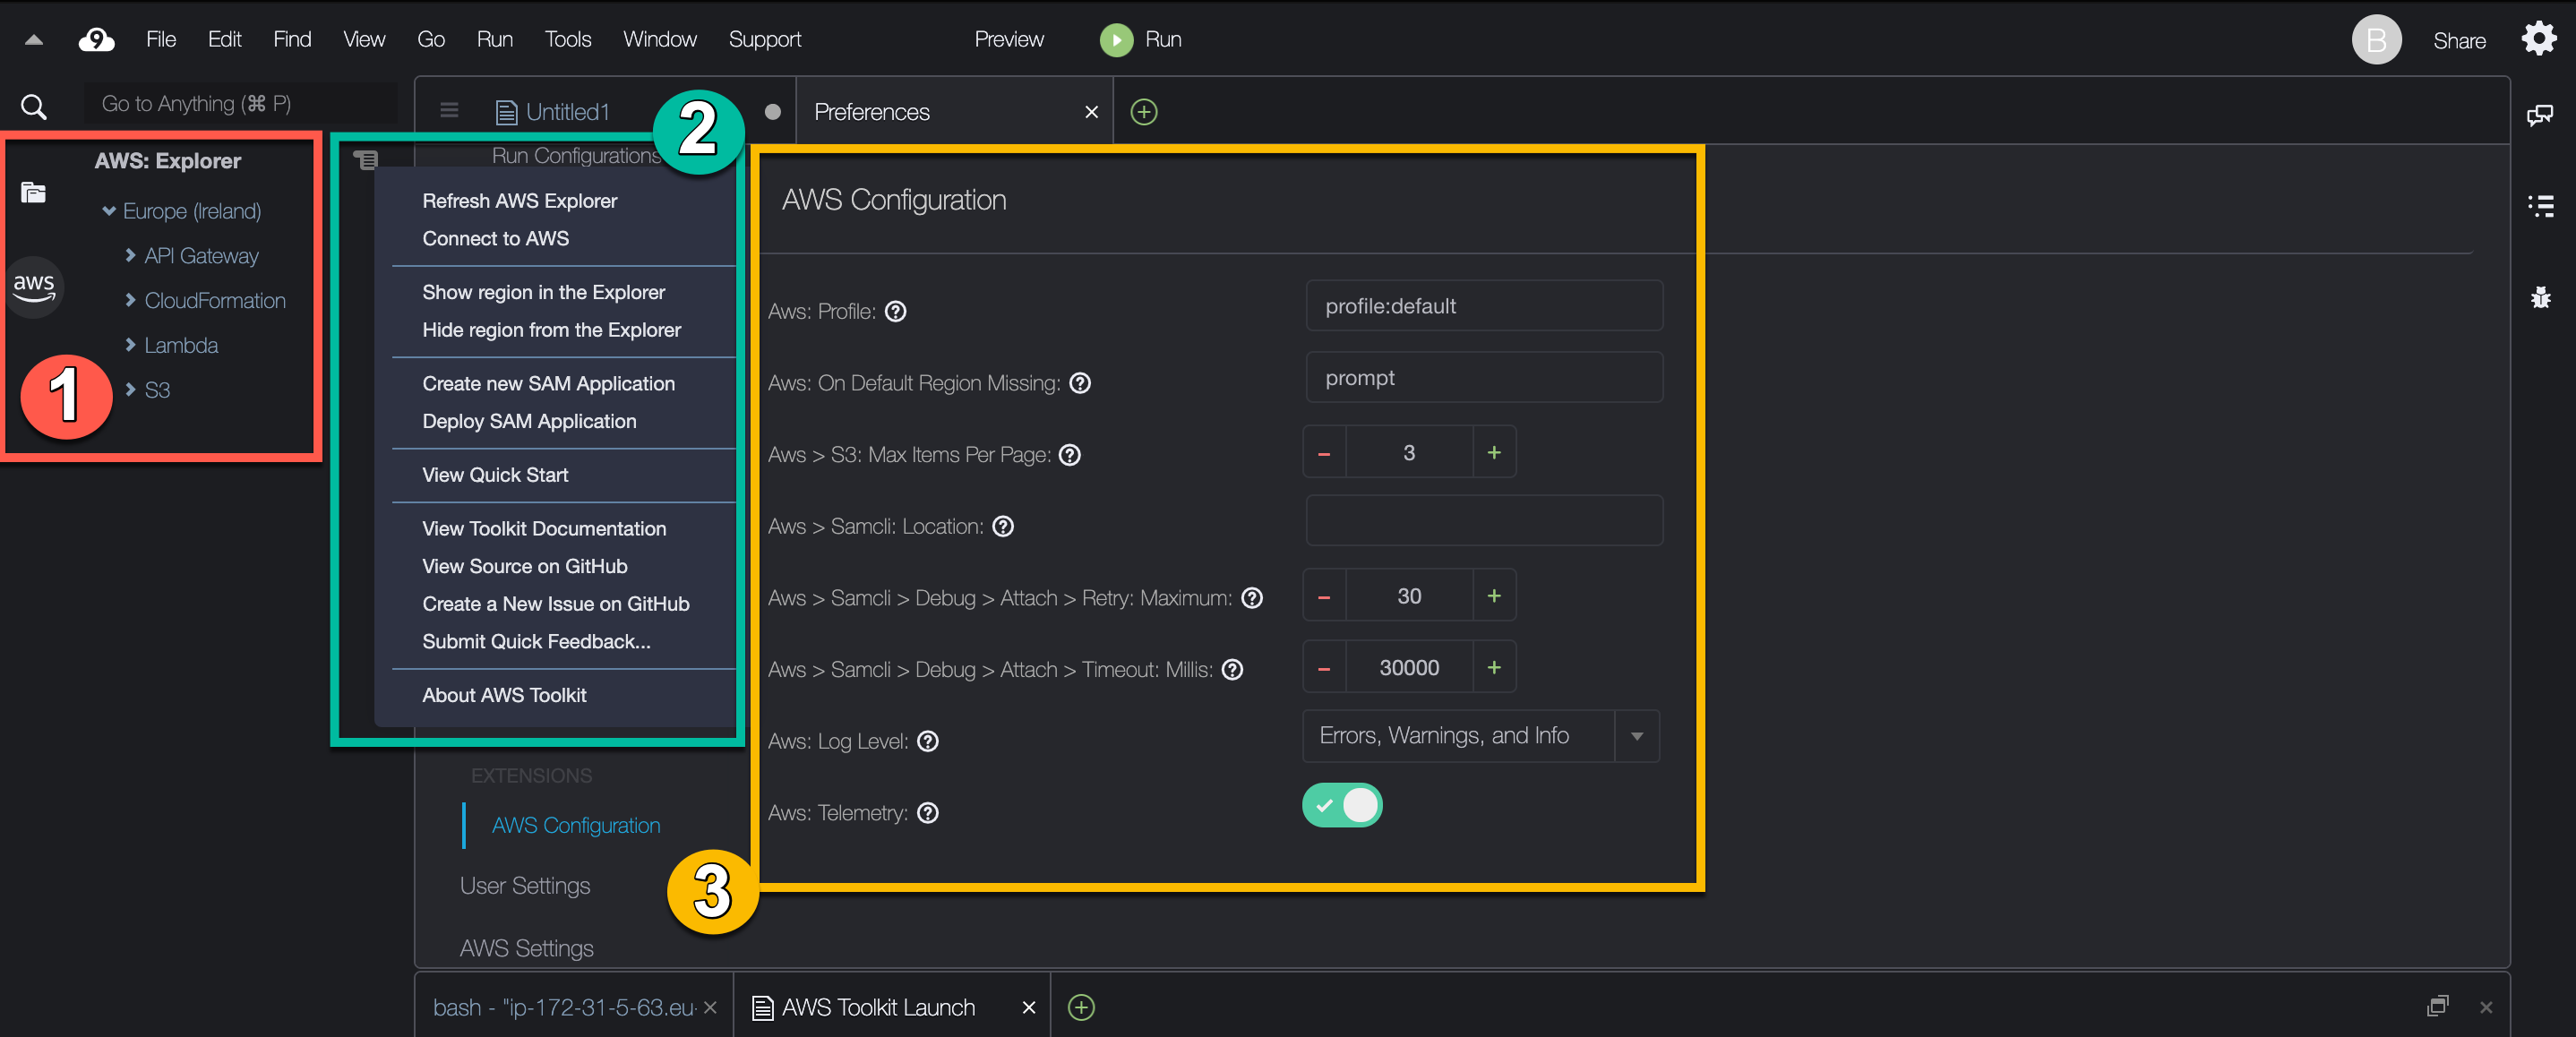
The following screenshot shows three key UI components of the AWS Toolkit.
-
AWS Explorer window: Used to interact with the AWS services that are accessible through the Toolkit. You can toggle between showing and hiding the AWS Explorer using the AWS option at the left side of the integrated development environment (IDE). For more about using this interface component and accessing AWS services for different AWS Regions, see Using AWS Explorer to work with services and resources in multiple Regions.
-
Toolkit menu: Used to manage connections to AWS, customize the display of the AWS Explorer window, create and deploy serverless applications, work with GitHub repositories, and access documentation. For more information, see Accessing and using the AWS Toolkit menu.
-
AWS Configuration pane: Used to customize the behavior of AWS services that you interact with using the Toolkit. For more information, see Modifying AWS Toolkit settings using the AWS Configuration pane.
Disabling AWS Toolkit
You can disable the AWS Toolkit in the Preferences tab.
To disable the AWS Toolkit
-
Choose AWS Cloud9, Preferences on the menu bar.
-
On the Preferences tab, in the side navigation pane, choose AWS Settings.
-
In the AWS Resources pane, turn off AWS AWS Toolkit.
When you disable the AWS Toolkit, the integrated development environment (IDE) refreshes to remove the AWS Toolkit option at the side of the IDE below the Environment option.
AWS Toolkit topics
