Extend the file system after resizing an Amazon EBS volume
After you increase the size of an EBS
volume, you must extend the partition and file system to the new, larger size. You can
do this as soon as the volume enters the optimizing state.
Before you begin
-
Create a snapshot of the volume, in case you need to roll back your changes. For more information, see Create Amazon EBS snapshots.
-
Confirm that the volume modification succeeded and that it is in the
optimizingorcompletedstate. For more information, see Monitor the progress of Amazon EBS volume modifications. -
Ensure that the volume is attached to the instance and that it is formatted and mounted. For more information, see Format and mount an attached volume.
-
(Linux instances only) If you are using logical volumes on the Amazon EBS volume, you must use Logical Volume Manager (LVM) to extend the logical volume. For instructions about how to do this, see the Extend the LV section in the article How do I use LVM to create a logical volume on an EBS volume's partition?
.
Note
The following instructions walk you through the process of extending XFS and Ext4 file systems for Linux. For information about extending a different file system, see its documentation.
Before you can extend a file system on Linux, you must extend the partition, if your volume has one.
Extend the file system of EBS volumes
Use the following procedure to extend the file system for a resized volume.
Note that device and partition naming differs for Xen instances and instances built on the Nitro System. To determine whether your instance is Xen-based or Nitro-based, see Amazon EC2 hypervisor type.
To extend the file system of EBS volumes
-
Resize the partition, if needed. To do so:
-
Check whether the volume has a partition. Use the lsblk command.
-
If the volume has a partition, continue to the next step (2b).
-
If the volume has no partitions, skip steps 2b, 2c, and 2d, and continue to step 3.
Troubleshooting tip
If you do not see the volume in the command output, ensure that the volume is attached to the instance, and that it is formatted and mounted.
-
-
Check whether the partition needs to be extended. In the lsblk command output from the previous step, compare the partition size and the volume size.
-
If the partition size is smaller than the volume size, continue to the next step (2c).
-
If the partition size is equal to the volume size, the partition does not need to be extended - skip steps 2c and 2d, and continue to step 3.
Troubleshooting tip
If the volume still reflects the original size, confirm that the volume modification succeeded.
-
-
Extend the partition. Use the growpart command and specify the device name and the partition number.
Troubleshooting tips
-
mkdir: cannot create directory ‘/tmp/growpart.31171’: No space left on device FAILED:
                      failed to make temp dir
: Indicates that there is not enough free disk space on the volume for growpart to create the temporary directory it needs to perform the resize. Free up some disk space and then try again. -
must supply partition-number: Indicates that you specified an incorrect partition. Use the lsblk command to confirm the partition name, and ensure that you enter a space between the device name and the partition number. -
NOCHANGE: partition 1 is size 16773087. it cannot be grown: Indicates that the partition already extends the entire volume and can't be extended. Confirm that the volume modification succeeded.
-
-
Verify that the partition has been extended. Use the lsblk command. The partition size should now be equal to the volume size.
-
-
Extend the file system.
-
Get the name, size, type, and mount point for the file system that you need to extend. Use the df -hT or lsblk -f command.
-
If the file system size is smaller than the volume size, continue to the next step (3b).
-
If the file system size is equal to the volume size, then it does not need to be extended. In this case, skip the remaining steps - the partition and file system have been extended to the new volume size.
-
-
The commands to extend the file system differ depending on the file system type. Choose the following correct command based on the file system type that you noted in the previous step.
-
[XFS file system] Use the xfs_growfs command and specify the mount point of the file system that you noted in the previous step.
Troubleshooting tips
-
xfs_growfs: /data is not a mounted XFS filesystem: Indicates that you specified the incorrect mount point, or the file system is not XFS. To verify the mount point and file system type, use the df -hT command. -
data size unchanged, skipping: Indicates that the file system already extends the entire volume. If the volume has no partitions, confirm that the volume modification succeeded. If the volume has partitions, ensure that the partition was extended as described in step 2.
-
-
[Ext4 file system] Use the resize2fs command and specify the name of the file system that you noted in the previous step.
Troubleshooting tips
-
resize2fs: Bad magic number in super-block while trying to open /dev/xvda1: Indicates that the file system is not Ext4. To verify file the system type, use the df -hT command. -
open: No such file or directory while opening /dev/xvdb1: Indicates that you specified an incorrect partition. To verify the partition, use the df -hT command. -
The filesystem is already 3932160 blocks long. Nothing to
                            do!
: Indicates that the file system already extends the entire volume. If the volume has no partitions, confirm that the volume modification succeeded. If the volume has partitions, ensure that the partition was extended, as described in step 2.
-
-
[Other file system] See the documentation for your file system for instructions.
-
-
Verify that the file system has been extended. Use the df -hT command and confirm that the file system size is equal to the volume size.
-
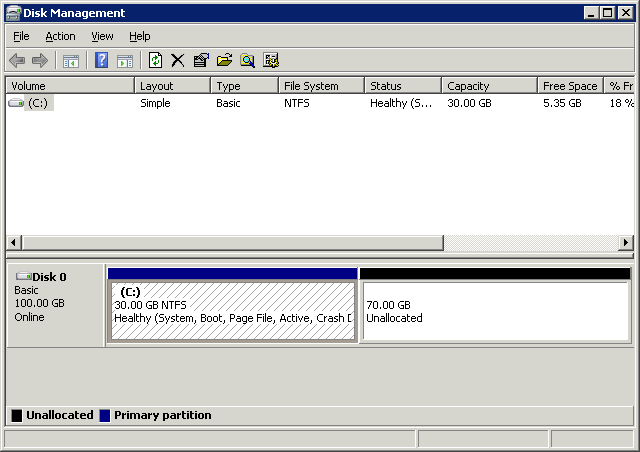
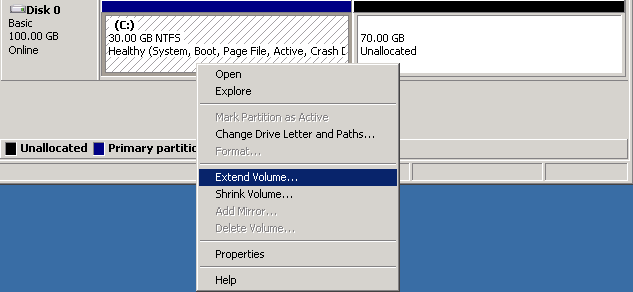
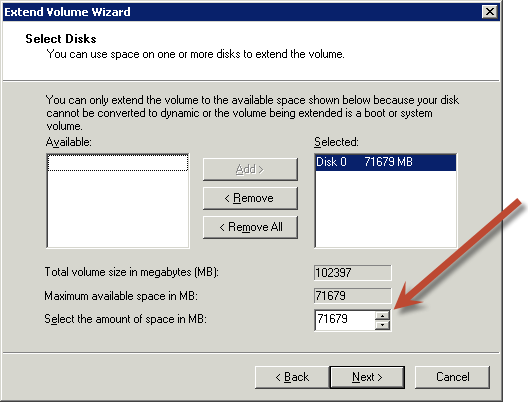
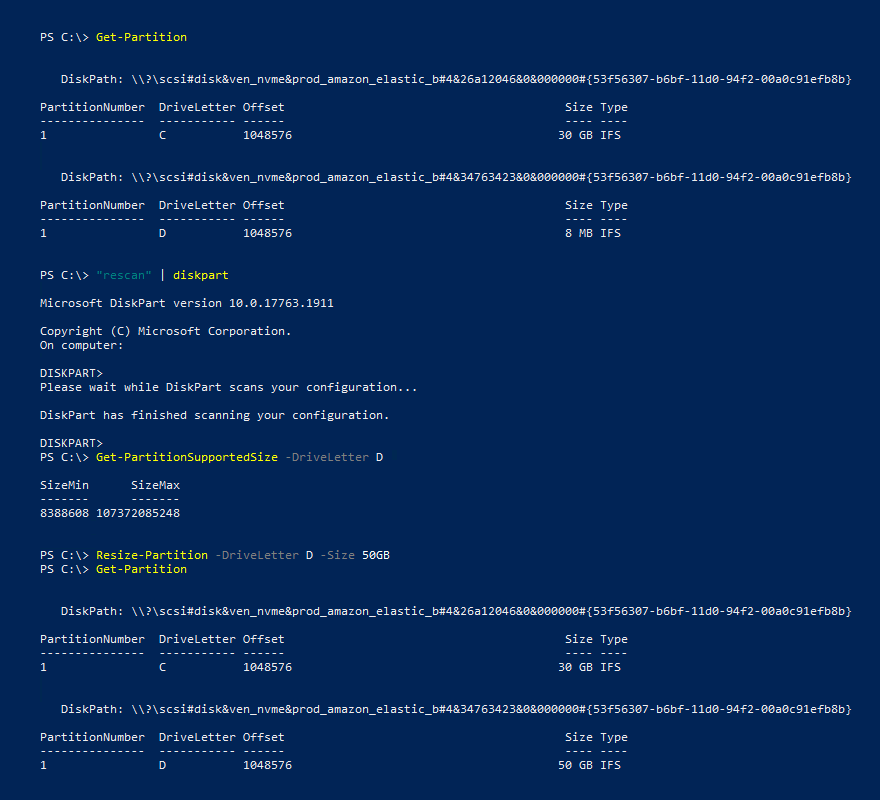
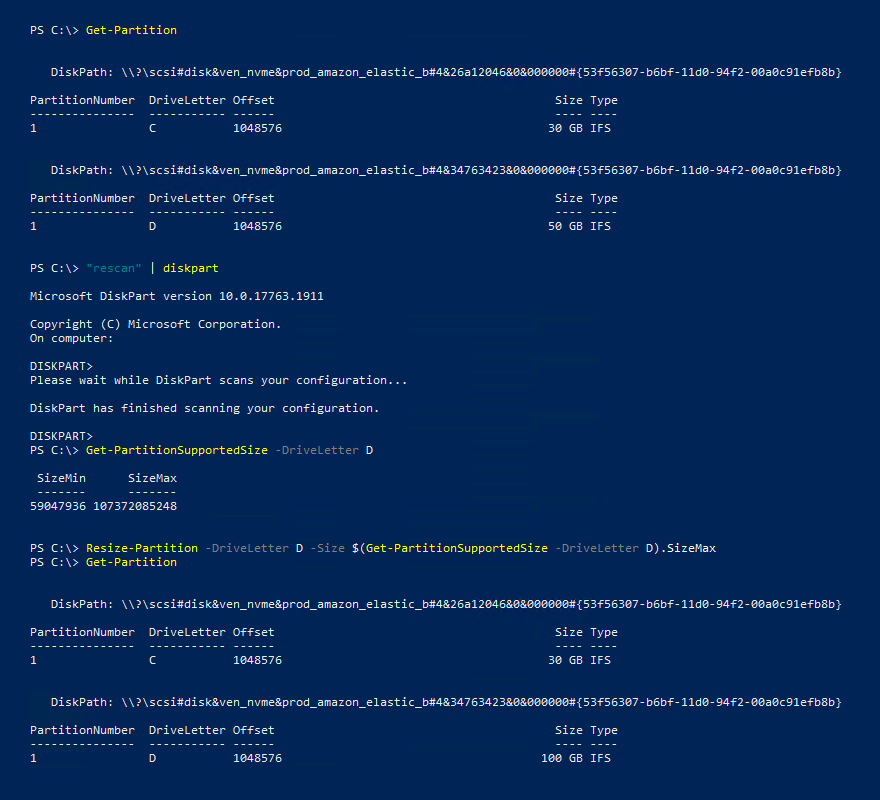
Use one of the following methods to extend the file system on a Windows instance.
