Edit server details
After you create an AWS Transfer Family server, you can edit the server configuration.
Topics
To edit a server's configuration
-
Open the AWS Transfer Family console at https://console.aws.amazon.com/transfer/
. -
In the left navigation pane, choose Servers.
-
Choose the identifier in the Server ID column to see the Server details page, shown following.
You can change the server's properties on this page by choosing Edit:
-
To change the protocols, see Edit the file transfer protocols.
-
For the identity provider, you can now change between any identity provider types (service-managed, AWS Directory Service, or custom identity provider). For details about changing identity provider types and the required information for each transition, see Edit identity provider configuration.
-
To change the endpoint type or custom hostname, see Edit the server endpoint.
-
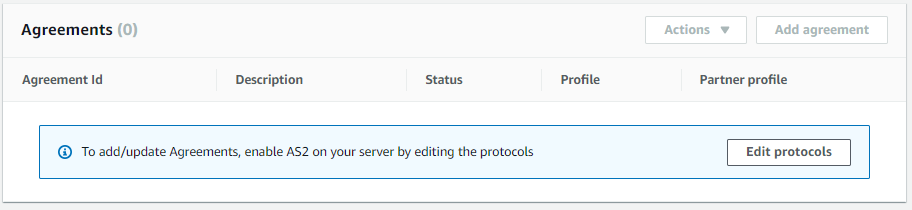
To add an agreement, you need to first add AS2 as a protocol to your server. For details, see Edit the file transfer protocols.
-
To manage host keys for your server, see Manage host keys for your SFTP-enabled server.
-
Under Additional details, you can edit the following information:
-
To change the logging role, see Edit your logging configuration.
-
To change the security policy, see Edit the security policy.
-
To change the server host key, see Manage host keys for your SFTP-enabled server.
-
To change the managed workflow for your server, see Change the managed workflow for your server.
-
To edit the display banners for your server, see Change the display banners for your server.
-
-
Under Additional configuration, you can edit the following information:
-
SetStat option: enable this option to ignore the error that is generated when a client attempts to use
SETSTATon a file you are uploading to an Amazon S3 bucket. For additional details, see theSetStatOptiondocumentation in the ProtocolDetails topic. -
TLS session resumption: provides a mechanism to resume or share a negotiated secret key between the control and data connection for an FTPS session. For additional details, see the
TlsSessionResumptionModedocumentation in the ProtocolDetails topic. -
Passive IP: indicates passive mode, for FTP and FTPS protocols. Enter a single IPv4 address, such as the public IP address of a firewall, router, or load balancer. For additional details, see the
PassiveIpdocumentation in the ProtocolDetails topic.Note
Avoid placing Network Load Balancers (NLBs) or NAT gateways in front of AWS Transfer Family servers. This configuration increases costs and can cause performance issues. For more details, see Avoid placing NLBs and NATs in front of AWS Transfer Family servers
-
-
To start or stop your server, see Put your server online or offline.
-
To delete a server, see Delete a server.
-
To edit a user's properties, see Managing access controls.


Note
The server host key Description and Date imported values are new as of September 2022. These values were introduced to support the multiple host keys feature. This feature required migration of any single host keys that were in use before the introduction of multiple host keys.
The Date imported value for a migrated server host key is set to the last modified date for the server. That is, the date that you see for your migrated host key corresponds to the date that you last modified the server in any way, before the server host key migration.
The only key that was migrated is your oldest or only server host key. Any additional keys have their actual date from when you imported them. Additionally, the migrated key has a description that makes it easy to identify it as having been migrated.
The migration occurred between September 2 and September 13. The actual migration date within this range depends on the Region of your server.


-
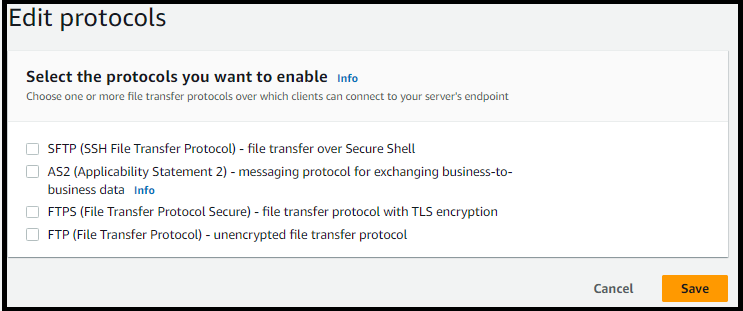
Edit the file transfer protocols
On the AWS Transfer Family console, you can edit the file transfer protocol. The file transfer protocol connects the client to your server's endpoint.
To edit the protocols
-
On the Server details page, choose Edit next to Protocols.
-
On the Edit protocols page, select or clear the protocol check box or check boxes to add or remove the following file transfer protocols:
-
Secure Shell (SSH) File Transfer Protocol (SFTP) – file transfer over SSH
For more information about SFTP, see Create an SFTP-enabled server.
-
File Transfer Protocol Secure (FTPS) – file transfer with TLS encryption
For more information about FTP, see Create an FTPS-enabled server.
-
File Transfer Protocol (FTP) – unencrypted file transfer
For more information about FTPS, see Create an FTP-enabled server.
Note
If you have an existing server enabled only for SFTP, and you want to add FTPS and FTP, you must ensure that you have the right identity provider and endpoint type settings that are compatible with FTPS and FTP.
If you select FTPS, you must choose a certificate stored in AWS Certificate Manager (ACM) which will be used to identify your server when clients connect to it over FTPS.
To request a new public certificate, see Request a public certificate in the AWS Certificate Manager User Guide.
To import an existing certificate into ACM, see Importing certificates into ACM in the AWS Certificate Manager User Guide.
To request a private certificate to use FTPS through private IP addresses, see Requesting a private certificate in the AWS Certificate Manager User Guide.
Certificates with the following cryptographic algorithms and key sizes are supported:
-
2048-bit RSA (RSA_2048)
-
4096-bit RSA (RSA_4096)
-
Elliptic Prime Curve 256 bit (EC_prime256v1)
-
Elliptic Prime Curve 384 bit (EC_secp384r1)
-
Elliptic Prime Curve 521 bit (EC_secp521r1)
Note
The certificate must be a valid SSL/TLS X.509 version 3 certificate with FQDN or IP address specified and contain information about the issuer.
-
-
Choose Save. You are returned to the Server details page.
Edit the server endpoint
On the AWS Transfer Family console, you can modify the server endpoint type and custom hostname. Additionally, for VPC endpoints, you can edit the availability zone information.
To edit the server endpoint details
-
On the Server details page, choose Edit next to Endpoint details.
-
Before you can edit the Endpoint type, you must first stop the server. Then, on the Edit endpoint configuration page, for Endpoint type, you can choose either of the following values:
-
Public – This option makes your server accessible over the internet.
-
VPC – This option makes your server accessible in your virtual private cloud (VPC). For information about VPC, see Create a server in a virtual private cloud.
-
-
For Custom hostname, choose one of the following:
-
None – If you don't want to use a custom domain, choose None.
You get a server hostname provided by AWS Transfer Family. The server hostname takes the form
serverId.server.transfer.regionId.amazonaws.com -
Amazon Route 53 DNS alias – To use a DNS alias automatically created for you in Route 53, choose this option.
-
Other DNS – To use a hostname that you already own in an external DNS service choose Other DNS.
Choosing Amazon Route 53 DNS alias or Other DNS specifies the name resolution method to associate with your server's endpoint.
For example, your custom domain might be
sftp.inbox.example.com. A custom hostname uses a DNS name that you provide and that a DNS service can resolve. You can use Route 53 as your DNS resolver, or use your own DNS service provider. To learn how AWS Transfer Family uses Route 53 to route traffic from your custom domain to the server endpoint, see Working with custom hostnames.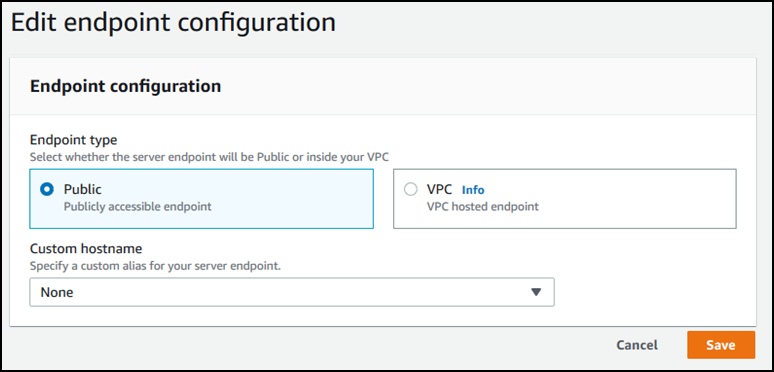
-
-
For VPC endpoints, you can change the information in the Availability Zones pane.
-
Choose Save. You are returned to the Server details page.
Edit your logging configuration
On the AWS Transfer Family console, you can change your logging configuration.
Note
If Transfer Family created a CloudWatch logging IAM role for you when you created a server,
the IAM role is called AWSTransferLoggingAccess. You can use it
for all your Transfer Family servers.
To edit your logging configuration
-
On the Server details page, choose Edit next to Additional details.
-
Based on your configuration, choose between a logging role, structured JSON logging, or both. For more information, see Updating logging for a server.
Edit the security policy
This procedure explains how to change a Transfer Family server's security policy by using the AWS Transfer Family console or AWS CLI.
Note
If your endpoint is FIPS-enabled, you can't change the FIPS security policy to a non-FIPS security policy.
Change the managed workflow for your server
On the AWS Transfer Family console, you can change the managed workflow associated with the server.
To change the managed workflow
-
On the Server details page, choose Edit next to Additional details.
-
On the Edit additional details page, in the Managed workflows section, select a workflow to be run on all uploads.
Note
If you do not already have a workflow, choose Create a new workflow to create one.
-
Select the workflow ID to use.
-
Choose an execution role. This is the role that Transfer Family assumes when executing the workflow's steps. For more information, see IAM policies for workflows. Choose Save.

-
-
Choose Save. You are returned to the Server details page.
Change the display banners for your server
On the AWS Transfer Family console, you can change the display banners associated with the server.
To change the display banners
-
On the Server details page, choose Edit next to Additional details.
-
On the Edit additional details page, in the Display banners section, enter text for the available display banners.
-
Choose Save. You are returned to the Server details page.
Put your server online or offline
On the AWS Transfer Family console, you can bring your server online or take it offline.
To bring your server online
-
Open the AWS Transfer Family console at https://console.aws.amazon.com/transfer/
. -
In the navigation pane, choose Servers.
-
Select the check box of the server that is offline.
-
For Actions, choose Start.
It can take a couple of minutes for a server to switch from offline to online.
Note
When you stop a server to take it offline, currently you are still accruing service charges for that server. To eliminate additional server-based charges, delete that server.
To take your server offline
-
Open the AWS Transfer Family console at https://console.aws.amazon.com/transfer/
. -
In the navigation pane, choose Servers.
-
Select the check box of the server that is online.
-
For Actions, choose Stop.
While a server is starting up or shutting down, servers aren't available for file operations. The console doesn't show the starting and stopping states.
If you find the error condition START_FAILED or
STOP_FAILED, contact AWS Support to help resolve your issues.
