Tutorial: Create a VPC for use with a DB instance (dual-stack mode)
A common scenario includes a DB instance in a virtual private cloud (VPC) based on the Amazon VPC service. This VPC shares data with a public Amazon EC2 instance that is running in the same VPC.
In this tutorial, you create the VPC for this scenario that works with a database running in dual-stack mode. Dual-stack mode to enable connection over the IPv6 addressing protocol. For more information about IP addressing, see Amazon RDS IP addressing.
Dual-stack network instances are supported in most regions. For more information see Region and version availability. To see the limitations of dual-stack mode, see Limitations for dual-stack network DB instances.
The following diagram shows this scenario.

For information about other scenarios, see Scenarios for accessing a DB instance in a VPC.
Your DB instance needs to be available only to your Amazon EC2 instance, and not to the public internet. Thus, you create a VPC with both public and private subnets. The Amazon EC2 instance is hosted in the public subnet, so that it can reach the public internet. The DB instance is hosted in a private subnet. The Amazon EC2 instance can connect to the DB instance because it's hosted within the same VPC. However, the DB instance is not available to the public internet, providing greater security.
This tutorial configures an additional public and private subnet in a separate Availability Zone. These subnets aren't used by the tutorial. An RDS DB subnet group requires a subnet in at least two Availability Zones. The additional subnet makes it easy to switch to a Multi-AZ DB instance deployment in the future.
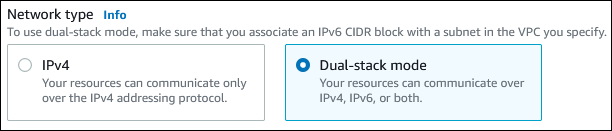
To create a DB instance that uses dual-stack mode, specify Dual-stack mode for the Network type setting. You can also modify a DB instance with the same setting. For more information, see Creating an Amazon RDS DB instance and Modifying an Amazon RDS DB instance.
This tutorial describes configuring a VPC for Amazon RDS DB instances. For more information about Amazon VPC, see Amazon VPC User Guide.
Create a VPC with private and public subnets
Use the following procedure to create a VPC with both public and private subnets.
To create a VPC and subnets
Open the Amazon VPC console at https://console.aws.amazon.com/vpc/
. -
In the upper-right corner of the AWS Management Console, choose the Region to create your VPC in. This example uses the US East (Ohio) Region.
-
In the upper-left corner, choose VPC dashboard. To begin creating a VPC, choose Create VPC.
-
For Resources to create under VPC settings, choose VPC and more.
-
For the remaining VPC settings, set these values:
-
Name tag auto-generation –
tutorial-dual-stack -
IPv4 CIDR block –
10.0.0.0/16 -
IPv6 CIDR block – Amazon-provided IPv6 CIDR block
-
Tenancy – Default
-
Number of Availability Zones (AZs) – 2
-
Customize AZs – Keep the default values.
-
Number of public subnet – 2
-
Number of private subnets – 2
-
Customize subnets CIDR blocks – Keep the default values.
-
NAT gateways ($) – None
-
Egress only internet gateway – No
-
VPC endpoints – None
-
DNS options – Keep the default values.
Note
Amazon RDS requires at least two subnets in two different Availability Zones to support Multi-AZ DB instance deployments. This tutorial creates a Single-AZ deployment, but the requirement makes it easy to convert to a Multi-AZ DB instance deployment in the future.
-
-
Choose Create VPC.
Create a VPC security group for a public Amazon EC2 instance
Next, you create a security group for public access. To connect to public EC2 instances in your VPC, add inbound rules to your VPC security group that allow traffic to connect from the internet.
To create a VPC security group
Open the Amazon VPC console at https://console.aws.amazon.com/vpc/
. -
Choose VPC Dashboard, choose Security Groups, and then choose Create security group.
-
On the Create security group page, set these values:
-
Security group name:
tutorial-dual-stack-securitygroup -
Description:
Tutorial Dual-Stack Security Group -
VPC: Choose the VPC that you created earlier, for example: vpc-
identifier(tutorial-dual-stack-vpc)
-
-
Add inbound rules to the security group.
-
Determine the IP address to use to connect to EC2 instances in your VPC using Secure Shell (SSH).
An example of an Internet Protocol version 4 (IPv4) address is
203.0.113.25/32. An example of an Internet Protocol version 6 (IPv6) address range is2001:db8:1234:1a00::/64.In many cases, you might connect through an internet service provider (ISP) or from behind your firewall without a static IP address. If so, find the range of IP addresses used by client computers.
Warning
If you use
0.0.0.0/0for IPv4 or::0for IPv6, you make it possible for all IP addresses to access your public instances using SSH. This approach is acceptable for a short time in a test environment, but it's unsafe for production environments. In production, authorize only a specific IP address or range of addresses to access your instances. -
In the Inbound rules section, choose Add rule.
-
Set the following values for your new inbound rule to allow Secure Shell (SSH) access to your Amazon EC2 instance. If you do this, you can connect to your EC2 instance to install SQL clients and other applications. Specify an IP address so you can access your EC2 instance:
-
Type:
SSH -
Source: The IP address or range from step a. An example of an IPv4 IP address is
203.0.113.25/32. An example of an IPv6 IP address is2001:DB8::/32.
-
-
-
Choose Create security group to create the security group.
Note the security group ID because you need it later in this tutorial.
Create a VPC security group for a private DB instance
To keep your DB instance private, create a second security group for private access. To connect to private DB instances in your VPC, add inbound rules to your VPC security group. These allow traffic from your Amazon EC2 instance only.
To create a VPC security group
Open the Amazon VPC console at https://console.aws.amazon.com/vpc/
. -
Choose VPC Dashboard, choose Security Groups, and then choose Create security group.
-
On the Create security group page, set these values:
-
Security group name:
tutorial-dual-stack-db-securitygroup -
Description:
Tutorial Dual-Stack DB Instance Security Group -
VPC: Choose the VPC that you created earlier, for example: vpc-
identifier(tutorial-dual-stack-vpc)
-
-
Add inbound rules to the security group:
-
In the Inbound rules section, choose Add rule.
-
Set the following values for your new inbound rule to allow MySQL traffic on port 3306 from your Amazon EC2 instance. If you do, you can connect from your EC2 instance to your DB instance. Doing this means that you can send data from your EC2 instance to your database.
-
Type: MySQL/Aurora
-
Source: The identifier of the tutorial-dual-stack-securitygroup security group that you created previously in this tutorial, for example sg-9edd5cfb.
-
-
-
To create the security group, choose Create security group.
Create a DB subnet group
A DB subnet group is a collection of subnets that
you create in a VPC and that you then designate for your DB
instances. By using a DB
subnet group, you can specify a particular VPC when creating DB
instances. To create a
DB subnet group that is DUAL compatible, all subnets must be
DUAL compatible. To be DUAL compatible, a subnet must have
an IPv6 CIDR associated with it.
To create a DB subnet group
-
Identify the private subnets for your database in the VPC.
Open the Amazon VPC console at https://console.aws.amazon.com/vpc/
. -
Choose VPC Dashboard, and then choose Subnets.
-
Note the subnet IDs of the subnets named tutorial-dual-stack-subnet-private1-us-west-2a and tutorial-dual-stack-subnet-private2-us-west-2b.
You will need the subnet IDs when you create your DB subnet group.
-
Open the Amazon RDS console at https://console.aws.amazon.com/rds/
. Make sure that you connect to the Amazon RDS console, not to the Amazon VPC console.
-
In the navigation pane, choose Subnet groups.
-
Choose Create DB subnet group.
-
On the Create DB subnet group page, set these values in Subnet group details:
-
Name:
tutorial-dual-stack-db-subnet-group -
Description:
Tutorial Dual-Stack DB Subnet Group -
VPC: tutorial-dual-stack-vpc (vpc-
identifier)
-
-
In the Add subnets section, choose values for the Availability Zones and Subnets options.
For this tutorial, choose us-east-2a and us-east-2b for the Availability Zones. For Subnets, choose the private subnets you identified in the previous step.
-
Choose Create.
Your new DB subnet group appears in the DB subnet groups list on the RDS console. You can choose the DB subnet group to see its details. These include the supported addressing protocols and all of the subnets associated with the group and the network type supported by the DB subnet group.
Create an Amazon EC2 instance in dual-stack mode
To create an Amazon EC2 instance, follow the instructions in Launch an instance using the new launch instance wizard in the Amazon EC2 User Guide.
On the Configure Instance Details page, set these values and keep the other values as their defaults:
-
Network – Choose an existing VPC with both public and private subnets, such as tutorial-dual-stack-vpc (vpc-
identifier) created in Create a VPC with private and public subnets. -
Subnet – Choose an existing public subnet, such as subnet-
identifier| tutorial-dual-stack-subnet-public1-us-east-2a | us-east-2a created in Create a VPC security group for a public Amazon EC2 instance. -
Auto-assign Public IP – Choose Enable.
-
Auto-assign IPv6 IP – Choose Enable.
-
Firewall (security groups) – Choose Select an existing security group.
-
Common security groups – Choose an existing security group, such as the
tutorial-securitygroupcreated in Create a VPC security group for a public Amazon EC2 instance. Make sure that the security group that you choose includes inbound rules for Secure Shell (SSH) and HTTP access.
Create a DB instance in dual-stack mode
In this step, you create a DB instance that runs in dual-stack mode.
To create a DB instance
-
Sign in to the AWS Management Console and open the Amazon RDS console at https://console.aws.amazon.com/rds/
. In the upper-right corner of the console, choose the AWS Region where you want to create the DB instance. This example uses the US East (Ohio) Region.
-
In the navigation pane, choose Databases.
-
Choose Create database.
On the Create database page, make sure that the Standard create option is chosen, and then choose the MySQL DB engine type.
-
In the Connectivity section, set these values:
-
Network type – Choose Dual-stack mode.
-
Virtual private cloud (VPC) – Choose an existing VPC with both public and private subnets, such as tutorial-dual-stack-vpc (vpc-
identifier) created in Create a VPC with private and public subnets.The VPC must have subnets in different Availability Zones.
-
DB subnet group – Choose a DB subnet group for the VPC, such as tutorial-dual-stack-db-subnet-group created in Create a DB subnet group.
-
Public access – Choose No.
-
VPC security group (firewall) – Select Choose existing.
-
Existing VPC security groups – Choose an existing VPC security group that is configured for private access, such as tutorial-dual-stack-db-securitygroup created in Create a VPC security group for a private DB instance.
Remove other security groups, such as the default security group, by choosing the X associated with each.
-
Availability Zone – Choose us-west-2a.
To avoid cross-AZ traffic, make sure the DB instance and the EC2 instance are in the same Availability Zone.
-
-
For the remaining sections, specify your DB instance settings. For information about each setting, see Settings for DB instances.
Connect to your Amazon EC2 instance and DB instance
After you create your Amazon EC2 instance and DB instance in dual-stack mode, you can connect to each one using the IPv6 protocol. To connect to an Amazon EC2 instance using the IPv6 protocol, follow the instructions in Connect to your Linux instance in the Amazon EC2 User Guide.
To connect to your RDS for MySQL DB instance from the Amazon EC2 instance, follow the instructions in Connect to a MySQL DB instance.
Deleting the VPC
After you create the VPC and other resources for this tutorial, you can delete them if they are no longer needed.
If you added resources in the VPC that you created for this tutorial, you might need to delete these before you can delete the VPC. Examples of resources are Amazon EC2 instances or DB instances. For more information, see Delete your VPC in the Amazon VPC User Guide.
To delete a VPC and related resources
-
Delete the DB subnet group:
-
Open the Amazon RDS console at https://console.aws.amazon.com/rds/
. -
In the navigation pane, choose Subnet groups.
-
Select the DB subnet group to delete, such as tutorial-db-subnet-group.
-
Choose Delete, and then choose Delete in the confirmation window.
-
-
Note the VPC ID:
Open the Amazon VPC console at https://console.aws.amazon.com/vpc/
. -
Choose VPC Dashboard, and then choose VPCs.
-
In the list, identify the VPC you created, such as tutorial-dual-stack-vpc.
-
Note the VPC ID value of the VPC that you created. You need this VPC ID in subsequent steps.
-
Delete the security groups:
Open the Amazon VPC console at https://console.aws.amazon.com/vpc/
. -
Choose VPC Dashboard, and then choose Security Groups.
-
Select the security group for the Amazon RDS DB instance, such as tutorial-dual-stack-db-securitygroup.
-
For Actions, choose Delete security groups, and then choose Delete on the confirmation page.
-
On the Security Groups page, select the security group for the Amazon EC2 instance, such as tutorial-dual-stack-securitygroup.
-
For Actions, choose Delete security groups, and then choose Delete on the confirmation page.
-
Delete the NAT gateway:
Open the Amazon VPC console at https://console.aws.amazon.com/vpc/
. -
Choose VPC Dashboard, and then choose NAT Gateways.
-
Select the NAT gateway of the VPC that you created. Use the VPC ID to identify the correct NAT gateway.
-
For Actions, choose Delete NAT gateway.
-
On the confirmation page, enter
delete, and then choose Delete.
-
Delete the VPC:
Open the Amazon VPC console at https://console.aws.amazon.com/vpc/
. -
Choose VPC Dashboard, and then choose VPCs.
-
Select the VPC that you want to delete, such as tutorial-dual-stack-vpc.
-
For Actions, choose Delete VPC.
The confirmation page shows other resources that are associated with the VPC that will also be deleted, including the subnets associated with it.
-
On the confirmation page, enter
delete, and then choose Delete.
-
Release the Elastic IP addresses:
Open the Amazon EC2 console at https://console.aws.amazon.com/ec2/
. -
Choose EC2 Dashboard, and then choose Elastic IPs.
-
Select the Elastic IP address that you want to release.
-
For Actions, choose Release Elastic IP addresses.
-
On the confirmation page, choose Release.
