Creating an App Runner service
AWS App Runner automates transitioning from a container image or a source code repository to a running web service that scales automatically. You point App Runner to your source image or code, specifying only a small number of required settings. App Runner builds your application if needed, provisions compute resources, and deploys your application to run on them.
When you create a service, App Runner creates a service resource. In some cases, you might need to provide a connection resource. If you use the App Runner console, the console implicitly creates the connection resource. For more information about App Runner resource types, see App Runner resources. These resource types have quotas that are associated with your account in each AWS Region. For more information, see App Runner resource quotas.
There are subtle differences in the procedure for creating a service depending on the source type and provider. This topic covers different procedures for creating these source types so that you can follow whichever is suitable for your situation. For starting a basic procedure with a code example, see Getting started with App Runner.
Prerequisites
Before you create your App Runner service, make sure to complete the following actions:
-
Complete the setup steps in Setting up for App Runner.
-
Make sure that your application source ready. You can use either a code repository in GitHub
, Bitbucket , or a container image in Amazon Elastic Container Registry (Amazon ECR) to create an App Runner service.
Create a service
This section walks through the creation process for the two App Runner service types: based on source code, and based on a container image.
Note
If you create an outbound traffic VPC connector for a service, the service startup process that follows will experience a one-time latency. You can set this configuration for a new service when you create it, or afterward, with a service update. For more information, see One-time latency in the Networking with App Runner chapter of this guide.
The following sections show how to create an App Runner service when your source is a code repository in GitHub
When you create the service, App Runner builds a Docker image that contains your application code and dependencies. It then launches a service that runs a container instance of this image.
Creating a service from code using the App Runner console
To create an App Runner service using the console
-
Configure your source code.
-
Open the App Runner console
, and in the Regions list, select your AWS Region. -
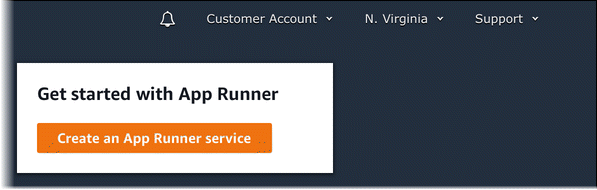
If the AWS account doesn't have any App Runner services yet, the console home page is displayed. Choose Create an App Runner service.
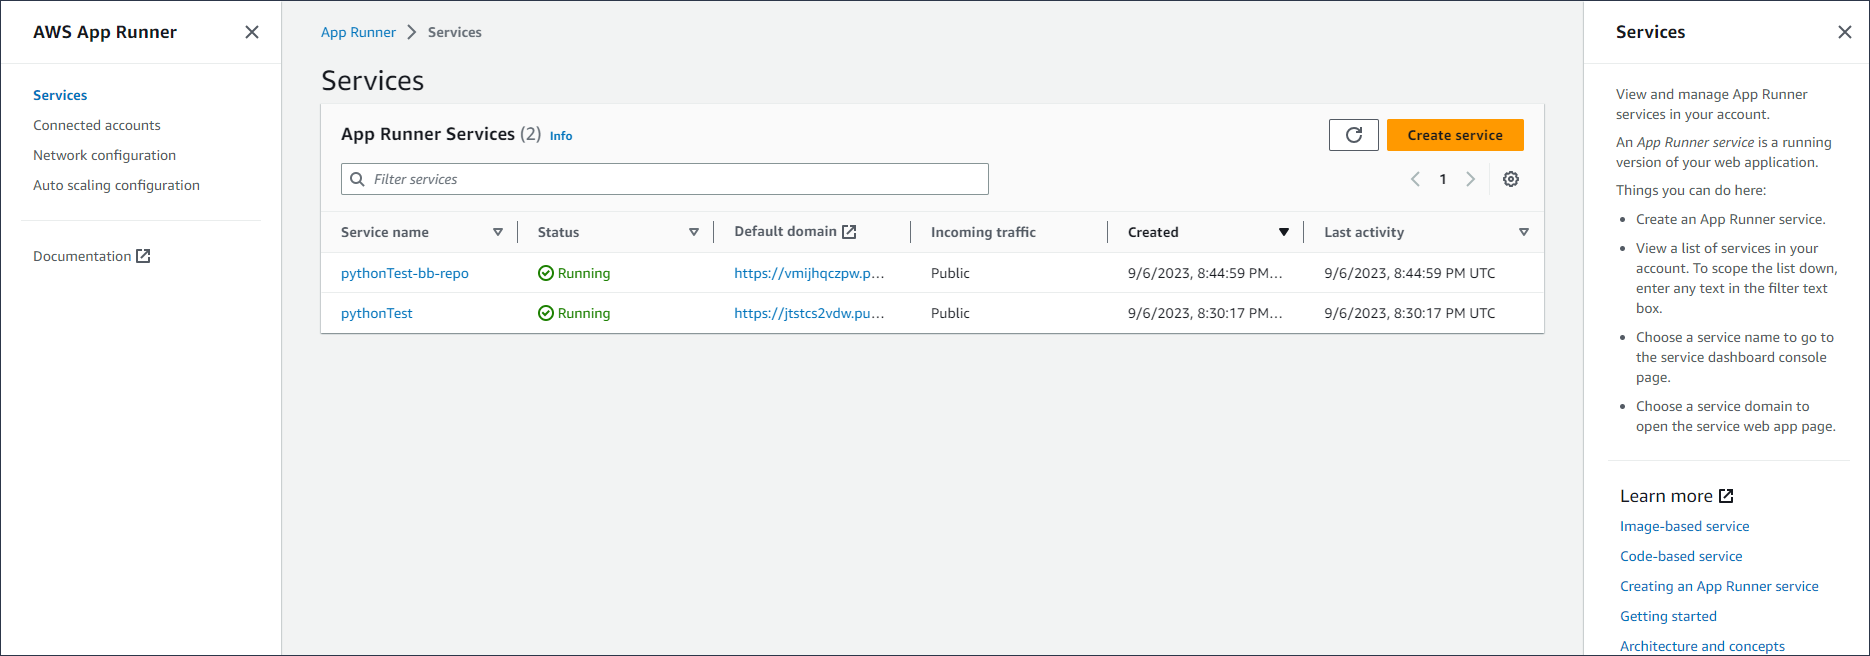
If the AWS account has existing services, the Services page with a list of your services is displayed. Choose Create service.
-
On the Source and deployment page, in the Source section, for Repository type, choose Source code repository.
-
Select a Provider Type. Choose either GitHub or Bitbucket.
-
Next select an account or organization for the Provider that you've used before, or choose Add new. Then, go through the process of providing your code repository credentials and choosing an account or organization to connect to.
-
For Repository, select the repository that contains your application code.
-
For Branch, select the branch that you want to deploy.
-
For Source directory, enter the directory in the source repository that stores your application code and configuration files.
Note
The build and start commands execute from the source directory that you specify. App Runner handles the path as absolute from root. If you don't specify a value here, the directory defaults to the repository root.
-
-
Configure your deployments.
-
In the Deployment settings section, choose Manual or Automatic.
For more information about deployment methods, see Deployment methods.
-
Choose Next.

-
-
Configure the application build.
-
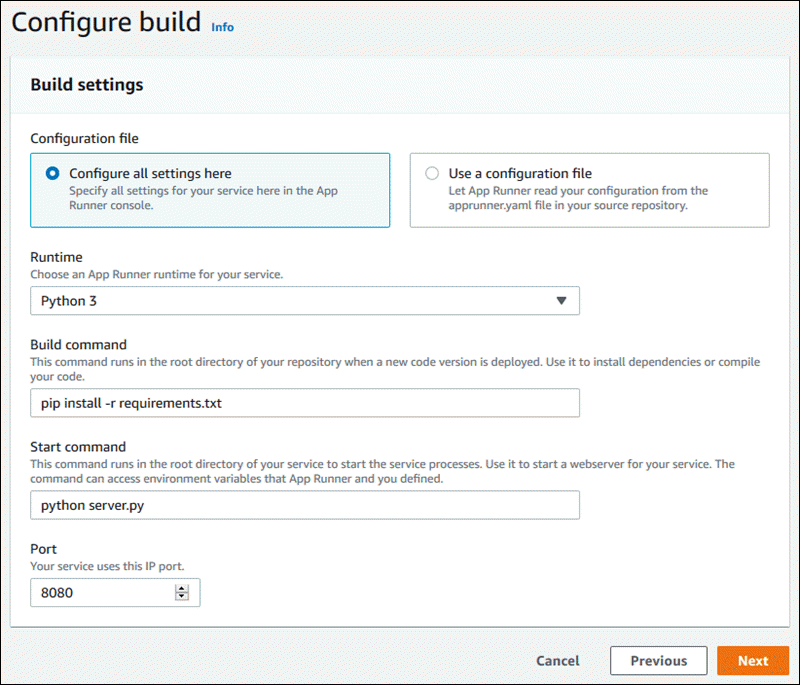
On the Configure build page, for Configuration file, choose Configure all settings here if your repository doesn't contain an App Runner configuration file, or Use a configuration file if it does.
Note
An App Runner configuration file is a way to maintain your build configuration as part of your application source. When you provide one, App Runner reads some values from the file and doesn't let you set them in the console.
-
Provide the following build settings:
-
Runtime – Choose a specific managed runtime for your application.
-
Build command – Enter a command that builds your application from its source code. This might be a language-specific tool or a script provided with your code.
-
Start command – Enter the command that starts your web service.
-
Port – Enter the IP port that your web service listens to.
-
-
Choose Next.
-
-
Configure your service.
-
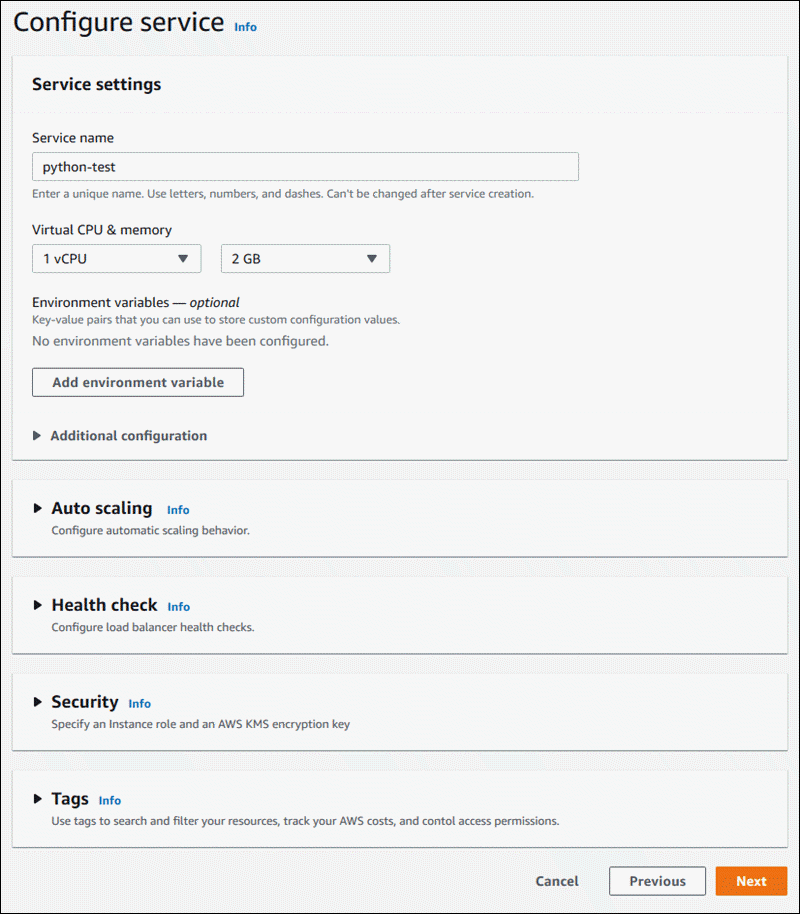
On the Configure service page, in the Service settings section, enter a service name.
Note
All other service settings are either optional or have console-provided defaults.
-
Optionally change or add other settings to meet your application requirements.
-
Choose Next.
-
-
On the Review and create page, verify all the details you entered, and then choose Create and deploy.
Result: If the service is created successfully, the console displays the service dashboard with a Service overview of the new service.
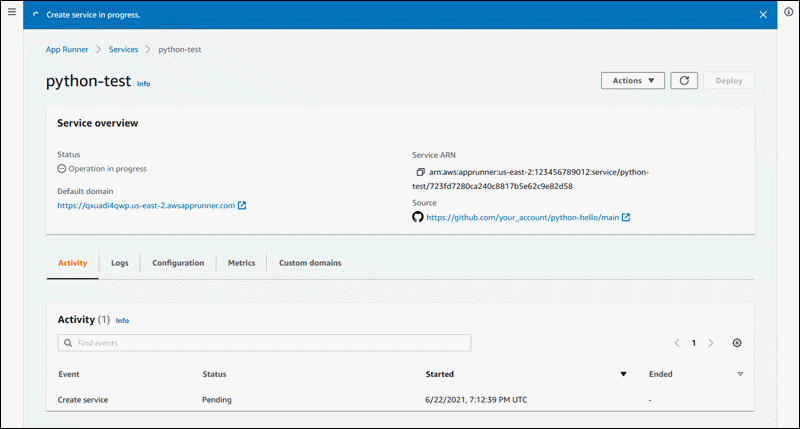
-
Verify that your service is running.
-
On the service dashboard page, wait until the service Status is Running.
-
Choose the Default domain value. It's the URL to your service's website.
-
Use your website and verify that it's running properly.
-
Creating a service from code using the App Runner API or AWS CLI
To create a service using the App Runner API or AWS CLI, call the CreateService API action. For more information and an example, see CreateService. If this is the first time that you're creating a service using a specific
organization or account for a source code repository (GitHub or Bitbucket), start by calling CreateConnection. This establishes a connection between App Runner and the repository provider's organization or account. For more information
about App Runner connections, see Managing App Runner connections.
If the call returns a successful response with a Service object showing "Status":
"CREATING", your service starts to create.
For an example call, see Create a source code repository service in the AWS App Runner API Reference
The following sections show how to create an App Runner service when your source is a container image stored in Amazon ECR. Amazon ECR is an AWS service. Therefore, to create a service based on an Amazon ECR image, you provide App Runner with an access role containing the necessary Amazon ECR action permissions.
Note
Images stored in Amazon ECR Public are publicly available. So, if your image is stored in Amazon ECR Public, an access role isn't required.
When your service is being created, App Runner launches a service that runs a container instance of the image you provide. There's no build phase in this case.
For more information, see App Runner service based on a source image.
Creating a service from an image using the App Runner console
To create an App Runner service using the console
-
Configure your source code.
-
Open the App Runner console
, and in the Regions list, select your AWS Region. -
If the AWS account doesn't have any App Runner services yet, the console home page is displayed. Choose Create an App Runner service.
If the AWS account has existing services, the Services page with a list of your services is displayed. Choose Create service.
-
On the Source and deployment page, in the Source section, for Repository type, choose Container registry.
-
For Provider, choose the provider where your image is stored:
-
Amazon ECR – A private image that's stored in Amazon ECR.
-
Amazon ECR Public – A publicly readable image that's stored in Amazon ECR Public.
-
-
For Container image URI, choose Browse.
-
In the Select Amazon ECR container image dialog box, for Image repository, select the repository that contains your image.
-
For Image tag, select the specific image tag that you want to deploy (for example, latest), and then choose Continue.

-
-
Configure your deployments.
-
In the Deployment settings section, choose Manual or Automatic.
Note
App Runner doesn't support automatic deployment for Amazon ECR Public images, and for images in an Amazon ECR repository that belongs to a different AWS account than the one that your service is in.
For more information about deployment methods, see Deployment methods.
-
[Amazon ECR provider] For ECR access role, choose an existing service role in your account or choose to create a new role. If you're using manual deployment, you can also choose to use the IAM user role at the time of deployment.
-
Choose Next.

-
-
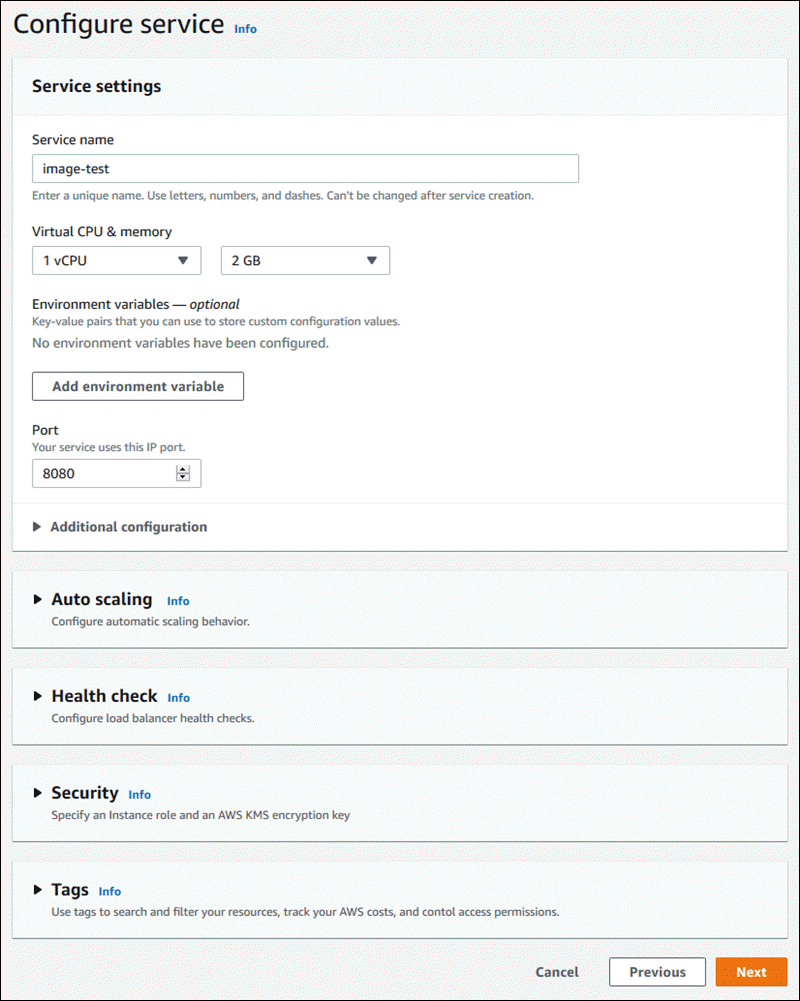
Configure your service.
-
On the Configure service page, in the Service settings section, enter a service name and the IP port that your service website listens to.
Note
All other service settings are either optional or have console-provided defaults.
-
(Optional) Change or add other settings to suit your application's needs.
-
Choose Next.
-
-
On the Review and create page, verify all the details that you entered, and then choose Create and deploy.
Result: If the service is created successfully, the console shows the service dashboard, with a Service overview of the new service.
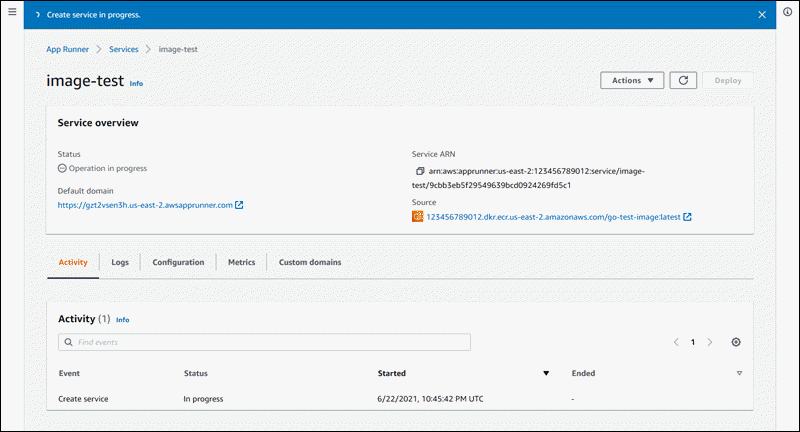
-
Verify that your service is running.
-
On the service dashboard page, wait until the service Status is Running.
-
Choose the Default domain value. It's the URL to your service's website.
-
Use your website and verify that it's running properly.
-
Creating a service from an image using the App Runner API or AWS CLI
To create a service using the App Runner API or AWS CLI, call the CreateService API action.
Your service creation starts if the call returns a successful response with a Service object
showing "Status": "CREATING".
For an example call, see Create a source image repository service in the AWS App Runner API Reference
