AWS Cloud9 is no longer available to new customers. Existing customers of
AWS Cloud9 can continue to use the service as normal.
Learn more
Creating an SSH Environment
You create an AWS Cloud9 SSH development environment with the AWS Cloud9 console. You can't create an SSH environment using the CLI.
Prerequisites
-
Make sure that you completed the steps in Setting up AWS Cloud9 first. That way, you can sign in to the AWS Cloud9 console and create environments.
-
Identify an existing cloud compute instance (for example, an Amazon EC2 instance in your AWS account) or your own server that you want AWS Cloud9 to connect to the environment.
-
Make sure that the existing instance or your own server meets all of the SSH host requirements. This includes having specific versions of Python, Node.js, and other components installed, setting specific permissions on the directory that you want AWS Cloud9 to start from after login, and setting up any associated Amazon Virtual Private Cloud.
Create the SSH Environment
-
Make sure that you completed the preceding prerequisites.
-
Connect to your existing instance or your own server by using an SSH client, if you aren't already connected to it. This ensures that you can add the necessary public SSH key value to the instance or server. This is described later in this procedure.
Note
To connect to an existing AWS Cloud compute instance, see one or more of the following resources:
-
For Amazon EC2, see Connect to Your Linux Instance in the Amazon EC2 User Guide.
-
For Amazon Lightsail, see Connect to your Linux/Unix-based Lightsail instance
in the Amazon Lightsail Documentation. -
For AWS Elastic Beanstalk, see Listing and Connecting to Server Instances in the AWS Elastic Beanstalk Developer Guide.
-
For AWS OpsWorks, see Using SSH to Log In to a Linux Instance in the AWS OpsWorks User Guide.
-
For other AWS services, see the documentation for that specific service.
To connect to your own server, use SSH. SSH is already installed on the macOS and Linux operating systems. To connect to your server by using SSH on Windows, you must install PuTTY
. -
-
Sign in to the AWS Cloud9 console, at https://console.aws.amazon.com/cloud9/
. -
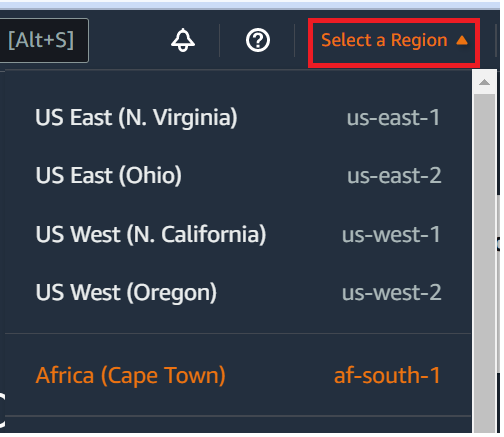
After you sign in to the AWS Cloud9 console, in the top navigation bar choose an AWS Region to create the environment in. For a list of available AWS Regions, see AWS Cloud9 in the AWS General Reference.
-
If this is the first time that you're creating a development environment, a welcome page is displayed. In the New AWS Cloud9 environment panel, choose Create environment.
If you've previously created development environments, you can also expand the pane on the left of the screen. Choose Your environments, and then choose Create environment.
In the welcome page:

Or in the Your environments page:

-
On the Create environment page, enter a name for your environment.
-
For Description, enter something about your environment. For this tutorial, use
This environment is for the AWS Cloud9 tutorial. -
For Environment type, choose Existing Compute from the following options:
-
New EC2 instance – Launches an Amazon EC2 instance that AWS Cloud9 can connect to directly over SSH or SSM.
-
Existing compute – Launches an existing Amazon EC2 instance that requires SSH login details as well as port 22 to be open. AWS Cloud9 connects to the instance through AWS Systems Manager.
-
If you select the Existing compute option, a service role is automatically created. You can view the service role name in the Service role and instance profile for Systems Manager access section further down the interface. For more information, see Accessing no-ingress EC2 instances with AWS Systems Manager.
-
Warning
Creating an EC2 instance for your environment might result in possible charges to your AWS account for Amazon EC2. There's no additional cost to use Systems Manager to manage connections to your EC2 instance.
Warning
AWS Cloud9 uses SSH public key to connect securely to your server. To establish the secure connection, add our public key to your
~/.ssh/authorized_keysfile and provide your login credentials in the following steps. Choose Copy key to clipboard to copy the SSH key, or View public SSH key to display it. -
-
On the Existing compute panel, for User, enter the login name that you used to connect to the instance or server earlier in this procedure. For example, for an AWS Cloud compute instance, it might be
ec2-user,ubuntu, orroot.Note
We recommend that the login name is associated with administrative permissions or an administrator user on the instance or server. More specifically, we recommend that this login name owns the Node.js installation on the instance or server. To check this, from the terminal of your instance or server, run the command
ls -l $(which node)(orls -l $(nvm which node)if you're usingnvm). This command displays the owner name of the Node.js installation. It also displays the installation's permissions, group name, and location. -
For Host, enter the public IP address (preferred) or the hostname of the instance or server.
-
For Port, enter the port that you want AWS Cloud9 to use to try to connect to the instance or server. Alternatively, keep the default port.
-
Choose Additional details - optional to display the environment path, path to node.js binary and SSH jump host information.
-
For Environment path, enter the path to the directory on the instance or server that you want AWS Cloud9 to start from. You identified this earlier in the prerequisites to this procedure. If you leave this blank, AWS Cloud9 uses the directory that your instance or server typically starts with after login. This is usually a home or default directory.
-
For Path to Node.js binary path, enter the path information to specify the path to the Node.js binary on the instance or server. To get the path, you can run the command
which node(ornvm which nodeif you're usingnvm) on your instance or server. For example, the path might be/usr/bin/node. If you leave this blank, AWS Cloud9 attempts to guess where the Node.js binary is when it tries to connect. -
For SSH jump host, enter information about the jump host that the instance or server uses. Use the format
USER_NAME@HOSTNAME:PORT_NUMBER(for example,ec2-user@ip-192-0-2-0:22).The jump host must meet the following requirements:
-
It must be reachable over the public internet using SSH.
-
It must allow inbound access by any IP address over the specified port.
-
The public SSH key value that was copied into the
~/.ssh/authorized_keysfile on the existing instance or server must also be copied into the~/.ssh/authorized_keysfile on the jump host. -
Netcat must be installed.
-
-
Add up to 50 tags by supplying a Key and a Value for each tag. Do so by selecting Add new tag. The tags are attached to the AWS Cloud9 environment as resource tags, and are propagated to the following underlying resources: the CloudFormation stack, the Amazon EC2 instance, and Amazon EC2 security groups. To learn more about tags, see Control Access Using AWS Resource Tags in the IAM User Guide and the advanced information about tags in this guide.
Warning
If you update these tags after you create them, the changes aren't propagated to the underlying resources. For more information, see Propagating tag updates to underlying resources in the advanced information about tags.
-
Choose Create to create your environment, and you're then redirected to the home page. When the account is created successfully, a green flash bar appears at the top of the AWS Cloud9 console. You can select the new environment and choose Open in Cloud9 to launch the IDE.

If the account fails to create, a red flash bar appears at the top of the AWS Cloud9 console. Your account might fail to create due to a problem with your web browser, your AWS access permissions, the instance, or the associated network. You can find information about possible fixes to issues that might cause the account to fail in the AWS Cloud9 Troubleshooting section.
Note
If your environment is using a proxy to access the internet, you must provide proxy details to AWS Cloud9 so it can install dependencies. For more information, see Failed to install dependencies.
