Enable Customer Profiles for your Amazon Connect instance
Amazon Connect provides pre-built integrations so you can quickly combine customer information from multiple external applications, with contact history from Amazon Connect. This allows you to create a customer profile that has all the information agents need during customer interactions in a single place.
Before you begin
Following is an overview of key concepts and the information that you'll be prompted for during the setup process.
About the customer profiles domain
When you enable Amazon Connect Customer Profiles, you create a customer profiles domain: a container for all data, such as customer profiles, object types, profile keys, and encryption keys. Following are guidelines for creating Customer Profile domains:
-
Each Amazon Connect instance can only be associated with one domain.
-
You can create multiple domains, but they don't share external application integrations or customer data between each other.
-
All the external application integrations you create are at a domain level. All of the Amazon Connect instances associated with a domain inherit the domain's integrations.
-
You can change the association of your Amazon Connect instance from your current domain to a new domain at any time, by choosing a different domain. This isn't recommended, however, because the customer profiles from the earlier domain won't be moved to the new domain.
How do you want to name your customer profiles domain?
When you enable customer profiles, you are prompted to provide a friendly domain name that's meaningful to you such as your organization name, for example, CustomerProfiles-ExampleCorp. You can change the friendly name using the API at any time.
Do you want to use a dead-letter queue?
A dead-letter queue is used for reporting errors associated with processing data from external applications.
Amazon AppFlow handles connecting to the external application and moving data from it to Amazon Connect Customer Profiles. Amazon Connect then processes the file.
-
If an error occurs during the connection or while transporting the data to Amazon Connect, Amazon AppFlow surfaces the error but it doesn't write the error to the dead-letter queue.
For example, a processing error could be that the external data didn’t match the specified schema or that the format of the external data format isn't correct (currently only JSON is supported).
-
If Amazon Connect encounters an error while processing the file, it writes the error to your dead-letter queue. You can look at the queue later and try to reprocess the error.
-
You might find SQS messages in the dead-letter queue defined with your domain that includes the error message, along with the object.
| Error Message | Recommendation |
|---|---|
| The UNIQUE key or PROFILE key does not exist in the profile object | Modify the data mapping or object, make sure keys marked as UNIQUE and PROFILE in data mapping exist in object. See data mapping page on how to set it up. |
| Too many objects ingested on profile per second | Too many objects assigned to same profile within short time. You can re-ingest the object or add wait time between calling the PutProfileObject API. |
| Customer Profiles cannot ingest the object due to the EncryptionKey does not exist in the region, the EncryptionKey does not have a grant for Customer Profiles to use, or the EncryptionKey does not have the GenerateDataKey permission | Check your KMS permission, make sure Customer Profiles has the required access. Follow Enable Customer Profiles, and specify a dead-letter queue and KMS key section. |
| KMS key is invalid | Check your KMS permission, make sure Customer Profiles has the required access. Follow Enable Customer Profiles, and specify a dead-letter queue and KMS key section. |
| Customer Profiles cannot ingest the object due to invalid KMS key | Check your KMS permission, make sure Customer Profiles has the required access. Follow Enable Customer Profiles, and specify a dead-letter queue and KMS key section. |
| Your data contains profile object larger than # bytes | Remove any unnecessary fields and reduce data size until it falls below the specified limit mentioned in the error message. |
| All keys of this object are binding to more than one profiles | Modify the data mapping or object, make sure at least 1 PROFILE key in the object binds to less than or equal to 1 existing profile. |
When you enable Customer Profiles, you have the option of specifying an Amazon SQS queue as your dead-letter queue. If you select this option, add the following resource policy to Amazon SQS so Customer Profiles has permissions to send messages to that queue:
{
      "Sid": "Customer Profiles SQS policy",
      "Effect": "Allow",
      "Principal": {
        "Service": "profile.amazonaws.com"
      },
      "Action": "SQS:SendMessage",
      "Resource": "arn:aws:sqs:region:accountID:YourQueueName"
}
To prevent a confused deputy security issue, see Amazon Connect Customer Profiles cross-service confused deputy prevention for an example policy to apply.
Step-by-step instructions for creating a dead-letter queue are provided later in this topic, in Enable Customer Profiles, and specify a dead-letter queue and KMS key.
Create a KMS key to be used by Customer Profiles to encrypt data (required)
Note
To maintain access to Customer Profiles APIs, entities using the Customer Profiles
profile APIs must have explicit kms:Decrypt
and kms:GenerateDataKey permissions in their IAM policies. This
enables them to use kms:Decrypt and
kms:GenerateDataKey for the KMS key associated with
resources retrieved from the API related to Customer Profiles.
When you enable Customer Profiles, you are prompted to create or provide a AWS Key Management Service KMS key. Step-by-step instructions for creating a KMS key are provided later in this topic, in Enable Customer Profiles, and specify a dead-letter queue and KMS key.
All data at rest for Customer Profiles is encrypted under the KMS key you choose. Your customer managed key is created, owned, and managed by you. You have full control over the KMS key (AWS KMS charges apply).
If you choose to set up a KMS key where someone else is the administrator,
it must have a policy that allows kms:GenerateDataKey,
kms:CreateGrant, and kms:Decrypt permissions to
the Customer Profiles service principal. For information about how to change a
key policy, see Changing a
key policy in the AWS Key Management Service Developer Guide. In addition, to prevent
cross-service impersonation, see Cross-service confused deputy
prevention in AWS for sample
policies that you should apply.
Enable Customer Profiles, and specify a dead-letter queue and KMS key
-
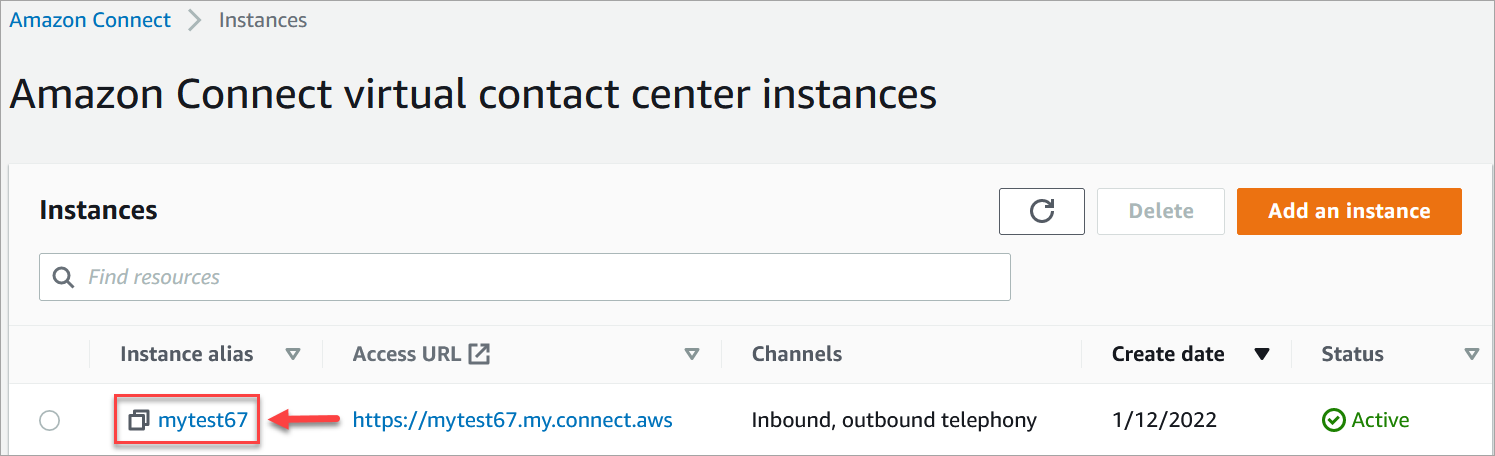
Open the Amazon Connect console at https://console.aws.amazon.com/connect/
. On the instances page, choose the instance alias. The instance alias is also your instance name, which appears in your Amazon Connect URL. The following image shows the Amazon Connect virtual contact center instances page, with a box around the instance alias.
-
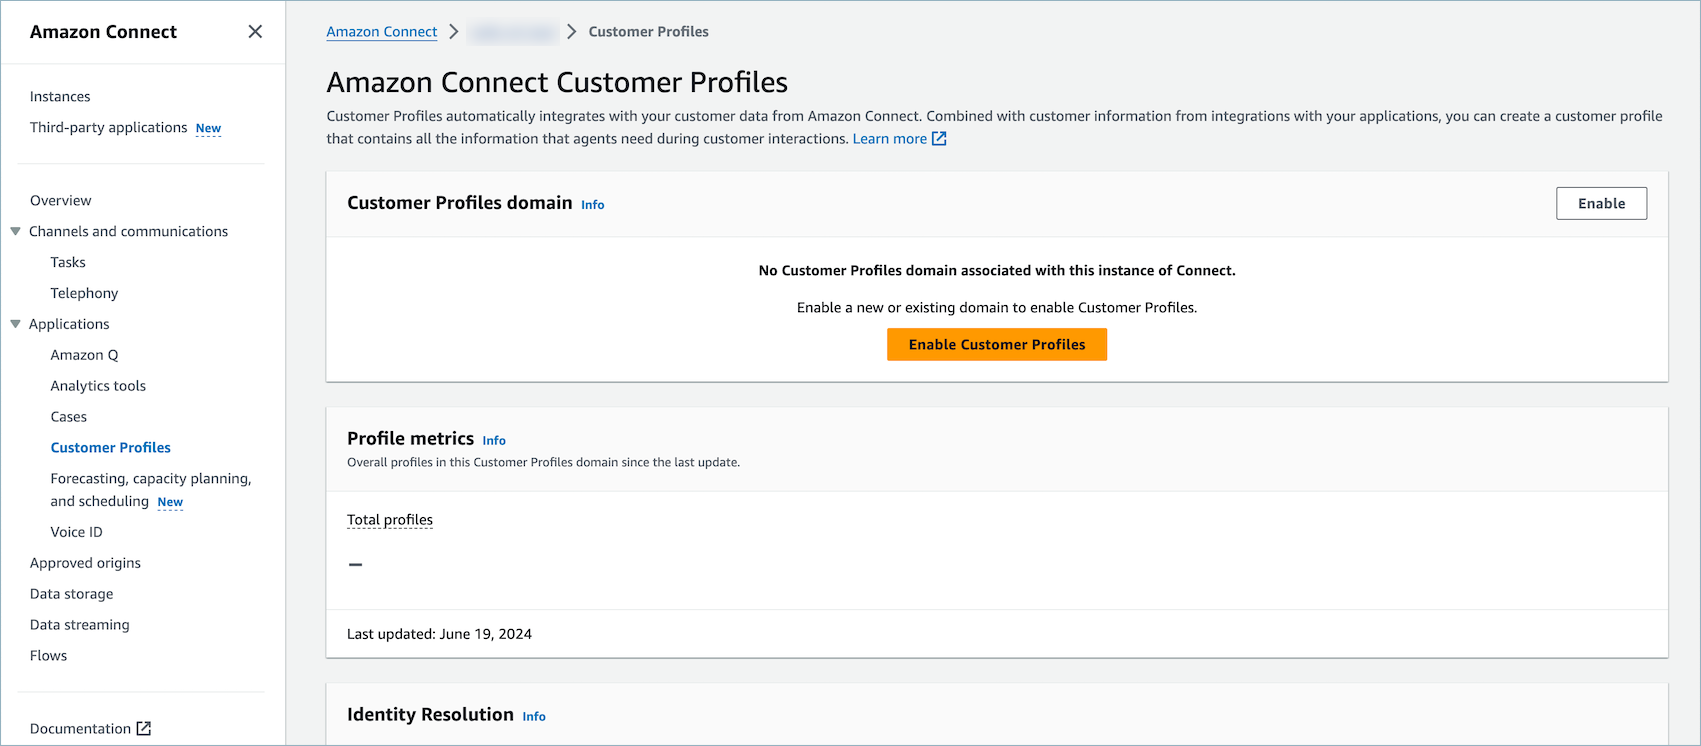
In the navigation pane, choose Customer profiles.
The Customer profiles domain page lists the applications that are available for integration. In the following image, the page shows no customer profile domains have been enabled.
-
Choose Enable customer profiles to get started.
-
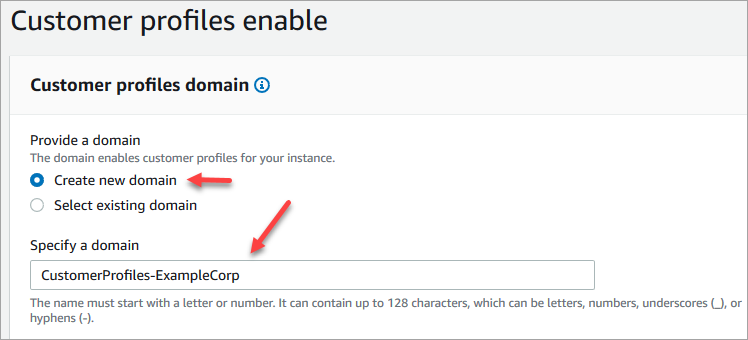
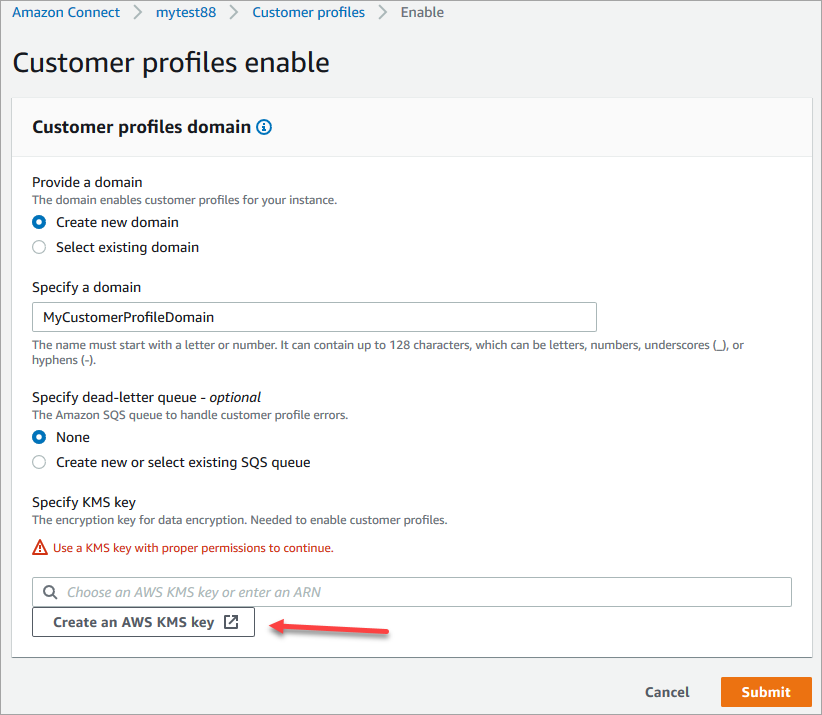
At the Customer profiles enable page, choose Create new domain. Under Specify a domain, enter a friendly name that's meaningful to you, such as your organization name, for example, CustomerProfiles-ExampleCorp.
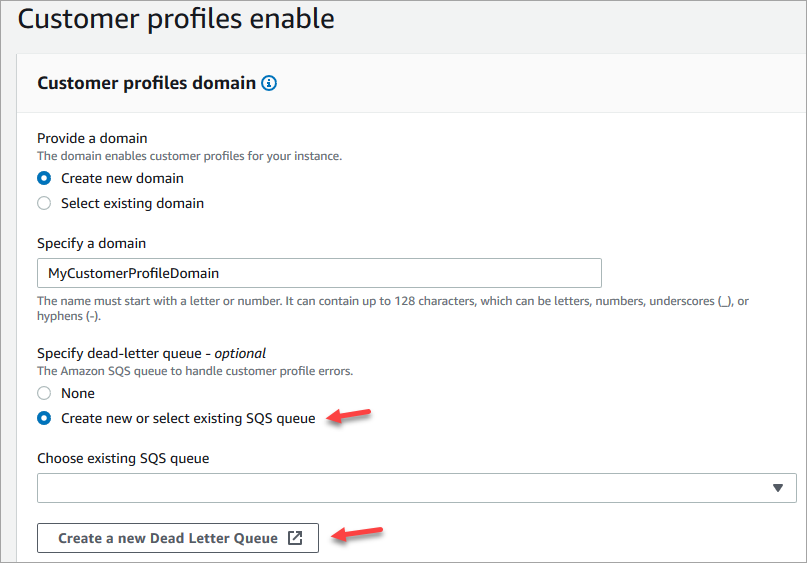
Under Specify dead-letter queue, choose whether to send failed events to a dead-letter queue. This is helpful if you want to get visibility into data that failed to be ingested. It also gives you the option to retry these failed data ingestions in the future.
Following are the steps to create a dead-letter queue:
-
On the Customer profiles enable page, choose Create new or select existing SQS queue and then choose Create a new Dead Letter Queue.
-
A new tab in your browser opens for the Amazon SQS console. Choose Create queue.
-
On the Create queue page, choose Standard, then assign a name to your queue.

-
In the Access policy section, choose Advanced.
The Version name, policy ID, and Statement appear. If needed, update this section to give access to only the appropriate roles.
-
At the end of the Statement section (line 15 in the following image) add a comma after }, and press
Enter.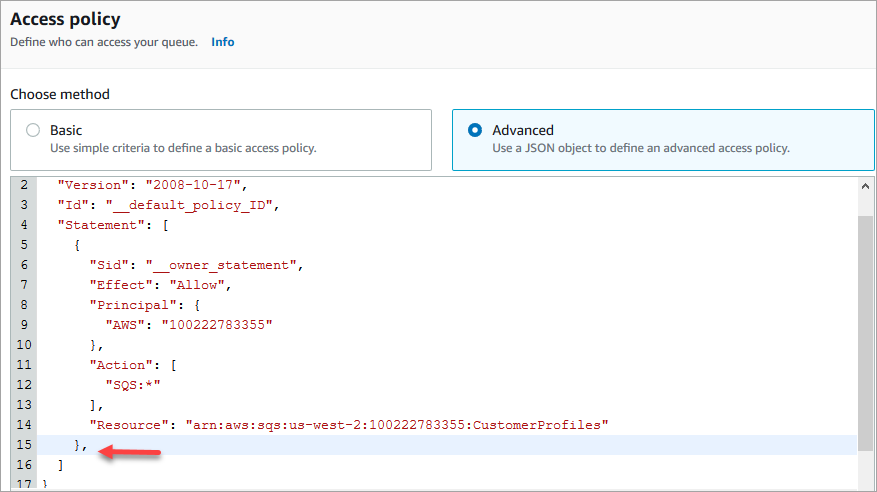
-
Then copy and paste the following code:
{ "Sid": "Customer Profiles SQS policy", "Effect": "Allow", "Principal": { "Service": "profile.amazonaws.com" }, "Action": "SQS:SendMessage", "Resource": "arn:aws:sqs:region:accountID:YourQueueName" } -
To replace
region,accountID, andYourQueueNamewith your information, copy and paste theResourceinformation from line 14.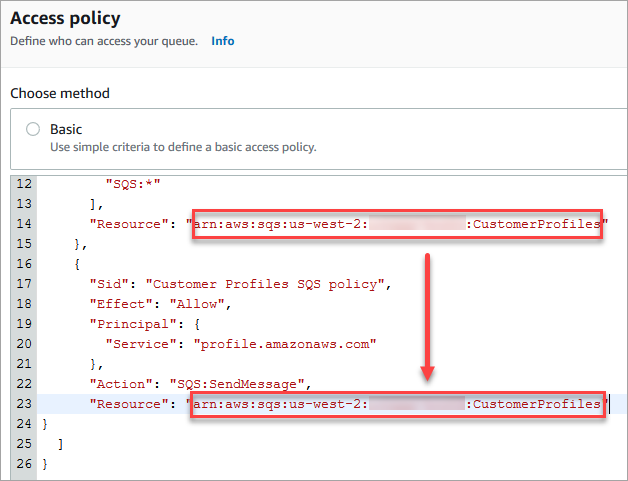
-
Choose Create queue.
-
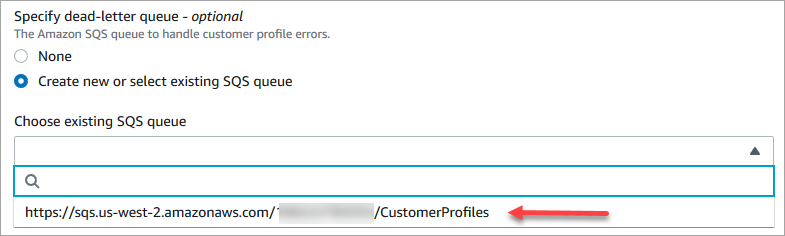
Return to the tab in your browser for the Amazon Connect console, Customer profiles enable page. Click or tap in the Choose existing SQS queue box to select the queue you just created from the dropdown list.
-
Under Specify KMS key, create or enter your own AWS KMS key for encryption. Following are the steps to create your AWS KMS key:
-
On the Customer profiles enable page, choose Create an AWS KMS key.
-
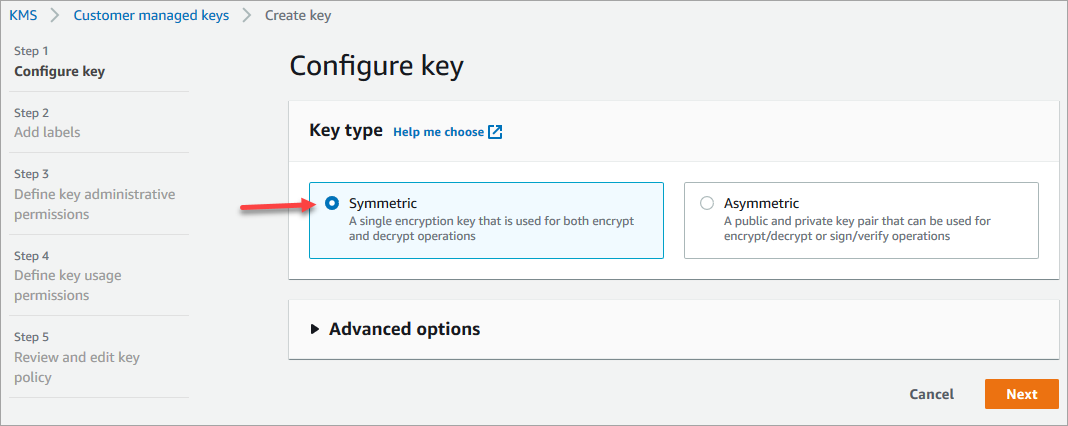
A new tab in your browser opens for the Key Management Service (KMS) console. On the Configure key page, choose Symmetric, and then choose Next.
-
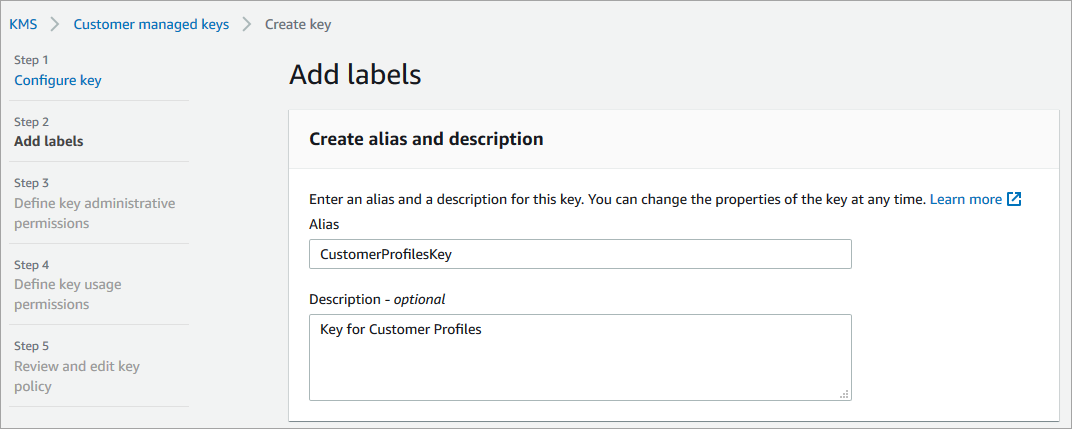
On the Add labels page, add a name and description for the key, and then choose Next.
-
On the Define key administrative permissions page, choose Next.
-
On the Define key usage permissions page, choose Next.
-
On the Review and edit key policy page, choose Finish.
In the following example, the name of the key starts with bcb6fdd:

-
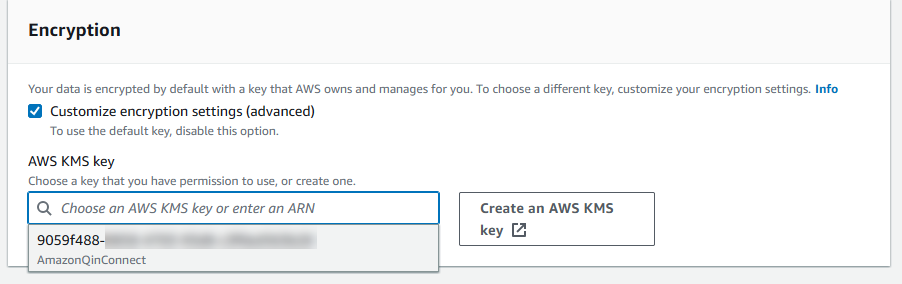
Return to the tab in your browser for the Amazon Connect console, Customer profiles enable page. Click or tap in the Specify KMS key box for the key you created to appear in a dropdown list. Choose the key you created.
-
-
Choose Submit. The completed page looks similar to the following image. It shows the name of the customer profiles domain, the dead-letter queue, and the KMS key.
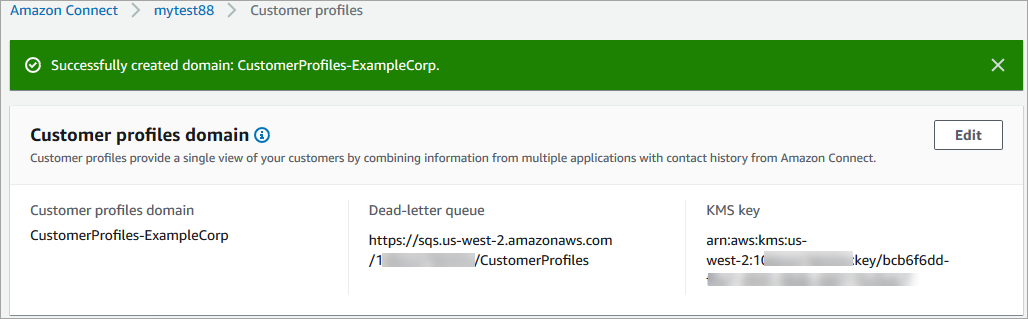
You're done! Amazon Connect Customer Profiles is enabled. Now with every new contact that comes in, Amazon Connect creates a customer profile record. It then tracks the contact history for that phone number (voice) or email address (chat).
Your agents can create new customer profiles and view contact records for your customers.
Next steps
-
Make Customer Profiles available through the agent application.
-
Assign agents permissions to access Customer Profiles in the agent application.
-
Integrate with external applications that profile customer profile data (optional).
-
Enable Identity Resolution to identify two or more similar profiles, and consolidate them.
