Tutorial: Using a Lambda function to access an Amazon RDS database
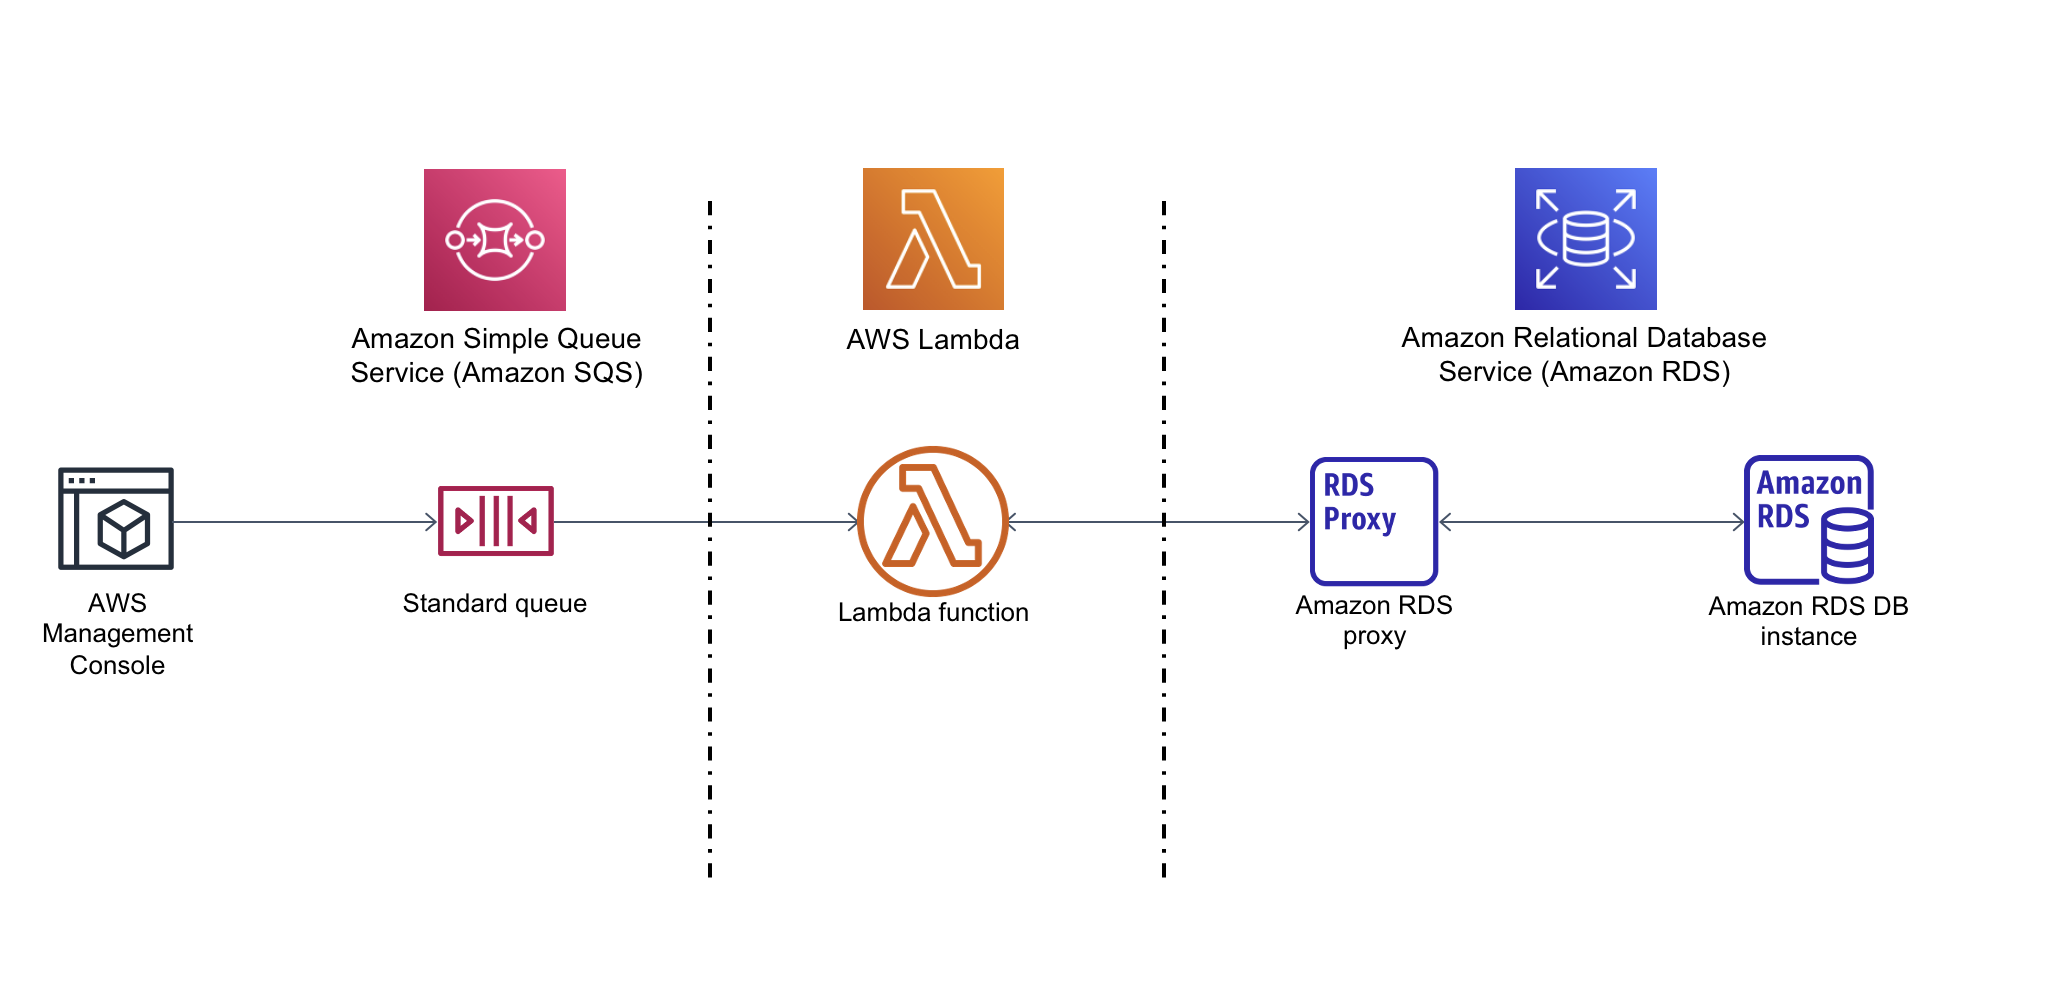
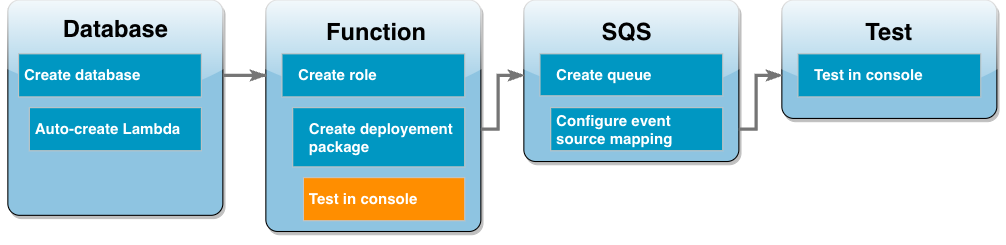
In this tutorial, you use a Lambda function to write data to an Amazon Relational Database Service (Amazon RDS) database through RDS Proxy. Your Lambda function reads records from an Amazon Simple Queue Service (Amazon SQS) queue and writes a new item to a table in your database whenever a message is added. In this example, you use the AWS Management Console to manually add messages to your queue. The following diagram shows the AWS resources you use to complete the tutorial.
With Amazon RDS, you can run a managed relational database in the cloud using common database products like Microsoft SQL Server, MariaDB, MySQL, Oracle Database, and PostgreSQL. By using Lambda to access your database, you can read and write data in response to events, such as a new customer registering with your website. Your function, database instance, and proxy scale automatically to meet periods of high demand.
To complete this tutorial, you carry out the following tasks:
-
Launch an RDS for MySQL database instance and a proxy in your AWS account's default VPC.
-
Create and test a Lambda function that creates a new table in your database and writes data to it.
-
Create an Amazon SQS queue and configure it to invoke your Lambda function whenever a new message is added.
-
Test the complete setup by adding messages to your queue using the AWS Management Console and monitoring the results using CloudWatch Logs.
By completing these steps, you learn:
How to use Amazon RDS to create a database instance and a proxy, and connect a Lambda function to the proxy.
How to use Lambda to perform create and read operations on an Amazon RDS database.
How to use Amazon SQS to invoke a Lambda function.
You can complete this tutorial using the AWS Management Console or the AWS Command Line Interface (AWS CLI).
Prerequisites
Before you begin, complete the steps in the following sections:
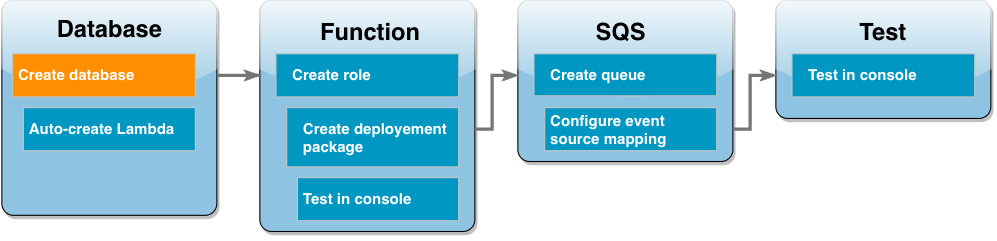
Create an Amazon RDS DB instance
An Amazon RDS DB instance is an isolated database environment running in the AWS Cloud. An instance can contain one or more user-created databases. Unless you specify otherwise, Amazon RDS creates new database instances in the default VPC included in your AWS account. For more information about Amazon VPC, see the Amazon Virtual Private Cloud User Guide.
In this tutorial, you create a new instance in your AWS account's default VPC and create
a database named ExampleDB in that instance. You can create your DB instance and
database using either the AWS Management Console or the AWS CLI.
To create a database instance
-
Open the Amazon RDS console and choose Create database.
-
Leave the Standard create option selected, then in Engine options, choose MySQL.
-
In Templates, choose Free tier or Sandbox. Free tier appears for free tier accounts. Sandbox appears for paid plan accounts.
-
In Settings, for DB instance identifier, enter
MySQLForLambda. -
Set your username and password by doing the following:
-
In Credentials settings, leave Master username set to
admin. -
For Master password, enter and confirm a password to access your database.
-
-
Specify the database name by doing the following:
-
Leave all the remaining default options selected and scroll down to the Additional configuration section.
-
Expand this section and enter
ExampleDBas the Initial database name.
-
-
Leave all the remaining default options selected and choose Create database.
Create Lambda function and proxy
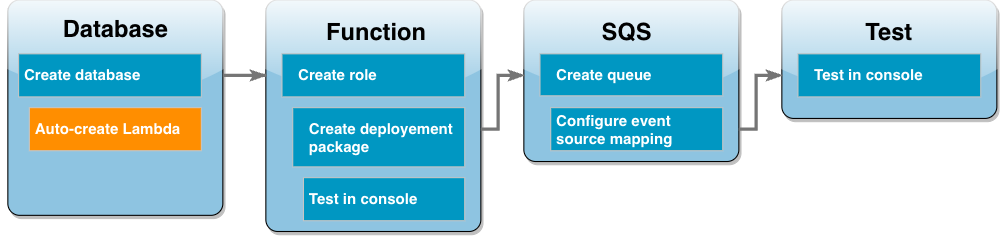
You can use the RDS console to create a Lambda function and a proxy in the same VPC as the database.
Note
You can only create these associated resources when your database has completed creation and is in Available status.
To create an associated function and proxy
-
From the Databases page, check if your database is in the Available status. If so, proceed to the next step. Else, wait till your database is available.
-
Select your database and choose Set up Lambda connection from Actions.
-
In the Set up Lambda connection page, choose Create new function.
Set the New Lambda function name to
LambdaFunctionWithRDS. -
In the RDS Proxy section, select the Connect using RDS Proxy option. Further choose Create new proxy.
-
For Database credentials, choose Database username and password.
-
For Username, specify
admin. -
For Password, enter the password you created for your database instance.
-
-
Select Set up to complete the proxy and Lambda function creation.
The wizard completes the set up and provides a link to the Lambda console to review your new function. Note the proxy endpoint before switching to the Lambda console.
Create a function execution role

Before you create your Lambda function, you create an execution role to give your function the necessary permissions. For this tutorial, Lambda needs permission to manage the network connection to the VPC containing your database instance and to poll messages from an Amazon SQS queue.
To give your Lambda function the permissions it needs, this tutorial uses IAM managed policies. These are policies that grant permissions for many common use cases and are available in your AWS account. For more information about using managed policies, see Policy best practices.
To create the Lambda execution role
-
Open the Roles
page of the IAM console and choose Create role. -
For the Trusted entity type, choose AWS service, and for the Use case, choose Lambda.
-
Choose Next.
-
Add the IAM managed policies by doing the following:
-
Using the policy search box, search for
AWSLambdaSQSQueueExecutionRole. -
In the results list, select the check box next to the role, then choose Clear filters.
-
Using the policy search box, search for
AWSLambdaVPCAccessExecutionRole. -
In the results list, select the check box next to the role, then choose Next.
-
-
For the Role name, enter
lambda-vpc-sqs-role, then choose Create role.
Later in the tutorial, you need the Amazon Resource Name (ARN) of the execution role you just created.
To find the execution role ARN
-
Open the Roles
page of the IAM console and choose your role ( lambda-vpc-sqs-role). -
Copy the ARN displayed in the Summary section.
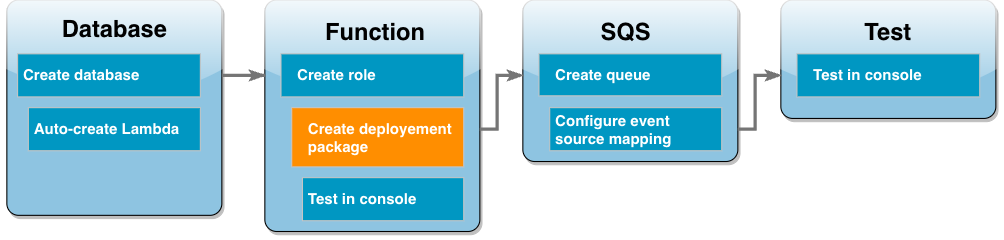
Create a Lambda deployment package
The following example Python code uses the PyMySQLCustomer. The table uses the following schema, where
CustID is the primary key:
Customer(CustID, Name)The function also uses PyMySQL to add records to this table. The function adds records using customer IDs and names specified in messages you will add to your Amazon SQS queue.
The code creates the connection to your database outside of the handler function. Creating the connection in the initialization code allows the connection to be re-used by subsequent invocations of your function and improves performance. In a production application, you can also use provisioned concurrency to initialize a requested number of database connections. These connections are available as soon as your function is invoked.
import sys
import logging
import pymysql
import json
import os

# rds settings
user_name = os.environ['USER_NAME']
password = os.environ['PASSWORD']
rds_proxy_host = os.environ['RDS_PROXY_HOST']
db_name = os.environ['DB_NAME']

logger = logging.getLogger()
logger.setLevel(logging.INFO)

# create the database connection outside of the handler to allow connections to be
# re-used by subsequent function invocations.
try:
        conn = pymysql.connect(host=rds_proxy_host, user=user_name, passwd=password, db=db_name, connect_timeout=5)
except pymysql.MySQLError as e:
    logger.error("ERROR: Unexpected error: Could not connect to MySQL instance.")
    logger.error(e)
    sys.exit(1)

logger.info("SUCCESS: Connection to RDS for MySQL instance succeeded")

def lambda_handler(event, context):
    """
    This function creates a new RDS database table and writes records to it
    """
    message = event['Records'][0]['body']
    data = json.loads(message)
    CustID = data['CustID']
    Name = data['Name']

    item_count = 0
    sql_string = f"insert into Customer (CustID, Name) values(%s, %s)"

    with conn.cursor() as cur:
        cur.execute("create table if not exists Customer ( CustID  int NOT NULL, Name varchar(255) NOT NULL, PRIMARY KEY (CustID))")
        cur.execute(sql_string, (CustID, Name))
        conn.commit()
        cur.execute("select * from Customer")
        logger.info("The following items have been added to the database:")
        for row in cur:
            item_count += 1
            logger.info(row)
    conn.commit()

    return "Added %d items to RDS for MySQL table" %(item_count)
Note
In this example, your database access credentials are stored as environment variables. In
production applications, we recommend that you use AWS Secrets Manager as a more secure
option. Note that if your Lambda function is in a VPC, to connect to Secrets Manager you need to create
a VPC endpoint. See How to connect to Secrets Manager service within a Virtual Private Cloud
To include the PyMySQL dependency with your function code, create a .zip deployment package. The following commands work for Linux, macOS, or Unix:
To create a .zip deployment package
-
Save the example code as a file named
lambda_function.py. -
In the same directory in which you created your
lambda_function.pyfile, create a new directory namedpackageand install the PyMySQL library.mkdir packagepip install --target package pymysql -
Create a zip file containing your application code and the PyMySQL library. In Linux or MacOS, run the following CLI commands. In Windows, use your preferred zip tool to create the
lambda_function.zipfile. Yourlambda_function.pysource code file and the folders containing your dependencies must be installed at the root of the .zip file.cd packagezip -r ../lambda_function.zip .cd ..zip lambda_function.zip lambda_function.pyYou can also create your deployment package using a Python virtual environment. See Deploy Python Lambda functions with .zip file archives.
Update the Lambda function
Using the .zip package you just created, you now update your Lambda function using the Lambda console. To enable your function to access your database, you also need to configure environment variables with your access credentials.
To update the Lambda function
-
Open the Functions
page of the Lambda console and choose your function LambdaFunctionWithRDS. -
In the Runtime settings tab, select Edit to change the Runtime of the function to Python 3.10.
-
Change the Handler to
lambda_function.lambda_handler. -
In the Code tab, choose Upload from and then .zip file.
-
Select the
lambda_function.zipfile you created in the previous stage and choose Save.
Now configure the function with the execution role you created earlier. This grants the function the permissions it needs to access your database instance and poll an Amazon SQS queue.
To configure the function's execution role
-
In the Functions
page of the Lambda console, select the Configuration tab, then choose Permissions. -
In Execution role, choose Edit.
-
In Existing role, choose your execution role (
lambda-vpc-sqs-role). -
Choose Save.
To configure your function's environment variables
-
In the Functions
page of the Lambda console, select the Configuration tab, then choose Environment variables. -
Choose Edit.
-
To add your database access credentials, do the following:
-
Choose Add environment variable, then for Key enter
USER_NAMEand for Value enteradmin. -
Choose Add environment variable, then for Key enter
DB_NAMEand for Value enterExampleDB. -
Choose Add environment variable, then for Key enter
PASSWORDand for Value enter the password you chose when you created your database. -
Choose Add environment variable, then for Key enter
RDS_PROXY_HOSTand for Value enter the RDS Proxy endpoint you noted earlier. -
Choose Save.
-
Test your Lambda function in the console
You can now use the Lambda console to test your function. You create a test event which mimics the data your function will
receive when you invoke it using Amazon SQS in the final stage of the tutorial. Your test event contains a JSON object specifying a
customer ID and customer name to add to the Customer table your function creates.
To test the Lambda function
-
Open the Functions
page of the Lambda console and choose your function. -
Choose the Test section.
-
Choose Create new event and enter
myTestEventfor the event name. -
Copy the following code into Event JSON and choose Save.
{ "Records": [ { "messageId": "059f36b4-87a3-44ab-83d2-661975830a7d", "receiptHandle": "AQEBwJnKyrHigUMZj6rYigCgxlaS3SLy0a...", "body": "{\n \"CustID\": 1021,\n \"Name\": \"Martha Rivera\"\n}", "attributes": { "ApproximateReceiveCount": "1", "SentTimestamp": "1545082649183", "SenderId": "AIDAIENQZJOLO23YVJ4VO", "ApproximateFirstReceiveTimestamp": "1545082649185" }, "messageAttributes": {}, "md5OfBody": "e4e68fb7bd0e697a0ae8f1bb342846b3", "eventSource": "aws:sqs", "eventSourceARN": "arn:aws:sqs:us-west-2:123456789012:my-queue", "awsRegion": "us-west-2" } ] } -
Choose Test.
In the Execution results tab, you should see results similar to the following displayed in the Function Logs:
[INFO] 2023-02-14T19:31:35.149Z bdd06682-00c7-4d6f-9abb-89f4bbb4a27f The following items have been added to the database:
[INFO] 2023-02-14T19:31:35.149Z bdd06682-00c7-4d6f-9abb-89f4bbb4a27f (1021, 'Martha Rivera')
Create an Amazon SQS queue
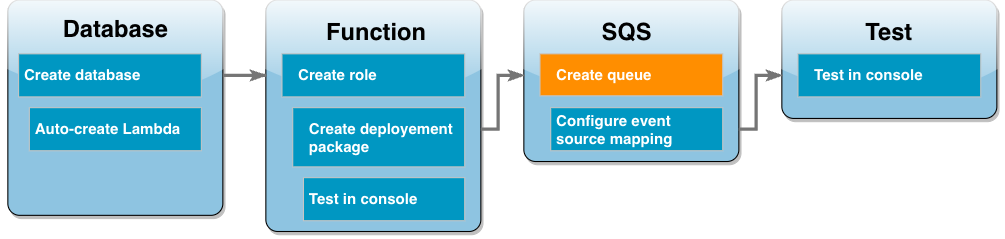
You have successfully tested the integration of your Lambda function and Amazon RDS database instance. Now you create the Amazon SQS queue you will use to invoke your Lambda function in the final stage of the tutorial.
To create the Amazon SQS queue (console)
-
Open the Queues
page of the Amazon SQS console and select Create queue. -
Leave the Type as Standard and enter
LambdaRDSQueuefor the name of your queue. -
Leave all the default options selected and choose Create queue.
Create an event source mapping to invoke your Lambda function
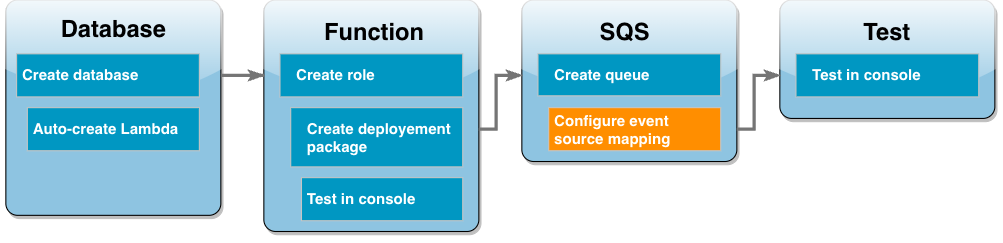
An event source mapping is a Lambda resource which reads items from a stream or queue and invokes a Lambda function. When you configure an event source mapping, you can specify a batch size so that records from your stream or queue are batched together into a single payload. In this example, you set the batch size to 1 so that your Lambda function is invoked every time you send a message to your queue. You can configure the event source mapping using either the AWS CLI or the Lambda console.
To create an event source mapping (console)
-
Open the Functions
page of the Lambda console and select your function ( LambdaFunctionWithRDS). -
In the Function overview section, choose Add trigger.
-
For the source, select Amazon SQS, then select the name of your queue (
LambdaRDSQueue). -
For Batch size, enter
1. -
Leave all the other options set to the default values and choose Add.
You are now ready to test your complete setup by adding a message to your Amazon SQS queue.
Test and monitor your setup
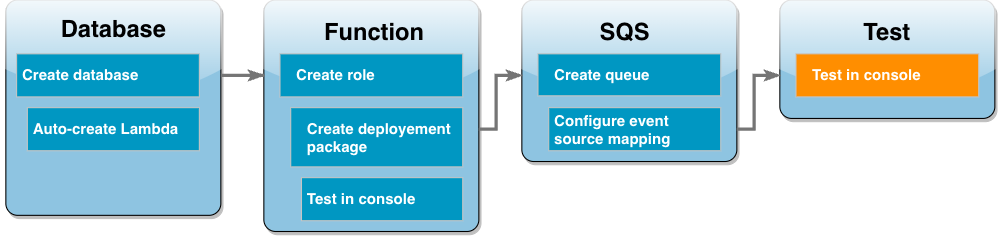
To test your complete setup, add messages to your Amazon SQS queue using the console. You then use CloudWatch Logs to confirm that your Lambda function is writing records to your database as expected.
To test and monitor your setup
-
Open the Queues
page of the Amazon SQS console and select your queue ( LambdaRDSQueue). -
Choose Send and receive messages and paste the following JSON into the Message body in the Send message section.
{"CustID": 1054,"Name": "Richard Roe"} -
Choose Send message.
Sending your message to the queue will cause Lambda to invoke your function through your event source mapping. To confirm that Lambda has invoked your function as expected, use CloudWatch Logs to verify that the function has written the customer name and ID to your database table.
-
Open the Log groups
page of the CloudWatch console and select the log group for your function ( /aws/lambda/LambdaFunctionWithRDS). -
In the Log streams section, choose the most recent log stream.
Your table should contain two customer records, one from each invocation of your function. In the log stream, you should see messages similar to the following:
[INFO] 2023-02-14T19:06:43.873Z 45368126-3eee-47f7-88ca-3086ae6d3a77 The following items have been added to the database:
[INFO] 2023-02-14T19:06:43.873Z 45368126-3eee-47f7-88ca-3086ae6d3a77 (1021, 'Martha Rivera')
[INFO] 2023-02-14T19:06:43.873Z 45368126-3eee-47f7-88ca-3086ae6d3a77 (1054, 'Richard Roe')
Clean up your resources
You can now delete the resources that you created for this tutorial, unless you want to retain them. By deleting AWS resources that you're no longer using, you prevent unnecessary charges to your AWS account.
To delete the Lambda function
-
Open the Functions page
of the Lambda console. -
Select the function that you created.
-
Choose Actions, Delete.
-
Choose Delete.
To delete the execution role
-
Open the Roles page
of the IAM console. -
Select the execution role that you created.
-
Choose Delete role.
-
Choose Yes, delete.
To delete the MySQL DB instance
-
Open the Databases page
of the Amazon RDS console. -
Select the database you created.
-
Choose Actions, Delete.
-
Clear the Create final snapshot check box.
-
Enter
delete mein the text box. -
Choose Delete.
To delete the Amazon SQS queue
-
Sign in to the AWS Management Console and open the Amazon SQS console at https://console.aws.amazon.com/sqs/
. -
Select the queue you created.
-
Choose Delete.
-
Enter
deletein the text box. -
Choose Delete.
