Integrate Stonebranch Universal Controller with AWS Mainframe Modernization
Vaidy Sankaran and Pablo Alonso Prieto, Amazon Web Services
Robert Lemieux and Huseyin Gomleksizoglu, Stonebranch
Summary
This pattern explains how to integrate Stonebranch Universal Automation Center (UAC) workload orchestration
Stonebranch UAC is a real-time IT automation and orchestration platform. UAC is designed to automate and orchestrate jobs, activities, and workflows across hybrid IT systems, from on-premises to AWS. Enterprise clients using mainframe systems are transitioning to cloud-centric modernized infrastructures and applications. Stonebranch’s tools and professional services facilitate the migration of existing schedulers and automation capabilities to the AWS Cloud.
When you migrate or modernize your mainframe programs to the AWS Cloud using AWS Mainframe Modernization service, you can use this integration to automate batch scheduling, increase agility, improve maintenance, and decrease costs.
This pattern provides instructions for integrating Stonebranch scheduler
Targeted outcome
This pattern focuses on providing the following target outcomes:
The ability to schedule, automate, and run mainframe batch jobs running in AWS Mainframe Modernization service (Microfocus runtime) from Stonebranch Universal Controller.
Monitor the application’s batch processes from the Stonebranch Universal Controller.
Start/Restart/Rerun/Stop batch processes automatically or manually from the Stonebranch Universal Controller.
Retrieve the results of the AWS Mainframe Modernization batch processes.
Capture the AWS CloudWatch
logs of the batch jobs in Stonebranch Universal Controller.
Prerequisites and limitations
Prerequisites
An active AWS account
A Micro Focus Bankdemo
application with job control language (JCL) files, and a batch process deployed in a AWS Mainframe Modernization service (Micro Focus runtime) environment Basic knowledge of how to build and deploy a mainframe application that runs on Micro Focus Enterprise Server
Basic knowledge of Stonebranch Universal Controller
Stonebranch trial license (contact Stonebranch
) Windows or Linux Amazon Elastic Compute Cloud (Amazon EC2) instances (for example, xlarge) with a minimum of four cores, 8 GB memory, and 2 GB disk space
Apache Tomcat version 8.5.x or 9.0.x
Oracle Java Runtime Environment (JRE) or OpenJDK version 8 or 11
Amazon Simple Storage Service (Amazon S3)
bucket for export repository Amazon Elastic File System (Amaon EFS)
for agent Stonebranch Universal Message Service (OMS) connections for high availability (HA) Stonebranch Universal Controller 7.2 Universal Agent 7.2 Installation Files
AWS Mainframe Modernization task scheduling template
(latest released version of the .zip file)
Limitations
The product and solution has been tested and compatibility validated only with OpenJDK 8 and 11.
The aws-mainframe-modernization-stonebranch-integration
task scheduling template will work only with AWS Mainframe Modernization service. This task scheduling template will work on only a Unix, Linux, or Windows edition of Stonebranch agents.
Some AWS services aren’t available in all AWS Regions. For Region availability, see AWS services by Region
. For specific endpoints, see the Service endpoints and quotas page, and choose the link for the service.
Architecture
Target state architecture
The following diagram shows the example AWS environment that is required for this pilot.

Stonebranch Universal Automation Center (UAC) includes two main components: Universal Controller and Universal Agents. Stonebranch OMS is used as a message bus between the controller and individual agents.
Stonebranch UAC Database is used by Universal Controller. The database can be MySQL, Microsoft SQL Server, Oracle, or Aurora MySQL–Compatible.
AWS Mainframe Modernization service – Micro Focus runtime environment with the BankDemo application deployed
. The BankDemo application files will be stored in an S3 bucket. This bucket also contains the mainframe JCL files. Stonebranch UAC can run the following functions for the batch run:
Start a batch job using the JCL file name that exists in the S3 bucket linked to the AWS mainframe modernization service.
Get the status of the batch job run.
Wait until the batch job run is completed.
Fetch logs of the batch job run.
Rerun the failed batch jobs.
Cancel the batch job while the job is running.
Stonebranch UAC can run the following functions for the application:
Start Application
Get Status of the Application
Wait until the Application is started or stopped
Stop Application
Fetch Logs of Application operation
Stonebranch jobs conversion
The following diagram represents Stonebranch’s job conversion process during the modernization journey. It describes how the job schedules and tasks definitions are converted into a compatible format that can run AWS Mainframe Modernization batch tasks.

For the conversion process, the job definitions are exported from the existing mainframe system.
JCL files can be uploaded to the S3 bucket for the Mainframe Modernization application so that these JCL files can be deployed by the AWS Mainframe Modernization service.
The conversion tool converts the exported job definitions to UAC tasks.
After all the task definitions and job schedules are created, these objects will be imported to the Universal Controller. The converted tasks then run the processes in the AWS Mainframe Modernization service instead of running them on the mainframe.
Stonebranch UAC architecture
The following architecture diagram represents an active-active-passive model of high availability (HA) Universal Controller. Stonebranch UAC is deployed in multiple Availability Zones to provide high availability and support disaster recovery (DR).

Universal Controller
Two Linux servers are provisioned as Universal Controllers. Both connect to the same database endpoint. Each server houses a Universal Controller application and OMS. The most recent version of Universal Controller is used at the time it is provisioned.
The Universal Controllers are deployed in the Tomcat webapp as the document ROOT and are served on port 80. This deployment eases the configuration of the frontend load balancer.
HTTP over TLS or HTTPS is enabled using the Stonebranch wildcard certificate (for example, https://customer.stonebranch.cloud). This secures communication between the browser and the application.
OMS
A Universal Agent and OMS (Opswise Message Service) reside on each Universal Controller server. All deployed Universal Agents from the customer end are set up to connect to both OMS services. OMS acts as a common messaging service between the Universal Agents and the Universal Controller.
Amazon EFS mounts a spool directory on each server. OMS uses this shared spool directory to keep the connection and task information from controllers and agents. OMS works in a high-availability mode. If the active OMS goes down, the passive OMS has access to all the data, and it resumes active operations automatically. Universal Agents detect this change and automatically connect to the new active OMS.
Database
Amazon Relational Database Service (Amazon RDS) houses the UAC database, with Amazon Aurora MySQL–Compatible as its engine. Amazon RDS is helps in managing and offering scheduled backups at regular intervals. Both Universal Controller instances connect to the same database endpoint.
Load balancer
An Application Load Balancer is set-up for each instance. The load balancer directs traffic to the active controller at any given moment. Your instance domain names point to the respective load balancer endpoints.
URLs
Each of your instances has a URL, as shown in the following example.
Environment | Instance |
|---|---|
Production |
|
Development (non-production) |
|
Testing (non-production) |
|
Note
Non-production instance names can be set based on your needs.
High availability
High availability (HA) is the ability of a system to operate continuously without failure for a designated period of time. Such failures include, but are not limited to, storage, server communication response delays caused by CPU or memory issues, and networking connectivity.
To meet HA requirements:
All EC2 instances, databases, and other configurations are mirrored across two separate Availability Zones within the same AWS Region.
The controller is provisioned through an Amazon Machine Image (AMI) on two Linux servers in the two Availability Zones. For example, if you are provisioned in the Europe eu-west-1 Region, you have a Universal Controller in Availability Zone eu-west-1a and Availability Zone eu-west-1c.
No jobs are allowed to run directly on the application servers and no data is allowed to be stored on these servers.
The Application Load Balancer runs health checks on each Universal Controller to identify the active one and direct traffic to it. In the event that one server incurs issues, the load balancer automatically promotes the passive Universal Controller to an active state. The load balancer then identifies the new active Universal Controller instance from the health checks and starts directing traffic. The failover happens within four minutes with no job loss, and the frontend URL remains the same.
The Aurora MySQL–Compatible database service stores Universal Controller data. For production environments, a database cluster is built with two database instances in two different Availability Zones within a single AWS Region. Both Universal Controllers use a Java Database Connectivity (JDBC) interface that points to a single database cluster endpoint. In the event that one database instance incurs issues, the database cluster endpoint dynamically points to the healthy instance. No manual intervention is required.
Backup and purge
Stonebranch Universal Controller is set to back up and purge old data following the schedule shown in the table.
Type | Schedule |
|---|---|
Activity | 7 days |
Audit | 90 days |
History | 60 days |
Backup data older than the dates shown is exported to .xml format and stored in the file system. After the backup process is complete, older data is purged from the database and archived in an S3 bucket for up to one year for production instances.
You can adjust this schedule in your Universal Controller interface. However, increasing these time-frames might cause a longer downtime during maintenance.
Tools
AWS services
AWS Mainframe Modernization is an AWS cloud-native platform that helps you modernize your mainframe applications to AWS managed runtime environments. It provides tools and resources to help you plan and implement migration and modernization.
Amazon Elastic Block Store (Amazon EBS) provides block-level storage volumes for use with Amazon EC2 instances.
Amazon Elastic File System (Amazon EFS) helps you create and configure shared file systems in the AWS Cloud.
Amazon Relational Database Service (Amazon RDS) helps you set up, operate, and scale a relational database in the AWS Cloud. This pattern uses Amazon Aurora MySQL–Compatible Edition.
Amazon Simple Storage Service (Amazon S3) is a cloud-based object storage service that helps you store, protect, and retrieve any amount of data.
Elastic Load Balancing (ELB) distributes incoming application or network traffic across multiple targets. For example, you can distribute traffic across Amazon EC2 instances, containers, and IP addresses in one or more Availability Zones. This pattern uses an Application Load Balancer.
Stonebranch
Universal Automation Center (UAC)
is a system of enterprise workload automation products. This pattern uses the following UAC components: Universal Controller
, a Java web application running in a Tomcat web container, is the enterprise job scheduler and workload automation broker solution of Universal Automation Center. The Controller presents a user interface for creating, monitoring, and configuring Controller information; handles the scheduling logic; processes all messages to and from Universal Agents; and synchronizes much of the high availability operation of Universal Automation Center. Universal Agent
is a vendor-independent scheduling agent that collaborates with existing job scheduler on all major computing platforms, both legacy and distributed. All schedulers that run on z/Series, i/Series, Unix, Linux, or Windows are supported.
Universal Agent
is a vendor-independent scheduling agent that collaborates with existing job scheduler on all major computing platforms, both legacy and distributed. All schedulers that run on z/Series, i/Series, Unix, Linux, or Windows are supported. Stonebranch aws-mainframe-modernization-stonebranch-integration AWS Mainframe Modernization Universal Extension
is the integration template to run, monitor and rerun batch jobs in AWS Mainframe Modernization platform.
Code
The code for this pattern is available in the aws-mainframe-modernization-stonebranch-integration
Epics
| Task | Description | Skills required |
|---|---|---|
Download the installation files. | Download the installation from Stonebranch servers. To get the installation files, contact with Stonebranch. | Cloud architect |
Launch the EC2 instance. | You will need about 3 GB of extra space for the Universal Controller and Universal Agent installations. So provide at least 30 GB of disk space for the instance. Add port 8080 to the security group so that it’s accessible. | Cloud architect |
Check prerequisites. | Before the installation, do the following:
| Cloud administrator, Linux administrator |
Install Universal Controller. |
| Cloud architect, Linux administrator |
Install Universal Agent. |
| Cloud administrator, Linux administrator |
Add OMS to Universal Controller. |
| Universal Controller administrator |
| Task | Description | Skills required |
|---|---|---|
Import Integration Template. | For this step, you need the AWS Mainframe Modernization Universal Extension
After the Integration Template is imported, you will see AWS Mainframe Modernization Tasks under Available Services. | Universal Controller administrator |
Enable resolvable credentials. |
| Universal Controller administrator |
Launch the task. |
| Universal Controller administrator |
| Task | Description | Skills required |
|---|---|---|
Create a task for the batch job. |
| Universal Controller administrator |
Launch the task. |
| Universal Controller administrator |
| Task | Description | Skills required |
|---|---|---|
Copy the tasks. |
| Universal Controller administrator |
Update tasks. |
| Universal Controller administrator |
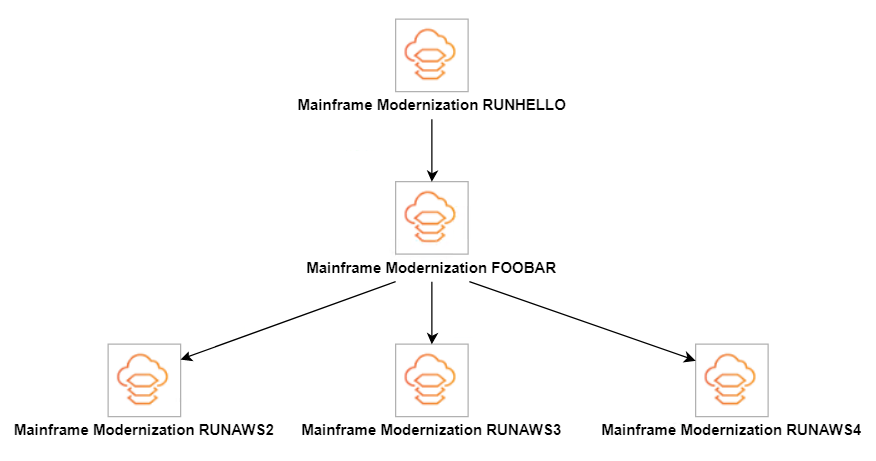
Create a workflow. |
| Universal Controller administrator |
Check the status of the workflow. |
| Univeral Controller administrator |
| Task | Description | Skills required |
|---|---|---|
Fix the failed task and rerun. |
| Universal Controller administrator |
| Task | Description | Skills required |
|---|---|---|
Create the Start Application action. |
| Universal Controller administrator |
| Task | Description | Skills required |
|---|---|---|
Create the Cancel Batch action. |
|
Related resources
Additional information
Icons in the Workflow Editor

All tasks connected
Workflow status

